3
(WARNING continued)
Do not ll the water more than
the maximum of the water level
gauge.
The hot water may splash over and you
may get burnt.
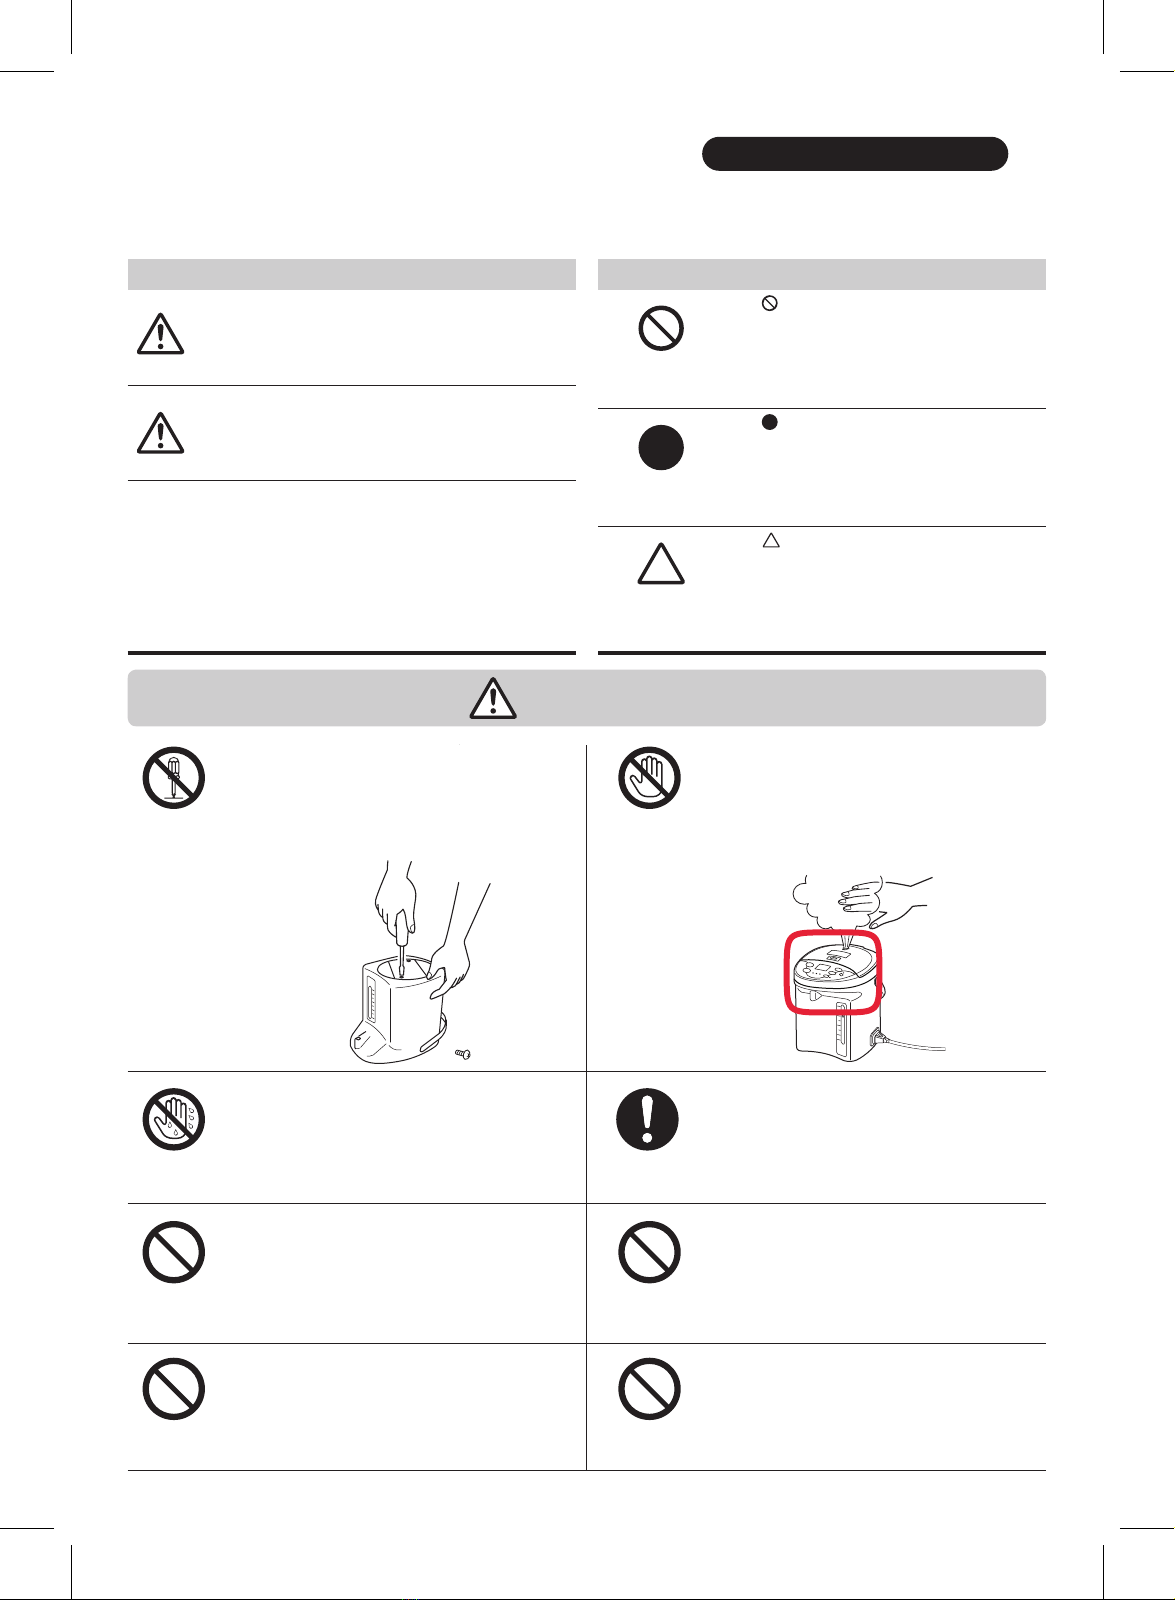
Do not allow the children to
apply this appliance and keep it
out of reach from the children.
It may cause burns, an electric shock,
and injury.
Do not scratch, bend, pull, twist,
or connect the power cord when
you put the object on it. Do not
place it near the heating source.
Do not put the heavy objects,
pinch, or modify the cord.
The cord may be damaged, and then
cause the re and an electric shock.
Do not wet or immerse the pot
into the water. Do not wash the
pot thoroughly. Do not immerse
the bottom of the pot into the
water and do not turn over
the pot while its bottom is wet.
Do not wet the power cord.
It may cause a short circuit, an electric shock,
and injury.
Do not tilt the pot.
Although the button is locked, the water can
ow out from the water dispenser or the steam
vent when the pot is tipped, and it will cause
burns.
When moving the pot, do not
hold the lid.
The water will ow out from the dispenser or
the steam vent. Then the pot may slip and fall
down, and cause some burns and injury.
Do not terribly shake
(especially vertically shake)
or strike the pot.
With the dispensing lock, if the pot is terribly
shook or stroked, the water can ow out from
the dispenser or the steam vent, and may
cause burns.
Do not throw away the water
with the lid closed.
If the lid is accidentally detached, the water
will spill over, then cause some burns.
Do not let the pot fall down.
With the dispensing lock, if the pot falls down,
the water can ow out from the dispenser or
the steam vent, and may cause burns.
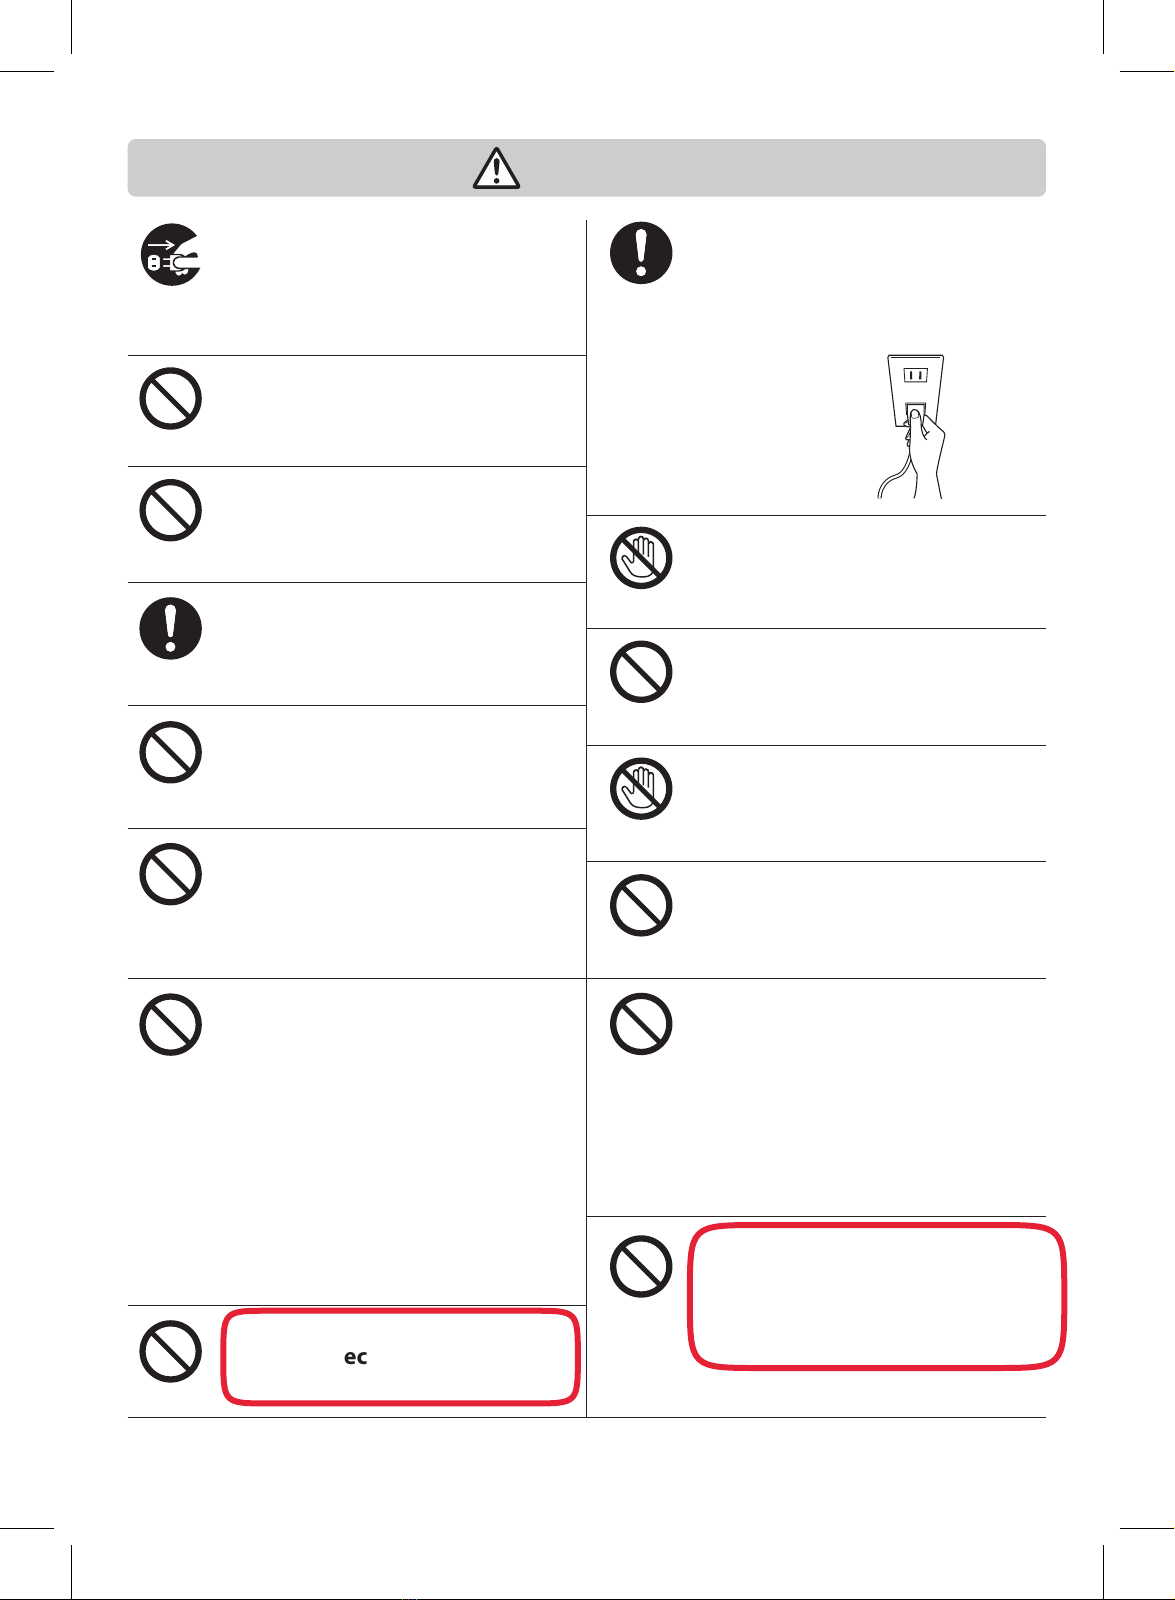
If the power plug or its polar is
dusty, wipe it away with the dry
cloth.
It may cause re.
Fully t the plug into the socket.
It may cause an electric shock, a short circuit,
and re.
Do not use if the cord or the
power plug is broken, or if the
power plug is loose.
It may cause an electric shock, a short circuit,
and ignition.
PROHIBITED
Do not
soak the pot.
PROHIBITED
PROHIBITED
Remove
the dust.
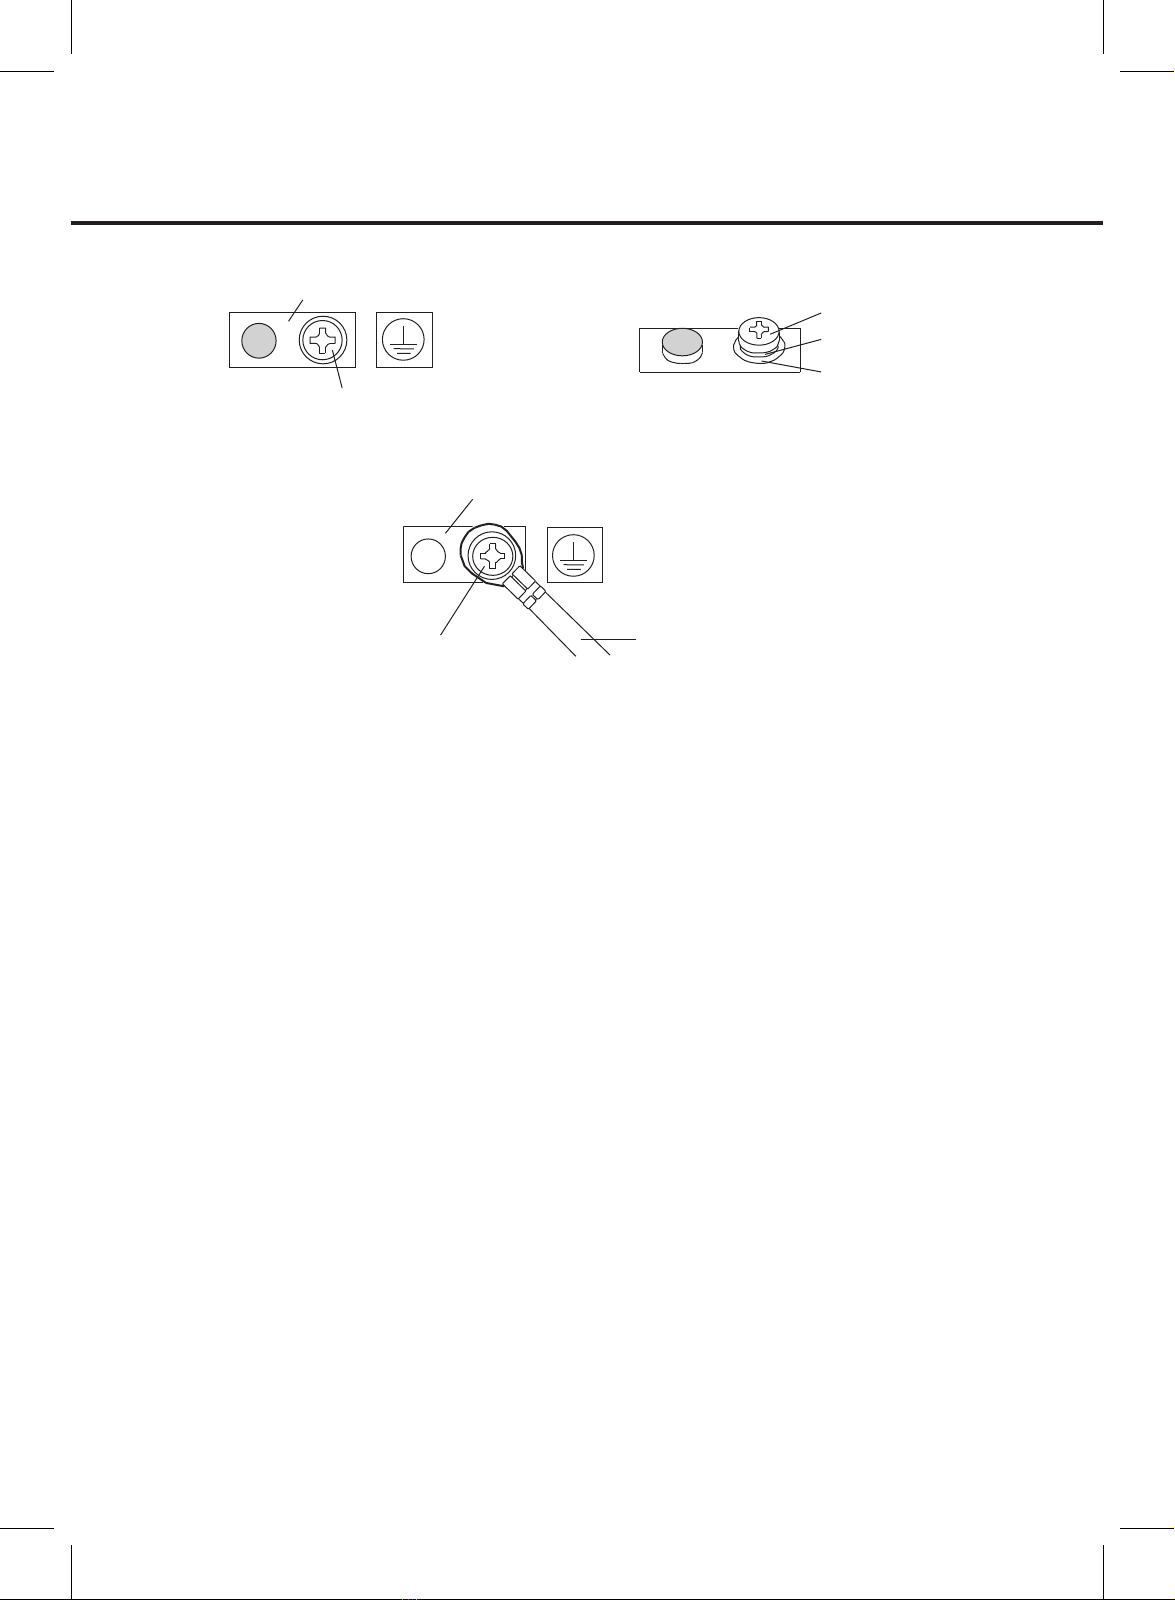
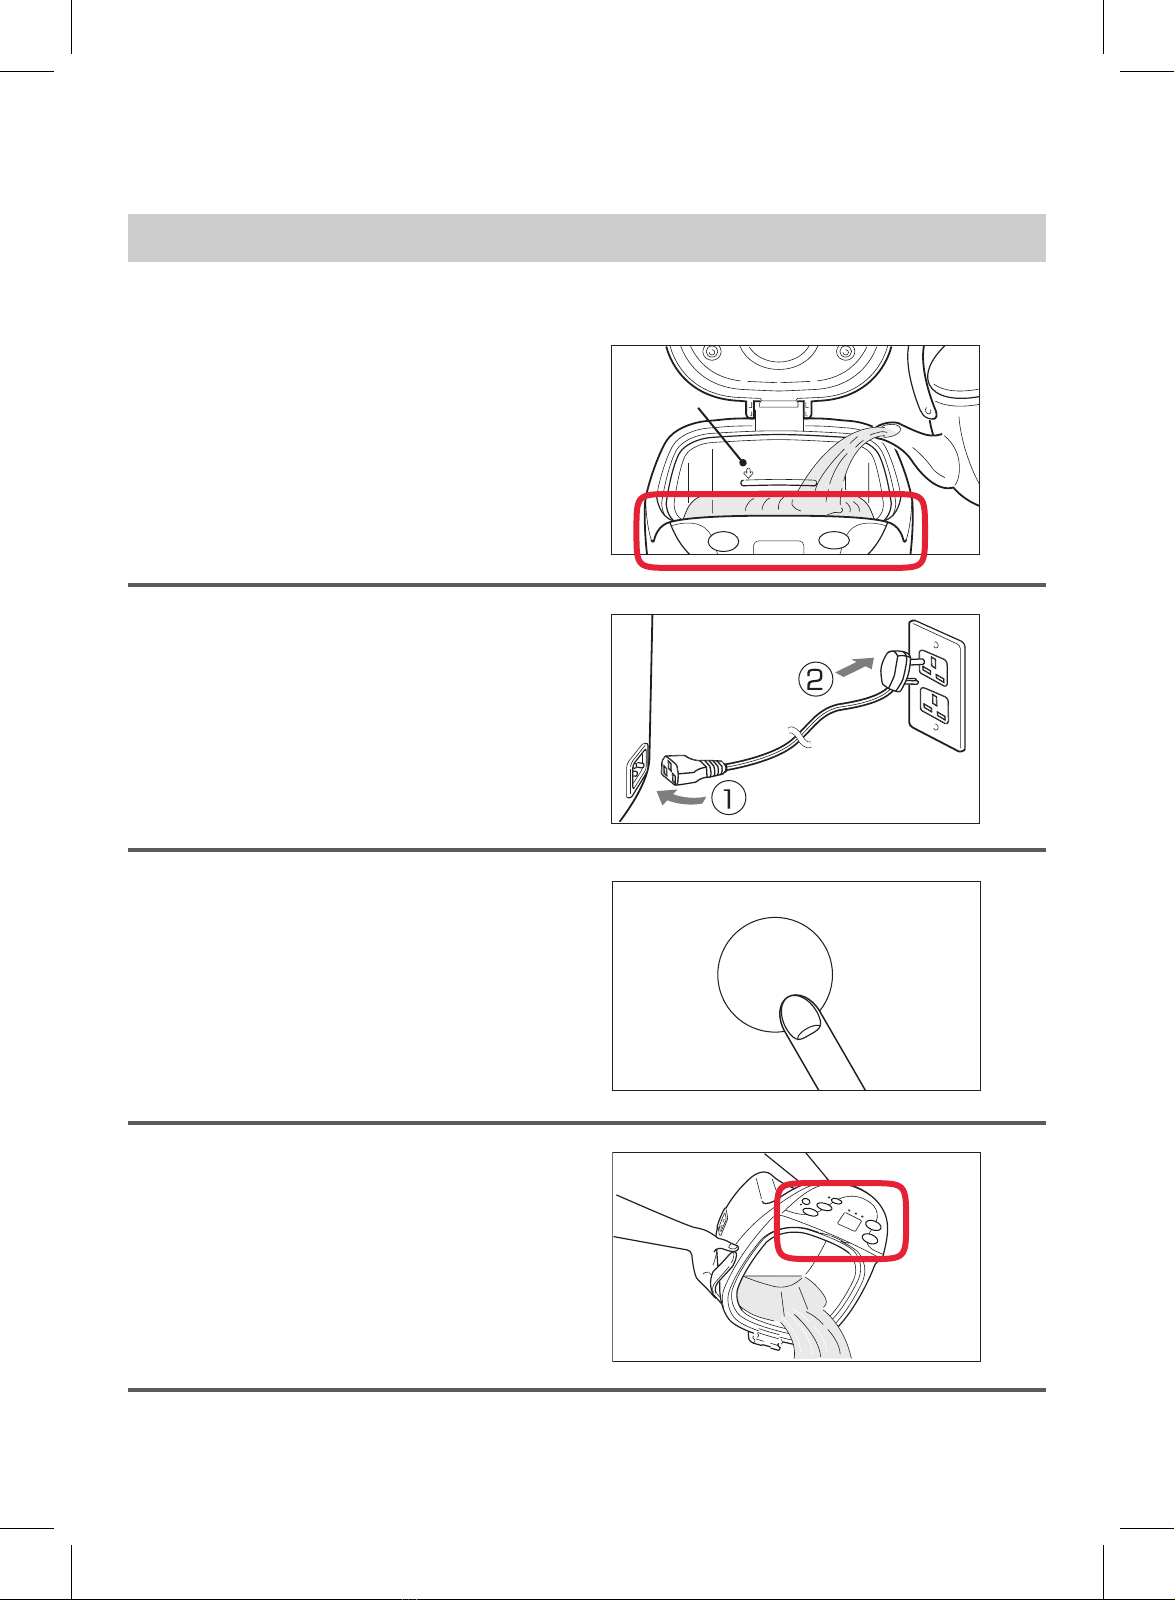
Fit the plug into
the socket fully.
Insert the
power plug
into the hole
completely.
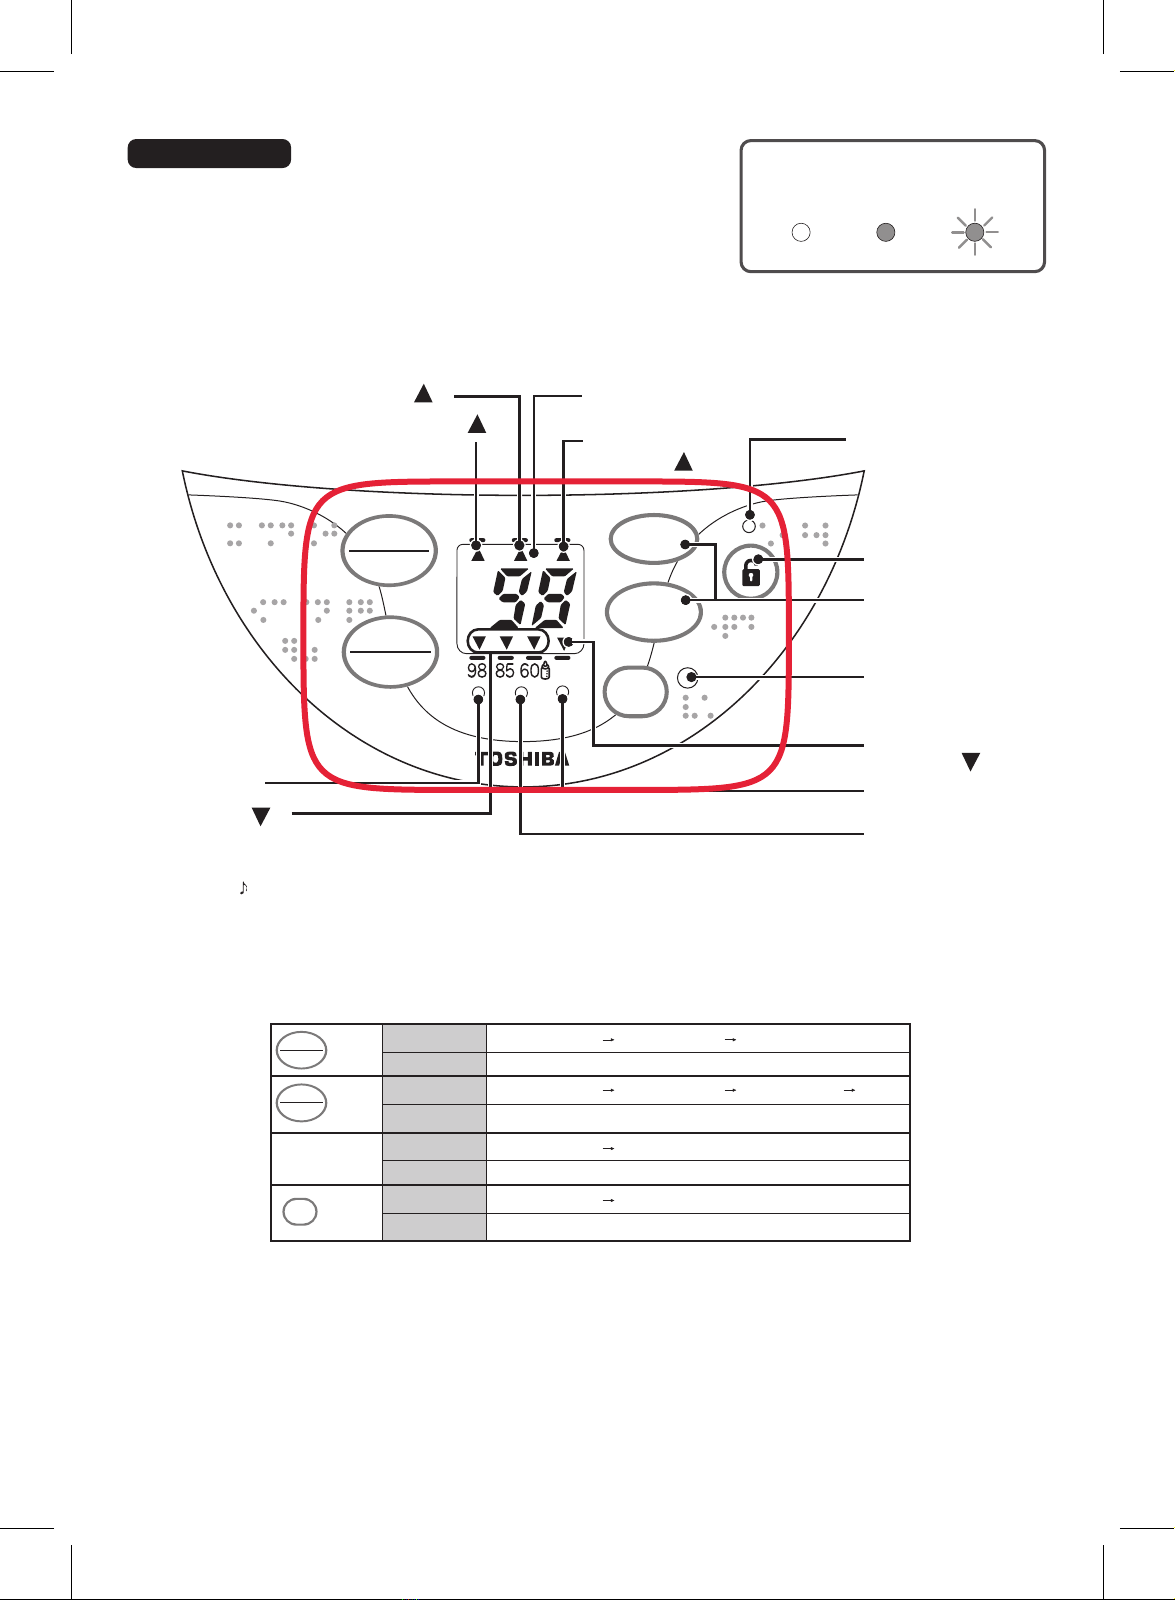
Insert the power plug (main
body side) into the plug
insertion hole on the rear
side of the main body.
PROHIBITED
Do not do
anything
improperly
with the pot.
PROHIBITED
PROHIBITED
PROHIBITED
PROHIBITED
PROHIBITED
If the power supply cord is
damaged, it must be replaced by
the manufacturer, its service
agent or similarly qualied
persons in order to avoid a hazard.
Power plug
(main body side)
OK NG