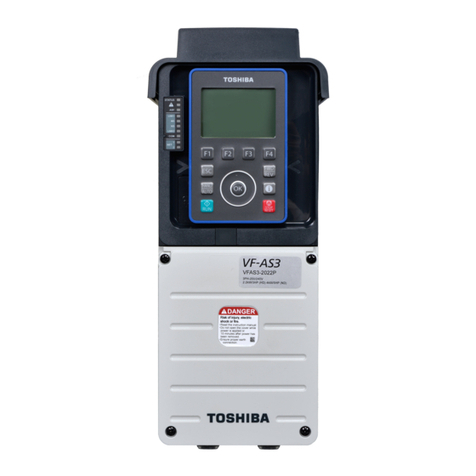
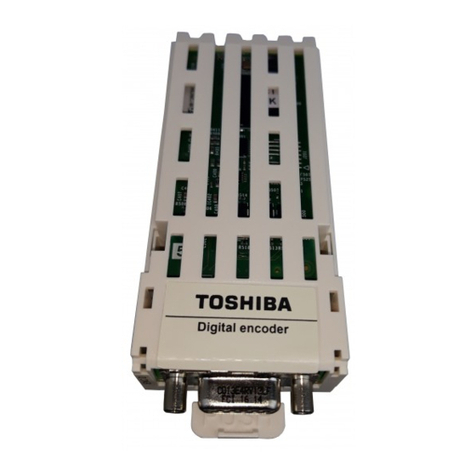
Toshiba TOSVERT VF-AS3 User manual

E6582148
Safety precautions
I
Introduction
II
Contents
Names of the Parts
1
Connection to the
Inverter
2
Functional Description
3
Specification
4
Warranty
5
6
7
8
9
10
11
12
13
14
15
16
17
18
Digital Encoder Instruction Manual
NOTICE
1. Make sure that this instruction manual is delivered to the end user of Digital Encoder
option.
2. Read this manual before installing or operating the option. Keep it in a safe place for
reference.
3. All information contained in this manual will be changed without notice.

1
9

I-1 I. Safety precautions
I
II
III
1
2
3
4
5
6
7
8
9
10
11
12
13
14
15
16
17
18
The items described in the instruction manual and on the inverter itself are very important so that
you can use safely the inverter, prevent injury to yourself and other people around you as well as to
prevent damage to property in the area. Thoroughly familiarize yourself with the symbols and
indications shown below and then continue to read the manual. Make sure that you observe all
warnings given.
Explanation of markings
Meanings of symbols
ISafety precautions
Marking Meaning of marking
WARNING
Indicates that errors in operation will lead to death or serious injury.
CAUTION
Indicates that errors in operation will lead to injury*1 to people or that these errors will cause
damage to physical property*2.
*1 Such things as injury, burns or electric shock that will not require hospitalization or long periods of outpatient treatment.
*2 Physical property damage refers to wide-ranging damage to assets and materials.
Marking Meaning of marking
Indicates an inhibition (Don't do it).
Detailed information on the inhibition is described in illustration and text in or near the
symbol.
Indicates a mandatory action that must be followed.
Detailed information on the mandatory action is described in illustration and text in or near
the symbol.
Indicates a warning or caution.
Detailed information on the warning or caution is described in illustration and text in or near
the symbol.

E6582148
I. Safety precautions I-2
I
3
■Limitation of use
■Handling in general
■Disposal
WARNING
Prohibited
• Never use the option with any device other than applicable TOSVERT series inverters.
This will result in accident.
WARNING
Disassembly
inhibited
• Never disassemble, modify or repair the option.
This can result in electric shock, fire or injury.
For repairs, call your Toshiba distributor.
Prohibited
• Do not put or insert any kind of objects into the option (electrical wire cuttings, rods, wires etc).
This can result in damage or fire.
• Do not splash water or any other fluid over the option, do not touch the option with wet hands.
This can result in damage or fire.
• Do not apply shock (falling, etc.) on the option.
This can result in damage or malfunction.
• Do not touch the connector to the inverter (refer to the outline drawing).
This can result in damage or accident.
Mandatory
action
• Turn off the power immediately in case of abnormalities such as smoke, abnormal odor, noise
or blind display.
Neglect of these conditions can result in fire.
For repairs, call your Toshiba distributor.
• Operate under the environmental conditions prescribed in this manual.
Operations under any other condition can result in malfunction.
CAUTION
Prohibited
• If you dispose of the option, have it done by a specialist in industrial waste disposal*.
If you dispose of the option by yourself, this can result in producing noxious gases, resulting in
injury.
(*) Persons who specialize in the processing of waste and known as "Industrial Waste Product
Collectors and Transporters" or "Industrial Waste Disposal Persons." Please observe any
applicable law, regulation, rule or ordinance for industrial waste disposal.
E6582148
I-3 I. Safety precautions
I
3
9
■Wiring - Installation
WARNING
Prohibited
• Do not use the option if it is damaged or any part of it is missing.
Operating the defective product can result in electric shock or fire.
For repairs, call your Toshiba distributor.
• Do not connect any wire other than applicable wire to the option.
This can result in malfunction or accident.
• Do not pull the cable and the connector connected to the option.
This can result in damage or malfunction.
• Do not touch the metal part of the power circuit terminals when connecting the connector to the
option.
This can result in injury.
Mandatory
action
• The following steps must be performed before wiring and installation.
Turn off all input power, wait at least 15 minutes, and confirm that the charge lamp of the
inverter is no longer lit.
If steps above are not properly performed, this can result in electric shock.
• Use an emergency stop device and an additional safety device in your system to prevent
serious accident due to the option malfunctions.
Usage without any emergency stop device or any additional safety device can result in accident
or injury.


II-1 II. Introduction
I
II
III
1
2
3
4
5
6
7
8
9
10
11
12
13
14
15
16
17
18
Thank you for purchasing the Digital Encoder option for TOSVERT VF-AS3 series inverter. This
option is applicable as PG feedback interface for differential line driver output (TIA/EIA RS422) type
encoder.
This manual contains instructions of this option.
<Description of the Encoder option>
II Introduction
CAUTION
Prohibited
• Do not use the encoder out of applicable type specified in this manual.
This can result in damage or accident.
Important
Firmware compatibility
• VF-AS3 of CPU version "V102" is limited in the maximum frequency of input pulse (160kHz at
maximum).
• VF-AS3 of CPU version "V102" and "V104" are limited in induction motor for closed loop control.
Refer to inverter instruction manual for the check method of the CPU version.
• VF-AS3 of CPU version "V102" and "V104" are limited not to use Z and NZ phase signals.
VEC 008 Z 0
Revision number
Without cable
Encoder option type number
008: Digital encoder (Line driver)
Vector control with sensor compatible


E6582148
i.
I
3
9
Contents
I Safety precautions .............................................................................................................................................I-1
II Introduction .......................................................................................................................................................II-1
1 Names of the Parts ...........................................................................................................................................1-1
2 Connection to the Inverter.................................................................................................................................2-1
2. 1 Installation to the Inverter...........................................................................................................................2-1
2. 2 Wiring .........................................................................................................................................................2-2
3 Functional Description.......................................................................................................................................3-1
3. 1 Performance of vector control with PG sensor...........................................................................................3-1
3. 2 Pulse input command (speed command selection) ...................................................................................3-7
4 Specification......................................................................................................................................................4-1
5 Warranty............................................................................................................................................................5-1


1-1 1. Names of the Parts
I
II
III
1
2
3
4
5
6
7
8
9
10
11
12
13
14
15
16
17
18
External views of the Encoder option are described in this section together with the names of parts.
■External views and names of parts on the option
1Names of the Parts
Tab for release option
Terminal connector
(D subminiature connector: DE-15 / HD15)
Connector (to inverter)


2-1 2. Connection to the Inverter
I
II
III
1
2
3
4
5
6
7
8
9
10
11
12
13
14
15
16
17
18
Install the Encoder option to the inverter according to the procedures below.
■Removing
2Connection to the Inverter
2. 1 Installation to the Inverter
1) 2)
The option should be inserted until
the body is totally covered by the
slot. (Refer to the picture above)
Insert the option into the slot B straightly
and slowly. Keep the option from hitting
other parts near slot.
Remove the option in the direction of arrow while
pushing the "PUSH" tab by a screw driver.

E6582148
2. Connection to the Inverter 2-2
2
9
2. 2. 1 Connector
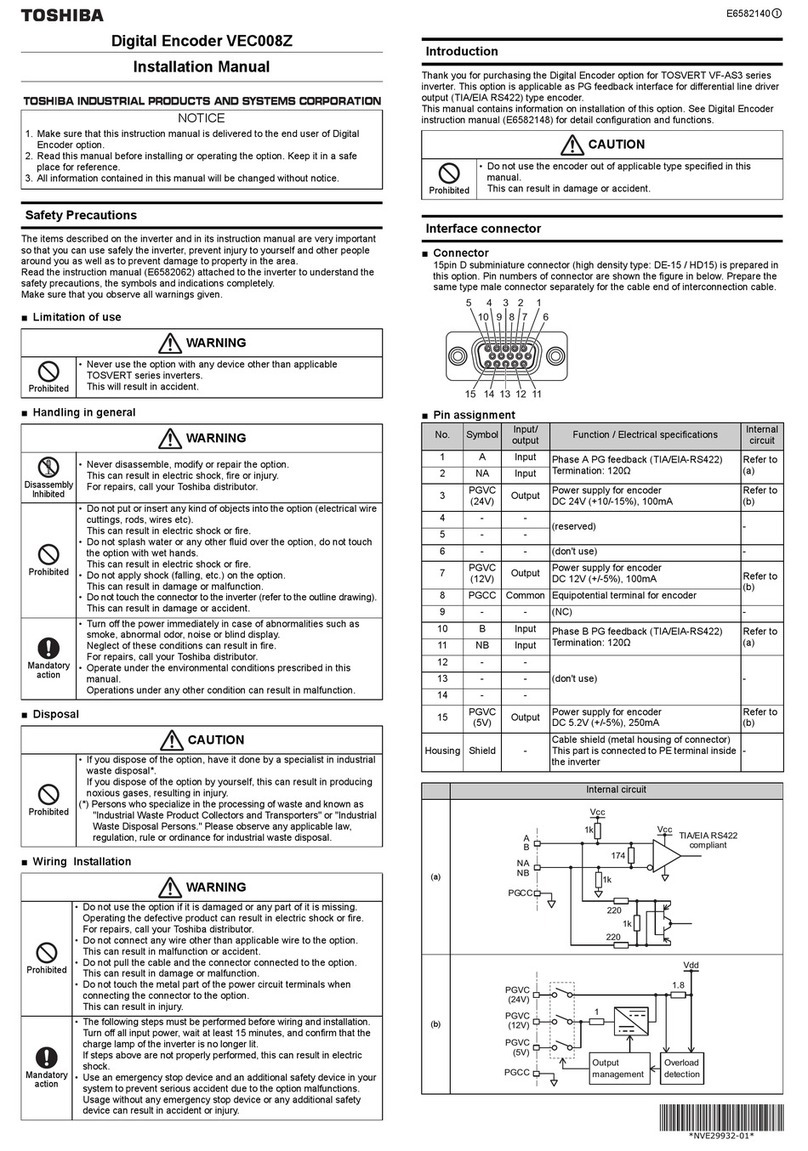
15pin D subminiature connector (high density type: DE-15 / HD15) is prepared in this option. Pin num-
bers of connector are shown the figure in below. Prepare the same type male connector separately for
the cable end of interconnection cable.
Fig.1 - Encoder interface connector (D subminiature)
2. 2 Wiring
Important
• This option is applicable with the feedback signal dedicated to the 2-phase pulse. Single phase
pulse input is not applicable.
12345
678910
1112131415

E6582148
2-3 2. Connection to the Inverter
2
3
9
10
2. 2. 2 Pin assignment
Table 1. Pin assignment
No. Symbol Input/
output Function / Electrical specifications Internal circuit
1 A Input Phase A PG feedback (TIA/EIA-RS422)
Termination: 120ΩRefer to (a)
2 NA Input
3PGVC
(24V) Output Power supply for encoder
DC 24V (+10/-15%), 100mA Refer to (b)
4 Z Input Phase Z PG feedback (TIA/EIA-RS422)
Termination: 120ΩRefer to (a)
5 NZ Input
6 - - (don't use) -
7PGVC
(12V) Output Power supply for encoder
DC 12V (+/-5%), 100mA Refer to (b)
8 PGCC Common Equipotential terminal for encoder
9 - - (NC) -
10 B Input Phase B PG feedback (TIA/EIA-RS422)
Termination: 120ΩRefer to (a)
11 NB Input
12 - -
(don't use) -13 - -
14 - -
15 PGVC
(5V) Output Power supply for encoder
DC 5.2V (+/-5%), 250mA Refer to (b)
Housing Shield -
Cable shield (metal housing of connector)
This part is connected to PE terminal inside the
inverter
-

E6582148
2. Connection to the Inverter 2-4
2
9
Table 2. Internal circuit
Internal circuit
(a)
(b)
A
B
Z
NA
NB
NZ
220
220
174
1k
1k
Vcc
PGCC
1k
TIA/EIA RS422
compliant
Vcc
PGVC
(24V)
PGCC
1.8
Vdd
PGVC
(12V)
PGVC
(5V)
1
Overload
detection
Output
management

E6582148
2-5 2. Connection to the Inverter
2
3
9
10
2. 2. 3 Signaling
As for the encoder feedback signals, Terminal A and NA are connected for Phase A, Terminal B and NB
are connected for Phase B.
The polarity of the pulse input signal should be as follows.
Non-inverting input side: A, B
Inverting input side: NA, NB
The signal feedback from the encoder should have the waveform shown in Fig.2 in terms of the
motor rotation direction. The encoder installation direction and signal wiring should be done
accordingly.
Fig.2 - Judge on normal and reverse rotations by the encoder
feedback of two phases (Phases A and B)
Important
• Forward rotation or reverse rotation is judged from the feedback pulses of Phase A and Phase
B (2-phase pulse that have 90 degrees of phase difference). Therefore, it should be noted that,
when connections are wrong, there is possibility for abnormal rotation of the motor.
A
NA
B
NB
A
A
B
B
V
A
V
B
Phase A(V
A
)
Reverse rotation
Phase B(V
B
)
Phase A(V
A
)
Forward rotation
Phase B(V
B
)
X
2
X
1
X
3
X
4
T
Phase difference : Xn>= 0.15T(n= 1,2,3,4)
PG

E6582148
2. Connection to the Inverter 2-6
2
9
2. 2. 4 Wiring with encoder
When wiring, follow the instructions bellow.
• Use twisted pair shield wire for A/NA, B/NB, Z/NZ and PGVC/PGCC each
• For PGVC, select a pin according to the encoder supply specification.
Parameter configuration is also needed (See Chapter 3)
• Do not connect any wire to unused pins
• Recommended wire size is 0.25 mm2(AWG26) for signal line (A, NA, B, NB, Z and NZ), 0.5mm2
(AWG20) for power supply (PGVC and PGCC)
• The cable length is 100m at maximum. At that time, supply voltage drop by wire impedance should be
taken into account.
Fig.3 - Example of wiring for line driver encoder
(Speed/Torque switching operation)
Important
• Separate the encoder cable, at least 20cm away from power (Power supply and motor) cable.
Important
• When using two-phase output type encoder, motor forward and reverse rotation can be judged
by encoder.
When prohibition on reverse rotation is set by the inverter parameter (F311=1) and when the
motor is rotating to reverse direction due to an external force, the inverter starts with reverse
operation in accordance with the motor's rotation direction for a time and the motor will be able
to shift to the forward rotation and the smooth startup becomes possible.
A
A
B
B
Vcc
0V
VF-AS3
Motor
R
S
T
U
V
W
ST *
F
S1
CC
A
NA
B
NB Z
Z
Z
NZ
PGVC
PGCC
Housing
VEC008Z
PE
PG
With OFF, free-run stop
Forward rotation with ON and
reduce speed and stop with OFF
Torque control with ON and
Speed control with OFF.
F115(S1 terminal) : Set to 112.
* Assign ST (standby) function to arbitrary
terminals.

3-1 3. Functional Description
I
II
III
1
2
3
4
5
6
7
8
9
10
11
12
13
14
15
16
17
18
Using the pulse-row feedback signal from the encoder installed on the motor shaft or load rotation shaft,
vector control with sensor can be conducted.
Speed control operation: 0 speed to 150% torque,
speed control range 1:1000 (1000 ppr-PG)
speed accuracy ±0.02% (50Hz base digital input)
Torque control operation: Torque control accuracy: ±10%
(torque control range: -100% to 100%)
3. 1. 1 Parameter setting for vector control with PG sensor
During operation with vector control with sensor, it would be necessary to set the following parameters
shown below.
■Set V/f pattern
Table 3-1. parameter of control pattern
When conducting vector control with sensor (speed/torque control) with this board option, [Pt] = "10",
"11", "12" should be set.
For torque control operation, it is necessary to allocate control switching (torque/position) to one of the
terminal function selection [F111] to [F118] (input terminal function selection 1 to 8) (when [CMOd] ="0")
or to allocate to communication control switching (when [CMOd] ="2" to "5"), in addition to the above
parameters.
For details of adjustment methods by the speed control command and torque control command, refer to
the inverter manual.
3Functional Description
3. 1 Performance of vector control with PG
sensor
Title Function
Name Parameter Setting Setting at
Shipment
Pt V/f Pattern
0: V/f constant
1: Variable torque
2: Automatic torque boost
3: Vector control 1
4: Energy savings
5: Dynamic energy savings (for fan and pump)
6: PM motor control
7: V/f 5-point setting
8: -
9: Vector control 2 (speed / torque)
10: PG feedback control
11: PG feedback vector control (speed / torque)
12: PG feedback PM motor control (speed / torque)
0

E6582148
3. Functional Description 3-2
3
9
■Set parameters of PG sensor
Table 3-2. Parameters of PG sensor
(1) The PG pulses number [F375] is the number of encoder output pulses per one motor rotation.
(2) The PG option voltage [F379] is the supplied voltage to PG option.
(3) For PG select [F376], set as follows:
(4) PG option disconnection detection [F377]=”1” : in case PG option is not connected, or PG at
least one pulse is missed, E-12 trip occurs.
It is necessary to reset the inverter power to enable the changes.
Title Function Name Parameter Setting Setting at
Shipment
F375 PG pulses number 1 - 9999 1000
F376 PG select
0: PTI (Command) – PTI (FB)
1: PTI (Command) – Digital option (FB)
2: -
3: PIT (Command) - Resolver option
4,5: -
6: Digital option (Command) - Non FB
7 - 9: -
10: PTI (Command) - PTI (FB inversion)
11: PTI (Command) - Digital option (FB inversion)
12: -
13: PIT (Command) - Resolver option (FB inversion)
14,15: -
16: Digital option (Command inversion) - Non FB
0
F377 PG option disconnection detection 0: Disabled
1: Enabled 0
F379 PG option voltage
0: 5V
1: 12V
2: 24V
0
Use the PG pulse input
for frequency feedback ?
Use the PG pulse input
for frequency reference ?
The polarity of PG
pulse input is positive ?
Set [F376]= “1” Set [F376]= “11” Set [F376]= “6”
or “16”
Set [F376]= “0
(PG pulse input is
not available)”
YES
YES
NO
YESNO NO
Other manuals for TOSVERT VF-AS3
15
Table of contents
Other Toshiba Media Converter manuals

Toshiba
Toshiba LF620 User manual

Toshiba
Toshiba TOSVERT VF-S15 series User manual

Toshiba
Toshiba VEC008Z User manual

Toshiba
Toshiba TOSVERT VF-AS3 User manual

Toshiba
Toshiba L5232 User manual

Toshiba
Toshiba LF620 User manual

Toshiba
Toshiba RS-485 User manual

Toshiba
Toshiba RS4001Z-0 User manual

Toshiba
Toshiba USB001Z User manual

Toshiba
Toshiba RS4002Z-0 User manual