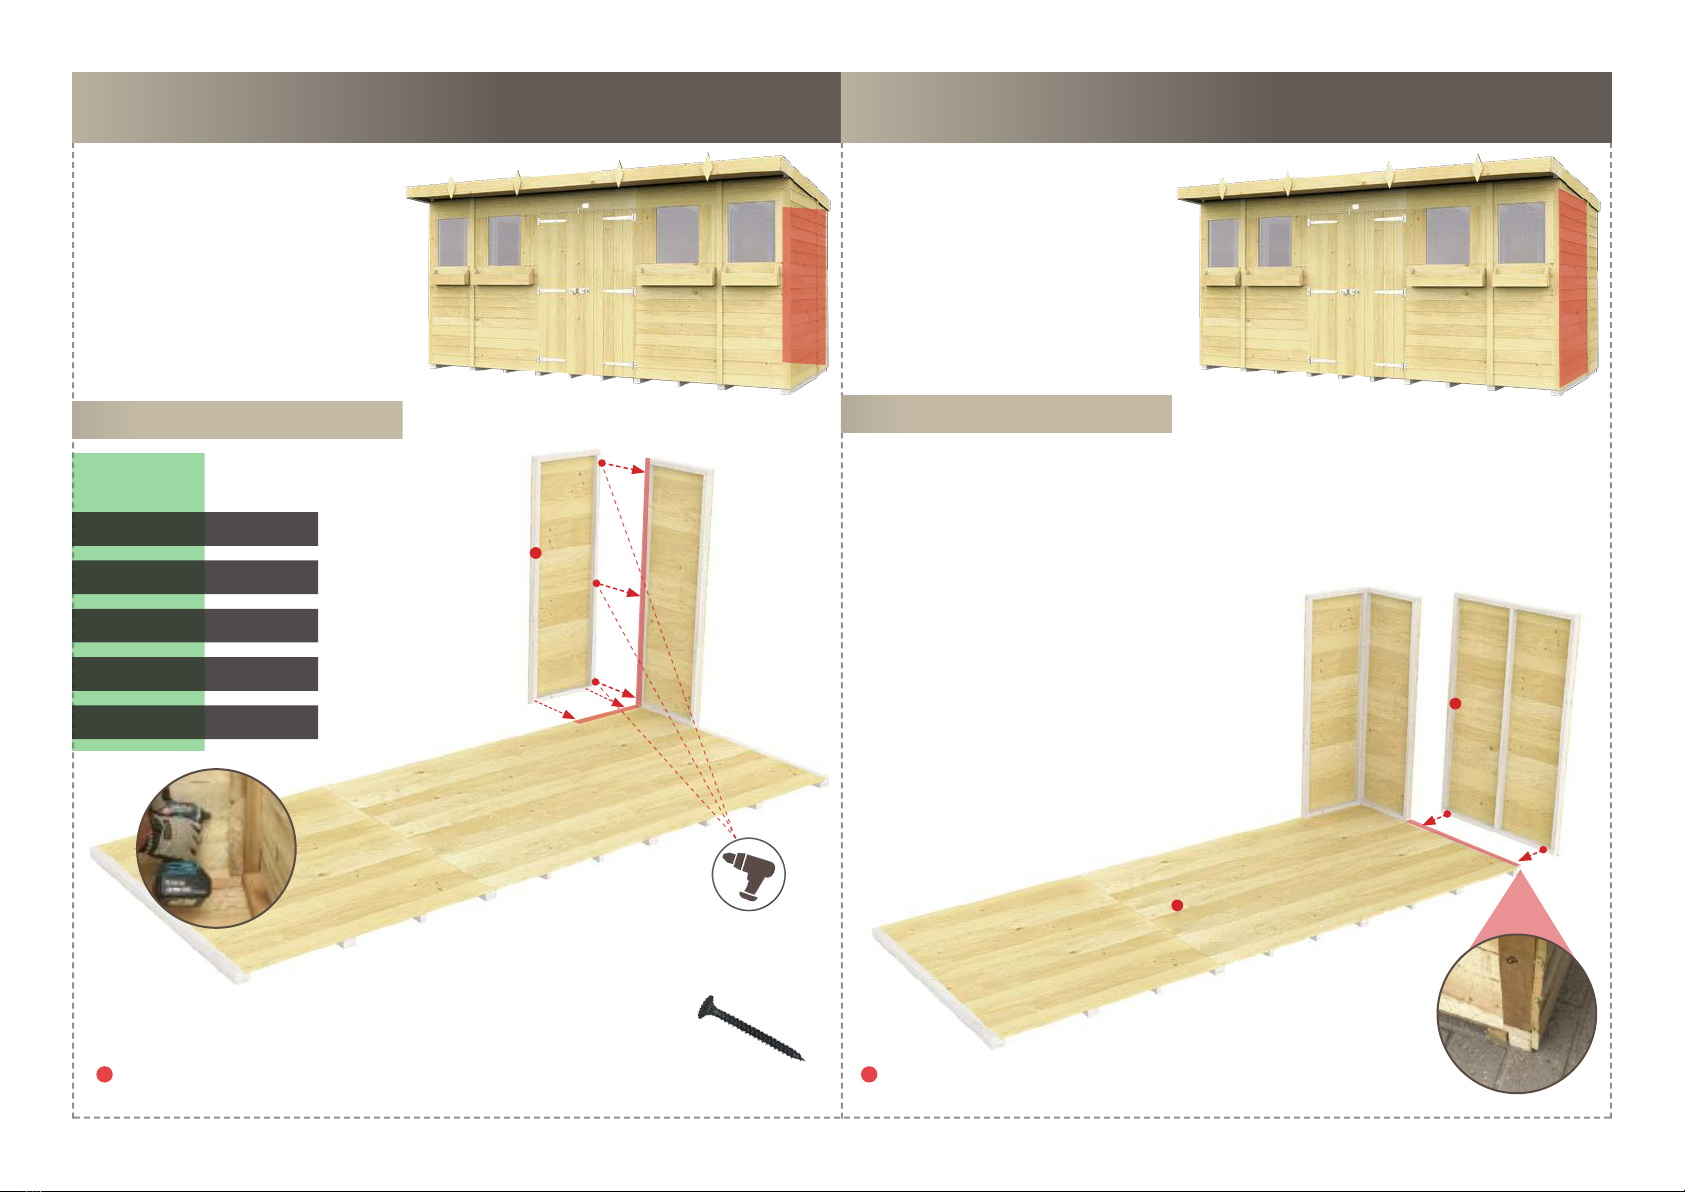
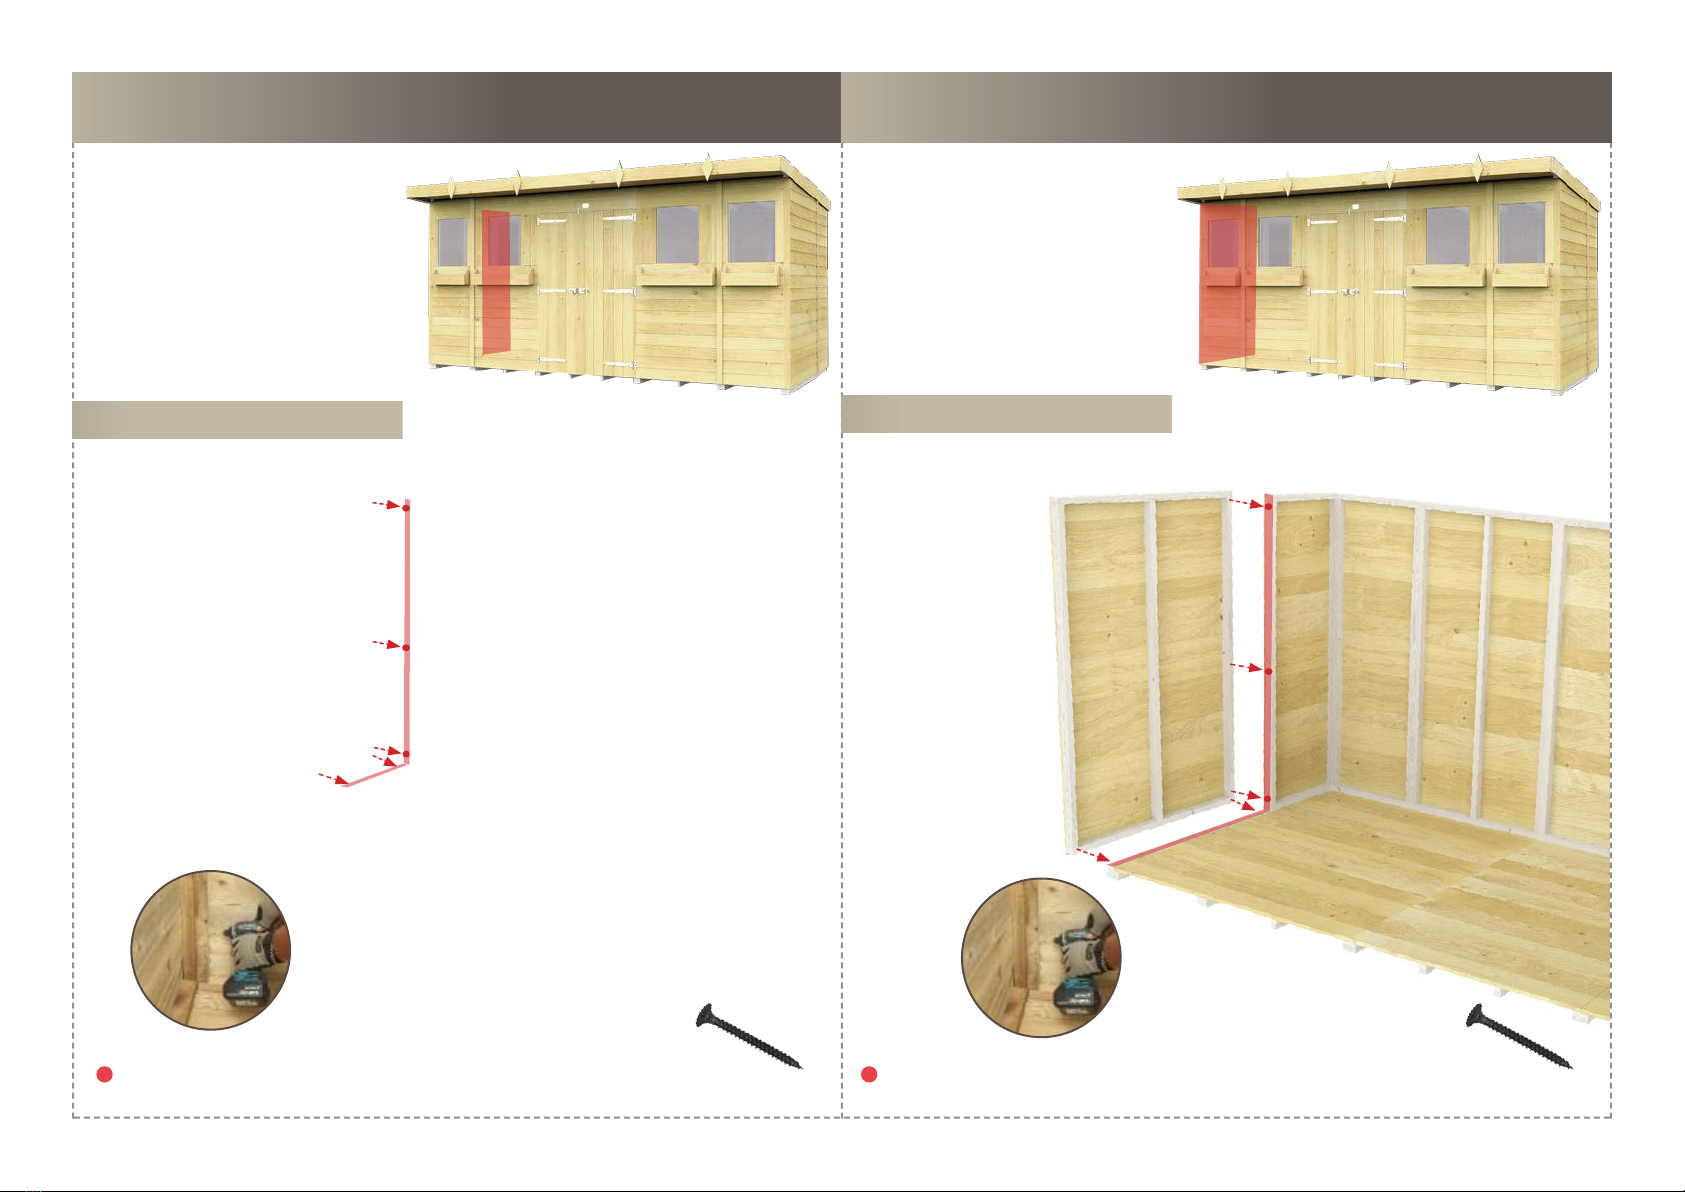
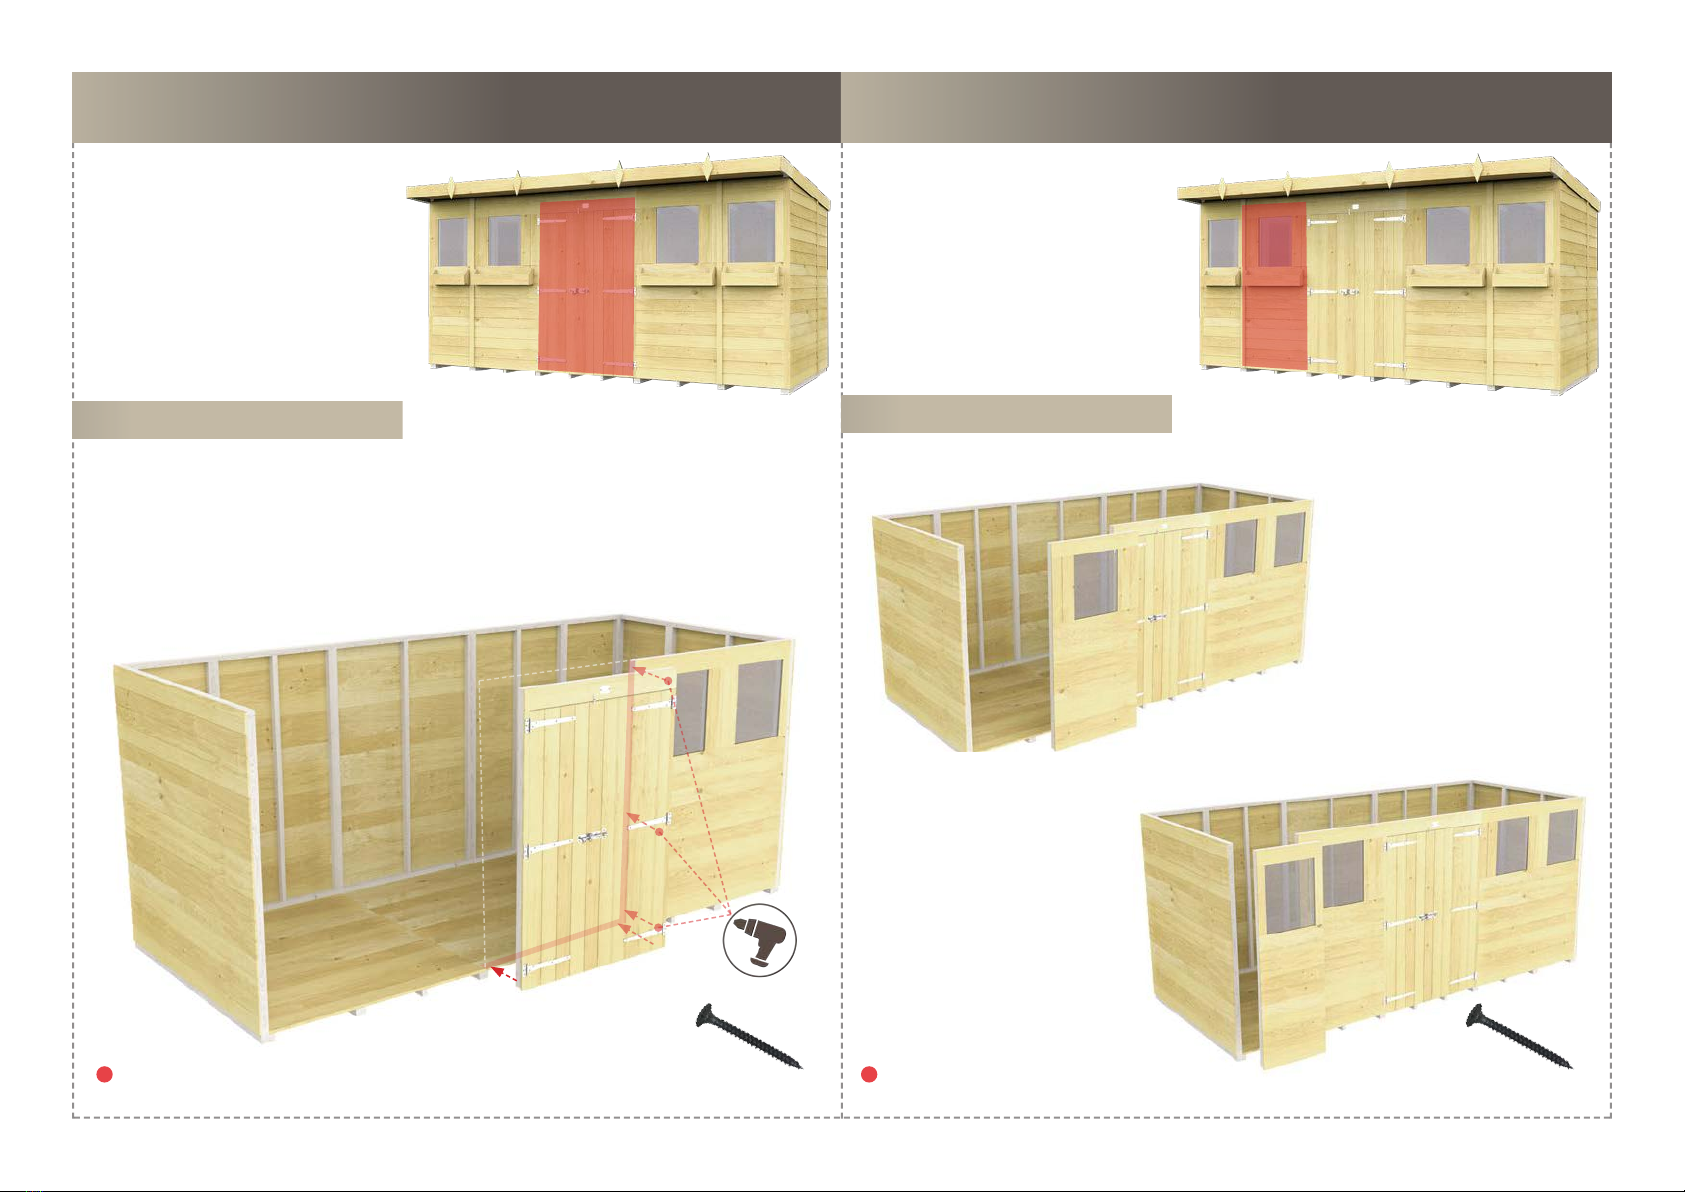
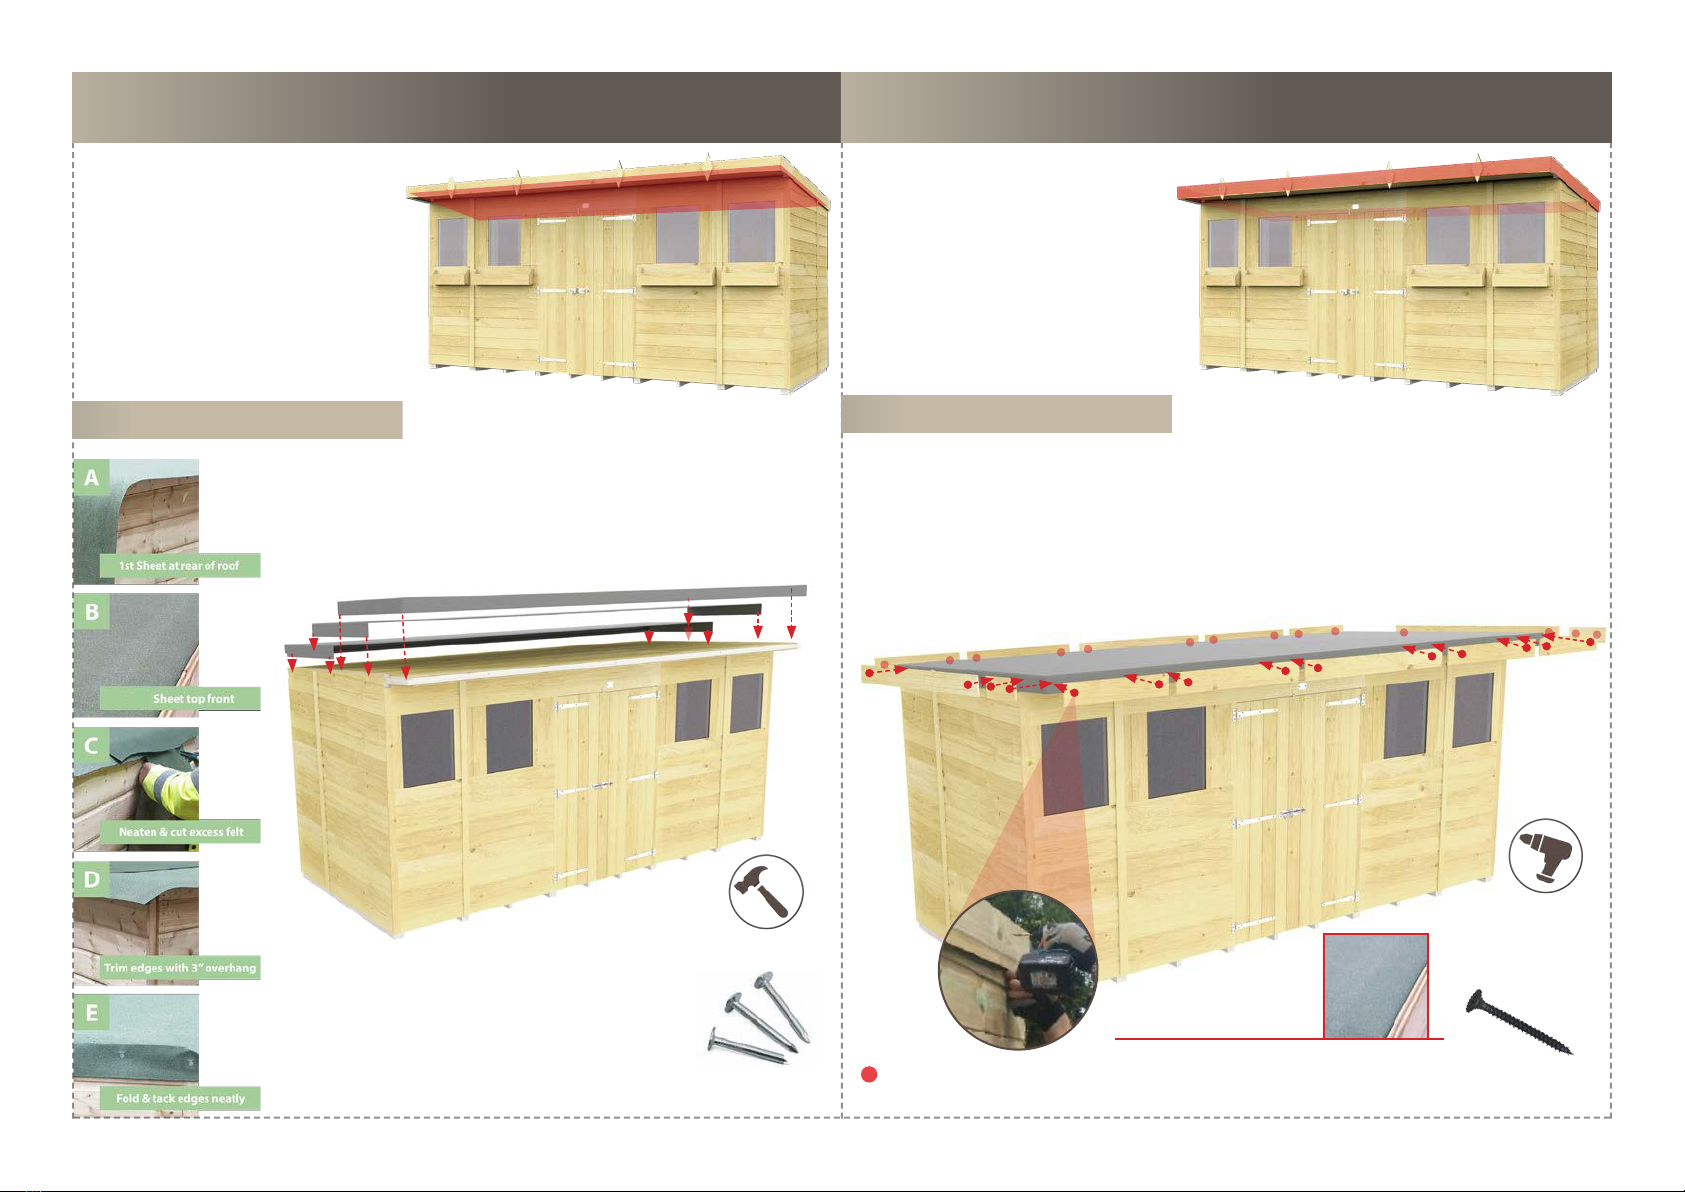
total sheds Pent Summer Shed User manual


Other total sheds Garden House manuals

total sheds
total sheds Pent Summer Shed 14x6ft User manual

total sheds
total sheds Apex Summer House 12ft x 4ft User manual

total sheds
total sheds Apex Shed 6ft x 7ft User manual

total sheds
total sheds Apex Shed 4ft x12ft User manual

total sheds
total sheds Apex Shed User manual

total sheds
total sheds Pent Summer Shed 14x7ft User manual

total sheds
total sheds Pent Shed 7ft x 5ft User manual

total sheds
total sheds Pent Shed User manual

total sheds
total sheds Apex Summer House 12ft x 4ft User manual

total sheds
total sheds Pent Shed User manual

total sheds
total sheds Pent Summer Shed 14x5ft User manual

total sheds
total sheds Apex Shed 5ft x 7ft User manual

total sheds
total sheds Pent Potting Shed User manual

total sheds
total sheds Pent Play House 8x4ft User manual

total sheds
total sheds Apex Summer House 12ft x 4ft User manual

total sheds
total sheds Pent Shed 7ft x 5ft User manual

total sheds
total sheds Pent Summer Shed 14x8ft User manual

total sheds
total sheds Pent Shed 6ft x 8ft User manual

total sheds
total sheds Apex Shed 8ft x 6ft User manual

total sheds
total sheds 6x6ft DOG KENNEL User manual


Popular Garden House manuals by other brands

Summer Garden Buildings
Summer Garden Buildings 085 Assembly instructions

garofalo
garofalo TUSCANY 280 user manual

Forest
Forest Xtend 4.0 Guide book

Décor et Jardin
Décor et Jardin Abri Massif 68526S000 Assembly Notice

Duratuf
Duratuf Waimate Assembly instructions

Palmako
Palmako Lara FRB28-3524 installation manual

Palmako
Palmako Lea installation manual

Palmako
Palmako Ella installation manual

Lemeks
Lemeks Palmako EL16-2737 Assembly, installation and maintenance manual

KidKraft
KidKraft Big Backyard FORESTVIEW II P280095 Installation and operating instructions

Project Timber
Project Timber Evolution My Den Building instructions

Finn Art Blockhaus
Finn Art Blockhaus Double grillkota 9m2 Assembly instruction


