16 17
PRIMING THE ATOMIZER HEAD
It is important to “prime” a new atomizer
head before rst use. Failure to do so can
damage the atomizer head.
Remove the tank from the Intu Pro battery
by unscrewing at the tank base. Turn the
tank upside down, then turn the tank base
through 120 degrees (1/3 turn) anti-
clockwise to release it from the main tank
body. Remove the atomizer head by pulling
straight out, and drip a few drops of e-liquid
onto the cotton wick through the openings
on the sides of the atomizer head. Push the
atomizer head back into the tank, ensuring
the at sections on the sides are aligned with
the location tabs. Turn the tank base gently
over the tank body until the bayonet tting
drops into place, then tighten by turning
through 120 degrees clockwise. Screw the
tank back onto the battery.
ATOMIZER HEAD LIFESPAN
Atomizer heads do not last forever and
need to be replaced periodically. Lifespan is
generally from a few days to several weeks,
depending on power used, vaping style,
avour and type of e-liquid. A slight burnt
taste, general loss of vapour production,
or a reduction in avour intensity can all be
indicators that the atomizer head requires
replacement.
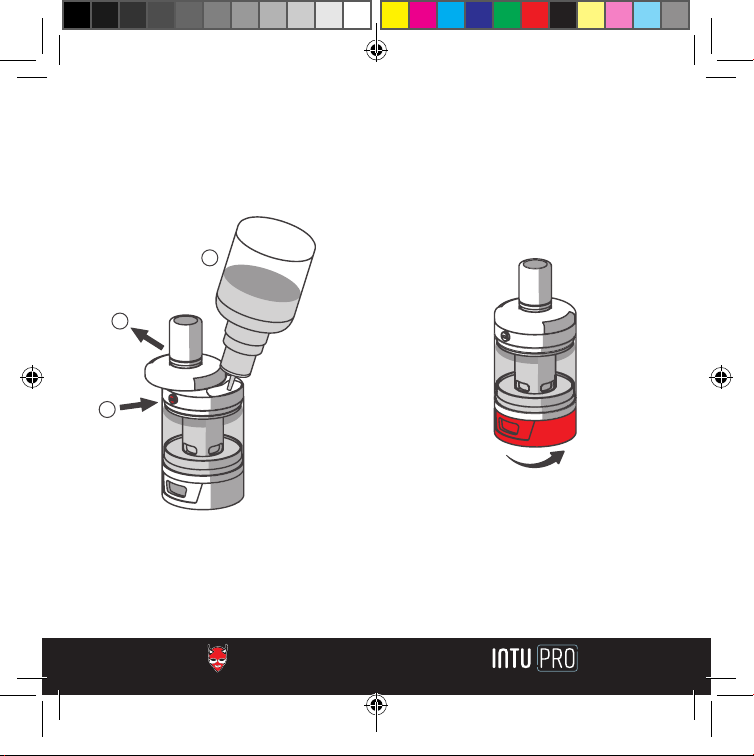
FILLING THE TANK
Press the ller release button on the side of
the tank and slide the top cap in the direction
indicated by the arrow symbol. Once opened,
ll the tank and then slide the top cap back
over the tank until it clicks into place.
Note: To avoid leaking, ensure an air gap of
2mm remains above the e-liquid after lling.
After priming a new atomizer head and lling
the tank, it is recommended to wait 5 minutes
to ensure the atomizer head is fully saturated.
ADJUSTING THE AIRFLOW
To adjust the airow to your personal
preference, rotate the airow control ring
located at the bottom of the tank. The more
area exposed behind the slots in the airow
ring, the more open the air draw will be.
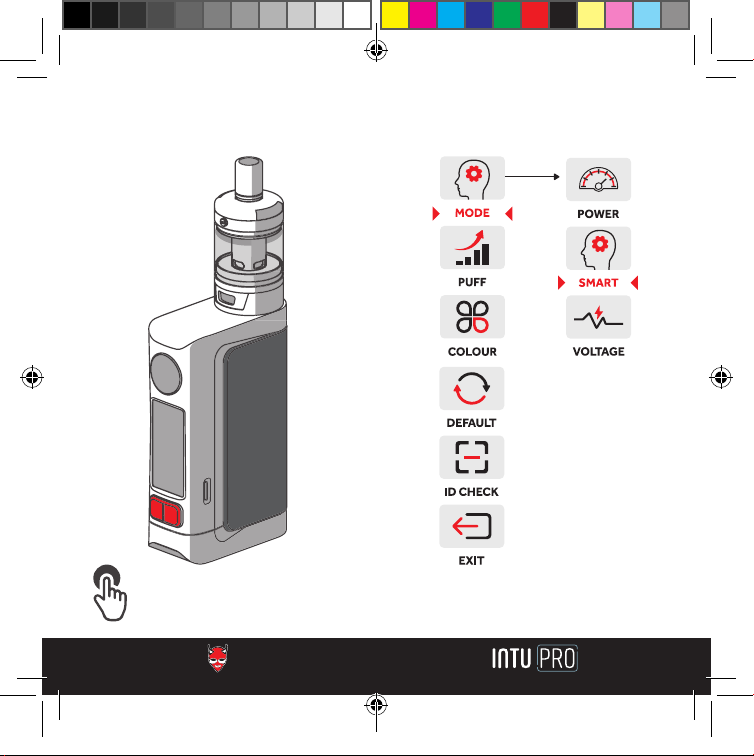
USING YOUR INTU PRO
TW_INTU-PRO_manual.indd 16-17TW_INTU-PRO_manual.indd 16-17 13/09/2021 13:0213/09/2021 13:02