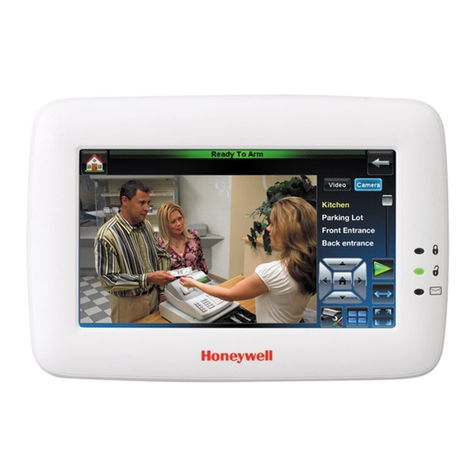
TouchWand Wanderfull Hub User manual

Wanderfull
Installation Manual 1.8

2
General…………………………………………………………………………………………….………………………….3
Our products…………..........................................................................................................3
About the Z-Wave system………………………………………….…………………………….………………..…4
Service and support system…………………….………………………….………………………….…………….5
Wanderfull Controller Setting……………………….……………………………………………….…..…………6
Set up the management system….…………………………………………….………………………….………9
General Settings………………………………………………………………………………………………….……...10
General Settings-Add a user…………………………………………………………………………….……….…11
General Settings - Daily and manual backup…..……………………………………………..….………..11
General Settings - Network Configuration…..…………………………………………….………………..14
General Settings - Set the location of the controller………………………………………….…..……15
General Settings - Languages and Calendars……………………………………………….………………16
General Settings - A look at the system log………………………………………………………………...16
General Settings - Green construction and energy consumption...........................………17
General Settings –Update hardware version……………………………….………………………..…..19
General Settings –BitWise and KNX system Setting….…………………………………………..……20
General Settings - Z-Wave System Setting…………………………………………………………..………21
Rooms………………….…………………………..…………………………………………..……………………………23
System Units………………………………………….…………………………………………………………………..25
Configuration Settings………………………………………………………….……………………………...…...27
System Units - Integration of IP camera…………..…………………….……………………….………….29
Scenarios……………………………………………………..……………………….……………………………………29
Scenarios - Running different operating scenarios……………………….…………………………….30
Troubleshooting…………………….……………………………………………………….………………………….45

3
General
About us
TOUCHWAND is a sister company of I FEEL which develops and manufactures control and
smart home systems. The company develops and manufactures the products in Israel and is
located in Petah Tikva.
The company's systems are based on a stable and robust platform that supports
international standards and serves as a link to various third-party systems.
TOUCHWAND's products are intended for various markets, mainly:
• Integrators dealing with smart home systems
• Integrators interested in office management systems and office buildings
• Integrators dealing with hotels
• Integrators working with construction developers.
The company does not work with end customers and does not provide them with services
and equipment.
Our products
The company is offering the following products:
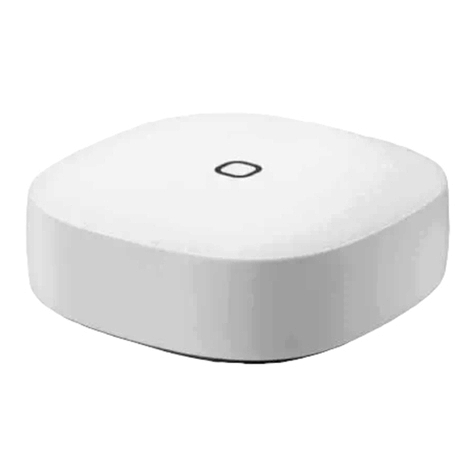
-Wanderfull Hub or the controller is used to manage wireless systems in the 916 Mhz Z-
WAVE standard. It supports BLE 4.2 or higher, Wi-Fi-based units and KNX standard used for
connecting to wired systems.
The controller has a management system that allows control at home and building systems
in a simple and user-friendly way with a technician, administrator and user approach
hierarchy. The management system is based on external cloud services (currently AWS) and
enables system survivability even during malfunctions.
The client and integrator are equipped with cloud services that enable remote access,
backups, information and alerts
.
Detailed description and other technical details of the product can be found on the website
at the following link http://www.touchwand.com/products/touchwand-wanderfull-hub/
-InWand Module Switch is a Z-Wave smart home micro module is the only micro module
that offers dual functionality. It can be used to control shutter, lighting or scenario in the Z-
WAVE standard.
-WallWand, intelligent electronic switch with LCD display for control of blinds, lighting and Z-
WAVE scenarios. This sleek wall controller offers both functionality and design, supporting
up to 15 icons that can be selected from a library of over 150 icons, representing various
smart home functionalities.

4
-Touchwand Din Rail Double Outputs for Electricity Cabinets –the din rail Z-Wave smart
home module is a special module that offers dual functionality (heavy load lights, hot water
heater, AC, or shutters), enabling control of 2 different loads.
-Touchwand Double Micro 24V DC Module is a small, hidden Z-Wave smart home micro
module that offers dual functionality (lights or shutters).
Note: Before going through the manual, make sure to use the latest updated
document located on the company's website.
About the Z-Wave system
1. Z-WAVE is the most popular smart home system standard in the world! Over 400 companies
in the world are using this standard. It is now the only standard in the wireless field.
2. The system operates at an independent wireless frequency according to the Ministry of
Communication standard - 916MHZ (does not operate in the WI-FI network environment
which is considered a busy network).
3. The standard Z-WAVE ensures customers two important issues - a system with a variety of
suppliers and the possibility to purchase equipment from other sources and from Internet
4. The method of operating the system is in the form of MESH - meaning that each switch
operates autonomously without the need for a management system and activates the other
switches in the system.
5. There is no need for a central system to operate the house in a smart way. The system
enables independent operation of each unit independently of other factors.
6. A power failure does not affect the system and the units because each unit has internal
protection.
7. The management system enables control of the application, including management of the
Hebrew calendar and the operation of a variety of Shabbat clocks.
8. The smart home system enables a smart alert system - this system is connected to detectors
and cameras and provides important information to the customer.

5
Service and support system
Training
The company holds ongoing training. You can register via the website at the following link:
http://www.touchwand.com/contact/ or contact us for further training whenever
additional knowledge is required.
Phone
support
and
on-site
support
For telephone support please call the following number 03-5089553 during working days
from 09:00 to 17:00.
Installation assistance is available for more than 15 units. The first installation is free of
charge. All subsequent installation costs 1200 NIS per day.
You can get programmable Touchwand switches at no charge for the first installation.
Delivery time is up to 5 working days. All subsequent programming is 100 hours for the
Touchwand switch.
Using ToolKit when installing over 10 units is mandatory. The rental of such a unit is 150 NIS
per day and its purpose is to provide an understanding tool for the stability of the network.
Notify upon reservation.
Supervision process, plans and installation communication problems
To
avoid
potential
network
problems
or
at
least
to
solve
potential
network
problems, the
electrician
should
be
required
to
install
closed
electrical
boxes
in
problem
areas.
If you
go to
the installation and there are network problems because
of
the
remote location
of
the
controller,
you
must
put
the
RIPs
on
the
way
to
the
remote
units.
After
the house is already
built
to
cut
concrete
for
electric
boxes,
this
is
a
m
ajor problem
and
can
cause
a
serious
problem
in
the
process.
When
there
is
a
basement
and
there
is
a
desire
to
put
ZWAVE
units
down
to
the basement
and
is
a
barrier
to
the
grid,
it
is
therefore
necessary
to
plan
electrical programs
and
install
down
the
stairs
boxes
of
electricity
that
will
allow
the
installation
of InWand
rectifiers.
When
you
have
set
up
a
large
network
that
has
more
than
10
or
15
units,
you
should
check
the
network
stability
using
ToolKit
Sniffer.
This
should be
considered
in
the
customer's
pricing
of
units
in
favor
of repeaters.
The distance between the units and their number
The
answer
is
uncertain,
and
this
can
be
due
to
a
variety
of
reasons:
1.
Physical
distance
from
the
controller.
The
greater
the
distance,
the
greater
the
risk
of
network
stability.
For
example,
in
a
house
of
3
floors
priority
put
the
controller
on
the
middle
floor.
However,
sometimes
a
large
open
space
waves
on
the
ground
floor
(most of
the
living
room)
and
on
the
top
floor
can
be
many
rooms
so
there
is
a
better
chance for
the
controller
to
control
the
top
floor.

6
2.
The
amount
of
high
plate
tats.
The
WallWand
transmitter
antenna
is
deducted
from
InWand
due
to
antenna
coverage
in
additional
equipment.
3.
Concrete
and
iron
-
the
more
concrete
walls
and
halls,
the
lower
the
quality
of
the wired
network.
Wanderfull
controller
configuration
Starting the controller
Unpack the unit and plug it to electricity through the power outlet port located in the back.
Once the controller is powered up, all LED indicators will be lighted up and emit red light. The
LED Indicators in the Wanderfull controller are for the Internet, Zwave, COM, IR and RS232.

7
emitting GREEN light
connected to the Cloud
Internet LED Indicator
blinking RED light
no Internet connection
blinking YELLOW light
data is being transferred
flashing GREEN light
transferring data
Z-Wave LED Indicator
blinking RED light
no connection can be established
blinking YELLOW light
pairing mode
blinking GREEN
light
data is being transferred
COM LED Indicator
flashing RED
light
no connection of any type
blinking YELLOW
light
pairing to BLE
Then through the Ethernet port, plug in the cable. Once the cable is plugged in little green
light will be emitted through the port on the back of the controller. Also the LED light upfront
for the Internet will turn green.
Through the SSID (Service Set Identifier) written on the back of the unit, the user is able to
find the Wanderfull unit in the Wi-Fi network. After locating it connect on this Wi-Fi network.
Open the browser and enter the following IP address
192.168.0.1
In the login form click on
Don’t have an account?

8
One new form will appear for Registration. In order to register in the form, enter an e-mail
address, password and the retype the password. After the initial registration is done, click on
the
Authorize Device
button.
After clicking on the Authorize Device button, the user should scan the QR code with a
mobile phone or laptop camera. The QR code is located in the back in the controller. This
allows immediate registration via your mobile phone or laptop camera. During the
registration process new form will appear in the application.

9
After the registering is completed, the initial interface can be seen. Click on the Settings
sub-menu located in the bottom left on the interface.
Under Settings click on the General tab. Select the country, time zone, latitude and
longitude.
Under General Configuration select the appropriate temperature unit, language and religion
calendar. To complete this part of the configuration, click on the Save button.
Set up the management system
Dashboard
It is possible to edit and adapt to the customer's preferences at any given moment!
Dashboard interface while using a computer
When logged in, initially the Dashboard is displayed. The dashboard is divided into several
parts:
•Energy consumption is displayed at the top to the right. In this part the user is able to see
calculated energy cost per month, energy consumption and status.
Three different status icons (cloud, lamp icon for the devices and turn off button) indicate
that:

10
-If the cloud icon is green than the controller is connected through the Internet
-If the cloud icon is red than the controller is locally connected
•Below are the system alerts set by the user or installer
•On the right side are the fixed scenarios of the house
•Preferred scenarios are displayed on the left by the client
•At the bottom is quick access to the rest of the app
Dashboard interface while using an App
In the app, the dashboard is divided into several parts
Energy consumption is displayed at the top
Below are the system alerts set by the user or installer
Below are the fixed scenarios of the house
Preferred scenarios or sessions are followed by the client
At the bottom is quick access to the rest of the app
General Settings
The management system is divided into 5 parts
•Dashboard - the place where the customer meets with the system and performs most of
its activities.
•Rooms - rooms / offices, etc.
•Scenarios - the way in which the customer adapts the operations to his needs
•Units - the types of units that make up the system, the way they connect and their names
• Settings
Each part of the system is configured independently and connected to the other parts.
It is very important to define the system fully before leaving the site by the installer.
This booklet or its summary must be left in the customer's hands so that he can perform
activities and settings independently to suit his needs.
The application logs off automatically after 30 minutes of inactivity!

11
General
Settings-Add
a
user
In order to add a user, go to the Settings sub-menu and click on the Users tab. A for as seen
in the picture below will appear.
After entering necessary data like username and password, the user should choose user
role. The management system supports several types of users:
A user with full access in all set up screens in called a TECHNICIAN. This user can add and
edit network configuration, the Z-wave configuration and the KNX.
A user with manageability and access to the setup screens. This user is defined in the
system as an ADMIN.
A user who is only able to use the system without being able to make changes in settings or
to construct different situations and scenarios. Such a user is called USER.
General
Settings-Daily
and
manual
backup
The backup tab is located in the Settings sub-menu.

12
Once the system is connected to the cloud services, every day at 3 AM a complete backup
procedure is performed automatically for the entire management system.
The purpose of the backup is to create redundancy or an option for a client or installer that
have settings that are incompatible with current status or requirements.
If a particular unit is damaged for some reason, the installer can reach the customer's home
with another unit and using a name and password to upload the whole system within a short
period of time.
The system rule means the names of the units, the names of the rooms, the groups defined
in the system, the scenarios that were built, the appropriate version, the client updates and
alerts, user names, and user types in the system hierarchy.
Attention should be paid to a customer who chooses to enter using a fixed IP address, and
not via cloud services, it is required to back up the controller via USB backup. In this case,
uploading the latest version depends on the user and his backup time.
In the application this can be done by clicking on two buttons as seen in the picture above:
Create backup to Cloud and Create backup to USB.
If we choose for example the option Create backup to Cloud, one warning message will
appear in the application.

13
By confirming this message, another one is going to appear while backing the controller.
Uploading from a backup can be done when installing a new controller for your home or
office network. Then enter the ADMIN username and password.
You should then go to the settings page and enter the BACKUP sub-menu. Click on the
Restore from USB option.
List of backups that have been saved in the system in recent months can been seen in this
interface. Access the appropriate time and restore. After uploading the updated file, you
can continue working.
IMPORTANT NOTE FOR INSTALLERS - Do not leave the customer's house before
backing up the cloud! You've finished setting up your home - perform a neat backup.

14
General
Settings-Network
Configuration
Network configuration can be performed by the user with installer/technician privileges!
This configuration can be performed in the Settings sub-menu under Network configuration.
It is important to enter the SSID that was located on the back of the controller and the start
and end address for the LAN. After entering all other necessary data click on the Save &
Apply button.

15
General
Settings
-
Set
the
location
of
the
controller
It is very important to define the location of the unit or more specifically the Wanderful Hub
coordinates.
For example, Israel is mainly defined in latitude 32 and longitude 34. It is important to add
at least 3 decimal places to accurately locate the site in the State of Israel. It is a matter of
minutes, but for observant customers it is of great importance.
The location of the management unit is where it was installed and the definition can be
removed from various sites including Google Maps.
At the end of the location setting, we can activate the sunset and sunrise scenarios and the
definition of the Sabbath and the Sabbath.
If the coordinates are not defined, the system will not be able to run time
scenarios properly or not at all!

16
General
Settings
-
Languages
and
Calendars
When setting up the system, it is important to set the temperature unit (Celsius or
Fahrenheit) and the system language –Arabic, English, French, Hebrew, Magyar and
Russian. The system also supports different religion calendars like Hebrew, Christian and
Muslim. Setting the calendars is important for defining different dynamic holiday based
scenarios.
Every user can then change the calendar, language and temperature unit on their own!
General
Settings
-
A
look
at
the
system
log
In the Settings sub-menu click on the General tab. The user is able to select the amount of
log data that will be displayed –1 month, 3 months, 6 months or 1 year. After selecting it by
clicking on the Show logs button, the user can see the logs. In this selected period, there is
a possibility to filtrate the data by the start and end date from the calendars at the top.

17
To check the operation of the system or to verify that certain conditions are working
properly, the system provides information about all the activities that occurred.
System Log Overview:
You can see the unit type (detector / shutter / lighting) in the left column - Unit.
If the unit is assigned to the room, you can see the division into rooms in the second column
on the left –Room.
The last activity of the system is in the third column on the left –Timestamp.
In the right hand you can see the event or type of change / activity taking place at any given
moment in the same unit that we review a blog –Event.
Skilled installers will test the operation of the various units and situations after building and
operating the different situations.
General
settings
-
Green
construction
and
energy
consumption
TOUCHWAND's management system is designed to provide data on energy and energy
consumption in the building or at home.
For this purpose, it is important to specify that all units installed or, alternatively, the units
that are important to us to receive information on their power consumption, will include a
power controller.
There are several processes to follow:
On the energy screen, select the setting - Energy Options

18
By checking the Show energy meter box, all power supply updates will appear on each unit
at the top right in the screen.
Also, it will be possible to see what electricity consumption is in each area or in the whole
house / building.
The system offers the possibility receive statistics and alerts on electricity consumption.
Statistics can be obtained on the Settings page, under setup –Reports.

19
General
Settings-Update
hardware
version
When connecting to cloud services, you can check periodically if there are any version
updates. If there is an update, by clicking on the Update FW button, the user can do the
update. During this process the application generates another form for notification.
If you have an updated version, the system displays the update and the latest version as
seen in the picture below.

20
You can get information about the update and choose whether to do it now or in the future.
Version updates refer to several options:
•Security updates made from time to time.
•Uploading new products to the management system.
•Connection and support for third party products such as alarm systems, air conditioners,
AV and more.
•Adding support for Z-Wave end products (all TouchWand products support wireless
updates to OTA).
If the client is not connected to the cloud services, it is possible to perform a remote update
by accessing and sending the update by remote software or sending an update file by email.
This service may incur an additional charge!
General
Settings
–
BitWise and
KNX
System
Setup
The Bitwise submenu is visible and available for editing only for users with
technician/installer privileges!
The Bitwise settings can be added and edited in the Settings tab. The client can check the
server status and client’s connection by clicking on the Refresh as seen in the picture above.
When clicking the Enable connection checkbox, the user is able to connect with the BitWise.
In the Listen on IP field, the user should enter the IP address. By entering 0.0.0.0 the user
can access connections from any IP address and 127.0.0.1 for local connections.
The controller creates a TCP server and listens to the clients on the port specified in the
settings (7443 as example entered in the Port field).
Other manuals for Wanderfull Hub
2
This manual suits for next models
4
Table of contents
