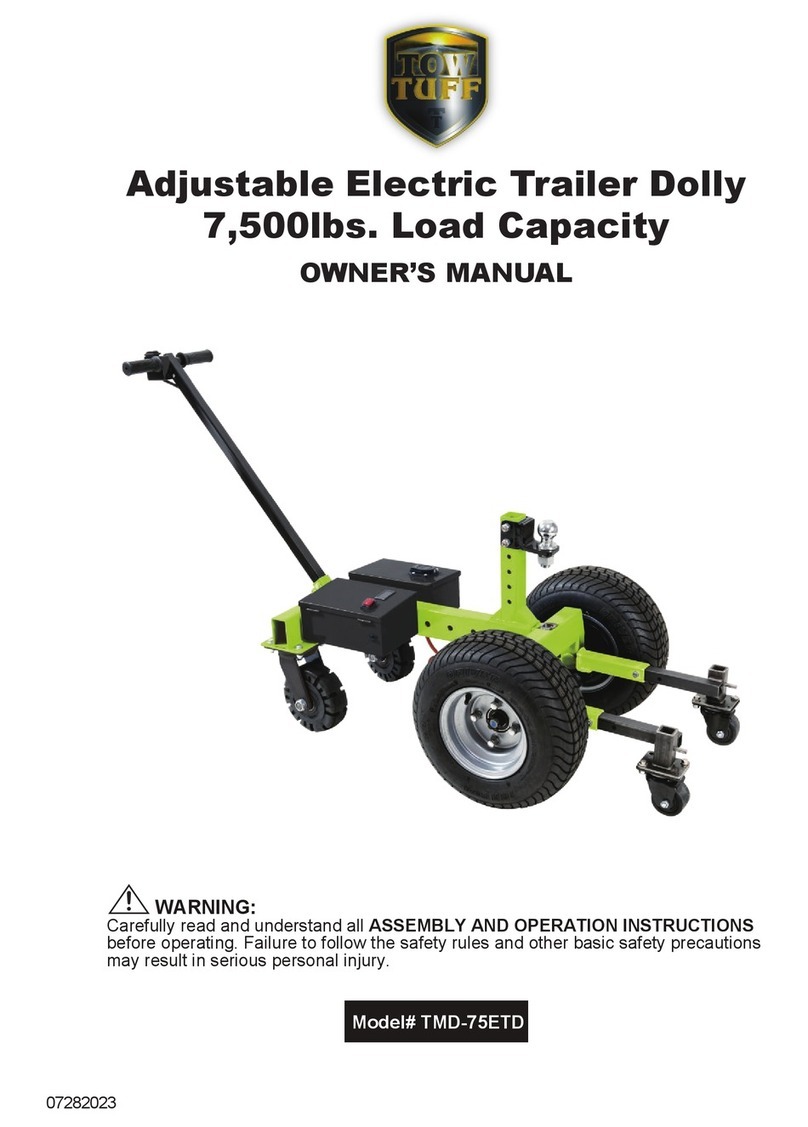
Tow Tuff TMD-3500ETD User manual

Adjustable Electric Trailer Dolly
OWNER’S MANUAL
WARNING:
Carefully read and understand all ASSEMBLY AND OPERATION
INSTRUCTIONS before operating. Failure to follow the safety rules and other
basic safety precautions may result in serious personal injury.
20191224
Model # TMD-3500ETD

Page of 14
2
Thank you very much for choosing this product! For future reference, please complete the owner’s
record below:
Model: ____TMD-3500ETD____ Purchase Date: _______________
Save the receipt, the warranty, and these instructions. It is important that you read the entire manual
to become familiar with this product before you begin using it.
This product is designed for certain applications only. The manufacturer cannot be responsible for
issues arising from modification. We strongly recommend that this product not be modified and/or
used for any application other than that for which it was designed. If you have any questions relative
to a particular application, DO NOT use the product until you have first contacted us to determine if
it can, or should, be performed on the product.
For technical questions, please call 1-218-943-6296.
INTENDED USE
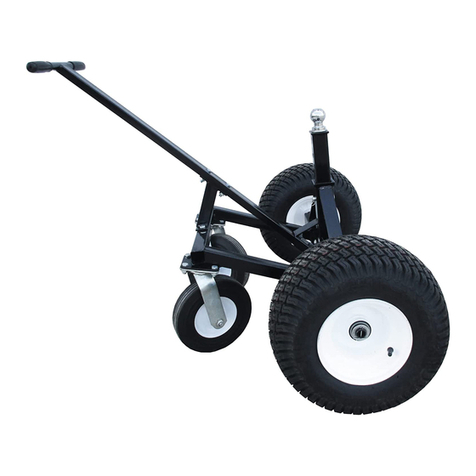
Tow Tuff brings the easy way to move trailers with the TMD-3500ETD heavy-duty adjustable trailer
dolly with 3 casters. This adjustable trailer dolly is the perfect way to move trailers into storage,
through tight areas, & in spaces that hard to drive. The 3,600 lb. Capacity of this dolly allows you to
easily move a wide variety of trailers. The handlebar and built-in 24V battery and 500w motor
eliminates the need to bend over altogether! With exceptional power, control, durability, and duration,
the TMD-3500ETD is perfect for moving further distances easily and comfortably with just the pull of
a trigger.
TECHNICAL SPECIFICATIONS
Item
Description
Capacity
Trailer Weight: 3,600lbs; Tongue Weight: 600lbs
Power Supply
DC24V, 7Ah
Hitch Ball
2”
Dimensions
42"x24"x40"
GENERAL SAFETY RULES
WARNING: Read and understand all instructions. Failure to follow all instructions listed
below may result in serious injury.
1. Always know your dolly. Take time to fully read the installation and operator's guide in order to
understand your dolly and its operations.
2. Never store battery pack in a tool box or box with nails, screws, keys, etc. Shorting of battery
terminal may cause fire.
3. Always avoid contact with battery fluid, which may occur under extreme use or temperature
conditions.
4. Always dispose or recycle battery according to local ordinances/regulations.
5. Always protect terminals with insulating tape, prior to disposal, to prevent shorting.
6. Never attempt to disassemble the battery. Battery is sealed.

Page of 14
3
7. Never charge damaged battery packs, replace damaged pack immediately. Battery short or fire
may result.
8. Never incinerate the battery pack even if it is severely damaged or is completely worn out.
9. Never operate trailer dolly in an environment containing explosive or combustible material.
10. Always remove the battery when the unit is not in use for extended periods.
11. Always use Tow Tuff charger to charge lead-acid battery pack, Other types of batteries may
burst causing damage and injury to person.
12. Never operate charger with damaged cord or plug. Replace immediately.
13. Never use Tow Tuff charger to charge other batteries.
14. Never operate charger if it has received a sharp blow, been dropped or otherwise damaged in
any way.
15. Never charge battery in damp or wet environments. Do not cover the charger with clothes or
similar items during charging.
16. The use of accessories which are not recommended or supplied by the charger manufacturer
may present a risk of fire, electric shock or personal injury.
17. Always charge battery at temperatures between32°F-120°F (0°C-49°).
18. Always store battery at temperatures between 32°F-86°F (0°C-30°C).
19. Always disconnect charger when battery is fully charged.
20. Always charge battery every three months if not in use.
21. Do not exceed the maximum capacity of the trailer dolly: Trailer weight: 1620kgs /3600lbs,
tongue weight: 270kgs / 600lbs.
22. Make sure the hitch ball and the coupler are locked securely before use
23. Always use factory approved mounting hardware, components, and accessories.
24. Do not use the dolly on the downhill slope, always make sure that the road is flat, and the slope
angle is less than 4 degrees when pulling uphill.
25. Do not use dolly to move people.
26. Do not operate this dolly under the influence of alcohol or drugs.
27. Be sure to remove any elements or obstacles that may hinder the safe operation of the dolly.
28. When installing, assembling, repairing or not using the dolly, be sure to disconnect the power
supply of the dolly.
29. Never operate or install the trailer dolly without reading or understanding the operator's manual.
30. DO NOT allow children to operate this dolly.
CAUTION: Do not allow persons to operate or assemble this Adjustable Electric
Trailer Dolly until they have read this manual and have developed a thorough understanding
of how the Adjustable Electric Trailer Dolly works.
WARNING: The warnings, cautions, and instructions discussed in this instruction
manual cannot cover all possible conditions or situations that could occur. It must be
understood by the operator that common sense and caution are factors that cannot be built into this
product, but must be supplied by the operator.
SAVE THESE INSTRUCTIONS

Page of 14
4
WORK AREA
•Keep work area clean, free of clutter, and well lit. Cluttered and dark work areas can cause
accidents.
•Keep children and bystanders away while operating a Adjustable Electric Trailer Dolly.
Distractions can cause you to lose control, so visitors should remain at a safe distance from the
work area.
•Be alert of your surroundings. Using a Adjustable Electric Trailer Dolly in confined work
areas may put you dangerously close to sharp tools and rotating parts.
PERSONAL SAFETY
•Stay alert, watch what you are doing, and use common sense when using a Adjustable
Electric Trailer Dolly. Do not use a Adjustable Electric Trailer Dolly while you are tired or
under the influence of drugs, alcohol, or medication. A moment of inattention while operating a
Adjustable Electric Trailer Dolly may result in serious personal injury.
•Dress properly. Do not wear loose clothing, dangling objects, or jewelry. Keep your hair,
clothing, and gloves away from moving parts. Loose clothes, jewelry, or long hair can be caught
in moving parts.
•Use safety apparel and equipment. Use safety goggles or safety glasses with side shields that
comply with current national standards or, when needed, a face shield. Use a dust mask if
working in dusty work conditions. This applies to all persons in the work area. Also use non-skid,
safety shoes, hard hats, gloves, dust collection systems, and hearing protection when
appropriate.
Adjustable Electric Trailer DollyUSE AND CARE
•Do not modify the Adjustable Electric Trailer Dolly in any way. Unauthorized modification
may impair the function and/or safety and could affect the life of the equipment. There are
specific applications for which the Adjustable Electric Trailer Dolly was designed.
•Always check for damaged or worn-out parts before using the Adjustable Electric Trailer
Dolly. Broken parts will affect the Adjustable Electric Trailer Dolly operation. Replace or repair
damaged or worn parts immediately.
•Do not exceed the Adjustable Electric Trailer Dolly load capacity.
•Distribute the load evenly. Uneven loads may cause the Adjustable Electric Trailer Dolly to
tip, resulting in personal injury to the operator or others.
•Use the Adjustable Electric Trailer Dolly on flat and level surfaces capable of supporting the
Adjustable Electric Trailer Dolly and its maximum load. Pulling or pushing a load on a slanted
or uneven surface can result in loss of control.
•Store idle Adjustable Electric Trailer Dolly. When Adjustable Electric Trailer Dolly is not in
use, store it in a secure place out of the reach of children. Inspect it for good working condition
prior to storage and before re-use.

Page of 14
5
All UNITS COME WITH
1
Handlebar
6
Rear wheel*2
2
Connecting road
7
Charger
3
Hitch ball
8
Controller
4
Main Frame
9
Lead acid battery*2
5
Swivel Wheel
STRUCTURE INTRODUCTION
1. Switch Button- Switch for “forward” or “reverse”
2. Speed controller: Drive with various speed by this controller
3. Connecting rod - connect the handle and main frame
4. Power Switch-Start this before use the power dolly, and shut down the dolly after use.
5. Battery box-Lead acid battery & controller installed inside
6. Ball mount- Connect the hitch ball with the trailer
7. Adjustable ball mount
8. Latch- locked while ball mount height adjusted
9. Machine Controller
10. Batteries: 2*12V -7AH lead acid battery
11. Rear Wheel : Transaction transmission
12. Motor: power Supply
13. Swivel: Turn away during working
14. Main frame: support for battery box and motor
15. 15. INPUT100~240VAC, OUTPUT:DC28.8V- 2.0A
16. Recharge socket: connect with charger
17. Handlebar: install the handle and switch button
Table of contents
Other Tow Tuff Outdoor Cart manuals
Popular Outdoor Cart manuals by other brands

Carts Vermont
Carts Vermont 20 manual

Westward
Westward 2CZY4 Operating instructions and parts manual

Numatic
Numatic EcoMatic EM-5 Assembly

Bosch
Bosch XL-Cart Operating/safety instructions

Tennsco
Tennsco Modular Cart Top Component Assembly Assembly Instructions/Parts Manual

Clam
Clam POLAR TRAILER HD MAX manual


