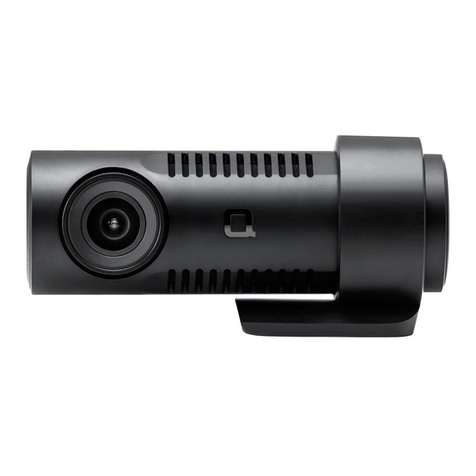
Toworld TS400 User manual

Cloud Share Car DVR
Users’ Manual

Model No.:TS400
Safety Precautions
1. Do not operate this product while driving vehicles.
Please operate this product after parked vehicles.
2. Please don’t do authorized disassemble and modification of this
product. It may cause fire or damage of this product. Toworld is
not liable for any user’s private disassembly, modification and
recombination.
3. Please do not use any sharp objects like a hammer or nails to
knock on this product, it may cause malfunction or damage of
this product.
4. Please remove any foreign bodies and too many reflective films
to influence DVR recording clearance. It may cause video
distortion or image blur.
5. The video recording quality would be decreased while you are
driving through tunnel whenever it is bright day or dark night.
6. If a bad accident caused its damage or power dump, this product
can no longer be used as recorder.
7. Product Cleansing
Please gently clean it with soft cloth if there is any adhered
substance on the lens.
This product is non-waterproof, so please do not immerse it into

water.
8. Please do not remove TF card while it’s saving or reading data, or
it may cause the information in TF card be missed or damaged.
9. Please use genuine TF card,
Non-genuine TF card may cause data information missed or
damaged. Toworld is not be responsible for this. Please use TF card
CLASS6 or the upper version.
10. TF Card Installation and Remove
Please make sure the correct inserting direction of TF card. Wrong
inserting direction may cause the damage of TF card or this product.
11. Under weak GPS signal status, the position and velocity
information can’t be recorded normally, but normal video
recording will not be influenced.
12. Please do not install this product on the position may hamper
driving or block driver’s sight.
13. The heavy dust on cigarette lighter may cause overheating or fire
of this product, please do regular cleansings.
Package Contents
Check the product and accessories in the content:
1. Car DVR×1
2. Vehicle Power Adapter×1
3. Users’ Manual×1

4. Cable Holder×5
5. 3M Double Faced Adhesive Tape×1
6. Certificate×1
7. Sucker Cover×1
Introduction of structure
Sucker
Up
Holder Knob
Down
Menu
Front View
Lock/Confir
Speaker
Lens
Back View

ON/OFF
Mode
Right
Left
Top View
TF Card SlotReset
Bottom

TF Card Installation
Warning: Users Must Use C6 or Upper Version TF Card
Please do disk formatting for TF card before use
DC Charge Light
USB
HIMI
Charge Light
Record Light
GPS Light
Side View

Please pinch the tail of TF card by your fingers and press the tail of
the TF card at the breach of card slot and the TF card will be pop-up.
Sucker and DVR Installation
Stick the sucker on the right position of car windshield and install it
on the correct position on slot.
Rotating Angle Adjustment Holder
Rotate it Up and Down, Left and Right to get the best recording
position.
Loose the nut to rotate the holder up and down, adjust to the most
suitable angle (MAX 180 Degree), and then tight the nut.

Rotate left and right, you can rotate the angle of the DVR ( max 200
degree)
Use cable holder to fix the cable of vehicle power adaptor.
Straighten out the cable and hide it in an appropriate place.

Operating Instructions
Menu (Back) key: It is used to choose the menu in the menu
interface.
It is used to set the parameter in the Recording Video/ Taking
Photos interface.
Press it again to exit the menu.
1- Click Lock (Confirmation) Key: Press this key you can lock the
profile with one-click, which make sure that the locked profile
cannot be deleted. In the menu choices this key is the confirm
key.
Mode Key: It is used to exchange Recording and Replay mode.
Up Key: Press it to open or close microphone in the Recording Video
interface.
Down Key: Press it to increase or decrease the EV value in the

Recording Video Interface/ Video Recording.
Left Key: Press it to close the screen, press it again to recover.
Choose the Video Recording setup, Taking Photos setup and Menu
in the left hand.
Right Key: Choose the Video Recording setup, Taking Photos setup
and Menu in the right hand.
Reset Hole Key: System reset key can be used to reset when the DVR
crash after abnormal operation.
On/ Off Key: Shortly press it switch on the DVR, long press for 3
seconds switch off the DVR (when the DVR is connected to external
power, the power should be 12V/24V vehicle power adapter).
When it is connected to vehicle power adapter, our product will
automatically start recording when the car starts. If the car stops,
our product will automatically close.
Only use the original vehicle power adapter which provided by our
company. Otherwise, we shall not be responsible for any damage to
the product if you use other vehicle power adapter.
Indicator Light
1. Charge Light: Under the USB charging condition, charge light
flashes. When the charge is completed, charge light is on.
2. Recording Light: When our product is recording, the light flashes,

and when recording stops, the light is off.
3. GPS light: When GPS has positioned, the light is on, when GPS
has no signal the light flashes.
Video Recording
When the car DVR is connected to the vehicle power adapter, car
starts, WIFI signal becomes green, the DVR will automatically start
recording.
Video Recording Interface
(In the circumstance of recording video press the menu key to set
up parameters)
1) Image resolution: video resolution 2304*1296/25P, 1920*1080,
1280*720, 848*480 can be chose.
2) Image quality: hyperfine/ good/ normal image can be chose.
3) WDR: wide dynamic optional ON/OFF.
4) Stamp: ON/OFF, set up time or date stamp in the video or not.
5) LDWS Detection: ON/OFF, used to detect track.
6) LDWS calibration: used to correct track deflection.
Photos:
Tips: You can only use smart phone APP to connect WIFI, go into
photographing interface, set up parameters, then you can take
photos.
Photographing Interface:

1) Image Resolution: size and resolution can be chose :
3M(2048*1536); 2.1M(1920*1080)
2) Image Quality: hyperfine/ good/ normal image can be chose.
3) Stamp: ON/OFF, set up time or date stamp in the video or not.
Operator Interface:
(Press menu key in the circumstance of recording video, the press
right key to choose setup menu)
1) System: PAL/NTSC, corresponding format can be chose.
2) Time: Time/Date can be set up.
3) License Plate: after set up license plate, there is license plate
display in the videos, photos profiles and screen of the car DVR.
4) Format: format TF card (Caution: format will delete locked
profiles.)
5) Default Setup: recover systematic parameters to default.
6) LCD setup: set up brightness and contrast.
7) Motion Detection: ON/OFF; when motion detection is on, as
soon as an object in the front of car moves, the car DVR will
automatically detect and start recording for a period of time that
is set up, if the object moves again, the car DVR will start
recording again.
8) LCD Off Time: 30s/1/3min/OFF; set up screen saver time, the car
DVR will automatically save the screen in time, press any key to

wake up.
9) Split Time: 1/2/5/10min: set up loop recording, when TF card is full,
new video will cover earliest one. (Caution: when the setup split
time of video is longer, the video profile’s size is larger.)
10)GPS: ON/OFF, open or close GPS satellite orientation.
11)Time Zone-12to+12: Different zones can be chose, time will
update automatically. Such as China is in time zone+8(can be
chose), the operation steps is: press menu key to open menu,
press up and down key to choose time zone , then press “MODE”
key again to choose time zone number +8.
12)G-sensor: rank 0-1-2-3-4-5; detect collision situation in car
driving. If there is a collision, then automatically trigger
mandatory protection. (Caution: when the number is smaller,
sensitivity coefficient is higher, “0” means closed.) The files
protected will not be covered.
13)Blinking Screen Correction: Automatical/50HZ/60HZ; it is used to
choose frequency of power line, if you choose wrong one, screen
will appear horizontal stripe interference
14)Exposure Compensation: EV-2.0~EV+2.0; it is used to choose
exposure value.
15)Speed Limit: OFF/20~170
16)Key Beep: ON/OFF; it is used to set up beep of buttons.

17)Language: it is used to choose corresponding languages
18)Recover WIFI Default Setup: it is used to recover name and
password of WIFI back to factory settings.
19)Version No.: it is used to check product firmware.
Replay Interface:
Replay Interface Menu:
1) In the recording mode, press mode key, then you can preview
and replay videos and photos in the replay mode, press confirm key
to play or pause.
2) In six grids of replay mode, you can press menu key, set up profile
protection, play single video, delete profiles, press confirm key to
confirm it, go back by pressing mode key.
Product Parameter Setting:
Mobile、Tablet PC And Other Intelligent Terminal Products Installed
A P P, It Can Set The Parameter After Connected Cloud Share Car
DVR.
Setting Items
Setting Parameter
Factory Parameter
Static Image Resolution
Setting 3.0M 2348X1536 4:3
2.1M(1920x1080 16:9) 3.0M(2348X1536 4:3)
Image Effect Setting Hyperfine、Good、Normal Good

Video Resolution Setting 2304X1296P
1920X1080P
1280X720P
848X480P
1920X1080P
Video Effect Setting Hyperfine、Good、Normal Good
Exposure Compensation - 2.0/-1.7/-1.3/-1.0/
-0.7/-0.3/0.0/+0.3/
+0.7/+1.0/+1.3/+1.7
/+2.0
0
Video Segmentation Time 1Min、2Min、5Min、10Min 2Min
G-sensor Sensitivity Close
Record Turn On/ Off Turn Off
Watermark Date Turn On/ Off Turn On
License Plate Setting Support Chinese、English
、
and Russian
Motion Detection Turn On/ Off Turn Off
Automatic Photo Upload Turn On, 10-60 Min ( Add 10
Min) Turn Off
Turn Off
WDR
Turn On/ Off
Turn On
Format TF Card Execute、Cancel
Default Setting Execute、Cancel
Speed-Limiting Turn Off, 0-170 (Increase 10
Each Time)
Turn Off
Wifi Setting
SSID Account, Password
amba_toworld,1234567890
Product Specification:
Chipset Ambarella A7
Lens Angle All glass 6G, Super Wide Angle
Video Format
MP4
Compressed Format H. 264 HD Video Compression
Recording Resolution 2304X1296(1296P) 1920X1080(1080P)
1280X720(720P) 848X480P(QVGA)
Photo Format
JPEG
Picture Resolution
3 Mega-pixel,2.1 Mega-pixel
Storage Card TF Card Support Up to 32G,( Suggest Use
Above Class 6 TF Card)
Video Segmentation Time
1Min
、
2Min
、
5Min
、
10Min
Other Function
Motion Detection / Emergency Collision
Induction / Loop Cycle Recording / Voice
Prompt Function / License Plate Setting
Main Feature Mobile APP / Wifi / GPS Positioning / A-Key

Lock / Automatic Photo Upload
/ Cloud
Data Function
Installation And Use Of The APP
1. Install “womenxing” Scan The QR Code To Install.
2. Use “womenxing”.
Turn On The Cloud Share Car DVR, Wifi Indicator Will Be Light, Click
And Operate “womenxing”APP, It Can Operate The Short Real-Time
Monitoring, Management And Settings To The Cloud Share Car DVR;
More Features, Please Login The Website: www.womenxing.com
Common Malfunction Exclude
Malfunction
Reason
Solution
Can’t Start Power No Insert Check The Power Adapter
Insert Or Not
All Keys Failure May Short Circuit Connect
Other Equipment Press The Reset And Start
Again
Note: When It Crashed Caused By Misuse, Please Press "RESET"
Hole Button, It Can Restart And Recover The Normal Working.
Shenzhen Toworld Technology Co. LTD.
Address: No.162 Nan Huan Road,Wan Feng Industry Park, Sha Jing
Town,Bao An District, Shenzhen City, Guangdong Province, China
Service Hotline:400-800-4031

Changes or modifications not expressly approved by the party responsible for compliance
could void the user's authority to operate the equipment.
The device has been evaluated to meet general RF exposure requirement. The device
can be used in portable exposure condition without restriction.
This device and its antenna(s) must not be co-located or operation in conjunction with any
other antenna or transmitter.
Note: This equipment has been tested and found to comply with the limits for a Class B
digital device, pursuant to part 15 of the FCC Rules. These limits are designed to provide
reasonable protection against harmful interference in a residential installation. This
equipment generates, uses and can radiate radio frequency energy and, if not installed
and used in accordance with the instructions, may cause harmful interference to radio
communications. However, there is no guarantee that interference will not occur in a
particular installation. If this equipment does cause harmful interference to radio or
television reception, which can be determined by turning the equipment off and on, the
user is encouraged to try to correct the interference by one or more of the following
measures:
—Reorient or relocate the receiving antenna.
—Increase the separation between the equipment and receiver.
—Connect the equipment into an outlet on a circuit different from that to which the
receiver is connected.
—Consult the dealer or an experienced radio/TV technician for help.
FCC ID: 2AC3FTS400
Shenzhen Toworld Technology Co. LTD.
Model No.: TS400
Model name: Car DVR
This device complies with Part 15 of the FCC Rules. Operation is
subject to the following two conditions: (1) this device may not
cause harmful interference, and (2) this device must accept any
interference received, including interference that may cause
undesired operation.
