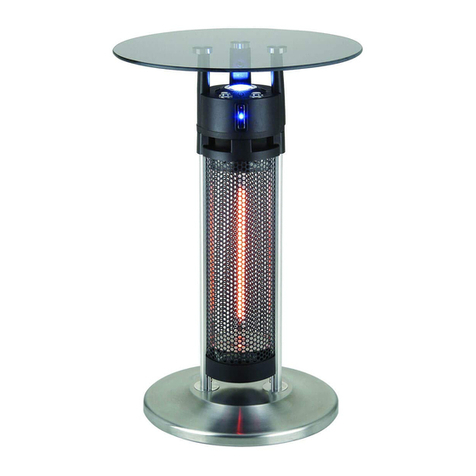
Traedgard Design Amrum User manual

Infrarot Heizstrahler
Amrum

1
INDEX
1. Deutsch……………………………………………………………………… 2
2. English……………………………………………………………………… 8
3. Italiano……………………………………………………………………… 14
4. Français……………………………………………………………………… 20
www.traedgard.de

2
DE
Sehr geehrte Kundin, sehr geehrter Kunde,
Wir möchten Ihnen herzlich danken, dass Sie sich für unser Produkt entschieden
haben. Dieses Dokument soll Sie bei Aufbau und Gebrauch des Heizstrahlers
Amrum unterstützen. Bei korrekter Benutzung und genauem Befolgen der
Bedienungsanleitung wird es unsere hohen Standards von Qualität und Leistung für
viele Jahre erfüllen.
Herzlichen Dank und viel Freude mit dem Gerät!
Ihr Traedgard Team

3
DE

4
DE
Teilebezeichnung:
Nr.
Name
Nr.
Name
1
Schraube
M6*20
5
Kabelclip
2
Standfuß
6
Unterlegscheibe
3
Fuß
Abdeckung
7
Schraube M4*28
4
Heizstrahler
8
Stecker
Zubehörliste
Name
Anz.
Schraube M6*20
2
Unterlegscheibe
2
Inbussschlüssel
1
Schraube M4*28
2
Kabelclip
1

5
DE
ACHTUNG: Einige Teile des Heizstrahlers werden sehr heiß und können
Verbrennungen verursachen. Es muss besondere Vorsicht geboten werden, wenn
Kinder oder andere gefährdete Personen anwesend sind.
Kinder zwischen 3 und 8 Jahren dürfen das Gerät nur an- oder ausschalten,
wenn es korrekt montiert wurde und nur, wenn sie beaufsichtigt werden oder
eine Unterweisung zur sicheren Benutzung und dem Verständnis der Gefahren
bekommen haben. Sie sollten den Heizstrahler nicht anschließen, regulieren,
sauber machen oder warten.
Der Heizstrahler darf nicht an eine Mehrfachsteckdose angeschlossen werden.
Nutzen Sie den Heizstrahler nicht in Verbindung mit einer Zeitschaltuhr (oder
einem vergleichbaren Programm, welches den Heizstrahler automatisch
anschaltet), da aufgrund einer falschen Position oder Abdeckung die
Brandgefahr erhöht ist.
Verwenden Sie den Heizstrahler nicht in der Nähe von Wasser (Badewanne,
Dusche, Schwimmbecken).
Platzieren Sie den Heizstrahler nicht in der Nähe von Gardinen oder anderen
leicht entzündbaren Objekten.
Decken Sie den Heizstrahler während der Benutzung oder kurze Zeit danach
nicht ab.
Wickeln Sie das Kabel nicht um den Heizstrahler.
Benutzen Sie das Gerät nicht als Handtuch- oder Wäschetrockner.
Das Gerät wird während der Benutzung sehr heiß und bleibt auch nach dem
Ausschalten noch einige Zeit warm.
Vermeiden Sie starke Vibrationen und Schläge.
Das Gerät muss während der Verwendung auf einem ebenem Boden stehen.
Sollte das Gerät beschädigt sein, muss es professionell repariert werden.
Wenn das Stromkabel beschädigt ist, muss es vom Hersteller oder einer
anderen qualifizierten Person ausgetauscht werden.
Halten Sie den Heizstrahler während des Aufbaus fern von entflammbaren
Materialien.
Dieses Gerät ist nicht für die Verwendung von Personen (Kinder
eingeschlossen) mit physischer, sensorischer oder geistiger Behinderung,

6
DE
mangelnder Erfahrung und Wissen vorgesehen, außer sie werden
beaufsichtigt.
Dieses Gerät ist nur für die Benutzung im Haushalt vorgesehen. Benutzen Sie
es nicht auf Baugelände, in Gewächshäusern, Schuppen oder Stallungen, wenn
entflammbarer Staub vorhanden ist.
Warten Sie mit der Reinigung nach der Benutzung, bis der Heizstrahler
vollkommen abgekühlt ist.
Das Gerät sollte mit einer Steckdose verbunden werden, die sichtbar und leicht
zu erreichen ist.
Verwenden Sie dieses Gerät nicht als Heizung, für die Aufzucht von Tieren oder
zum Trocknen von Kleidung.
Das Gerät sollte min. 150 cm Abstand zu Wänden haben.
WARNUNG:
Dieses Gerät ist nicht mit einem Thermostat ausgestattet. Nutzen Sie den
Heizstrahler nicht in kleinen Räumen, wenn sich in diesem nur Personen befinden,
die den Raum nicht allein verlassen können, außer sie werden durchgehend
beaufsichtigt.
Vorbereitung:
1. Öffnen Sie den Karton. Entnehmen Sie die Tüte mit dem Zubehör und überprüfen
Sie diese anhand der enthaltenen Liste auf Vollständigkeit. Sollte dies nicht der Fall
sein, kontaktieren Sie den Händler.
2. Halten Sie einen Kreuzschraubendreher bereit.
3. Lesen Sie die Bedienungsanleitung sorgsam durch, bevor Sie mit dem Aufbau
beginnen. Bewahren Sie diese für ein späteres Nachschlagen auf.
Montage:
1. Drehen Sie den Heizstrahler vorsichtig auf den Kopf (Abb. A). Stecken Sie den
Stecker (8) und das Netzkabel durch die Löcher in der Mitte der

7
DE
Fußabdeckung (3) und des Fußes (2). Schieben Sie dann die Fußabdeckung
(3), den Fuß (2) und die Unterlegscheibe (6) auf den Hauptkörper.
2. Unterlegscheibe (6), Fuß (2), Fußabdeckung (3) mit der Schraube M6 * 20 (1)
befestigen. Befestigen Sie das Netzkabel mit dem Kabelclip (5) und befestigen
Sie es mit der Schraube (7) an dem Fuß (2).
Inbetriebnahme:
1. Stecken Sie den Stecker in eine Steckdose. Vergewissern Sie sich, dass die
tatsächliche Stromversorgung mit der Angegebenen übereinstimmt.
2. Betätigen Sie den Schalter, um den Heizstrahler ein und aus zu schalten.
Reinigung:
Trennen Sie das Gerät von der Stromversorgung und lassen Sie es vollständig
abkühlen. Nutzen Sie einen feuchten, keinen nassen Lappen, um das Gerät zu
säubern.
Altgerät- und Batterieentsorgung
Nach der Umsetzung der europäischen Richtlinien 2002/96/EG in
nationales Recht gilt folgendes: Elektrische und elektronische Geräte
dürfen nicht mit dem Hausmüll entsorgt werden. Der Verbraucher
ist gesetzlich dazu verpflichtet, elektrische und elektronische Geräte
am Ende ihrer Lebensdauer an den öffentlichen Sammelstellen
abzugeben. Einzelheiten dazu sind nach dem nationalen Recht des
jeweiligen Landes definiert. Das Symbol auf dem Produkt, der
Gebrauchsanleitung oder der Verpackung weist auf die jeweiligen
Bestimmungen hin. Durch das Recycling, Wiederverwendung der
Materialien oder anderen Formen, leisten Sie einen wichtigen
Beitrag zum Schutz unserer Umwelt.

8
EN
Dear Customer
We would like to thank you very much for choosing our product. This document is
intended to assist you in setting up and using the „Amrum" radiant heater. If used
correctly and the operating instructions are followed closely, it will meet our high
standards of quality and performance for many years to come.
If you have any questions, do not hesitate to contact us at kontakt@vivatrade.de.
Thanks and have fun
Traedgard

9
EN

10
EN
Parts Descriptions:
No.
Part Name
No.
Part Name
1
Screw M6*20
5
Cord Clip
2
Base
6
Washer
3
Base Cover
7
Screw M4*28
4
Main body
8
Plug
Accessories Pack Check List
Accessory Name
Qty
Screw M6*20
2
Washer
2
Allen Key
1
Screw M4*28
2
Cord Clip
1

11
EN
Cautions:
Children of less than 3 years should be kept away unless continuously
supervised.
This appliance can be used by children aged from 8 years and above and
persons with reduced physical, sensory or mental capabilities or lack of
experience and knowledge if they have been given supervision or instruction
concerning use of the appliance in a safe way and understand the hazards
involved. Children shall not play with the appliance. Cleaning and user
maintenance shall not be made by children without supervision.
CAUTION -- Some parts of this product can become very hot and cause burns.
Particular attention has to be given where children and vulnerable people are
present.
Children aged from 3 years and less than 8 years shall only switch on/off the
appliance provided that it has been placed or installed in its intended normal
operating position and they have been given supervision or instruction
concerning use of the appliance in a safe way and understand the hazards
involved. Children aged from 3 years and less than 8 years shall not plug in,
regulate and clean the appliance or perform user maintenance.
The heater must not be located immediately below a socket-outlet.
Do not use this heater with a programmer, timer or any other device that
switches the heater on automatically, since a fire risk exists if the heater is
covered or positioned incorrectly.
Do not use this heater in the immediate surroundings of a bath, a shower or a
swimming pool.
Do not place the unit close to curtain and/or other flammable objects.
Otherwise there will be a danger of catching fire.
Do not cover the unit with anything during operation or a short time after it's
shut down.
Do not wrap the power supply cord on the unit.
Do not use this unit in place where causticity or volatile air exists, i.e. dust,
steam, gas, etc.
Do not use this unit as a cloth drier or towel drier.

12
EN
Do not use this unit as a sauna heater.
Do not use this unit as a room heater of heat storing.
Do not use this unit in place of animal propagating and raising.
Do not use this unit in heating system of hot air centre.
Do not immerse this unit into water for cleaning.
The unit must be placed with the clearance of 150cm at least to the wall.
The unit must be securely placed on a horizontal and flat surface.
The unit is at high temperature during operation. It keeps hot for a period after
shut down. Potential danger would occur when touching it during this period.
The unit must be handled with care, and avoid of vibration or hitting.
The unit must be securely grounded during operation.
When damaged, the unit must be repaired by professional repairing team.
If the supply cord is damaged, it must be replaced by the manufacturer, its
service agent or similarly qualified persons in order to avoid a hazard.
When assembling, keep clear from any board or flammable material.
This appliance is not intended for use by persons (including children) with
reduced physical, sensory or mental capabilities, or lack of experience and
knowledge, unless they have been given supervision or instruction concerning
use of the appliance by a person responsible for their safety.
The unit is for outdoor use only. It's not allowed to use in building site,
greenhouses, barn or stable where there's flammable dust.
The head of the unit is at high temperature during operation. Unplug the unit
and wait till it's cool before cleaning.
The unit should be plugged in a socket, which is easily visible and reachable.
WARNING:
This heater is not equipped with a device to control the room temperature. Do not
use this heater in small rooms when they are occupied by persons not capable of
leaving the room on their own, unless constant supervision is provided.

13
EN
Preparation
1. Prepare a cross head screw driver.
2. Read this instruction manual carefully before installation and use. Keep this
instruction manual and warranty card in a proper and safe place for future use
in case needed.
Installation:
1. Put the main body up-side-down (Fig. A). Put the plug (#8) and power supply
cord through the holes on the center of Base Cover (#3) and Base (#2). Then
slide Base Cover (#3) , Base (#2) and Washer (#6) onto Main body respectively.
2. Fix Washer (#6), Base (#2), Base Cover (#3) with Screw M6*20 (#1). Clip the
power supply cord with Cord Clip (#5) and fix it onto Base (#2) with Screw (#7).
Operations:
1. Plug in the unit to a socket. Make sure the power supply is same as rated.
2. Press Heater Switch to switch on or off the heater.
Cleaning:
Unplug the unit before cleaning. It should be wiped with wet cloth. Do not use too
much water.
Disposal of appliances and batteries
After the implementation of the European Directive 2002/96/EU in
the national legal system, the following applies:
Electrical and electronic devices may not be disposed of with
domestic waste. Consumers are obliged by law to return electrical
and electronic devices at the end of their service lives to the public
collecting points set up for this purpose or point of sale. Details to
this are defined by the national law of the respective country. This
symbol on the product, the instruction manual or the package
indicates that a product is subject to these regulations. By recycling,
reusing the materials or other forms of utilising old devices, you are
making an important contribution to protecting our environment.

14
IT
Gentile cliente,
ci teniamo a ringraziarti per aver scelto la nostra stufa a raggi infrarossi Amrum.
Questo documento ha lo scopo di aiutarti ad installare e utilizzare correttamente
il riscaldatore.
Per qualsiasi domanda non esitare a contattarci al seguente indirizzo e-mail:
kontakt@vivatrade.de
Grazie per la fiducia accordataci
Il team Traedgard

15
IT

16
IT
Componenti:
Nr.
Nome
Nr.
Nome
1
Vite M6*20
5
Fermacavo
2
Base
6
Rondella
3
Coperchio della base
7
Viti M4*28
4
Corpo principale del
riscaldatore
8
Spina
Lista degli accessori
Nome
Quantitá
Vite M6*20
2
Rondella
2
Chiave a brugola
1
Vite M4*28
2
Fermacavo
1

17
IT
Precauzioni:
Tenere il dispositivo lontano dalla portata dei bambini
La pulizia e la manutenzione del riscaldatore sono svolti solo da persone adulte.
Alcune parti del riscaldatore possono diventare molto calde. Occorre pertanto
prestare attenzione onde evitare di causare delle ustioni. A tal proposito va
prestata particolare attenzione in presenza di bambini.
I bambini di età compresa tra 3 anni e meno di 8 anni devono solo
accendere/spegnere l'apparecchio a condizione che lo stesso sia stato
installato correttamente e siano state date chiare istruzioni relative al corretto
utilizzo e funzionamento del riscaldatore, accertandosi che gli stessi abbiano
capito i pericoli che si possono manifestare. Ai bambini è vietato collegare alla
fonte di corrente il riscaldatore, regolare la temperatura e eseguire pulizia e o
manutenzione dello stesso.
Il riscaldatore non deve essere collocato nelle immediate vicinanze di una presa
di corrente.
Non utilizzare il riscaldatore con un programmatore, un timer o qualsiasi altro
dispositivo in grado di accendere automaticamente il dispositivo, poiché esiste
un rischio di incendio se il riscaldatore è coperto o posizionato in modo errato
ed è sempre necessaria la preventiva verifica prima della sua accensione.
Non utilizzare il riscaldatore nelle immediate vicinanze di fonti d´acqua.
Non posizionare l'unità vicino alla tenda e/o ad altri oggetti infiammabili.
Non coprire il riscaldatore durante il funzionamento o poco tempo dopo che è
stato spento.
Non avvolgere il cavo di alimentazione sul riscaldatore.
Non utilizzare il riscaldatore in luoghi dove vi sia presente una forte
concentrazione di polvere, vapore, gas, ecc.
Il riscaldatore deve essere posizionato con una distanza minima di 150 cm
rispetto alla parete.
Il riscaldatore deve essere posizionato saldamente su una superficie orizzontale
e piana.
Il riscaldatore raggiunge un´alta temperatura durante il suo funzionamento.
Dopo il suo spegnimento il riscaldatore si mantiene caldo per un periodo

18
IT
definito. È pertanto necessario evitare il contatto con il riscaldatore durante il
summenzionato periodo di raffreddamento dello stesso apparecchio.
Il riscaldatore deve essere maneggiato con cura ed è necessario evitare
vibrazioni o colpi contro lo stesso.
Il riscaldatore deve essere messo a terra in modo sicuro durante il
funzionamento.
In caso di danneggiamento, il riscaldatore deve essere riparato dal personale
autorizzato e competente.
Se il cavo di alimentazione è danneggiato, deve essere sostituito solo dal
produttore o da persone altrettanto qualificato.
Durante l'assemblaggio, tenere lontano da qualsiasi materiale infiammabile.
Scollegare l'unità e attendere che il riscaldatore si sfreddi prima di procedere
con la pulizia dello stesso.
Il riscaldatore deve essere collegato a una presa facilmente visibile e
raggiungibile.
Avviso:
Questo riscaldatore non è dotato di un dispositivo per controllare la temperatura
ambiente. Non utilizzare il riscaldatore in luoghi occupati da persone non in grado
di lasciare la stanza in autonomia.
Leggere attentamente questo manuale di istruzioni prima dell'installazione e
dell'utilizzo. Mantenere questo manuale di istruzioni in un luogo sicuro per un uso
futuro.
Montaggio:
Mettere il corpo principale verso l'alto (Fig. A). Posizionare la spina (n.8) e il cavo di
alimentazione attraverso i fori al centro del coperchio della base (n.3) e della base
(n.2). Far scorrere quindi il coperchio della base (n.3), la base (n.2) e le rondelle
(n.6) rispettivamente sul corpo principale del riscaldatore (n.4). Fissare la rondella
(n.6), la base (n.2), il coperchio della base (n.3) mediante le viti M620. Agganciare

19
IT
il cavo di alimentazione con il fermacavo (n.5) e fissarlo sulla base (n.2) con le viti
(n.7).
Accensione:
Collegare il riscaldatore a una presa. Assicurarsi che l'alimentatore sia adatto al tipo
di presa che si intende utilizzare.
Premere l´interruttore del riscaldatore per accendere o spegnere lo stesso.
Pulizia:
Scollegare l'unità prima della pulizia. Per un efficace e corretta pulizia
dell´apparecchio, si suggerisce l´utilizzo di una stoffa bagnata. Limitare l´utilizzo
dell´acqua all´essenziale. L´utilizzo eccessivo di acqua potrebbe compromettere il
corretto funzionamento dell´apparecchio.
Smaltimento di elettrodomestici e batterie
Dopo l'attuazione della direttiva europea 2002/96/EU nel sistema
giuridico nazionale, si applica quanto segue:
I dispositivi elettrici ed elettronici non possono essere smaltiti con i
rifiuti domestici. I consumatori sono obbligati per legge, una volta
definito che il dispositivo non è più funzionante, a restituire i
dispositivi elettrici ed elettronici al personale addetto dei punti di
raccolta predisposti a tale scopo. Per i dettagli in merito allo
smaltimento di tale rifiuto si rimanda a quanto previsto dalla legge
nazionale di riferimento del paese cui l´articolo è stato venduto.
Questo simbolo sul prodotto, il manuale di istruzioni o la confezione
indica che un prodotto è soggetto a queste normative. Attraverso il
riciclaggio, il riutilizzo dei materiali o qualsiasi altra forma di utilizzo
dei vecchi dispositivi, si sta dando un importante contributo alla
protezione del nostro ambiente.
Table of contents
Languages:
Other Traedgard Design Heater manuals
Popular Heater manuals by other brands

DR. Heater
DR. Heater DR-122X4 owner's manual

Etherma
Etherma ET-SOLID 1800 W Installation and instruction manual
cecotec
cecotec READYWARM 2000 MAX CERAMIC ROTATE DESIGN instruction manual
Zibro
Zibro SRE 153 operating instructions

Vornado
Vornado SRTH owner's guide
Euromate
Euromate 107433 Original instructions
SINED
SINED CALDO-IRB-BLACK-2000 PHA20WR user manual
RADSON
RADSON ELATO E Mounting instructions
Anslut
Anslut 411-102 Operating instructions in original
AEG
AEG MTE 350 Operation and installation

VTS Euroheat
VTS Euroheat CH-2000M TURBO-UK instruction manual
Leister
Leister LE 5000 DF-R operating instructions

