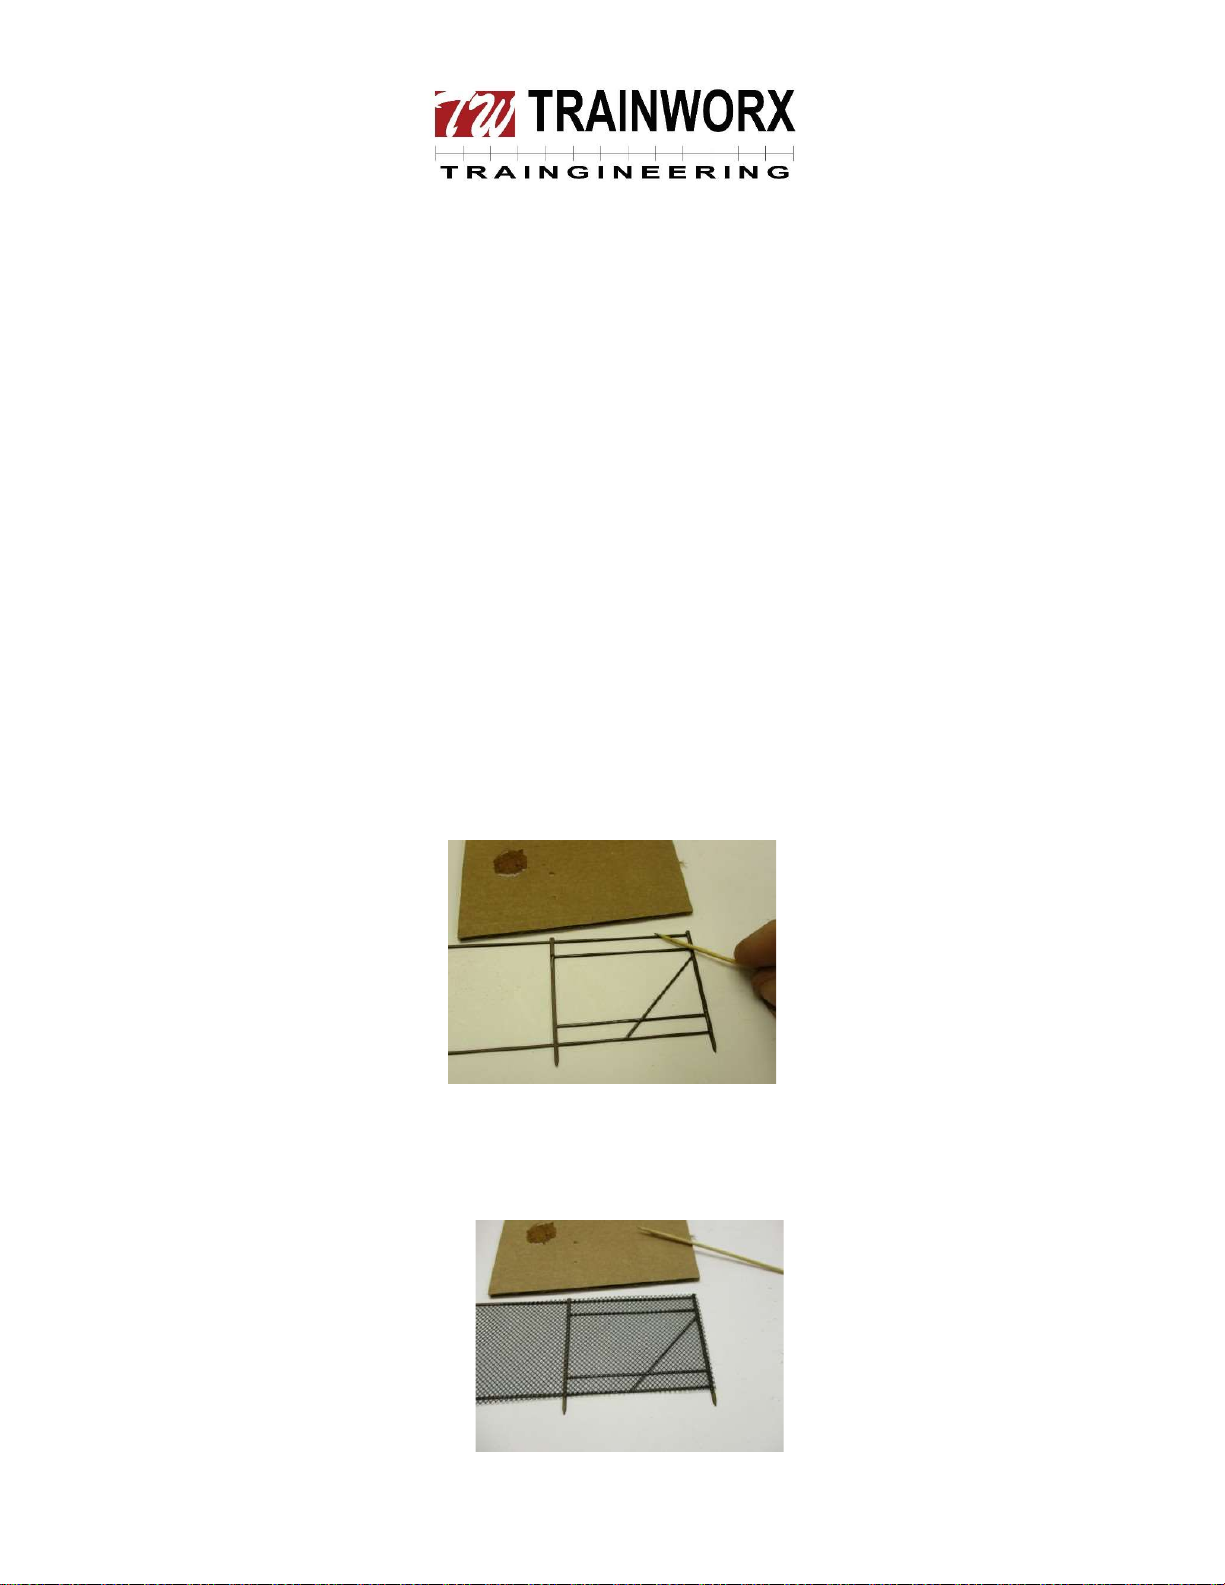
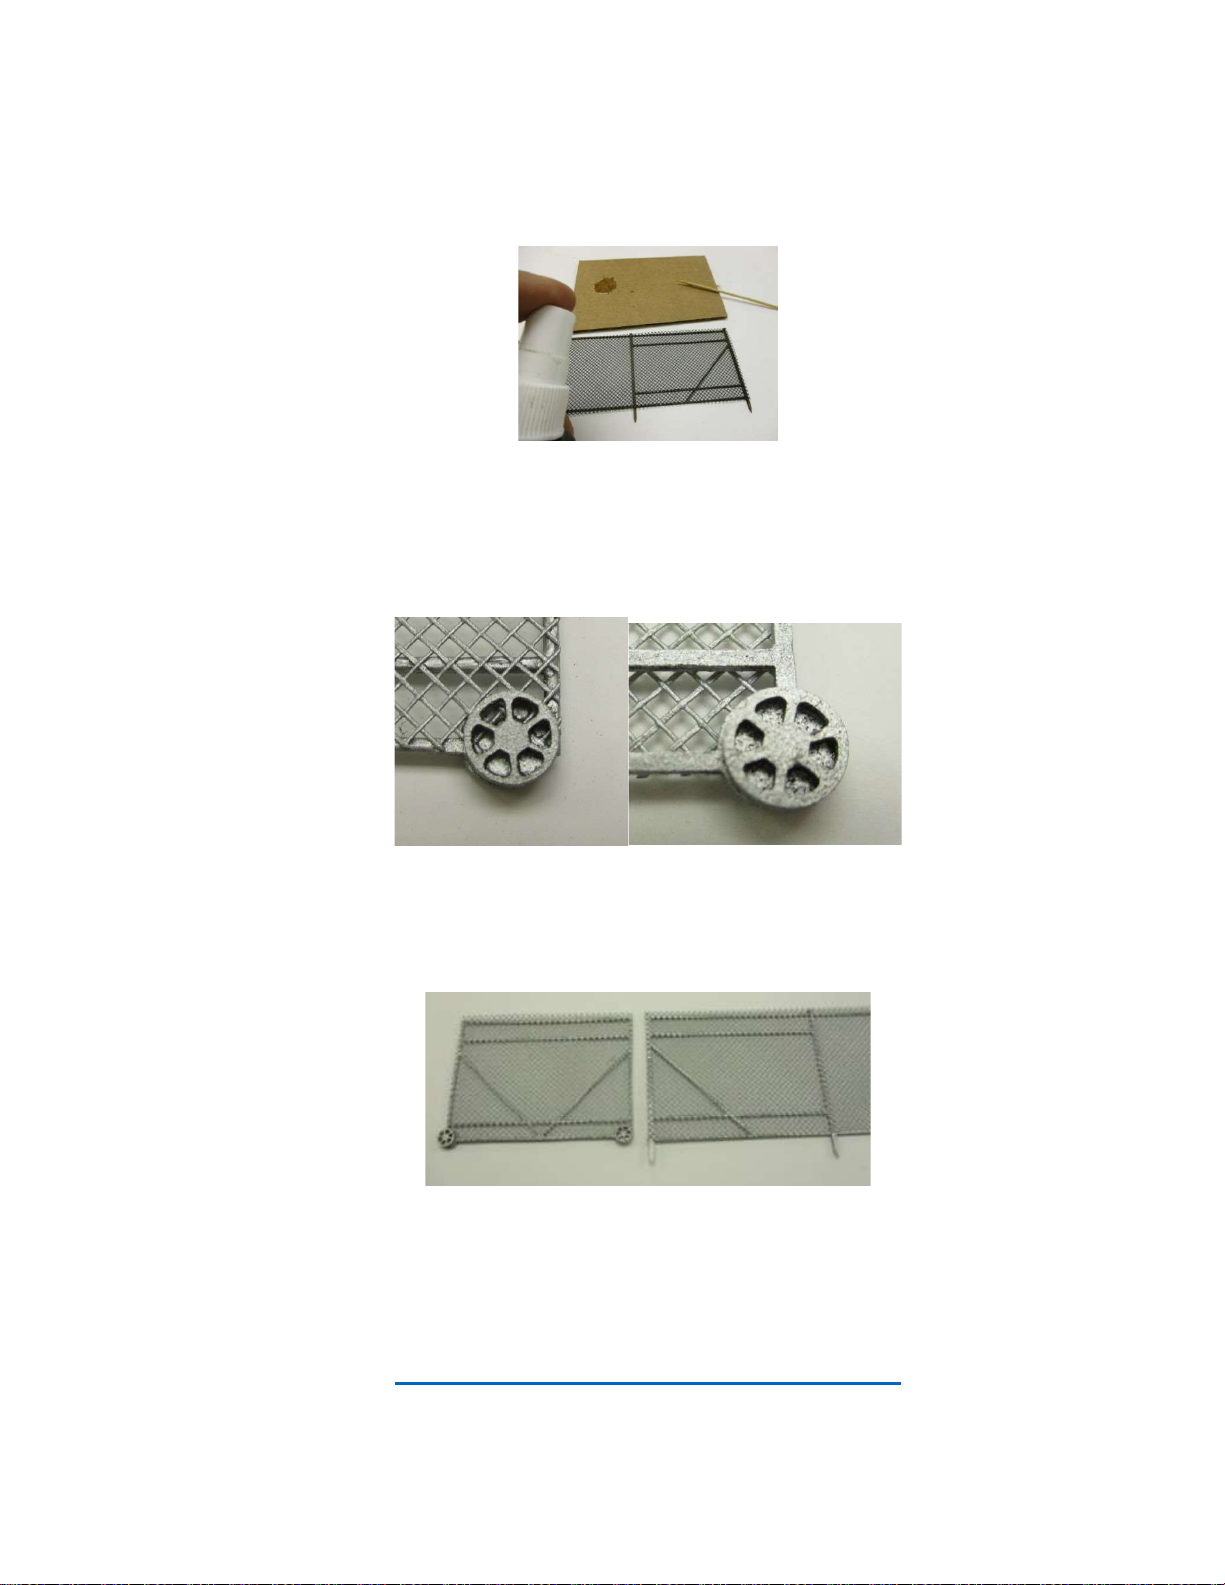
Trainworx TWX-2120 User manual

TWX-2120 Chain Link Fence Kit
Assembly Instructions
Contents:
3-15” Fence Frames
2-15” Fence Frames with gate bracing
2-2 ½” Gates
8- Gate Wheels
5-fence Screens
2-Gate Screens
1-Post Hole Jig
1-Assembly Instructions
1-Warning placards & No Trespassing Signs
Tools required for assembly;
Medium Viscosity Super Glue
Cyanoacrylate Accelerator (Super Glue Kicker)
Several Toothpicks
Scrap cardboard (to place glue on for assembling)
1.) Place a small puddle of medium viscosity super glue on a piece of scrap cardboard. Using a toothpick carefully
apply a small coat of super glue to one side of the fence frame. (photo 1)
Photo 1
2.) Carefully work one section of the fence frame at a time. Once the glue is applied with the toothpick place the
screen with just a tiny bit of overhang so it can be trimmed if needed.
Photo 2

3.) Align the bottom edge of the screen with the bottom runner of the fence frame. Once in place quickly run your
finger over the fence to ensure it is making contact with the frame. Using the kicker, spray the area you applied
the glue to. This will immediately cure the glue and allow you to move on to the next section. Carefully glue the
screen to the frame across each section, to prevent the glue from drying before adhering the screen to the
frame. (Photo 3)
Photo 3
4.) Once you have completed the 5 fence sections repeat the process to glue to short screen sections to the rolling
gates. Apply glue to the entire surface of one side of the frame, then attach the screen using the Kicker.
5.) Once the screen is adhered to the gates carefully glue the wheels to the gates using the super glue and kicker
(Photo 4).
Photo 4
6.) Once assembled and painted use the Post Hole Jig to make holes in the layout to mount the fences vertically. It
is your choice whether or not to glue the fences in the layout. The gates line up with the fence frames with gate
bracing, as shown in photo 5.
Photo 5
Look for more exciting TW Trainworx products on our website and follow us on our blog!
Blog.traindame.com
www.twtrainworxstore.com
TW Trainworx, 2808 McGowan St, Dallas, TX 75203 214-634-2965
Other Trainworx Toy manuals
Popular Toy manuals by other brands

Eduard
Eduard Shackleton AEW.2 landing flaps quick start guide

Lionel
Lionel Tinplate Power Station owner's manual

REVELL
REVELL Supermarine Walrus Mk.I Assembly manual

Rapido
Rapido GMD-1 Product guide

M.T.H.
M.T.H. PREMIER FM TRAINMASTER operating instructions

REVELL
REVELL Titanic Searcher Le Suroit Assembly manual