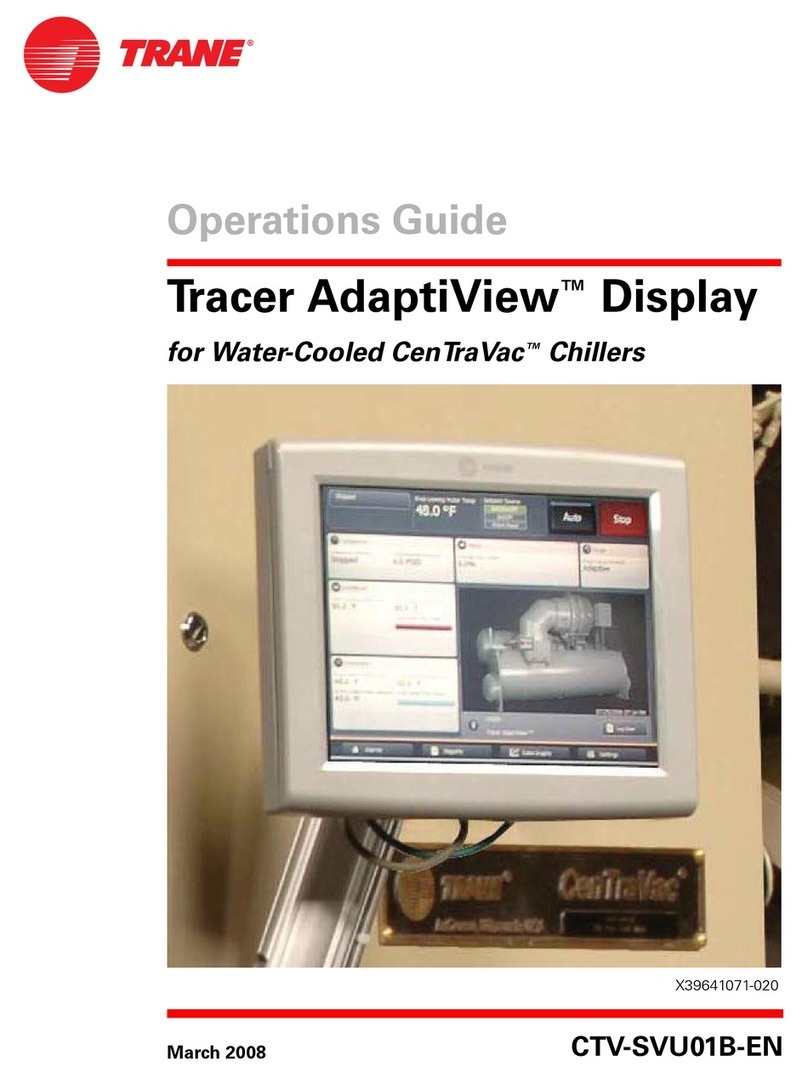
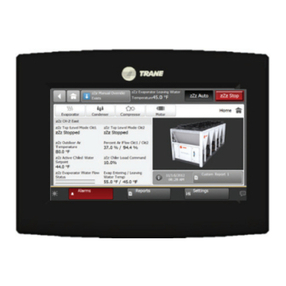
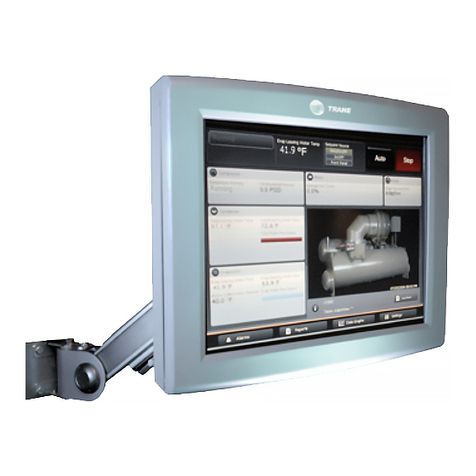
Trane Tracer AdaptiView User manual

Tracer® AdaptiView™ Display for
CenTraVac™ Water-cooled Chillers
User Guide
March 2020 CTV-SVU01G-EN
SAFETY WARNING
Only qualified personnel should install and service the equipment. The installation, starting up, and servicing of
heating, ventilating, and air-conditioning equipment can be hazardous and requires specific knowledge and training.
Improperly installed, adjusted or altered equipment by an unqualified person could result in death or serious injury.
When working on the equipment, observe all precautions in the literature and on the tags, stickers, and labels that are
attached to the equipment.
X39641071060

©2020Trane CTV-SVU01G-EN
Warnings, Cautions, and Notices
Safety advisories appear throughout this manual as required.Your personal safety and the proper
operation of this machine depend upon the strict observance of these precautions.
The three types of advisories are defined as follows:
WARNING Indicates a potentially hazardous situation which, if not avoided, could result in
death or serious injury.
CAUTIONsIndicates a potentially hazardous situation which, if not avoided, could result in
minor or moderate injury. It could also be used to alert against unsafe practices.
NOTICE Indicates a situation that could result in equipment or property-damage only
accidents.
WARNING
Proper Field Wiring and Grounding Required!
Failure to follow code could result in death or serious injury. All field wiring MUST be
performed by qualified personnel. Improperly installed and grounded field wiring poses FIRE
and ELECTROCUTION hazards.To avoid these hazards, you MUST follow requirements for field
wiring installation and grounding as described in NEC and your local/state electrical codes.
Failure to follow code could result in death or serious injury.
WARNING
Personal Protective Equipment (PPE) Required!
Failure to wear proper PPE for the job being undertaken could result in death or serious injury.
Technicians, in order to protect themselves from potential electrical, mechanical, and chemical
hazards, MUST follow precautions in this manual and on the tags, stickers, and labels, as well
as the instructions below:
• Before installing/servicing this unit, technicians MUST put on all PPE required for the work
being undertaken (Examples; cut resistant gloves/sleeves, butyl gloves, safety glasses, hard
hat/bump cap, fall protection, electrical PPE and arc flash clothing). ALWAYS refer to
appropriate Safety Data Sheets (SDS) and OSHA guidelines for proper PPE.
• When working with or around hazardous chemicals, ALWAYS refer to the appropriate SDS
and OSHA/GHS (Global Harmonized System of Classification and Labeling of Chemicals)
guidelines for information on allowable personal exposure levels, proper respiratory
protection and handling instructions.
• If there is a risk of energized electrical contact, arc, or flash, technicians MUST put on all PPE
in accordance with OSHA, NFPA 70E, or other country-specific requirements for arc flash
protection, PRIOR to servicing the unit. NEVER PERFORM ANY SWITCHING,
DISCONNECTING, OR VOLTAGETESTING WITHOUT PROPER ELECTRICAL PPE AND ARC
FLASH CLOTHING. ENSURE ELECTRICAL METERS AND EQUIPMENT ARE PROPERLY RATED
FOR INTENDED VOLTAGE.
CTV-SVU01G-EN 3
WWAARRNNIINNGG
FFoollllooww EEHHSS PPoolliicciieess!!
FFaaiilluurree ttoo ffoollllooww iinnssttrruuccttiioonnss bbeellooww ccoouulldd rreessuulltt iinn ddeeaatthh oorr sseerriioouuss iinnjjuurryy
•• AAllll TTrraannee ppeerrssoonnnneell mmuusstt ffoollllooww tthhee ccoommppaannyy’’ss EEnnvviirroonnmmeennttaall,, HHeeaalltthh aanndd SSaaffeettyy
((EEHHSS)) ppoolliicciieess wwhheenn ppeerrffoorrmmiinngg wwoorrkk ssuucchh aass hhoott wwoorrkk,, eelleeccttrriiccaall,, ffaallll pprrootteeccttiioonn,,
lloocckkoouutt//ttaaggoouutt,, rreeffrriiggeerraanntt hhaannddlliinngg,, eettcc WWhheerree llooccaall rreegguullaattiioonnss aarree mmoorree
ssttrriinnggeenntt tthhaann tthheessee ppoolliicciieess,, tthhoossee rreegguullaattiioonnss ssuuppeerrsseeddee tthheessee ppoolliicciieess
•• NNoonn--TTrraannee ppeerrssoonnnneell sshhoouulldd aallwwaayyss ffoollllooww llooccaall rreegguullaattiioonnss
Copyright
This document and the information in it are the property of Trane, and may not be used or
reproduced in whole or in part without written permission Trane reserves the right to revise this
publication at any time, and to make changes to its content without obligation to notify any
person of such revision or change
Trademarks
All trademarks referenced in this document are the trademarks of their respective owners
Factory Training
Factory training is available through Trane University™ to help you learn more about the
operation and maintenance of your equipment To learn about available training opportunities
contact Trane University™
Online: www trane com/traneuniversity
Phone: 855-803-3563
Email: traneuniversity@trane com
Revision History
• Added LLID Binding section
• Updated “Evaporator settings and status points (Simplex)”, “Condenser settings and status
points (Simplex)”, “Motor settings and status points (Simplex)”, “Condenser data” and
“Evaporator data” tables in Appendix A — Data for CenTraVac Simplex Chillers

4CTV-SVU01G-EN
Product Overview 7
Equipment Description 7
Touchscreen Guidelines 8
Related Information 8
Screen Overview 8
Chiller Status Area 9
Main Display Area/Home Screen 10
Main Display Area/Screen Saver 14
Component Screens 14
Main Menu Area 17
Stopping/Restarting Chiller Operation 18
Stopping the Chiller 18
Restarting the Chiller 19
Alarms 20
The Alarms Screen 20
Alarm Icons 21
Active and Historic Alarm Categories 21
Sorting Alarms 21
Resetting Alarms 22
Additional Alarm Indicators 22
Reports 23
The Reports Screen 23
Viewing the Log Sheet 23
Viewing the ASHRAE Chiller Log 24
Creating and Viewing a Custom Report 24
Editing a Custom Report 25
About this Chiller 26
Viewing Chiller Operating Modes 26
Simplex Chillers 26
Duplex Chillers 28
Purge Operating Modes 31
Data Graphs 32
The Data Graphs Screen 32
Viewing Data Graphs 33
Changing the Scales on Data Graphs 34
Creating Custom Data Graphs 35
Creating a Custom Data Graph From a Default Data Graph 35
Table of Contents

CTV-SVU01G-EN 5
Creating a Custom Data Graph With No Previously Defined Data Graph
Points 37
Editing Custom Data Graphs 37
Deleting a Custom Data Graph 38
Equipment Settings 39
The Settings Screen 39
Viewing and Changing Equipment Settings 39
Chiller Settings 42
Service Settings 43
Setpoint Sources 43
Setpoint Source Arbitration 43
Changing the Setpoint Source 44
Using the Setpoint Source Button in the Chiller Status Area 44
From the Setpoint Source Button on the Chiller Settings Screen 44
From an Arbitrated Setpoint Screen 45
Feature Settings 46
Chilled Water Reset 46
Purge Settings 47
Manual Control Settings 47
Changing a Manual Control Setting 49
Display Settings 51
Settings Screen 51
Viewing and Changing Display Preferences 51
Viewing and Changing the Language Preference 54
Viewing and Changing Date and Time Preferences 56
Clean Touchscreen 57
Security Settings 58
Settings Screen 58
Disabling Security 58
Enabling Security 59
Logging In 59
Logging Out 61
LLID Binding 61
Troubleshooting 62
Appendix A: Data for CenTraVac Simplex Chillers 63
Component Screen Data 63
TTaabbllee ooff CCoonntteennttss

6CTV-SVU01G-EN
Reports 65
Log Sheet 65
ASHRAE Chiller Log 67
Items Available to Include in Custom Reports 69
Data Graph Data Points 72
Data Points Used in Default Data Graphs 72
Data Points in Custom Data Graphs 75
Appendix B: Data for CenTraVac Duplex Chillers 77
Component Screen Data 77
Reports 78
Log Sheet 79
ASHRAE Chiller Log 80
Items Available to Include in Custom Reports 82
Data Graph Data Points 83
Data Points Used in Default Data Graphs 83
Data Points in Custom Data Graphs 86
TTaabbllee ooff CCoonntteennttss

CTV-SVU01G-EN 7
Product Overview
The Tracer® AdaptiView™ display provides a means for viewing data and for making operational
changes on the following types of chillers:
• Simplex (single compressor) CenTraVac™ chiller models
• Duplex™ (dual compressor) CenTraVac™ chiller models
The purpose of this guide is to assist you in using the Tracer® AdaptiView™ display This guide
describes how to access the screens and the types of information that appear on the screens
Equipment Description
The basic equipment features of the Tracer® AdaptiView™ display are described here
HHaarrddwwaarree
The Tracer® AdaptiView™ display is mounted on or near the chiller control panel It can be
attached to the chiller by an arm that can extend 11 inches Five pivot points enable full
articulation as described in the following specifications and in the figure:
Figure 1. The Tracer AdaptiView mounting arm
• Two horizontal pivots points 90º right or left (180º total)
• Two vertical pivots points: 90º degrees up or down (180º total)
• Rotation: 135º clockwise and 135º counterclockwise (270º total)
SSccrreeeenn CChhaarraacctteerriissttiiccss
The 12 1-inch color touch-screen display shows data in either inches and pounds (I-P) or standard
international (SI) units, and in one of twenty-seven available languages Animated color graphics
indicate the status of the chiller and its components

8CTV-SVU01G-EN
DDCC PPoowweerr
The Tracer® AdaptiView™ display receives 24 Vdc power through its power cable The Tracer®
UC800 controller must be powered on
CCoommmmuunniiccaattiioonn
A separate ethernet cable provides communication between the Tracer® AdaptiView™ display
and the Tracer® UC800 controller Alarms are communicated immediately upon detection
Touchscreen Guidelines
The touch screen registers the downward pressure of a touch However, touching with increased
pressure has no effect
Use your fingers to operate the touch screen Do NOT use a pen or pencil point, or any other
sharp or pointed object that might scratch the screen surface
If you apply and hold pressure at more than one point, the touch screen registers only the first
touch For example, if you press a finger on an area of the screen that is not touch sensitive,
pressing a sensitive area with another finger will not register
Holding on to the screen with your hand can cause unintended navigation, such as from thumb
or palm pressure
Related Information
Additional information on CenTraVac™ chillers with Tracer® AdaptiView™ control can be found
in these documents:
• CVHE-SVX02*-EN (Installation, Operation, and Maintenance: CVHE, CVHF, and CVHG Water-
Cooled CenTraVac Chillers with Tracer AdaptiView Control )
• CDHF-SVX01*-EN (Installation, Operation, and Maintenance: CDHF and CDHG Water-Cooled
CenTraVac Chillers with Tracer AdaptiView Control )
• CVHH-SVX001*-EN (Installation, Operation, and Maintenance: CVHH Water-Cooled
CenTraVac Chillers with Tracer AdaptiView Control )
• CDHH-SVX001*-EN (Installation, Operation, and Maintenance: CDHH Water-Cooled
CenTraVac Chillers with Tracer AdaptiView Control)
• PRGF-SVX001*-EN (Installation, Operation, and Maintenance: EarthWise P rge System with
Tracer AdaptiView Control for Water-cooled CenTraVac Chillers with R-123 Refrigerant)
• PRGG-SVX001*-EN (Installation, Operation, and Maintenance: P rge System with Tracer
AdaptiView Control for Water-cooled CenTraVac Chillers with R-514A Refrigerant)
• CTV-SVD03*-EN (Diagnostics Man al: Diagnostic Descriptions, Tro bleshooting Tables, and
Control Component Overview for Water-cooled CenTraVac Chillers with Tracer AdaptiView
Control)
• CTV-SVP02*-EN (Programming G ide: Tracer TU Service Tool for Water-cooled CenTraVac
Chillers with Tracer AdaptiView Control)
• TTU-SVN01*-EN (Getting Started G ide: Tracer TU Service Tool)
Screen Overview
The touch-sensitive areas of the Tracer® AdaptiView™ display screen are described in detail in
this section
PPrroodduucctt OOvveerrvviieeww

CTV-SVU01G-EN 9
Figure 2. Tracer AdaptiView display (Home screen for Simplex chillers is shown)
1
2
3
1 “Chiller Status Area,” p 9
2 “Main Display Area/Home Screen,” p 10 This area is different between the Simplex chiller
models and the Duplex™ chiller models Table 2, p 11 describes the differences
3 “Main Menu Area,” p 17
Chiller Status Area
The chiller status area (shown as Location 1 in “Screen Overview,” p 8) remains visible from
every screen on the Tracer® AdaptiView™ display Basic information about chiller status and
control appears on the face of the buttons and touch targets When touched, the buttons and
touch targets open other screens that provide more information and control access The
following table provides the details
Table 1. Chiller status area
Button/Touch target Description
Chiller status button The top-level operating mode of the chiller appears on the chiller status button. Touch this button to
view the Chiller Operating Mode screen.
Note: For more information, refer to “Reports,” p. 65 .
Alarm indicator button If an active alarm exists, the alarm indicator button appears with the alarm severity indicated on it. If
there is more than one alarm, the most severe appears. You can touch this button as an alternate way
to view the Alarms screen.
Note: For more information, refer to “Alarms,” p. 20.
Manual override button If a manual override exists but no active alarm exists, a manual override button appears in the same
location as the alarm indicator button. If neither an alarm nor a manual override exist, no button
appears.
If a manual override exists, you can touch this button as an alternate way to view the Manual Control
Settings screen.
Note: For more information, refer to “Manual Control Settings,” p. 47.
PPrroodduucctt OOvveerrvviieeww

10 CTV-SVU01G-EN
Table 1. Chiller status area (continued)
Button/Touch target Description
Water temperature touch target
The water temperature touch target shows one of the following, depending on whether the chiller is in
heating or cooling mode (also referred to as the Active Control Type):
• If the Active Control Type is chilled water, the Evaporator Leaving Water Temperature appears and
the touch target links to the evaporator component screen.
• If the Active Control Type is hot water, the Condenser Leaving Water Temperature appears and the
touch target links to the condenser component screen.
• If the Ice Building mode is Active, the Evaporator Entering Water Temperature appears and the
touch target links to the evaporator component screen.
Note: For more information on the evaporator and condenser component screens, refer to “Component
Screens,” p. 14.
Setpoint source touch target
The current setpoint source is highlighted in green on the setpoint source touch target. Touch this
target to view the Setpoint Source screen, where you can change the setpoint source.
Note: For more information, refer to “Changing the Setpoint Source,” p. 44 .
Auto/Stop buttons Auto and Stop are toggle buttons: One appears raised when the other is appears depressed.
• Touch Auto to activate the chiller startup process.
• Touch Stop to active the chiller shutdown process.
Note: For more information, refer to “Stopping/Restarting Chiller Operation,” p. 18.
Main Display Area/Home Screen
All screens appear within the main display area (shown as Location 2 shown in the figure in
“Screen Overview,” p 8)
HHoommee ssccrreeeenn:: CChhiilllleerr ssttaattuuss iinnffoorrmmaattiioonn
The home screen (shown in “Screen Overview,” p 8) provides the most frequently needed
chiller status information on “touch targets” (the entire white rectangular areas) for each chiller
component Touching any touch target displays a screen containing more chiller status
information related to each component (refer to “Component Screens,” p 14)
Each touch target that appears on the home screen is described in the following table, including
those for Simplex chillers, and those for Duplex™ chillers
In the lower right corner of the home screen, you can view the date and time as well as additional
chiller information For details, see the last three rows of the following table
PPrroodduucctt OOvveerrvviieeww

CTV-SVU01G-EN 11
Table 2. Home screen touch targets and buttons
Touch target Description
Compressor for Simplex chillers
This compressor touch target chiller provides information on:
• Compressor Running Status
• Differential Oil Pressure
Touch anywhere on the touch target to view the Compressor component
screen.
Compressor for Duplex Chillers
This compressor touch target provides information on:
• Compressor Running Status Ckt1
• Compressor Running Status Ckt2
Touch anywhere on the Ckt1 side of the touch target to view the
Circuit 1 Compressor component screen.
Touch anywhere on the Ckt2 side of the tough target to view the Circuit 2
Compressor component screen.
Condenser for all chiller models
This condenser touch target provides information on:
• Condenser Leaving Water Temperature
• Condenser Entering Water Temperature
• Active Hot Water Setpoint (if Hot Water Control is available)
• Condenser Water Flow Status (animation in graphic indicates if
condenser is running)
Touch anywhere on the touch target to view the Condenser component
screen.
Evaporator for all chiller models
The evaporator touch target provides information on:
• Evaporator Leaving Water Temperature
• Evaporator Entering Water Temperature
• Active Chilled Water Setpoint (if Chilled Water Control is available) or
Active Ice Termination Setpoint in Ice Building mode)
• Evaporator Water Flow Status (animation in graphic indicates if
evaporator is running)
Touch anywhere on the touch target to view the Evaporator component
screen.
Motor for Simplex chillers
The motor touch target provides information on:
• Average line current
• Frequency (if adjustable-frequency drive is configured)
Touch anywhere on the touch target to view the Motor component screen.
PPrroodduucctt OOvveerrvviieeww

12 CTV-SVU01G-EN
Table 2. Home screen touch targets and buttons (continued)
Touch target Description
Motor for Duplex chillers
The motor touch target provides information on:
• Average line current Ckt1
• Average line current Ckt2
Touch anywhere on the Ckt1 side of the touch target to view the Circuit 1
Motor component screen.
Touch anywhere on the Ckt2 side of the tough target to view the Circuit 2
Motor component screen.
Purge for Simplex chillers
The purge touch target provides information on:
• Purge top level mode
Touch anywhere on the touch target to view the Purge component screen.
Note: The Purge button is not displayed if Purge is not installed.
Purge for Duplex chillers The purge touch target provides information on:
• Purge top level mode Ckt1
• Purge top level mode Ckt2
Touch anywhere on the Ckt1 side of the touch target to view the Circuit 1
Purge component screen.
Touch anywhere on the Ckt2 side of the tough target to view the Circuit 2
Purge component screen.
Note: The Purge button is not displayed if Purge is not installed.
Information button and chiller and display names
Touch the “i” or the chiller or display name to view the About this Chiller
screen.
Note: For more information, see “About this Chiller,” p. 26 .
Custom Report
Touch the Custom Report button to view the Custom Report screen.
Note: For more information, see “Creating and Viewing a Custom
Report,” p. 24.
HHoommee ssccrreeeenn:: AAnniimmaatteedd GGrraapphhiicc
A graphic of a chiller appears on the home page The graphic uses animation to indicate the
operational status of the chiller If the chiller is running, animation appears within the cutaway
areas of the compressor, the evaporator, and the condenser, as shown in the figure in “Screen
Overview,” p 8 If the chiller is not running, the components are enclosed and are not animated
The chiller graphic that appears on the screen also indicates the type of chiller that the Tracer®
AdaptiView™ display is monitoring One of the following graphics will appear in the display for
Simplex chillers:
• 2-stage compressor, cooling only (as shown in the figure in “Screen Overview,” p 8)
• 2-stage compressor with auxiliary condenser
• 2-stage compressor with heat recovery
• 3-stage compressor, cooling only
• 3-stage compressor with auxiliary condenser
• 3-stage compressor with heat recovery
PPrroodduucctt OOvveerrvviieeww

CTV-SVU01G-EN 13
One of the following graphics will appear on the display for Duplex™ chillers:
• 2–stage compressor
• 3–stage compressor
PPrroodduucctt OOvveerrvviieeww

14 CTV-SVU01G-EN
Main Display Area/Screen Saver
After 30 minutes of inactivity, the screen dims and a screen saver appears in the main display
area as shown in the following figure The screen saver also appears if you touch the animated
graphic on the home screen Alternately, if you touch the screen saver, the home screen appears
Figure 3. Screen saver
Component Screens
Each chiller component has a touch target, accessible from the home screen, that is illustrated in
“Screen Overview,” p 8 (main display area/home screen) and described in “Main Display Area/
Home Screen,” p 10
SSiimmpplleexx CChhiilllleerrss
If you touch anywhere on a component touch target, a screen appears containing data that is
related to that component (see the example in the following figure) You can use the shortcut
buttons at the top of each of the component screens to view the other components screens
“Appendix A: Data for CenTraVac Simplex Chillers,” p 63 lists the settings and status points that
are accessible from each of the component screens The chiller configuration determines which
of the settings and status points appear
PPrroodduucctt OOvveerrvviieeww

CTV-SVU01G-EN 15
Figure 4. Component screen example for Simplex chillers
1
2
1 Data Graph shortcut button
2 Component screen shortcut buttons
DDuupplleexx CChhiilllleerrss
Each component has a separate screen for circuit 1 and circuit 2
• If you touch anywhere on an evaporator or condenser component touch target, a screen
appears containing data related to circuit 1 of that component (refer to the following figure)
• If you touch in the circuit 1 data area of a compressor, motor, or purge component touch
target, a screen appears containing data related to circuit 1 of that component If you touch in
the circuit 2 data area of a compressor, motor, or purge component touch target, a screen
appears containing data related to circuit 2 of that component
Circuit 1 and Circuit 2 buttons at the bottom of each component screen (see Location 4 in the
following figure) allow you to toggle between circuit 1 and circuit 2 component screens
You can use the shortcut buttons at the top of each of the component screens (see Location 2 in
the preceding figure) to view the other components screens If you are viewing a circuit 1
component screen and touch a shortcut button, the circuit 1 screen for the component
represented by that button appears; and likewise for circuit 2
“Appendix B: Data for CenTraVac Duplex Chillers ,” p 77 lists the settings and status points that
are accessible from each of the component screens The chiller configuration determines which
of the settings and status points appear
PPrroodduucctt OOvveerrvviieeww

16 CTV-SVU01G-EN
Figure 5. Component screen example for Duplex chillers
1
2
3
22
4
1 Data Graph shortcut button
2 Component screen shortcut buttons
3 Animated graphic
4 Circuit 1 and Circuit 2 components screen toggle buttons
CCoommppoonneenntt SSccrreeeenn SSeettttiinnggss
Some settings appear on the component screens as buttons These buttons take you to another
screen, where you can change the setting (See, for example, the buttons on the evaporator
component screen in the preceding two figures, which show the Active Chilled Water Setpoint
and the Evaporator Water Pump Override)
NNoottee:: For more information abo t changing settings, see “Eq ipment Settings,” p. 39.
DDaattaa GGrraapphh SShhoorrttccuutt BBuuttttoonn
To view a data graph that is related to the component screen you are viewing, touch the Data
Graph button at the top left of the component screen (Location 1 in the preceding two figures)
CCoommppoonneenntt SSccrreeeenn GGrraapphhiiccss
On the left side of each component screen is a graphic of the component If the chiller is running,
each graphic, except for the purge graphic, is animated
PPrroodduucctt OOvveerrvviieeww

CTV-SVU01G-EN 17
Main Menu Area
The main menu area (shown in “Screen Overview,” p 8) always remains visible at the bottom of
the display When touched, each of the buttons displays the main menu screen for the topic
listed on the button The following table provides a description of each button
Table 3. Main menu area
Button Description
Touch the Alarms button to view the Alarms screen.
If there is an active alarm, the button flashes a color. The flashing color is determined by the highest
severity of active alarms:
• If an Immediate Shutdown alarm exists, the flashing color is red.
• If a Normal Shutdown alarm exists, the flashing color is yellow.
• If a Warning alarm exists, the flashing color is blue.
Note: For more information, see “Alarms,” p. 20.
Touch the Reports button to view the Reports screen.
Note: For more information, see . “Reports,” p. 23.
Touch the Data Graphs button to view the Data Graphs screen.
Note: For more information, see “Data Graphs,” p. 32.
Touch the Settings button to view the Settings screen, which is separated into the following three
categories:
•“Equipment Settings,” p. 39
•“Display Settings,” p. 51
•“Security Settings,” p. 58
Note: Refer to the page numbers for detailed information about each category.
Touch the Language icon to view the Language screen. (This button is a shortcut. You can also view the
Language screen by using the Settings button.)
Note: For more information, see “Viewing and Changing the Language Preference,” p. 54.
Touching the brightness button will cycle the display brightness from 30% to 60% to 90% brightness.
PPrroodduucctt OOvveerrvviieeww

18 CTV-SVU01G-EN
Stopping/Restarting Chiller Operation
You can start or stop the chiller from the Tracer® AdaptiView™ display by using the Auto and
Stop buttons The buttons are located in upper right
Stopping the Chiller
You can stop the chiller in two ways:
• Normally, which involves stopping the various components sequentially in order to protect
them from damage
• Immediately, which shuts down all the components at once, and should be used only in an
emergency
To stop the chiller in either of these ways:
1 Touch the Stop button to initiate the chiller shutdown process A confirmation screen appears
as shown in the following figure
Figure 6. Stop the Chiller confirmation screen
2 Touch the YYeess button The Shutting Down Chiller screen appears as shown in the following
figure
• To stop the chiller normally, no further action is required You can observe the submodes
change and the timers count down
• To stop the chiller immediately, touch the IImmmmeeddiiaattee SShhuuttddoowwnn button
• To cancel shutdown, touch the CCaanncceell SShhuuttddoowwnn button

CTV-SVU01G-EN 19
Figure 7. Shutting Down Chiller screen
NNoottee:: If the chiller is a D plex™, the screen shows top-level modes and s bmodes for both
the chiller and the two circ its.
Restarting the Chiller
Touch the Auto button to initiate the chiller restart process You can observe the mode change to
Auto The chiller will wait until cooling is needed before starting the compressor
When the chiller is running normally, it automatically starts and stops as needed to reach its
setpoints
SSttooppppiinngg//RReessttaarrttiinngg CChhiilllleerr OOppeerraattiioonn

20 CTV-SVU01G-EN
Alarms
You can use the Tracer® AdaptiView™ display to view alarms and to reset them Alarms are
communicated to the display immediately upon detection
The Alarms Screen
Touch the AAllaarrmmss button in the main menu area at the bottom of the screen to view the Alarms
screen A table of active alarms appears that is organized chronologically with the most recent at
the top of the list, as shown in the following figure This example shows the default view, which
appears each time you return to the screen
Figure 8. Alarms screen (default view)
1
2
3
4
5
1 Reset Alarms button
2 Number of alarms
3 Sortable columns—The example is sorted by date/time
4 Page controls
NNoottee:: A page n mber appears in the lower right corner of the screen. If a screen contains
more than one page, p/down arrows also appear for viewing the other pages.
5 Alarms categories—The example shows active alarms
Other manuals for Tracer AdaptiView
2
Table of contents
Other Trane Monitor manuals

Trane
Trane CVHE Quick setup guide

Trane
Trane Tracer MP580 Reference guide

Trane
Trane Tracer TD7 Installation and operating instructions

Trane
Trane Tracer AdaptiView User manual

Trane
Trane Tracer TD-5 Installation and operating instructions

Trane
Trane Tracer Summit User manual

Trane
Trane BCU Operator Display Instruction Manual

Trane
Trane TruSense RMWH Installation and operating instructions

Trane
Trane Symbio 800 Control Upgrade Kit User manual

Trane
Trane Tracker Reference guide