TriBrer Lemon 3 User manual

Fusion Splicer
USER'S GUIDE


Any undefined changeor modification ofthis manual willdeprive you ofthe right tooperate the equipment.
Toreduce the riskof fire orelectric shock, donot expose theequipment to rainor humidity.
To prevent electric shock, please do not open the shell, and it must be repaired by qualified personnel.
This product isdesigned for splicingthe glass fiberof optical communicationsand cannot beused to spliceother materials.
Toreduce the riskof fire or electric shock,do not allowliquid such aswater or metallicsubstances to enterthe machine.
It is forbidden to usethe fusion splicerin the flammableand explosive environment,otherwise it willlead to fireor explosion.
When the fusion splicer isworking, do nottouch the electrode,avoid the hurtcaused by thedischarge of theelectrode.
When replacing the electrode, you must turn off the power and disconnect the power cord.
Please follow theoperation manual strictlyto use the battery:
*Please do notcharge the batteryby using methodsother than inthe manual;
*Don't throw thebattery into the fire;
*Don't reverse positiveand negative poles;
*Do not chargeor discharge underhigh temperature, fireor direct sunlight;
*Do not throwor impact the battery;
*If the batteryelectrolyte leaks out,please handle itcarefully. If you contactthe skin oreyes accidentally, please must clean
it thoroughly andseek medical adviceimmediately. Please also informthe maintenance center of handling the battery.
WarningWarning
1

CautionsCautions
Do not useand store the fusion splicer in a high temperature and humidity environment . Otherwise, it may cause damage
to the equipment.
Do not touchthe heat-shrinkable tube during the heating or just ending, because the heat shrink is hot and may causeburns.
Do not touchthe fusion splicer, ACpower cord and AC plug when wet hand, otherwise it may cause electric shock.
Do not use any chemicals other than alcohol to clean microscope lenses, V-grooves, LCD screen, etc., otherwise it may
cause blurred images, stains, etc., and may even cause equipment's corrosion and damage.
In the dusty environment, dust-proofmeasures must be taken to prevent dust from entering the machine and causing trouble.
Do not allowthe fusion splicer to be subjected to strong vibration and shocks, otherwise the machine will be damaged.
Please use adedicated carrier to transport or store the fusion splicer.
Using the battery
The equipment canuse a disposable alkaline battery or rechargeable battery, and cannot be mixed with different types or
different capacity batteries. Only rechargeable batteries can be charged.
Avoiding condensation:
Sudden changes intemperature should be avoided. Do not use the device immediately after moving the device from the cold
area to thehot area, or when the room suddenly heats up, because the device may have condensation phenomenon. If the
temperature changes abruptly, stop using it and take out the battery, and the power canbe switched on after at least an hour.
Storage
When the deviceis not used for a long time, please take out the battery to avoid the damage caused by battery leakage .
All is subjectedto the physical products, the manual here is just only for reference.
:
:
2
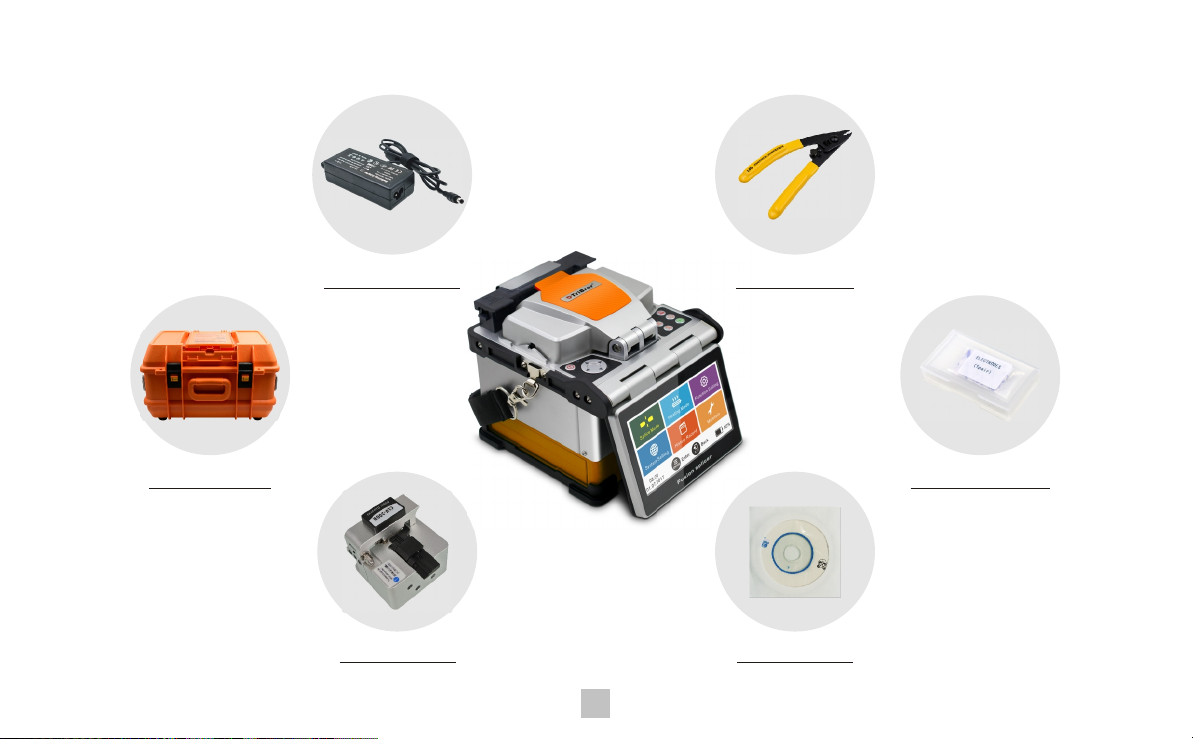
Standard Package
3
Spare electrode
Fiber stripper
AC/DC adaptor
Carrying case
Fiber cleaver User manual
Table of contents


