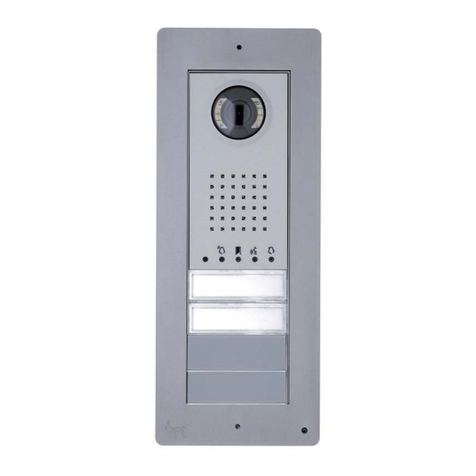
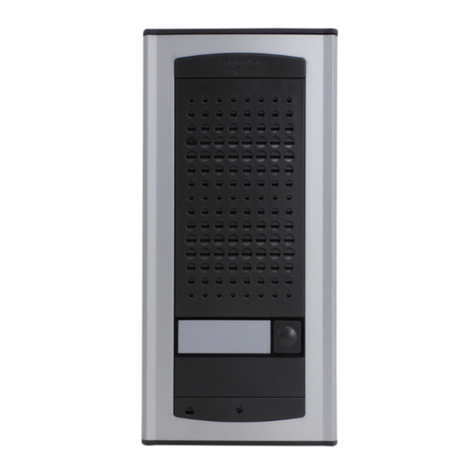
Trigon Minipak 4000 Installation instructions

Page 1
MP 4000
October 29, 2004
255 Glider Circle • Corona, CA 92880
(951) 371-1730 • FAX (951) 371-2592
www.TrigonElectronics.com
INSTALLATION
&
OPERATION INSTRUCTIONS
Minipak 4000
Multiple Resident Telephone Entry System

Page 2
MP 4000
TABLE OF CONTENTSTABLE OF CONTENTS
TABLE OF CONTENTSTABLE OF CONTENTS
TABLE OF CONTENTS
INTRODUCTION--------------------------------------------------------------------- 3
PRODUCT OVERVIEW------------------------------------------------------------- 3
MOUNTING --------------------------------------------------------------------------- 4
WIRING -------------------------------------------------------------------------------- 4
PROGRAMMING
ENTER PROGRAM MODE ----------------------------------------------------- 6
SETUP SCREEN
Definitions ----------------------------------------------------------------------- 6
Resident Code Length---------------------------------------------------------- 6
Ring Count----------------------------------------------------------------------- 6
Gate Time Duration ------------------------------------------------------------ 6
Call Length ---------------------------------------------------------------------- 6
Dial Mode. ----------------------------------------------------------------------- 6
Active Keypad ------------------------------------------------------------------ 7
Welcome Screen Duration ----------------------------------------------------- 7
Instruction Screen Duration --------------------------------------------------- 7
Set Inverse Screen Mode ------------------------------------------------------ 7
Dense Mode --------------------------------------------------------------------- 7
CLOCK CONTROL SCREEN
Set Date and Time -------------------------------------------------------------- 7
Set Relay, Backlight ON/OFF Timing --------------------------------------- 7
Set Program Code -------------------------------------------------------------- 8
Master Erase--------------------------------------------------------------------- 8
MESSAGE EDIT SCREEN .----------------------------------------------------- 8
DATABASE EDIT SCREEN ----------------------------------------------------- 8
Resident Code ------------------------------------------------------------------- 9
Resident Name ------------------------------------------------------------------ 9
Resident Telephone Number -------------------------------------------------- 9
Entry Code----------------------------------------------------------------------- 9
Enroll Access Cards (OPTION) ---------------------------------------------- 9
Keep File------------------------------------------------------------------------- 9
Find File-------------------------------------------------------------------------- 9
Delete File ----------------------------------------------------------------------- 9
Next File ------------------------------------------------------------------------- 9
Clear ------------------------------------------------------------------------------ 9
Quit ------------------------------------------------------------------------------- 9
TENANT FILE EDITING -------------------------------------------------------- 9
DISPLAY EDITING --------------------------------------------------------------- 10
OPERATION
GRANTING A VISITOR ACCESS --------------------------------------------- 11
DENYING VISITOR ACCESS -------------------------------------------------- 11
TROUBLESHOOTING -------------------------------------------------------------- 12

Page 3
MP 4000
INTRODUCTIONINTRODUCTION
INTRODUCTIONINTRODUCTION
INTRODUCTION
USE OF THIS MANUAL
This manual contains all of the information required to
successfully install and program the Trigon MP4000.
If you are using this manual to install this unit, it is very
importantfor you toreadthefollowing sections inorder:
You should read these instructions before you begin the
installation. This will insure that everything is done
efficiently.
If you are using this manual as a programming guide
after the initial installation, you will find the TABLE
OF CONTENTS helpful in locating the particular
programming procedure you desire.
PRODUCT OVERVIEWPRODUCT OVERVIEW
PRODUCT OVERVIEWPRODUCT OVERVIEW
PRODUCT OVERVIEW
Figure 1
Telephone Line - 22 AWG;
Shielded or Twisted,
2 Conductor
Camera, Door or Gate
Secondary
Relay
Serial Printer
(18 AWG; Shielded, 3 Conductor)
Postal
Lock
Box
Primary
Output
Relay
Main Entrance
Power Cabling -
Shielded or Twisted,
2 Conductor,
18AWG up to 250'
16AWG up to 500'
Card Reader
(Interface Module Req'd)
18 AWG; Shielded,
4 to 6 Conductor
Alarm
Shunt
Relay
MINIPAK
4000
TRIGON ELECTRONICS
ORANGE CA.
PUSH START
DIAL NUMBER
9.5" 3.0"
12.5"
The TRIGON MP4000 is in itself a complete Access
Control Security System. It makes use of an ordinary
telephone line to provide complete remote control of
an entrance point and/or its monitoring equipment. It
allows visitors to make contact inside the building they
wish to enter. Personnel inside the building answer the
incoming telephone call and, with a touch of a button
on their Touch-tone telephone, they grant or deny the
visitor’s entrance. Likewise, it allows tenants/
employees a means of direct entry via code or card.
Two relay outputs make it possible to control a camera
as well as a barrier. Barriers may be latched open under
control of an on-board Time-of-day Clock. Available
flush mount backboc as well as anoptional lighted hood
add to alternative mounting options. Records of entry/
exit activity are made possible with a Serial Printer
Output.

Page 4
MP 4000
MOUNTINGMOUNTING
MOUNTINGMOUNTING
MOUNTING
The MP4000 may be connected to a no-phone-charge
control switch such as the Trigon Model 5000, or
connected to a dedicated telephone line. If connected
to a dedicated telephone line, arrangements must be
made with the local telephone company for installation
of a standard voice-grade telephone line (Touch-tone
or rotary), as close to the unit mounting location as
possible. The telephone company may require the
following information:
FCC Registration No. ... AZ8898-62546-DT-I
Ringer Equivalence ..... 0.8B
Connector .............. Standard USOC Jack RJ-11-C
The unit is designed to be as weather-resistant as
possible; however, we recommend some shelter from
direct rain and sunlight. An overhang is usually
sufficient.
Bolt the backplate to the mounting surface using the
four 5/16" holes in the chassis. Also, feed the wiring
through the access hole in the rear of the backplate. At
this point, the wiring should NOT be energized.
It is critical on units that support a Liquid Crystal
Display, that direct sunlight not be allowed to fall on
the display itself. Like all Liquid Crystal Displays, heat
absorption will temporarily blacken the crystals making
the display unreadable.
If extreme cold is anticipated, a
thermal switch and heater element
may need to be installed inside the
unit’s housing. At about 20 degrees
Fahrenheit, the display will become
sluggish. If a heater element is
installed, be sure to use a bimetal
thermalswitch to preventoverheating
during the summer months.
1. Use the enclosed wiring diagram (Fig. 3) for wire
connection information.
2. Do not power any other device from the Trigon’s 12
VAC transformer. If a substitute transformer is used,
be sure it is rated 12 VAC, 20VA, UL Class 2 listed.
The 12 VAC input power wires should be 18AWG,
600V, insulated wire. This should be sufficient for
distances up to 200 feet.
3. Do not energize wires until installation is completed.
4. Ground the unit by attaching a separate 12 AWG
ground wire to the ground location on the terminal
block. This ground wire should go to a grounding
rod or grounded metal conduit.
5. Trigon recommends that an EMI filter (Cornell-
Dubilier ModelAPF 1021 or equivalent) be mounted
between the 12VAC transformer output and the unit.
EMI/RFI filters are available from Trigon. Mount
the filter as close to the unit as possible. Ground the
filter to the same point as unit ground.
6. Shieldedcables recommended. Ground theshielding
to the same point as the unit and filter. To avoid
ground loops, do not ground the shield at both ends.
Use 600V insulated wire for this installation.
7. IsolatetheTelcolinefrom 12 VACpowerwires. This
will prevent 60 Hz hum from occurring on the
telephone line. Use 22AWG wire on Telco line run
distances of up to 2400 feet. Consult the factory for
distances greater than 2400 feet.
8. Power Relays 1 and 2 are dry contact, Form C type,
rated for 5 AMPS @ 30 VDC/ 250VAC.
Figure 2
9.35"
7.35 "
1.00 "
10.25"
.312" dia.
4 places 1.00" dia.
1.00"
1.00"
2.40"
12.25"
9.35"
12.25"
.812" dia. 2.35"
2.00"
2.70"
WIRINGWIRING
WIRINGWIRING
WIRING

Page 5
MP 4000
WIRING (Continued)
9. The Shunt relay is a low-power (4 watt) reed relay.
It can be used for temporary alarm switch bypass,
video camera activation, etc. The Shunt relay
activates with the #1 or #2 power relay, and
deactivates thirty seconds after relay release when
the power relay is activated by pressing ‘O’ or ‘8’
on the resident’s keypad.
10.Printer Operation (Option): The MP4000 supports
audit log output to a remote serial printer up to 300
feet away.
The printer must be a SERIAL type with a standard
RS232 interface connector. The settings of the
printer are:
300 Baud, 8 bits, No parity, 1 stop bit.
Serial linkage requires a minimum of three wires
that carry “DATA, COMMON, and BUSY”.
The logic board has three terminals marked:
1. “COM” which goes to pin 7 (Com) of a printer
RS232 port.
2. “OUT” which goes to pin 3 (Rec. Data) of a printer
RS232 port.
3. “BSY” which goes to pin 20 (Transmit Data) of a
printer RS232 port.
All access data is recorded to the printer.
11. Postal Input: Two screw terminals are located on the
logic board marked “POST”. Shorting these terminals
together via the Postal Switch will cause the unit to
generate a Gate Open Cycle and generate a Postal
Access message toAudit Log.
NOTE: Other forms of emergency access may also
use this input but will logged as Postal Entry granted.
12.If all wiring and grounding is completed, mount the
faceplate onto the backbox.
Ground
CARD
Pos.
Com.
Neg.
Card
Reader
Interface
POSTAL
INPUT Secondary
Relay (N.O.)
ALARM
SHUNT
N.C.
Com.
N.O.
POWER PHONE
Out
Com.
Busy
Printer or
Computer
Primary
Relay
12 VAC
Power
Telephone
Line
Display
Board
Speaker
Volume
Control
Board
0 - 250'
250 - 500' 18 AWG; Shielded
16 AWG; Shielded
Voice Grade, 24 to 48VDC
22 AWG; Shielded or twisted
up to 2400'.
Input Power Cabling
Telephone Line/Cabling
Figure 3

Page 6
MP 4000
PROGRAMMINGPROGRAMMING
PROGRAMMINGPROGRAMMING
PROGRAMMING
Figure 4 SETUP SCREEN
* = SKIP SCREEN
# = CURSOR DOWN
0 = CHOICES
>[4] RES.LENGTH
[3] RING COUNT
[3] GATE TIME
[3] CALL LENGTH
[T] DIAL MODE
[N] ACT. KEYPAD
[4] WELCOME SEC
[8] INSTRCT SEC
[N] SET INVERSE
[N] DENSE MODE
NOTE: Characters inside brackets in Figure 1 represent
factory presets.
If you press the ‘*’ key at this time, you will leave this
screen and go to Screen 2.
If you press the ‘#’ key, you will move the Cursor (>)
down one line.
Pressing the ‘0’ key will cause the character within the
brackets beside the Cursor to step through the choices
for that particular Setup parameter.
DEFINITIONS
RES. LENGTH:
“Resident Code Length” refers to the number of digits
thevisitor will havetodial to callatenant. For example:
Apartment “304” is three digits. To call Apt. 304, one
would dial “3, 0, 4”. Resident Codes can be from 1 to 4
digits in length. Select the digit (1-4) that corresponds
to the desired Resident Code length for all tenants.
RING COUNT:
“Ring Count” refers to the number of incoming rings
the MP4000willwait before it auto-answers. Thiscount
is adjustable from 1 to 9. Select the digit (1-9) that
corresponds to the desired ring count.
GATE TIME:
“Gate Time” refers to the length of time Relay 1 or 2
will stay engaged after an “Activate Relay” command
has been issued.
One gate interval equals five seconds. You may set the
total gate interval time by selecting the digit that
corresponds to the number of five-second gate intervals
desired. For example: Select “6” for six 5-second
intervals (30 seconds). Select the digit (1-9) that
correspondsto the totalnumberofgate intervals desired.
NOTE: A “0” will allow Relay 1 or 2 to engage for a
one second pulse.
CALL LENGTH:
“Call Length” refers to the maximum time (in minutes)
that the unit will allow a conversation to last. Select
the digit (1-4) that corresponds to the Call Length time
(in minutes) that is desired.
NOTE: A “0” allows indefinite Call Length, however
the unit will auto-disconnect after 30 seconds of voice
silence.
DIAL MODE:
“Dial Mode” refers to the type of signal the unit uses to
dial a telephone number. The MP4000 is capable of
dialingTouch-tone or rotary/pulse. Select “T” if Touch-
tone is desired, or select “R” for rotary/pulse dial out.
Note: The Model MP4000 can be locally programmed
via the unit's keypad or remotely programmed via a
Hayes Compatible 1200 baud modem.
The following instruction refer to programming the
Model MP4000 directly from the unit's keypad. For
remote programming instructions, seeTrigon's PSL4000
product support software and it's instructions.
ENTER PROGRAM MODE:
Before any programming can be done, you must first
enter the Program Mode. Begin by pressing the start
button for dial tone. Enter “*” and the unit’s Program
Code. (The code is 5269 if unit is new). The first screen
to appear is the ‘Setup’ Screen. It will display the
following format:
SETUP SCREEN
If you are installing the unit and are ready to begin
programming, it is necessary for you to do Setup first.
If the unit is already installed and in service, Setup may
not be necessary. However, if you wish to change Setup
parameters, you may do so.
You may find it helpful to read through SETUP before
actually performing any of the steps.

Page 7
MP 4000
Programming (Continued)
Figure 5
ACT. KEYPAD:
“Active Keypad” allows the keypad to be used for
stepping through “voice-mail”, paging systems, etc.
Select ‘N’for NO, NOTActive Keypad or ‘Y’forYES,
Active Keypad. The keypad isActive only after tenant
connection has been established.
WELCOME SEC
This selection allows you to choose the length of time
that the ‘WELCOME’ message stays displayed (in
seconds). Select the digit (0-9) that corresponds to the
number of seconds that you wish for this message to be
displayed.
INSTRCT SEC
This selection allows you to choose the length of time
that the ‘INSTRUCTION’ message stays displayed (in
seconds). Select the digit (1-9) that corresponds to the
number of seconds for this message to be displayed.
SET INVERSE
This function allows you to choose between Normal
display and Inverse display. Normal is white characters
on a black background, and Inverse is the opposite.
Select‘N’for NO, NOTInverse or‘Y’forYES,Inverse.
DENSE MODE
“Dense Mode” sets the number of listings displayed per
screen. Normal Mode displays up to 15 listings per
screen, while Dense Mode displays up to 29 listings
per screen. Select ‘N’ for NO, NOT Dense Mode or
‘Y’for YES, Dense Mode.
CLOCK CONTROL SCREEN
The second screen in the Program Mode is the ‘Clock
Control’ screen. It will display the format shown in
Figure 5.
If you press the ‘*’ key at this time, you will leave this
screen and go to Screen 3, Message Edit..
If you press the ‘#’ key, you will move the Cursor (>)
down one line.
Thenumerickeys (0-9) are usedtocompletetherequired
data inside the brackets next to the Cursor.
SET CURRENT DATE AND TIME
The first six lines require the current Date and Time.
‘HOURS’ are expressed in Military time based on the
24 hour clock. ‘DAY’ refers to the day of the week;
Monday being Day 01 through Sunday, Day 07.
CLOCK CONTROLS
* = SKIP SCREEN
# = CURSOR DOWN
0-9 CHANGE
>[11] MONTH
[11] DATE
[99] YEAR
[04] DAY
[15] HOURS
[59] MINUTES
[00] #1 ON HR
[00] #1 ON MIN
[00] #1 OFF HR
[00] #1 OFF MIN
[00] #1 DAY/DAY
[00] #2 ON HR
[00] #2 ON MIN
[00] #2 OFF HR
[00] #2 OFF MIN
[00] #2 DAY/DAY
[00] LP ON HR
[00] LP 0N MIN
[00] LP OFF HR
[00] LP OFF MIN
[00] LP DAY/DAY
[52] ACCESS MSD
[69] ACCESS LSD
SET RELAY, BACKLIGHT ON/OFF TIMING
The next groups of parameters are used to control the
automatic timing of Relays #1 and #2, as well as the
Display Backlight ON and OFF timing.
Suppose we wish to leave the door unlocked between
the hours of 7:30 AM and 5:00 PM on Monday through
Friday. The Door Strike is wired through Relay #1. We
would program the display to show the following:
[07] #1 ON HR
[30] #1 ON MIN
[17] #1 OFF HR
[00] #1 OFF MIN
[15] #1 DAY/DAY
The fifth parameter in this example [15], relates to day 1
through day 5, (Monday through Friday).
If you wish to extend the life of the lamp used to
Backlight the Display, the lamp can be programmed to
automatically shut off during low traffic hours. If the
unit senses activity on its keypad, the lamp will come
back on for a limited period of time.

Page 8
MP 4000
SET PROGRAM CODE
The last two lines on this screen are used to set the
Program Code for this unit. One line contains the first
two digits of the code (MSD), and the next line contains
the last two digits (LSD).
NOTE: If, after performing this step, you lose the ability
to access the Program Mode, callTRIGON service. We
have the ability to reset the Program Code back to 5269
remotely.
MASTER ERASE
To clear all files from memory as well as return Setup
parameters to factory presets, set Program Access Code
to 9999. This will erase all data and reset the Program
Access Code to 5269.
MESSAGE EDIT SCREEN
The next screen to appear in the Program Mode is the
‘Message Edit’ Screen. This screen is used to create
your own message to be displayed as the ‘WELCOME’
Screen. It will display the following format:
message. Each character is made with two keystrokes.
For example, to create an "A", press 2, then 1. The 2
represents the key the 'A' letter is located on, and 1
represents the fact 'A' is the first letter on the key. To
make a "B", press 2, 2. Again, 'B' is on the '2' key, its
second letter. Spaces are made by pressing 1, 1. The
letter 'Q' is 1, 2. The letter 'Z' is 1, 3. Press "#" to go to
the next line. Press the star key (*) to go back. See the
DISPLAY EDITING section for more information.
If you wish to eliminate the Message Edit screen, set
the ‘WELCOME SEC’ parameter to ‘0’ on the Setup
Screen.
DATABASE EDIT SCREEN
The last screen to appear in the Program Mode is the
‘Database Edit’ Screen. This is the screen that will be
used for all keypad editing of tenant information. It
will display the following format:
Programming (Continued)
There are 12 lines available on this screen for your
message. Each line will hold 16 characters or spaces.
Alphabetic characters are entered from the keypad to
the ‘Message Edit’ screen in order to create a custom
MESSAGE EDIT
* = SKIP SCREEN
# = DOWN LINE
0 = SKIP RIGHT
1-9 ALPHAEDIT
DATABASE EDIT
* = UP LINE
# = DOWN LINE
0 = NUMBER ZERO
RESIDENT CODE:
——
RESIDENT NAME:
................
PHONE NUMBER:
——————
ENTRY CODE:
——
[ ] KEEP FILE
[ ] FIND FILE
[ ] DEL FILE
[ ] NEXT FILE
[ ] CLEAR
[ ] QUIT
Figure 7
Figure 6

Page 9
MP 4000
RESIDENT NAME
Press the ‘#’ key to move the Cursor to the RESIDENT
NAME line. The ‘0’ line at the top of the screen will
change to read: “0 = SKIP RIGHT”. Enter the
RESIDENT NAME now. Each character is made with
two keystrokes. For example, to create an "A", press 2,
then 1. The 2 represents the key the 'A' letter is located
on, and 1 represents the fact 'A' is the first letter on the
key. To make a "B", press 2, 2. Again, 'B' is on the '2'
key, its second letter. Spaces are made by pressing 1, 1.
The letter 'Q' is 1, 2. The letter 'Z' is 1, 3. Press "#" to
go to the next line. Press the star key (*) to go back.
Press '0' to skip over and leave in place a period. See
the DISPLAY EDITING section for more information.
Note:The name can beupto16 digits inlength,however
the last characters of a long name may be covered up
by the RESIDENT CODE on a Directory listing. Only
alphabetic characters may be entered on this line.
PHONE NUMBER
Press the ‘#’ key to move the Cursor to the PHONE
NUMBER line. The ‘0’line at the top changes back to
read: “0 = NUMBER ZERO”. Enter the PHONE
NUMBER for this tenant now. The phone number can
be up to 12 digits in length. All entries in this field will
be numeric.
ENTRY CODE
Press the ‘#’ key to move the Cursor to the ENTRY
CODE line. Enter the 4-digit ENTRY CODE now. If
just one ENTRY CODE will be assigned for all tenants,
it should be stored at one tenant location only. This
makes it easier to change the code later. The ENTRY
CODE must be 4 digits in length. ENTRY CODES
that begin with a ‘9’ will close the Secondary Relay.
All data in this field is numeric.
ENROLLACCESS CARDS
Access cards may also be enrolled using the Entry Code
function. (Requires the unit be equipped with the
optional interface module and a card reader.) With the
cursor positioned at the first entry code digit location,
Programming (Continued)
RESIDENT CODE
To program a listing for the electronic directory, first
assign a RESIDENT CODE for that tenant. Only ONE
listing is allowed for each RESIDENT CODE. All
entriesin that fieldwillbenumeric. Enter a RESIDENT
CODE now.
use the desired card at the attached card reader. The
card number will be read into the entry code location.
Press the ‘#’key to move the Cursor down one line. The
‘0’line at the topchangestoread: “0 = PERFORMJOB”.
This means that the function listed beside the current
Cursor location will be performed when the ‘0’ key is
pressed.
The Cursor should now be inside the brackets beside the
line that reads: “KEEP FILE”. Press the ‘0’ key to store
the file that was just created.
“FIND FILE” is used to locate a tenant file in memory.
When a RESIDENT CODE is entered, FIND FILE will
display all data associated with that RESIDENT CODE.
“DEL FILE” will delete from memory, the current file
that is displayed at the top of this screen.
“NEXT FILE” will step through the files in memory in
the order in which they were entered.
“CLEAR” will remove the file data from this screen,
but will not remove it from memory.
“QUIT” will take you out of Program Mode and return
to Normal Mode.
TENANT FILE EDITING
To change data pertaining to a tenant, first enter the
tenant’s RESIDENT CODE in the RESIDENT CODE
field. Next move the Cursor to the line labeled: ‘FIND
FILE’and press the ‘0’ key. The screen will display the
data for that tenant. Any information pertaining to that
tenant may now be changed by moving the Cursor to the
relevant field and writing over the existing data. When
all corrected data has been entered, move the Cursor to
‘KEEP FILE’ and press the ‘0’ key. The updated file
will be stored in memory.
If the RESIDENT CODE is not known for a particular
piece of data, such as ENTRY CODE, use the ‘NEXT
FILE’command to step through the listings in memory.

Page 10
MP 4000
To EDITis to REPLACE. Editing replaces blank spaces
on the Message Screen and periods on the Database Edit
Screen with a desired letter, space, or period (as in
“SMITH J.”).
NOTE: There are no periods on the Message Screens.
Each letter is selected with two (2) key strokes on the
keypad.
When a listing is complete, use ‘#’ to move the Cursor
to the next line.
The two letter keystroke combinations are:
NOTES:
‘Q’ and ‘Z’ are located on key ‘1’ (not seen).
Key in ‘11’to SPACE the Cursor 1 position to the right.
Key ‘0’ is used for nondestructive Cursor Skip Right.
Key ‘*’ is BACKUP one line.
Key ‘#’ is GO DOWN one line.
To get the PERIOD in ‘SMITH J. ‘ use nondestructive
skip, ‘0’ to leave the existing ‘.’ in place after the letter
‘J’.
From the keypad editor, only “A” through “Z”, SPACE,
and preexisting PERIODS are possible.
Usekeysequence “11”to eraseaposition(SPACEover).
Use keypad sequence “#*” to restore Cursor to the first
position of any given listing.
Alphabetizing is automatic, based on the first letter of
each listing.
Look at this Example:
To Enter: S M I T H J.
The letter ‘S’is on the ‘7’key of a Telephone Keypad.
.PRESS 7.
(Thislimits the selectiontothreechoices; ‘P RS’). Note
that ‘S’is the third (3rd) letter on that key.
.PRESS 3.
An ‘S’ will now appear and the Cursor will move right
to the next position.
Letter ‘M’ is on key ‘6’ Position 1,
PRESS 61
Letter ‘I’ is on key ‘4’ Position 3,
PRESS 43
Letter ‘T’ is on key ‘8’ Position 1,
PRESS 81
Letter ‘H’ is on key ‘4’ Position 2,
PRESS 42
Space ‘ ‘ is on key ‘1’ Position 1,
PRESS 11
Letter ‘J’ is on key ‘5’ Position 1,
PRESS 51
Symbol ‘.’is displayed so use a single ‘0’ to skip over.
Use ‘11’,’11',’11', etc. to replace the rest of the periods
on that line with active SPACES.
DISPLAY EDITINGDISPLAY EDITING
DISPLAY EDITINGDISPLAY EDITING
DISPLAY EDITING
Figure 8
Key No.
Character
Key sequence Q Z
1
11 12 13 A B C
2
21 22 23 D E F
3
31 32 33
G H I
4
41 42 43 J K L
5
51 52 53 M N O
6
61 62 63
P R S
7
71 72 73 T U V
8
81 82 83 W X Y
9
91 92 93
Previous
Line
0
SKIP
#
Next
Line
Space

Page 11
MP 4000
Calling a Tenant:
Building Information and Guest Instructions are
displayed on the MP4000 front panel and screen.
Press the start button for dial tone. Enter the Resident
Code located next to the tenant’s name on the directory.
You should hear the tenant answer and be able to
converse with them.
Direct Entry Codes:
Press the start button for dial tone. Enter “#” and your
four digit Entry Code.
Letting a Visitor In:
Answer telephone and identify visitor. You have the
following options:
Touch-tone Telephones
Enter “0” to activate Relay 1 and disconnect.
Enter “8” to activate Relay 2 and disconnect.
Enter “9” to activate Relay 2 and continue conversation.
Rotary Telephones
Dial “0” to activate Relay 1 and disconnect.
OPERATIONOPERATION
OPERATIONOPERATION
OPERATION
Denying Visitor Entry (disconnect):
To deny entry, enter “7” to force disconnect. Hang up
telephone.
Note: It is important that the tenants recognize this
responsibility because otherwise the visitor will walk
away leaving the unit active. Shortly, an off-hook
indicator tone from the phone company will be loudly
heard for the remaining call length.
Figure 9
1
A B C
2
D E F
3
G H I
4
J K L
5
M N O
6
P R S
7
T U V
8
W X Y
9
0#
Grant Entry
via relay #1,
then disconnect.
Activate relay #2
for duration
of call.
Deny Entry,
then disconnect.
Activate
relay#2,
then disconnect.

Page 12
MP 4000
Troubleshooting GuideTroubleshooting Guide
Troubleshooting GuideTroubleshooting Guide
Troubleshooting Guide
NO DIAL TONE
1. Check input power at unit. Should
be 12 VAC. Check fuse.
2. Check that unit is properly
grounded to a good Earth ground.
3. Current starved. Increase AC
input wire size.
4. Remove power, wait 5 seconds,
restore power. Check for dial tone.
5. Check for phone line. Should be
48-52 VDC across phone line
terminals (on hook).
6. Check VOLUME adjustment on PC
board.
7. Check “SPKR” plug on PC board.
Make sure speaker is properly
plugged in.
8. Verify that contacts and wires are
clean and tight.
CANNOT PROGRAM
1. Incorrect/lost program code.
2. Not entering “*” before program
code.
3. Try ‘NO DIAL TONE’
troubleshooting procedures.
4. Not pressing start button before
entering code.
5. Keypad damaged. Check for
vandalism.
6. Check that Program Prom/
Microprocessor is fully seated.
LOSES MEMORY
1. Electrical noise on power line.
Install EMI/RFI filter.
2. Excessive electrical noise from
strike. Use low current strike.
3. Unit transformer shared with
another device (i.e. door strike).
UNIT NOT DIALING
1. No phone number programmed
under that resident code.
Reprogram and try again.
2. Incorrect resident code length
entered (see SETUP).
3. Unit dialing Touch-tone on a
rotary telephone line.
4. Check phone line at board
terminals. Should be 48-52 VDC
(on hook).
5. If on an in-house phone system,
incorrect dialing procedure to
access outside line/extension. May
require special software.
6. Low AC Supply voltage or
incorrect/defective transformer.
TENANT CANNOT ACTIVATE STRIKE/
GATE
1. Tenant not pressing correct
number on telephone.
2. Strike/gate operator not wired
correctly.
3. Missing or incorrect power to
strike or gate operator.
4. Current starved. Increase wire
size.
5. Tone may be too brief in duration
(cordless phones, etc.).
AC HUM IN EARPIECE/SPEAKER
1. Telephone wires running in same
conduit as AC power.
2. Unit not properly grounded.
3. Defective microphone.
TENANT CANNOT HEAR VISITOR
1. Defective microphone.
2. Too much background or street
noise. Relocate unit.
Feel free to contact our Tech
Services Dept.
(800 842-7444 or (951 371-1730
techsuppor[email protected]
www.TrigonElectronics.com
Table of contents
Other Trigon Intercom System manuals
