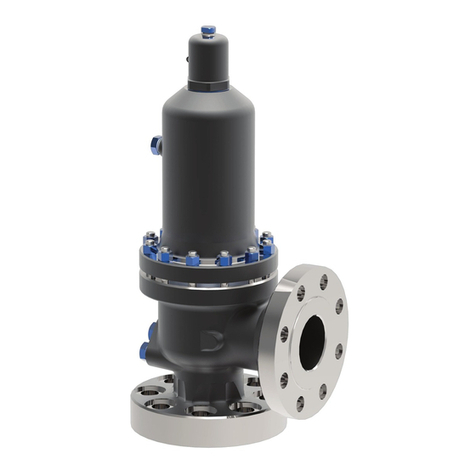
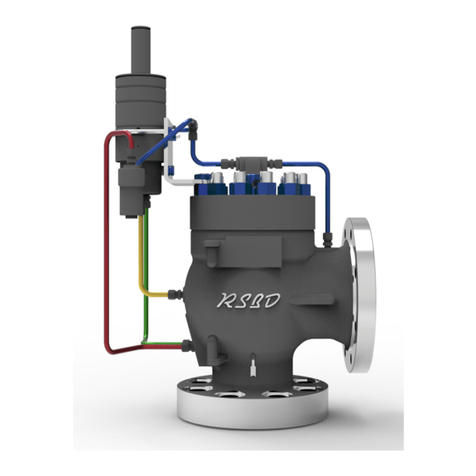
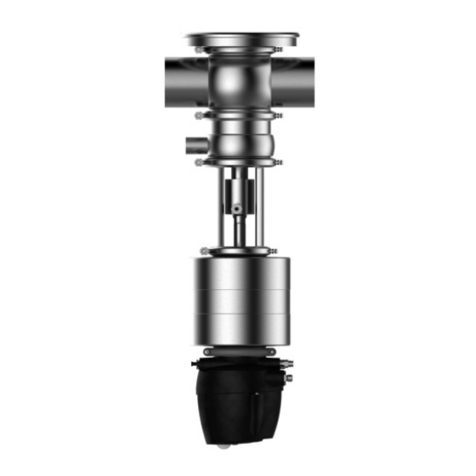
Trillium 74LP Series Instruction manual

74LP SERIES
Installation, Operation,
Maintenance Manual

1 CONTENT
74LP PRESSURE RELIEF VALVE
SARASIN-RSBD™
1 SAFETY SIGNS AND LABELS .................................................................................................................... 2
2 SAFETY INSTRUCTIONS .......................................................................................................................... 3
3 SAFETY PRECAUTIONS ........................................................................................................................... 4
4 WARRANTY INFORMATION ...................................................................................................................... 5
5 TERMINOLOGY ....................................................................................................................................... 6
6 GENERAL ADVICE .................................................................................................................................... 7
6.1 RESPONSIBILITIES .................................................................................................................. 7
6.2 IDENTIFICATION PLATE ........................................................................................................... 7
6.3 PILOT SPRING ........................................................................................................................ 8
6.4 STORAGE ............................................................................................................................... 9
6.5 HANDLING ............................................................................................................................. 9
7 74LP SERIES BASICS ............................................................................................................................. 10
7.1 DESCRIPTION ......................................................................................................................... 10
7.2 FEATURES AND NOMENCLATURES .......................................................................................... 10
8 INSTALLATION ....................................................................................................................................... 11
8.1 GENERAL ............................................................................................................................... 11
8.2 INLET PIPING ......................................................................................................................... 11
8.3 OUTLET PIPING ...................................................................................................................... 12
8.4 INSTALLATION ON THE PROTECTED EQUIPMENT ....................................................................... 12
8.5 OPTIONS ................................................................................................................................ 13
8.6 OUTDOOR INSTALLATION ......................................................................................................... 16
9 MAINTENANCE ....................................................................................................................................... 17
9.1 DISASSEMBLY ........................................................................................................................ 18
9.2 MAIN VALVE PARTS INSPECTION & MAINTENANCE .................................................................. 22
9.2.1 GENERAL RECOMMENDATIONS............................................................................................. 22
9.2.2 PART INSPECTION............................................................................................................... 22
9.2.3 MAIN VALVE RE-ASSEMBLY ................................................................................................ 23
10 MAINTENANCE TOOLS .......................................................................................................................... 30
11 TROUBLESHOOTING...............................................................................................................................30
12 SPARE PARTS ...................................................................................................................................... 31
13 GENUINE PARTS ...................................................................................................................................31

2| www.trilliumflow.com
SAFETY SIGNS AND LABELS
Signs or labels are included throughout this document.
These signs or labels communicate the following messages:
•
•
•
•
The level of hazard seriousness
The nature of the hazard
The consequence of human or product interaction with the hazard
The instructions if necessary on how to avoid the hazard
The format is characterised by vertical panels. The panels include a signal word shown below which advises the
level of hazard seriousness
• DANGER
• WARNING
• CAUTION
• ATTENTION
DANGER
WARNING
CAUTION
ATTENTION
DANGER
Immediate danger which
WILL cause
serious personal injury
or death.
WARNING
Risk or dangerous
practice which
COULD cause
serious personal
injury or death.
CAUTION
Risk or dangerous
practice which
COULD cause
minor injuries.
ATTENTION
Risk or dangerous
practice which
COULD cause
damage to equipment.
Never face the outlet of a
valve when it is discharging
as this may result in serious
personal injury or death
Be aware of all site safety
procedures to prevent the risk
of serious injury or death.
Protect yourself by wearing
the necessary protective
equipment to prevent
possible injury.
Use the proper lifting
equipment to avoid personal
injury or damage to
equipment.
74LP PRESSURE RELIEF VALVE
SARASIN-RSBD™

3| www.trilliumflow.com
2 SAFETY INSTRUCTIONS
WARNING
CAUTION
ATTENTION
Be aware of all site safety
procedures to prevent the risk
of serious injury or death.
Protect yourself by wearing
the necessary protective
equipment to prevent
possible injury.
Use the proper lifting
equipment to avoid personal
injury or damage to
equipment.
•In order that the product may work as expected, ensure that it has been correctly installed, it is being correctly used
and it is correctly maintained and serviced.
• This document describes the main procedures which are necessary to satisfy to the essential safety requirements in
order to operate the product correctly and to comply with the International rules and regulations for the specified
pressure equipment.
• This document describes each essential step from the receipt of valves through the stages of installation, operation
and service. It is mandatory to ensure that anyone intervening with the product, directly or indirectly, is fully aware of
these steps. Pictograms are used to clearly advise of the potential dangers associated with the use of the product.
• Whilst this document is intended to be informative, it is important to understand that the safety messages provided
are not exhaustive. Trillium Flow TechnologiesTM Flow TechnologiesTM cannot possibly be aware of, evaluate or advise,
all of the conceivable methods by which tasks might be performed, or of the possible hazardous consequences of
each of those methods.
Consequently, anyone who uses a procedure and/or tool, which is not recommended by Trillium Flow TechnologiesTM, or
deviates from Trillium Flow TechnologiesTM recommendations must be thoroughly satisfied that neither personal
safety nor equipment safety will be jeopardized by the method and/or tools which have been selected.
The installation, operation and maintenance of safety valves could be dangerous. During these activities personnel might be exposed
to direct or indirect injury risks from fluids which are at various high pressures and/or temperatures. Therefore, every precaution
should be taken to prevent injury to personnel during the performance of any procedure. Any person who uses a safety valve shall be
trained in all aspects of handling, installation, operation and service.
74LP PRESSURE RELIEF VALVE
SARASIN-RSBD™

4|www.trilliumflow.com
3 SAFETY PRECAUTION
DANGER WARNING CAUTION
Never face the outlet of a
valve when it is discharging
as this may result in serious
personal injury or death
Never dismantle a valve in
line without making
absolutely sure there is no
remaining or residual
pressure
Protect yourself by wearing
the necessary protective
equipment to prevent
possible injury
• Never stand in front of the discharge side of a safety valve if the valve is operating or being tested.
• Always wear personal protective equipment (PPE): PPE should consist of but not be limited to ear protection, eye
protection, and the use of protective clothing (gloves, headgear, etc). Noise can be extremely high and can occur
suddenly. Steam and hot water can burn. Superheated steam is NOT visible.
• Always lower the operating pressure before making any adjustment to the valve. Always gag the valve before making
any ring setting adjustments.
• Before removing a valve for disassembly, ensure that there is no remaining pressure upstream the valve and that
the valve is isolated from the system pressure.
• Before performing each pop test on the safety valve, ensure that no personnel are close to the valve. The steam
which could escape during the operation could cause serious personal injury.
• When a lift test is performed using the lifting lever, be sure to use a rope or a chain whilst standing at a safe
distance away from the valve and any potential steam escapes.
• Valves under the operating pressure may relieve at any time. Never strike the body or tamper with the valve as such
practice could cause premature relief.
• Never modify or change the valves, especially when they are under pressure. It is essential that you inform Trillium
Flow Technologies™ in ALL instances if any machining of parts is to be considered. Deviation from critical
dimensions can adversely affect the performance of a safety valve.
A safety valve is a self-acting product. Always consider the potential dangers associated with the product and never minimise them.
Each plant or installation has its own safety rules. Be aware of them and follow them carefully.
74LP PRESSURE RELIEF VALVE
SARASIN-RSBD™

5|www.trilliumflow.com
4 WARRANTY INFORMATION
Trillium Flow TechnologiesTM warrants that its products (including performance) and work will meet the specifications
of the customer’s Purchase Order. If any issue arises whilst operating the product, the customer should inform Trillium
Flow TechnologiesTM as quickly as possible. A return to the original plant should then be considered in order for Trillium
Flow TechnologiesTM to inspect the product.
Trillium Flow TechnologiesTM cannot be held responsible for any incorrect sizing and selection of a valve if the original
specification supplied by the customer was incomplete or inaccurate.
Trillium Flow TechnologiesTM does not authorise any third parties (eg, non-Trillium Flow TechnologiesTM service centres)
to repair a product of Trillium Flow TechnologiesTM’s manufacture. Any customer allowing or sub-contracting the repair
of a Trillium Flow TechnologiesTM product which is still within its warranty period will do so entirely it at their own risk.
74LP PRESSURE RELIEF VALVE
SARASIN-RSBD™

6|www.trilliumflow.com
5 TERMINOLOGY
ACCUMULATION
The pressure increase over the maximum allowable working pressure of the vessel, expressed in pressure units or as a percentage of
maximum allowable working pressure (MAWP) or design pressure.
BACK PRESSURE
Back pressure is the static pressure existing at the outlet of a safety valve device due to pressure in the discharge system.
BLOWDOWN
The difference between actual popping pressure of a safety valve and actual reseating pressure expressed as a percentage of set
pressure, or in pressure units.
CDTP (COLD DIFFERENTIAL TEST PRESSURE)
The pressure at which a safety valve is adjusted to open on the factory test bench. The cold differential test pressure includes
corrections for the service conditions of backpressure or temperature or both.
CHATTER
Rapid and erratic motion of the disc from closed to open position. This phenomenon can create damage to the valve internals, the
main effect being on the disc and the nozzle components.
CLOSING PRESSURE
The value of decreasing inlet static pressure at which the valve disc re-establishes contact with the seat or nozzle, or at which the
lift becomes zero.
LIFT
The actual travel of the disc away from closed position when a valve is relieving. LEAK TEST PRESSURE Leak test pressure is the
specified inlet static pressure at which a quantitative seat leakage test is performed in accordance with a standard procedure.
MAWP (maximum allowable working pressure)
The maximum gauge pressure permissible at the top of a vessel in its normal operating position at the designated coincident
temperature specified for that pressure.
OPERATING PRESSURE
The pressure at which protected unit is working and at which the safety valve should be tight.
OVERPRESSURE
The pressure increase over the set pressure of a safety valve, usually expressed as a percentage of the set pressure.
POPPING PRESSURE
The value of increasing inlet static pressure at which the disc moves in the opening direction at a faster rate as compared with
corresponding movement at higher or lower pressures. It applies only to valves in compressible fluid service.
SET PRESSURE
Inlet gauge pressure at which the safety valve is set to open under relief conditions
SIMMER
The audible or visible escape of fluid between the seat and disc at an inlet static pressure below the popping pressure and at no
measurable capacity.
For the purpose of this manual, the following abbreviations, definitions and terms apply
74LP PRESSURE RELIEF VALVE
SARASIN-RSBD™

6 GENERAL ADVICE
6.1 RESPONSIBILITIES
The recommended practices indicated within this manual must be respected to prevent any potential
damage to goods. It is important that all points of advice are followed closely and are implemented by
suitably qualified personnel. Trillium Flow TechnologiesTM disclaims all responsibility for maintenance operations which may be
performed by persons who are either not suitably qualified or are not considered to be an accepted part the
Trillium Flow TechnologiesTM organisation.
6.2 IDENTIFICATION PLATE
The data shown on the identification plate (figure 1) should be referenced with all requests for work, or for
the supply of spare parts.
The identification plate bears the following information fields fulfilled according code and regulation
requirements:
•Serial number (also stamped on the edge of the outlet flange)
•Safety valve type (model number)
•Inlet dimension - pressure class (rating)
•Outlet dimension - pressure class (rating)
•Orifice
•Set pressure with units
•Capacities (water and steam for economizer application)
•Backpressure with units
•Identification number
•Spring identification number
FIGURE 1
7|www.trilliumflow.com
74LP PRESSURE RELIEF VALVE
SARASIN-RSBD™

6.3 PILOT SPRING
The correct operation of a pressure relief valve depends upon its spring characteristics, resilience, and compression.
Good pilot operated ressure relief valve operation requires:
• Effective and accurate lift
• Quick closing (no damping effect when reseating)
The adjustment range of the spring must be within ± 5 % of the nominal value.
• Above than +5% adjustment can cause permanent deformation to the spring.
• Below than -5% adjustment can cause the pilot not to open fully.
• For more than +/- 5% adjustment you must contact Trillium Flow TechnologiesTM
Sarasin-RSBDTM Aftersales Department.
Spring data should be obtained from Trillium Flow TechnologiesTM Sarasin-RSBDTM Aftersales Department. When requesting
information, please quote the serial number which is shown on the valve identification plate. Without this number, it may not be
possible to identify the original valve.
8|www.trilliumflow.com
74LP PRESSURE RELIEF VALVE
SARASIN-RSBD™

9|www.trilliumflow.com
6.4 STORAGE
ATTENTION ATTENTION
Never lift the valve
horizontally, or hook to the
lifting lever or the spring.
Always lift by using the lifting
eyes or sling.
Make sure the valve is not
dropped and does not receive
strikes.
Safety valves may be received several months before an actual plant start-up date. In order that the valve performance
is not adversely affected, it is important to follow some clear rules concerning storage and handling prior to
installation.
• It is recommended that the safety valves are stored in a clean and dry environment, protected
from weather conditions, the ingress of sand, dust, or any other solid particles or foreign matter.
• Wherever possible, the valves should be stored in their original packaging.
• Blanking plugs, thread protectors and plastic covers should only be removed at the point of
installation of the valve.
• Special attention should be given to flange gasket contact surfaces and machined threads.
Impact on these areas should be a voided.
5.5 HANDLING
According to procedure 20.02, the safety valve should be handled very carefully at all times whether they are in the
packed or unpacked condition. The valves should never be subjected to any impact or striking, either directly or
indirectly through the packaging.
Never lift or handle a safety valve by its lifting lever.
The valve should be moved and transported in the upright position at all times to maintain performance accuracy.
74LP PRESSURE RELIEF VALVE
SARASIN-RSBD™

7.1 DESCRIPTION
Pilot operated pressure relief valves dedicated to LNG and FLNG installations but can also be used in any moderated
temperature application.
The nozzle has been designed to have the best flow coefficient possible.
7.2 FEATURES AND NOMENCLATURES
Body design in accordance with ASME B16.34
• ASME B&PV Code section VIII div I design
o 10% overpressure
o Blowdown between 5% and 10%
o Capacity certified gas (National Board)
• Semi nozzle design
• Body inlet connection : Flanged
• Pressure rating : from class 150 to class 300
• Operating temperature: -196°C TO 260°C.
• Standard soft goods dimensions.
• Selection of soft goods according the temperature level and chemical compatibility.
10 |www.trilliumflow.com
7 74LP SERIES BASICS
74LP PRESSURE RELIEF VALVE
SARASIN-RSBD™

11 |www.trilliumflow.com
DANGER WARNING CAUTION CAUTION
Never face the outlet of a
valve when it is
discharging as this may
result in serious personal
injury or death
Protect against high noise
levels which occur during
popping tests. Keep a
safe distance when the
test is being performed.
Helmets and gloves must
be worn to prevent any
injures while operating or
working on the valve.
Be aware that the
environment might be
extremely hot. Care should
be taken if there is any
potential steam leakage.
Superheated steam is
invisible
8 INSTALLATION
8.1 GENERAL
7.2 INLET PIPING
Piping systems and equipment through which the fluid flows must be thoroughly cleaned. Dust, deposits and metal particles must
be removed using controlled blasts of compressed air or steam.
The presence of any solid particles between the safety valve and its seat faces will have damaging effects. Any leak will lead to
improper functioning and erosion of the seating surfaces. Such erosion develops quickly, due to the high pressure. The system
should always be purged before safety valve is installed.
Prior to installation of the safety valves, all protective covers must be removed. It is recommended that any surfaces in contact with
gaskets are checked. Dimensions of gaskets should be checked: gaskets must not obstruct inlet or outlet orifices.
A pressure relief valve will only operate correctly if all installation procedures are observed.
If the inlet pressure drop is excessive, it may generate chattering effect during operation of the valve. Chattering may in turn be the
cause of seat damage, or spindle deformation.
In order to avoid chattering, the following recommendations should be followed to reduce pressure drop:
• A rounded concentric reducer from the installation will create a minimum of turbulence.
• The inlet piping must be as short as possible and direct.
• A safety valve must not be installed on piping which has a nominal diameter of less than the nominal inlet
diameter of the safety valve.
• The safety valve must not be subjected to excessive vibration which might be transmitted by the installation.
74LP PRESSURE RELIEF VALVE
SARASIN-RSBD™

8.3 OUTLET PIPING
The safety valve must not support either the weight or the installation stresses of the outlet piping.
The backpressure should be reduced by using outlet piping with a nominal diameter of at least equal to
the nominal diameter of the safety valve outlet flange, together with large radius elbow.
Recommendations
• The inside diameter of the exhausting piping must not be less than that of the safety valve outlet orifice.
• Release should be in the upwards direction and, a means of draining must be available in the
lower angle to prevent any accumulation in the body.
• The connection curve to the vertical piping must be as close as possible to the safety valve outlet
flange. The easiest solution is for the elbow to be bolted directly to the safety valve flange.
• The radius of the elbow must be as great as possible, ie, at least R ≥2.5 d.
8.4 INSTALLATION ON THE PROTECTED EQUIPMENT
The equipment nozzle on which the safety valve is to be connected must be designed to give direct
flow. There must be no obstruction between the equipment and the safety valve.
The pressure relief valve must be mounted on the upper part of the equipment which it is to protect.
Recommendations
• The safety valve must always be installed in the vertical position.
• The safety valve must be subjected to no stresses whatsoever from piping, connections or drains.
• The use of reinforcement should be considered for the inlet piping connections, to support dynamic
loading which might be caused by reaction forces at the outlet connection.
• For maintenance operations, it is necessary to have sufficient space around and above the safety
valve to perform essential tasks.
It is necessary to use a torque wrench to tighten the inlet and outlet flange bolting.
1. A check should be made that the gasket is centered on the flange
2. Tighten to 30% of the nominal torque according to the following figures:
Continue to tighten alternatively until the required torque is reached.
This should be done in 3 or 4 steps. (Nominal tighten torque p.25)
NOTE: Due to the relaxation of the gasket, it should be checked it 24 to 48 hours after the first installation.
74LP PRESSURE RELIEF VALVE
SARASIN-RSBD™
12 |www.trilliumflow.com

8.5 OPTIONS
REMOTE SENSE
• Safety valve will respond to actual system pressure conditions.
• Eliminates undesirable cycling due to excessive inlet pressure losses.
• Improves safety, under adverse operating conditions.
This optional feature permits the pilot to sense system pressure at a location that most accurately reflects the actual operating
pressure of the protected system.
A remote pressure sense connection eliminates the false system pressure indication that will occur during relieving conditions, due
to pressure losses in the inlet piping to the safety valve. Most applicable codes recommend that the inlet piping system be designed
for a maximum anticipated non-recoverable pressure loss of 3 percent. If this is not possible, the remote pressure sense connection
should be specified.
Please note that the addition of a remote pilot sense line allows the pilot to correctly sense system pressure and to keep the valve
from rapid cycling or chattering. With remote sensing the piston type, pilot operated safety valves described in this catalogue will
remain stable against the effects of high inlet pressure loss phenomena. However, relieving capacity will be proportionately reduced
whenever there is inlet pressure loss to the safety valve.
74LP PRESSURE RELIEF VALVE
SARASIN-RSBD™
13 |www.trilliumflow.com

•Field test connection
• In-service verification of set pressure.
• Simplifies the periodic testing of safety valves.
Trillium Flow TechnologiesTM pilot operated safety valves may be readily tested for verification of set pressure during normal
system operation with this option. Its connection is 1/4” NPT. The customer furnishes a pressure source,
plus a pressure-reducing valve and a test gauge for the portable field testing system.
When test pressure is slowly admitted through a pressure-reducing valve Sarasin-RSBDTM recommends
to increase the pressure up to 80-90% of set pressure and then increase the pressure with a gradient
around 0.1 Set pressure/sec, the pilot and the main valve dome are pressurized, simulating an
increased system pressure. When set pressure is reached, the pilot will actuate.
This actuation pressure may then be compared with the nameplate value. Depending upon the current
system pressure, and the characteristics of the specific pilot, the main valve may also briefly open and
close, or partially open and close, providing verification that the main valve piston is free to move.
! Pay attention to connect the field test
connection correctly!
Test gauge
Pressure-reducing
Pressure source
74LP PRESSURE RELIEF VALVE
SARASIN-RSBD™
14 |www.trilliumflow.com

•Back flow preventer
• Prevents accidental reverse flow through safety valve.
This option prevents a pilot operated safety valve from
reverse flow, when sufficient vacuum is present at the inlet
flange. The backflow preventer also prevents reverse flow
when the pressure at the outlet flange (superimposed back
pressure) is greater than the current system pressure.
Reverse flow will occur with any standard type or design of
pilot operated safety valve, when sufficient reverse
differential pressure exists. Reverse flow, should it be
induced by a reverse differential pressure, will be
prevented by this option. All backflow preventers operate
by permitting the introduction of outlet pressure into the
dome of the main valve, thereby holding the piston firmly
onto the nozzle, overcoming the effect of a reverse
differential pressure across the safety valve. The option
also includes a built-in provision to prevent reverse flow
through the pilot that would otherwise pass through the
pilot supply line, back into the system.
A Backflow Preventer should be specified whenever:
• A vacuum may be present at the inlet connection due to unusual operating conditions or a temporary
vacuum condition that may occur under startup conditions.
• The discharge of the safety valve is connected to a downstream pressure vessel, where pressure may
vary from time to time, in excess of the pressure in the upstream system.
!Pay attention to connect the back flow preventer
correctly!
74LP PRESSURE RELIEF VALVE
SARASIN-RSBD™
15 |www.trilliumflow.com

8.6 OUTDOOR INSTALLATION
A safety valve which is installed outdoors must be protected against any inclement environmental conditions to ensure that it will provide the
highest level of safety and will operate in the most effective & responsive manner.
If the safety valve is exposed to hazardous weather conditions, ingress of dirt or other foreign matter or any extremes of temperature
conditions, please ensure that:
• The valve is insulated from the inlet neck to the cover. Excessive variations in
temperature may affect the set pressure or the body structure (thermal stress).
74LP PRESSURE RELIEF VALVE
SARASIN-RSBD™
16 |www.trilliumflow.com

74LP PRESSURE RELIEF VALVE
SARASIN-RSBD™
17 |www.trilliumflow.com
No particular tool is required for the maintenance operations on the main valve of the 76 series valve. Regarding the pilot, a tool kit is
recommended to ease the lapping and the re-assembly of disc in the pilot body. Maintenance may be performed without taking the valve off
line. Please contact Trillium Flow TechnologiesTM SarasinRSBDTM aftersales team in the event of any uncertainty.
Prior to performing any maintenance operation, the system upon which the pressure relief valve is installed must not be pressurised.
9 MAINTENANCE
DANGER CAUTION CAUTION
Never face the outlet of a
valve when it is
discharging as this may
result in serious personal
injury or death. There
should be zero pressure at
the valve inlet prior to
commencement of any
work which is to be
performed.
Any person who is
working on the valve
should be aware of any
potential dangers such
as retained heat)
Helmets and gloves must
be worn to prevent any
injures while operating or
working on the valve.

9.1 DISASSEMBLY
• First, ensure pressure in bled off in the main valve!!!(Outlet & inlet)
- Unscrew Plug (Rep34)
.
• PILOT /MAIN VALVE DISSASEMBLY
- Unscrew fitting CLVF and FLPF.
- Unscrew Nuts (013) and remove Nord-lock®washers (012).
- Separate pilot, support and tubing. TAKE CARE OF THE TUBING!
FIGURE 1-PILOT/MAIN VALVE GENERAL VIEW
18 |www.trilliumflow.com
74LP PRESSURE RELIEF VALVE
SARASIN-RSBD™

•MAIN VALVE DISASSEMBLY
•Disassembly cover (002)
- Unscrew lifting lugs.
- Unscrew nuts (050) and remove lock washers (050-1)
- Take the upper cover off (002)
19 |www.trilliumflow.com
FIGURE 2-MAIN VALVE GENERAL VIEW
74LP PRESSURE RELIEF VALVE
SARASIN-RSBD™
Table of contents
Other Trillium Control Unit manuals
