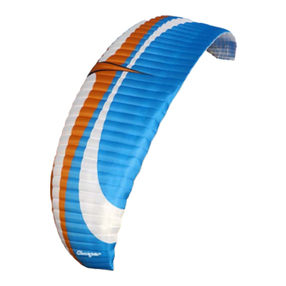
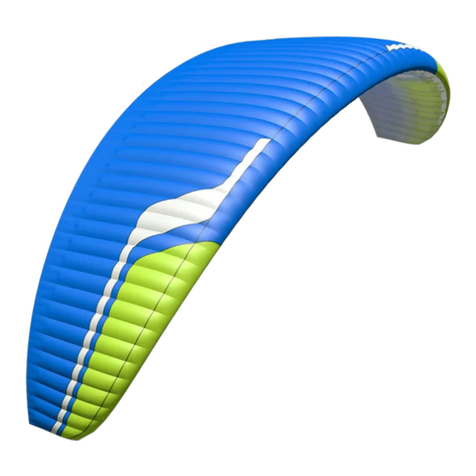
Triple Seven Bishop 42 User manual

9.11.2022 Ver 1.1
introduced
+386 8 200 43 52 www.777gliders.com
info@777gliders.com

3
Introduction
Welcome
We thank you for joining the Triple Seven team through your
purchase of this Triple Seven wing. If this is your rst Triple Seven
product, you may be interested in learning more about the people
behind it and the thoughts that go into our wings.
Triple Seven d.o.o. was founded in 2021 by brothers Urban
and Aljaz Valic. Both veterans of the international paragliding
competition scene learned the ropes by working with some of
the foremost minds in the sport. They nally felt free to let their
creativity and innovative mindsets come to the forefront with the
new brand.
Today, that spirit lives on in everything Triple Seven makes. Our
creativity ows more freely when we think a problem through
from the bottom up, and our designs reect this approach. We
make paragliders for everyone, but being performance-oriented
ourselves, we cannot help but ensure that ALL our wings are at the
very top of the performance ladder in their respective classes.
Both Aljaz and Urban enjoy a nimble wing, easy to throw around,
easy to play with, and their designs y accordingly – the hallmark
playfulness is an intrinsic part of every Triple Seven wing ever
sold. This makes our wings stand out in a crowd, and if your
ying mindset is anything like ours, we KNOW you will love every
moment of it!
This document contains complete product information and
instructions to familiarize you with the main characteristics of your
new glider.
You must take the time to read this manual carefully before the rst
ight, as a thorough knowledge of your equipment enables you to
y safely and maximize your full potential. Please pass this manual
on if you borrow or give your glider to another pilot.
If any use of Triple Seven equipment remains unclear after reading
this manual, please get in touch with your local Triple Seven dealer.
This product manual is subject to changes without prior notice.
Please check www.777gliders.com for the latest information
regarding our products.
Contents
Introduction . . . . . . . . . . . . . . . . . . . . . . . . . 2
Welcome . . . . . . . . . . . . . . . . . . . . . . . . . . 2
Before ight . . . . . . . . . . . . . . . . . . . . . . . . . 4
Elements, components . . . . . . . . . . . . . . . . . . .4
Harness . . . . . . . . . . . . . . . . . . . . . . . . . . . 4
Pilot skills required for safe operation . . . . . . . . . . . 4
First Flight. . . . . . . . . . . . . . . . . . . . . . . . . . 4
Ination, control, take-off . . . . . . . . . . . . . . . . . . 4
In ight . . . . . . . . . . . . . . . . . . . . . . . . . . . 5
Asymmetric deations . . . . . . . . . . . . . . . . . . . 6
Symmetric deations . . . . . . . . . . . . . . . . . . . .6
Wing tangle, cravat . . . . . . . . . . . . . . . . . . . . .6
Negative spin . . . . . . . . . . . . . . . . . . . . . . . .6
Deep stall . . . . . . . . . . . . . . . . . . . . . . . . . .6
Big ears . . . . . . . . . . . . . . . . . . . . . . . . . . . 7
B line stall . . . . . . . . . . . . . . . . . . . . . . . . . . 7
Spiral dive. . . . . . . . . . . . . . . . . . . . . . . . . . 7
Aerobatics . . . . . . . . . . . . . . . . . . . . . . . . .7
Primary controls failure . . . . . . . . . . . . . . . . . . .7
Landing . . . . . . . . . . . . . . . . . . . . . . . . . . .7
Maintenance . . . . . . . . . . . . . . . . . . . . . . . . 8
General advice . . . . . . . . . . . . . . . . . . . . . . .8
Packing instructions . . . . . . . . . . . . . . . . . . . . 8
Storage . . . . . . . . . . . . . . . . . . . . . . . . . . .8
Cleaning . . . . . . . . . . . . . . . . . . . . . . . . . . 8
Repair . . . . . . . . . . . . . . . . . . . . . . . . . . . . 8
Checks and control . . . . . . . . . . . . . . . . . . . . . 9
Spare parts . . . . . . . . . . . . . . . . . . . . . . . . .9
Packing . . . . . . . . . . . . . . . . . . . . . . . . . . .10
Drawings . . . . . . . . . . . . . . . . . . . . . . . . . .12
Technical data . . . . . . . . . . . . . . . . . . . . . . . 14
Materials . . . . . . . . . . . . . . . . . . . . . . . . . . 14
Riser . . . . . . . . . . . . . . . . . . . . . . . . . . . . 15
Harness connection . . . . . . . . . . . . . . . . . . . . 16
Safety and responsibility . . . . . . . . . . . . . . . . . .20
Guarantee. . . . . . . . . . . . . . . . . . . . . . . . . . 20
Registration information . . . . . . . . . . . . . . . . . . 21
Get involved . . . . . . . . . . . . . . . . . . . . . . . . 21
Contact . . . . . . . . . . . . . . . . . . . . . . . . . . .21
Online resources . . . . . . . . . . . . . . . . . . . . . . 21

45
Ination, control, take-off
The Bishop has easy take-off behaviour; however, following the markings
on your riser is essential to set up the glider for the take-off properly.
The trimmers’ correct position on the risers is when you have extended
trimmers for 3 cm from the neutral position; markings alligned. At that
point, you have your glider at the proper trim for take-off.
Wind speeds up to 25 to 30km/h are considered strong and extra care is
required for the ight.
Before flight
Elements, components
The Bishop scope of delivery is a rucksack, inner bag, compression strap,
and Triple Seven T-shirt.
Before you rush to the rst take-off, we recommend you take your time
to unpack and test your equipment on a training slope. This way, you will
have time and will not be distracted or rushed to prepare your gear, and
you will be able to properly do your rst pre-ight check.
The place should be at, free of obstacles, and with light wind. This will
enable you to nicely inate the wing and familiarize yourself with it during
ground handling.
Harness
The harness dimensions used during the certication tests was:
hangpoint height 55 cm, chest-strap width 44 cm.
Pilot skills required for safe operation
To y the Bishop tandem wing, one needs to be familiar with ying at
least a high B class wing. If the country you are ying in, demands the
tandme licence to y one, you are obligatory to have one for ying the
Bishop wing. The Bishop is certied in the B class, so the pilots skills
need to be on par with the demands of the B class wing.
First Flight
Now that you have already familiarized yourself with your new glider while
ground handling on a training slope, you are ready for your rst ight. For
the rst ight, it is recommended that you choose a familiar ying area
and y your new glider in calm conditions.
Pre-ight check equipment
Before every ight, you need to do a pre-ight check and the inspection
of other equipment. Learn to do this, as it takes no extra time. This
procedure may vary depending on the instructor, pilot, or equipment
settings. Some pilots have their wings always connected to the harness.
However, you should have a consistent method of checking and preparing
your equipment and doing the nal pre-ight check.
After the arrival on take-off, assess the suitability of ying conditions.
While walking around the canopy, preparing and spreading out the wing,
you should, at the same time, inspect the canopy.
After you check the lines and connect the risers to the harness, grab
the lines and slide them through your ngers as you walk towards the
canopy. This way, you double-check that the lines are not tangled, stuck,
or damaged.
Final pre-ight check
Check the risers for a twist and that the carabiners are correctly closed.
Check the lines. The A riser lines should be on top, and all lines
untangled. Check that none of the lines are lying over or below the
canopy.
Check the canopy. The glider should be spread out in an arch, and all
cells open.
Check the wind, take-off and airspace. The wind should be favourable
for take-off and the pilot’s level of expertise. Airspace should be cleared,
together with the take-off area.

67
Big ears
This is a safe method to moderately loose altitude while still maintaining
forward speed. To do big ears, we recommend trims released at 50 %
for the normal weight, 30 % for the top weight and 60 % for the smaller
loadings. Now pull the outer A lines (the A2 risers in the drawing) on both
sides. As long as you keep the A2 risers pulled, the wing tips stay folded
and the sink speed increases. With Bishop risers, you have an option of
securing the ears in the cleat that is specially designed for this. Do note,
that it is advides that you stay with your palms on the cleat in order to
release the line from it if necessary.
To regain normal ight, release the A2 risers, and if necessary apply
the brakes with short impulse movements. Release big ears at least
100 meters above the ground. While using big ears, the wing speed
decreases, which is why we also recommend using the half open
trimmers in combination with big ears to maintain enough horizontal
speed and to also additionally increase vertical speed. Be careful not to
pull the brakes while making the ears! Steering is done by weight shift
only.
B line stall
While in the B-stall the glider has no horizontal speed and the sink rate
increases to about -8m/s. To enter the B-stall reach for the B risers just
below the maillons and pull both B line risers symmetrically for about 20
cm. To exit the manoeuvre, simultaneously release both risers quickly. On
exit the Bishop gently dives without deep stall tendencies.
Spiral dive
We may enter the spiral dive when applying the brake on one side for
an extended period. There is a possibility of losing consciousness while
in the spiral dive. Never make a spiral with more than 16-18m/s sinking
speed. Going over this limit, you enter a nose-down spiral. This is already
out of the scope of this manual and is, therefore, forbidden. In fast spirals,
it may be necessary to apply the outer brake to begin exiting the spiral
dive.
Winch launch
The Bishop is easy to launch using a winch. We recommend using the
same trimmer position as with normal take off, 3 cm longer than the trim
position. In order to practice this launching technique, special training is
needed, and you have to be aware of the procedures and dangers, which
are specic for winching. We do not recommend using any special towing
device which accelerates the glider during the winch launch.
Aerobatics
The Bishop is not designed for aerobatic ying. Therefore, these may not
be performed on this glider. In addition to this, any extreme maneuvers
place unnecessary stress on the glider and shorten its lifespan.
Primary controls failure
If, for any reason, you cannot use the brake lines, you have to pilot the
wing to the landing-place by utilizing a weight shift. Weight shift should be
enough to land the glider safely. You can also use the C risers to control
and steer the wing. Be careful not to over-handle the glider by using the C
riser technique when steering. By pulling the C risers too strong, you can
cause a stall or a negative spin.
Landing
To achieve the best possible are, we recommend using 3 cm extended
trim position from the neutral position.
In flight
Asymmetric deations
Strong turbulence may cause the wing to collapse asymmetrically. Before
this occurs the brake lines and the feeling of the harness will transmit
a loss of pressure to the pilot. This feedback is used in active piloting
to prevent a collapse. If the collapse does occur, the Bishop will easily
re-inate without the pilot’s reaction, but the wing will turn towards the
collapsed side.
To prevent this from happening turn and actively recover the asymmetric
collapse by weight shifting and applying appropriate brake input on the
side that is still ying. Be careful not to over-brake your wing’s ying side.
This is enough to maintain your course and give the glider enough time
to recover the collapsed side by itself. To actively reopen the collapsed
side after course stabilization, pull the brake line on the collapsed side
rmly and release it. You can do this several times with a smooth pumping
motion. After the recovery, release the brake lines for your glider to regain
its trim speed. You must be aware of the fact that asymmetric collapses
are much more radical when ying accelerated. This is due to the
difference in weight and the inertia of the canopy and the pilot hanging
below.
Symmetric deations
Symmetric or frontal deations normally reopen immediately by
themselves without pilot’s input. The glider will then regain its airspeed
accompanied by a small surge forwards. To actively control this event,
apply both brakes slightly when the collapse occurs and then instantly
release the brakes to let the glider y. Be prepared to compensate for the
glider’s slight surge forward while returning to normal ying.
Wing tangle, cravat
A cravat is very unlikely to happen with the Bishop, but it may occur after
a severe deation or in a cascading situation, when the wing tip gets
caught in the glider’s lines. A pilot should be familiar with the procedure
of handling this situation with any glider. Familiarize yourself with the
stabilizer’s main line (“stabilo” line) already on the ground. If a cravat
occurs, the rst thing to do is to try to keep the glider ying on a straight
course. Do this by weight shifting and counter braking the untangled
side. After that, grab the stabilizer’s main line on the tangled side and
pull it down until it becomes tight again. At this point the cravat normally
releases itself.
Possible solutions of the cravat situations (consult your SIV instructor):
• Pulling the wing tip “stabilo” line
• If you are in a situation where you have a cravat and you are low
in rotation or even with twisted risers, then the only solution is the
reserve parachute.
Negative spin
In normal ight you are far from negative spin. But, certain circumstances
may lead to it. Should this occur, just release the brake lines progressively
and let the wing regain its ying speed. Be prepared for the glider to surge
forward, compensating the surge with brake input if necessary.
Deep stall
Generally when in deep stall, the wing has no forward motion and at
the same time high sink speed. When in deep stall the wing is almost
fully inated. With the Bishop it is very unlikely to get into this situation
unintentionally. This could possibly happen if you are ying at a very low
speed in turbulent conditions. Also the porosity of the material and line
stretch on a very old glider can increase the possibility of the deep stall
tendency. If you apply the brakes a little bit too much you enter the full
stall. If you release the brakes just a little bit too much the wing returns to
normal ight

89
Checks and control
To ensure the wing’s airworthiness the Bishop has to be periodically
serviced and checked to guarantee that the glider continues to full
the EN certication results and to extend your glider’s lifespan. We
recommend a line check and trim inspection every 100hours or 300 take
offs or 24 months depending what happens rst. This inspection includes
checking the suspension lines, line geometry, riser geometry and the
permeability of the canopy material. A certied inspector can then dene
the check interval depending on the glider’s condition. Please note that
the condition of the glider can vary considerably depending on the type of
usage and environment. Salty coastal air or dunes will considerably affect
your wing’s material. For more information please visit our website.
To obtain the dimensions and materials needed for the check of the wing,
please visit the Triple Seven web page.
Spare parts
To obtain the spare parts, you can use info@777gliders.com
To obtain the spare lines you can do so via web page at
https://777gliders.com/ordering-spare-lines/
Maintenance
General advice
Careful maintenance of your glider and the following simple guidelines will
ensure a much longer airworthiness and performance of your wing:
• Pack your glider after you land and do not unnecessarily expose it to
UV radiation by leaving it on the landing site unpacked. The sun UV
radiation degrades the cloth and lines material.
• Fold your glider like recommended under the section of packing
instructions.
• If the glider is damp or wet when you pack it, partially unfold it at
home to allow it to dry. Do not dry it in direct sunlight.
• Avoid exposing the glider to violent shocks, such as the leading edge
hitting the ground.
• Avoid dragging the glider on the ground or through rocky terrain as
you might damage the lines or canopy.
• Avoid stepping on the lines or canopy, especially when they are lying
on a hard surface.
• Avoid exposing the glider to salt water, as it damages the lines and
the canopy material (wash with fresh water).
• Avoid bending your lines, especially in a small radius.
• Avoid opening your glider in strong winds without rst untangling the
lines.
• In general, avoid exposing your glider to very hot or humid
environments, UV radiation or chemicals.
Packing instructions
It is important to correctly pack your glider as this prolongs its lifespan.
We recommend that you fold the glider like a harmonica, neatly aligning
the proles with the leading edge reinforcements side by side. The wing
should then be folded in three parts or two folds. The wing should be
packed as loosely as possible. While packing be careful not to trap any
grasshoppers inside your canopy as they will tear the canopy cloth.
This technique will make your glider last longer and ensure its best
performance.
Storage
Correctly packed and dried out, store your glider in a dry place at room
temperature. The glider should not be stored damp, wet, sandy, salty or
with objects inside the cells of the glider. Keep your equipment away from
any chemicals.
Cleaning
If necessary always clean your glider with fresh water and a cloth only,
without using any cleaning chemicals. This includes also the lines and
canopy. More importantly, always remove any stones or sand from the
canopy as they will gradually damage the material and reduce the glider’s
lifespan.
Repair
To repair small damages (less than 5cm) on the canopy cloth, you can
use the rip stop tape. Greater damages, including stitches and lines
must be repaired by a specialized repair shop. Damaged lines should
be replaced by a Triple Seven dealer. When replacing a line it should
always be compared with the counterpart for adjusting the appropriate
length. After the line was repaired, the wing should be inated before
ying, to ensure that everything was done correctly. Major repairs, such as
replacing panels, should only be carried out by a Triple Seven distributor
or Triple Seven. If you are unsure about the damage or in any doubt
please contact Triple Seven.

10 11
Packing

12 13
Drawings
1. Suspension lines
2. Risers
3. Main lines
4. Middle cascades
5. Upper cascades
6. Brake lines
1.
2.
3.
4.
5.
22
3.
2.
5.
4.
1.
1. Middle lines
2. Risers
3. Main lines
4. Top lines
5. Canopy
1. Top canopy
2. Bottom canopy
3. Trailing edge
4. Leadin edge
5. Cell opening

14 15
Technical data Materials Riser
Bishop 42
Cell number 55
Flat Area (m2) 41.1
Span (m) 14.8
Aspect ratio 5.3
Projected Area (m2) 35
Span (m) 11.47
Projected Aspect ratio 3.7
Trimmers NO Riser lengths (difference not more than ±5 mm from the lengths laid down in the
Risers A A’ B C
Bishop 42 Lenght mm 400 400 400 390 Standard
Lenght mm 400 400 437 500 Accelerated
Trimmer distance 100 mm
In flight Weight 42
Minimum kg 120
Maximum kg 225
Wing weight 8400 g
Certification B
Bishop All sizes
CANOPY FABRIC CODE
Leading edge Porcher Skytex 38
Upper surface MJ32MF P/D Coating
Bottom surface MJ32MF P/D Coating
Profiles Skytex Porcher 40 hard
SUSPENSION LINES FABRIC CODE
Upper cascades PPSL, DSL
Middle1 cascades TSL
Main TSL
Brake upper DSL
Brake middle 1 TSL
Brake middle 2 TSL
Brake main DSL
RISERS FABRIC CODE
Material 25 mm Kevlar-reinforced Nylon
Trimmers Press trim
1.
2.
3.
4.
5.
6.
1. Maillon Rapide
2. A riser
3. A’ riser
4. B riser
5. C risers
6. Trimmer

16 17
Harness connection
The Bishop has been tested with both hard and soft
spreaders so both can be used for tandem ying. It is
important you connect your harness to wing through
the spreaders in the right manner.
Flying direction
Passenger
Pilot
Wing

18 19

20 21
Safety and responsibility
Paragliding is a dangerous and high risk activity, where safety depends on the person practicing it. By purchasing and using this equipment you
declare that you are a certied paragliding pilot, and you accept all risks involved in paragliding activities, including serious injury and death. Improper
use or misuse of paragliding equipment considerably increases the risks.
The designer, manufacturer, distributor, wholesaler and retailer cannot and will not guarantee your safety when using this equipment, nor accept
responsibility for any damage, injury or death as a result of the use of this equipment. This equipment should only be used by qualied and competent
pilots.You must not use this equipment if you are not trained.
Guarantee
Triple Seven WARRANTY:
All Triple Seven products are fully warranted for 24 months, against material defects that are not the result of normal wear or accidental damage.
Spare parts
To obtain the spare parts, you can use info@777gliders.com To obtain the spare lines you can do so via web page at
https://777gliders.com/ordering-spare-lines/
Warranty online reference:
www.777gliders.com/warranty
Glider disposal
Our sport takes place in the natural environment, and we should do everything to preserve our environment. A glider
is basically made of nylon, synthetic bres and metal. At the end of your paraglider’s life, please remove all metal
parts and put the different materials in an appropriate waste/recycling plant.
Registration information
To fully use all Triple Seven maintenance and warranty services you need to register your glider on our website. Wanting to provide
good product support, we invite you to do so, even if you bought your glider second-hand.
Triple Seven Warranty & Product registration:
http://www.777gliders.com/tripleseven/support
Get involved
As a new Triple Seven pilot we invite you to contact us in case of any technical or practical issues regarding equipment or
techniques. We also invite you to send us your ying photos, videos or even postcards. We would like to hear from you and your
exciting adventures with your new glider! Finally, join our Facebook community and share the passion. Have fun!
Contact
Triple Seven Gliders
Company: 777 jadralna padala d.o.o.
Address: Ulica Ane Ziherlove 10
Postal Code / City: 1000 Ljubljana
Country: Slovenia
Tel.: +386 8 200 43 52
Email: inf[email protected]
Online resources
For complete help, the latest news, product information and
support go to:
Official website:
www.777gliders.com
Facebook:
www.facebook.com/TripleSevenParagliders
Instagram
www.instagram.com/triplesevengliders
Newsletter register:
www.777gliders.com/newsletter/subscriptions

22
Table of contents
Other Triple Seven Aircraft manuals

Triple Seven
Triple Seven ROOK 777 XC SUPERSTAR User manual
Triple Seven
Triple Seven Queen 3 User manual
Triple Seven
Triple Seven GAMBIT User manual

Triple Seven
Triple Seven MATRIX User manual

Triple Seven
Triple Seven King 2 User manual
Triple Seven
Triple Seven KNIGHT Series User manual
Triple Seven
Triple Seven ROOK2 User manual
Triple Seven
Triple Seven QUEEN Series User manual

Triple Seven
Triple Seven DECK S User manual

Triple Seven
Triple Seven D-LIGHT Series User manual
