Niviuk MAKAN User manual

2
WELCOME
USER MANUAL
GENERAL CHARACTERISTICS
Overview of the harness
Technical data
Target group
Design process
UNPACKING AND ASSEMBLY
Assembling the harness
Connecting the wing
Adjusting the harness
Pilot position
Chest straps
Shoulder straps
Speed-bar
Installing the protectors and accessories
Installing the parachute
IN FLIGHT
Pre-flight checks
Launch
Landing
Flying above water or landing in water
TYPES OF FLIGHT
Winch flying
Tandem
Other
CARE AND MAINTENANCE
Maintenance
Storage
Checks and inspections
Repairs
Niviuk Service
Product registration
SAFETY AND RESPONSIBILITY
GUARANTEE
SPECIFICATIONS
Compatibility
Certification
CONTENTS
3
4
15
5
8
16
17
19
19
20

NIVIUK GLIDERS & AIR GAMES SL
C/ Del Ter 6 - nave D 17165 La Cellera de Ter - Girona - Spain Tel: +34 972 422 878 [email protected]
3
niviuk.com
We welcome you to our team and thank you for the trust you have placed in
our MAKAN harness.
We would like to share with you the excitement and passion that went into the process of
creating this harness. The MAKAN has been designed to offer excellent maneuverability and to
complement different learning and progression stages in your paragliding journey.
GIVE IMPORTANCE
TO THE SMALL
DETAILS TO MAKE
BIG THINGS HAPPEN
THIS IS THE MANUAL AND WE RECOMMEND YOU READ IT CAREFULLY BEFORE USING THE HARNESS.
THE NIVIUK TEAM
“
WELCOME

4niviuk.com
GET READY TO TAKE OFFGET READY TO TAKE OFF
This manual provides you with the necessary information on the main characteristics of your new
harness. However, it should be noted that it does not serve to instruct you to be able to fly this
type of harness. Flying instruction can only be provided by flying schools recognised by the free
flying federation of your country.
You can get more information from our website at niviuk.com
We would like to remind you of the importance of carefully reading the contents of this manual for
your new MAKAN harness.
Severe injury can occur as a result of misuse of this equipment.

6
Target group
The MAKAN is the harness designed by Niviuk for instruction. It is a harness ideal
for beginning to fly.
It has been designed to offer a high degree of comfort and excellent maneuverability, as it adapts
easily to the pilot’s body during each flight.
Technical data
WEIGHT
PILOT HEIGHT
SEAT BOARD
WIDTH
3.5 kg 3.7 kg 4.3 kg 4.9 kg
LENGHT
150 -165 cm 160 -175 cm 173-187 cm 182-200 cm
33 cm 35 cm 37,5 cm 43 cm
45,5 cm 47,5 cm 51 cm 54,5 cm
120 kg 120 kg 120 kg 120 kg
EN/LTF EN/LTF EN/LTF EN/LTF
MAXIMUM LOAD
CERTIFICATION
XSS SM ML LXL
45
99
150
180
160
190
170
200
155
185
165
195
175
50
105
55
112
60
119
65
125
70
132
75
139
80
145
85
152
90
159
95
165
100
172
105
178
110
185
115
192
120
198
Weight (kg)
Weight (Ibs)
Height (cm)
XS-S
XS-S/S-M
S-M
S-M/ M-L
M-L
M-L/L-XL
L-X L

7
niviuk.com
Design process
The NIVIUK team has done extensive and meticulous work. Numerous adjustments were made
as a result of flight testing of the various prototypes. These were tested in all flight conditions.
This intensive development of an innovative and modern harness has been made possible by the
extensive experience of our team. All NIVIUK products undergo a thorough final inspection.
MAXIMUM SAFETY INYOUR FLYING:
A 16 cm/35 G foam protector with
great impact protection combined with
durable materials. It features a simple
buckle system for easy fastening
of the harness.
IDEAL FOR EXPLORING:
With its stable nature, it will allow you
to discover the various aspects of free
flight with total confidence. Learn and
enjoy yourself with a harness which is
both comfortable and maneuverable
so the beginning of your flying
career starts with the most pleasant
experiences.
MADE TO YOUR MEASURE:
Its ergonomic design includes foam
reinforcements in the seat and
backrest to ensure maximum comfort
in all flights. In addition, the adjustable
straps allow the quick and easy
adjustment of the harness to the pilot’s
body shape.
ONE OF THE LIGHTEST
HARNESSES IN ITS CATEGORY:
The MAKAN brings a wide range of
advantages while learning to fly as it
is easy to transport - ideal for when
the pilot has to move from one flight
area to another or carry it back up the
training hill. A lower weight also makes
it easier to practise initial inflations and
its reduced volume means that it is
easier to compress, pack and store.

8
UNPACKING AND
ASSEMBLY
Assembling the harness
Connecting the harness to the wing
Adjusting the harness
We recommend that before your first flight the initial adjustment of the harness is made
using a hang frame.
Position the harness and hang it from the carabiners. Sit in the harness and close it. Then adjust it
to your personal preference using the adjustable straps.
To adjust the harness to your body shape, a number of easy-to-use adjustable straps have been
incorporated into the MAKAN.
The MAKAN has two carabiners to connect the harness to the paraglider. The right carabiner is
connected to the right riser of the wing. The left carabiner is therefore connected to the left riser.
PILOT POSITION
The MAKAN can be adjusted to regulate
the angle of the pilot. This angle can
be varied by adjusting the appropriate
straps.
The angle of the back and shoulder
straps can also be adjusted.
CHEST STRAP
The chest strap which controls the
distance between the two carabiners
can be adjusted from 36 - 45 cm (in
sizes XS-S and S-M) and from 40 - 49
cm (in sizes M-L and L-XL). For the
first flight with the MAKAN, we suggest
that the strap is set to the middle
position, and then gradually ensure
that the option that best suits your
needs is selected in flight. The optimum
adjustment will depend on the type of
wing you are flying with the MAKAN.
When the chest strap is tighter, the
wing feels more stable. However, over-
tightening the strap may enhance the
“twist” effect. A wide distance between
carabiners increases the
turning capacity.
SHOULDER STRAPS
The optimum adjustment of the shoulder
straps depends on the height of the pilot.
Sit up straight with chest strap and legs
loops closed and adjust the shoulder
straps symmetrically.
SPEED-BAR
The MAKAN comes fitted with a speed-
bar. It is important to adjust the harness
before adjusting the speed-bar, as the
position of the speed-bar depends on the
length of the legs.
Use a hang frame to adjust the speed-
bar before your initial flight.
Sit the harness and adopt your flying
position to adjust the cords symmetrically
on both sides.
If the cords are set too short, they can
cause constant tension on the speed
system, which could be dangerous.
Please remember that it is always
preferable for the speed-bar to be set
longer than shorter.
1
2
3
4
You will find a tutorial about the correct harness adjustment on our Youtube channel:
www.youtube.com/watch?v=ICWhXC0QyQ4
2
1
4
3
10
You can find a tutorial on correctly installing parachutes in our harnesses on our Youtube channel:
https://youtu.be/VNd7EIRVC3g
*Please note: the parachute must be fitted inside the container. In case the parachute is too small
and to avoid movement, foam must be incorporated to solve this problem. If it fits too loosely in
the inner container there is a possibility that it may twist or that the lines or webbing may not be
positioned correctly, which may make it difficult or impossible to deploy the parachute.
TAKE CARE: your safety depends on the correct installation of your emergency parachute.
This process should be performed with utmost care. We recommend the parachute is
installed by qualified professionals.
Installing the parachute
Ready the deployment bag and the parachute
handle. Below you will see how to connect
them.
To connect them, the loop at the end of the
handle strap must be inserted through the
attachment loop on the parachute container.
Pass the parachute handle through the loop
to form a lark’s foot/clove hitch.
Tighten the knot by pulling firmly on the
handle.
Check that the Y-bridle on the harness is
free of twists and tangles.

6
7
5
8
9
11
Connect the parachute bridle to the Y-bridle
using a 7 mm maillon.
Use rubber bands at each end of the
maillion to avoid any slipping or movement.
Prepare the materials you will use to
connect the parachute and the Y-bridle of
the harness.
(1 x Rescue INOX 7MM).
Insert the parachute into the parachute
container of the harness.
The bridle connecting the parachute to the handle must pass under the initial attachment point
“1”. This pictures show the correct and the incorrect position of the bridle.
Pass the Nylon rod through the small
hole and insert the parachute handle into
its compartment. This will facilitate the
installation and closing process of all the
numbered flaps (detailed below).

10
12
13 14
11
12
Use a thin piece of string or paraglider
line to close the flaps. Pass the string/line
through the yellow loop, leaving the same
distance on both sides.
Pull the string/line until the yellow loop is
completely through the hole.
Then pull the loop through the hole
labelled “3”.
Insert the two ends of the string/line through
the back of the hole labelled “2”.
Identify the different numbers of the flaps to
perform the correct closing sequence of the
parachute compartment.

15
16 17
18 19
13
Close the zip as indicated in the image.
Make sure that the zip is securely closed
from the start of the zip all the way to the
top of the harness.
Pass the Nylon rod through the yellow loop
to secure.
Insert the Nylon rod into the hole and
carefully remove the string/line from the
yellow loop.
Insert the two ends of the string/line through the back of the eyelet labelled “4” and pull until the
loop passes completely through.

20
21
14
TIPS AND TRICKS:
Completely close the lower zip and make
sure that no area is left open.
Make sure that the bridle connecting the handle to the parachute is tightened securely.
These images show the correct and incorrect installation.
Here you can see the final result if the steps
are followed correctly.
The Makan harness is delivered with extra foam to adjust the
volume of the container in case a small parachute is used.
As far as possible, the parachute must always remain in a
fixed position inside the container to avoid any displacement
which could hinder its deployment.

15
niviuk.com
IN FLIGHTIN FLIGHT
For maximum safety, use a comprehensive and consistent system of pre-flight checks and repeat
the same sequence before each flight.
Check the following:
There is no visible damage to the harness or carabiners that could affect the flight.
All buckles, straps and zips are connected/closed. The buckles should snap into place when you
close them, and a gentle tug on them verifies this. Take extra care on sites with snow or sand.
The glider is correctly connected to the harness and both carabiners are secured with their
locking mechanisms closed.
All pockets are properly closed and items hanging from the harness are secured/attached.
Check again that you have secured the chest strap and leg loops before launch.
The parachute container is properly closed and the pins are in the proper position.
The deployment handle is fully inserted into the pockets.
Make sure the weather conditions are suitable for your skill and experience level. If you make the
decision to fly, put on the harness and make sure all buckles are closed correctly and your legs
are through the leg loops. Your life depends on it.
Before you take off, ensure you have completed all daily and pre-flight checks.
CAUTION: stay away from mountain relief if you have to use your hands to get into the harness.
You should always have your hands on the brakes when near terrain.
If you need to use your hands to get into the harness, try adjusting the harness
using a hang frame.
Before landing, slide your legs forward in the harness to assume a standing position. Never land
whilst still in the seated position as this may cause a back injury. Standing up before landing is an
active safety decision and is much more effective than relying on the passive system of the back
protector. It is not necessary to adjust the harness before landing. Simply straighten your legs and
get into a standing position and prepare to land.
CAREFUL: flying above water during a cross-country flight or SIV course exposes the pilot to the
risk of a water landing. This situation is very dangerous and flying with a life jacket is essential
during an SIV course. We recommend avoiding this situation.
After a water landing, the foam back protector floats and there is a risk of the pilot being pushed
underwater. To avoid this situation, the pilot must wear a life jacket and just before hitting the water
it is recommended to undo the buckles (without compromising safety) to allow a rapid exit from
the harness to avoid the risk of drowning. This way you will be able to reach the safety
boat more easily.
In case of an immersion in water, the protector and the harness must be allowed to dry completely.
The parachute also has to be removed and spread out to dry properly. Once dried, it must be
folded, packed and installed correctly. See the section on “installing the parachute”.
Do not store your equipment if it is still wet or damp - wait for it to dry completely.
Pre-flight checks
Launch
Landing
Flying above water or landing in water

16
TYPES OF
FLYING
Winch flying
Tandem
Other
The MAKAN is suitable for winch launching.
The winch release is attached by means of the main carabiners on the risers, where the
wing is attached.
The MAKAN is not recommended for tandem operation.
The MAKAN is not designed or recommended for aerobatic or acro flying.
We consider aerobatic/acrobatic flights to be any form of piloting which varies from standard
flights. Learning aerobatic/acrobatic manoeuvres should be conducted under the supervision of
qualified instructors within a school environment and over water with all safety/rescue elements in
place.

17
CARE AND
MAINTENANCE
Maintenance Storage Checks and
inspections
The materials used in the
MAKAN have been carefully
selected to ensure maximum
durability. We recommend
checking the harness after
every impact, bad launch or
landing, and if it shows signs
of damage or heavy wear.
We recommend the harness
is fully inspected in an
authorised workshop every
two years and the carabiners
are also changed
every two years.
To prevent wear or damage to
the harness, it is important to
avoid dragging the harness
on the ground, over stones
or abrasive surfaces. Do not
expose it unnecessarily to UV
radiation (sun light). Whenever
possible, protect the harness
from moisture and heat.
Store all your paragliding
equipment in a cool, dry
place, and never store it when
it is wet or damp.
Keep your harness as clean
as possible by regularly
wiping off dirt with a plastic
brush and/or a damp cloth. If
the harness is very dirty, clean
it with water and mild soap.
Allow it to dry naturally in a
well-ventilated area without
direct sun light.
Keep your equipment in the
in a cool, dry place away from
solvents, fuels or oils. Do not
leave the gear inside a car
boot, as cars left in the sun
can become very hot. The
inside of a rucksack can reach
temperatures up to 60º C.
Weight should not be laid
on top of the equipment.
When storing the harness in a
rucksack, care must be taken
to avoid damaging the shape
of the harness. Never store it
when still damp. Never use
detergents to clean it. Dry the
harness in a well-ventilated
area. If your parachute gets
wet (e.g. if you fall into water)
it must be removed from the
harness, dried and repacked
before being put back
into the container.
Repairs and replacement
of components may not be
carried out by the pilot, but
only by the manufacturer or in
an authorised workshop.
The manufacturer and
authorised workshop
personnel may use materials
and techniques that ensure
optimum functionality in
accordance with the
product certification.
In addition to daily and pre-
flight checks, the MAKAN
must be thoroughly inspected
at every parachute repack,
which is normally once a year.
Additional checks should be
carried out after every incident,
bad launch or landing, or in
case of signs of
damage or wear.
Every two years or 100 flying
hours (whichever comes first),
the harness must be inspected
in an autorised workshop.
If in doubt, contact a
professional. These are the
required inspections:
Check webbing and buckles
for damage, especially in
areas that are not easily
visible, such as the attachment
points on the inside of the
carabiner.
All seams must be intact
and any anomalies must be
repaired immediately to avoid
aggravating the problem.
The main aluminium
carabiners must be replaced
every two years or 500 flying
hours or if they have any
signs of damage. Impacts can
create undetectable damage
that can result in structural
failure under
continuous loading.

18
Repairs Niviuk Service Product
registration
Any repairs involving
critical parts of the harness
must be carried out by the
manufacturer or an authorised
workshop. This ensures that
the most appropriate materials
and correct repair techniques
are applied.
If you are not qualified to do
so, do not attempt to repair the
harness yourself.
We offer our pilots the
best service for their flying
equipment. This is why we
have created the official
Niviuk Service workshop,
to guarantee the safety and
durability of your new product.
The extensive experience
of our specialist staff makes
our official workshop the best
place to inspect and repair
your equipment.
The harness must be
inspected every two years.
For more information, please
consult the Niviuk Service
section of our web site.
For better tracking of your
harness, you can register your
product on the Niviuk website
in the MyNiviuk section.

19
SAFETY AND
RESPONSIBILITY
GUARANTEE
It is well known that free-flying with a paraglider is considered a high-risk sport, where safety
depends on the person who is practicing it.
Incorrect use of this equipment may cause severe, life-changing injuries to the pilot, or even
death. Manufacturers and dealers cannot be held responsible for your decisions, actions or
accidents that may result from participating in this sport.
You must not use this equipment if you have not been properly trained to use it. Do not take
advice or accept any informal training from anyone who is not properly qualified
as a flight instructor.
The equipment and components are covered by a 2-year warranty against any manufacturing
defect.
If you notice any defects in your harness, please contact Niviuk immediately for a more thorough
inspection.
The warranty does not cover misuse of the equipment.
SPECIFICATIONS
Compatibility
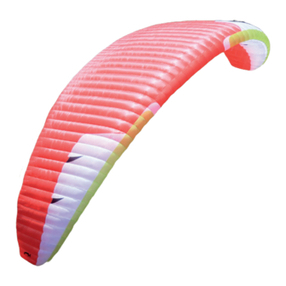
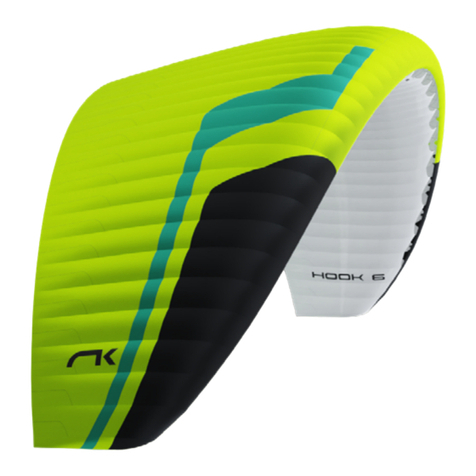
KOYOT 4 KOYOT 4 P
HOOK 5 P
IKUMA 2 P
HOOK 5 IKUMA 2
RECOMMENDED COMPATIBLE
Table of contents
Other Niviuk Aircraft manuals

Niviuk
Niviuk LINK 2 User manual

Niviuk
Niviuk Takoo 4 User manual

Niviuk
Niviuk TAKOO 5 User manual

Niviuk
Niviuk DOBERMANN 3 User manual

Niviuk
Niviuk HOOK 2 User manual

Niviuk
Niviuk ICEPEAK 6 User manual

Niviuk
Niviuk R-BUS User manual

Niviuk
Niviuk HOOK 5 P User manual

Niviuk
Niviuk TAKOO 2 User manual

Niviuk
Niviuk KODE P User manual

Niviuk
Niviuk ICEPEAK X-ONE User manual

Niviuk
Niviuk Kougar-2 User manual

Niviuk
Niviuk KLIMBER 2 P User manual

Niviuk
Niviuk Arktik User manual

Niviuk
Niviuk ICEPEAK 3 22 User manual

Niviuk
Niviuk ARTIK P User manual

Niviuk
Niviuk PEAK 6 User manual

Niviuk
Niviuk KOYOT 3 User manual

Niviuk
Niviuk Hook 4 User manual

Niviuk
Niviuk Hook 5 User manual