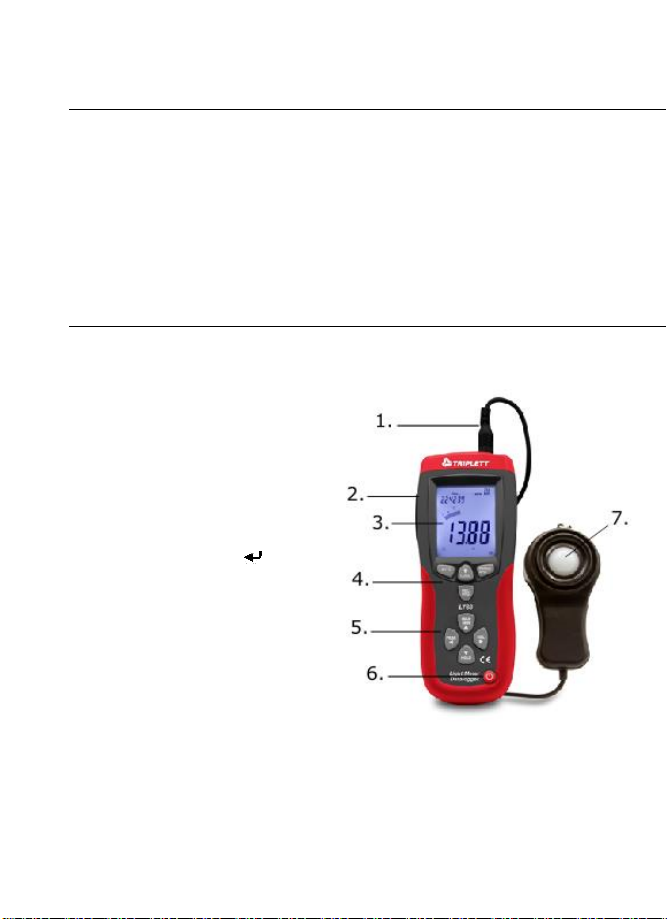
Triplett LT68 User manual
Other Triplett Measuring Instrument manuals

Triplett
Triplett RHT05 User manual

Triplett
Triplett GSM350 User manual

Triplett
Triplett 630-APL User manual

Triplett
Triplett LT80 User manual

Triplett
Triplett DPR302 User manual

Triplett
Triplett LT65 User manual

Triplett
Triplett RFT10 User manual

Triplett
Triplett PR600 User manual

Triplett
Triplett CTX690 User manual

Triplett
Triplett VBDL100 User manual

Triplett
Triplett EM300 User manual

Triplett
Triplett PH180 User manual

Triplett
Triplett CFM100 User manual

Triplett
Triplett 9200B User manual

Triplett
Triplett VCT1000 User manual

Triplett
Triplett hotwire fox User manual

Triplett
Triplett EM400 User manual

Triplett
Triplett SoniChek PRO 3550 User manual

Triplett
Triplett EG480 User manual

Triplett
Triplett TA200 User manual