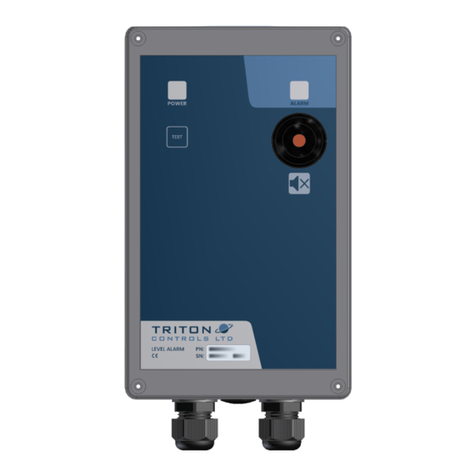
Triton TRIT001-US Assembly instructions

Installation and user guide- 1
TRITON™ Pool Alarm: TRIT001-US
I
NSTALLATION GUIDE AND USER MANUAL
T
O READ CAREFULLY AND TO KEEP FOR LATER LOOK UP
S
YNOPSIS
1Introduction – Important Safety Precautions ............................................................................................. 2
2Checking the package.................................................................................................................................... 3
3Quick Start Guide.......................................................................................................................................... 4
4Operating principle........................................................................................................................................ 5
5TRITON™ installation.................................................................................................................................. 9
5.1 Placing the Batteries ............................................................................................................................... 10
5.2 Location choice....................................................................................................................................... 10
5.3 Temporary installation............................................................................................................................ 11
5.4 Installation Tests..................................................................................................................................... 11
5.5 Final installation ..................................................................................................................................... 12
6Recommendations for remote siren installation........................................................................................ 13
7TRITON™ Operating principle................................................................................................................. 15
7.1 I want to swim ........................................................................................................................................ 15
7.2 Automatic reset....................................................................................................................................... 16
7.3 Manual reset............................................................................................................................................ 16
7.4 Too much wind....................................................................................................................................... 16
7.5 Attenuated siren mode ............................................................................................................................ 17
7.6 Password Change mode.......................................................................................................................... 17
7.7 OFF mode............................................................................................................................................... 17
7.8 Replacing the batteries............................................................................................................................ 18
7.9 I have an issue with my falling detector ................................................................................................. 18
8FAQ Frequently asked questions................................................................................................................ 20
9Warranty and after sale services................................................................................................................ 23
10 Monthly Tests............................................................................................................................................... 24
FCC REGULATION
This device complies with part 15 of the FCC Rules. Operation is subject to the following conditions: (1) This
device may not cause harmful interference, and (2) This device must accept any interference received, including
interference that may cause undesired operation.
Per FCC Part 15.21, any changes or modification not expressly approved by ABTYS could void the user's
authority to operate the equipment.
Note: the manufacturer is not responsible for any radio or TV interference caused by unauthorized
modifications to this equipment. Such modifications could void the user’s authority to operate the
equipment.
FALL DETECTOR FOR SWIMMING POOL
TRITON™ Pool Alarm

Installation and user guide- 2
1 Introduction – Important Safety Precautions
You just bought a swimming pool alarm TRITON™ and we would like to thank you for choosing our
products and service.
This alarm meets requirements of ASTM standard F2208e1.
This user guide will allow you to install your swimming pool alarm and understand the way it works.
If you have any comments or questions, please feel free to contact your reseller, write or call us at the
address below:
TRITON™ Pool Alarm Customer Care
SafeBlue
c/o Gestrust, 2 rue Thalberg
Case postale 1507
1211 Geneve 1 - Switzerland
•TRITON™ is a subsurface pool device which detects the fall of an 18+ lbs child by providing
automatically sounding an alarm.
•This device is not intended to replace any other safety consideration; that is, adult
supervision, lifeguards, fences, gates, pool covers, locks, and so forth, and some devices
may not detect gradual entry.
•TRITON™ isn’t a rescue device: The intervention of a responsible grown-up is mandatory
while the alarm rings out.
•Under no circumstances, your re-seller or the swimming pool alarm producer shall be liable
and assume responsibility for fall or drowning of an animal or a person.
•Please warn all the users that the pool and its access are under electronic supervision.
Please read carefully the safety information through out this user manual and specifically on page xxx of this
manual.

Installation and user guide- 3
2 Checking the package
Despite the careful attention we pay to the quality of our products and their packaging, we also
ask you to check its contents. The contents are:
- 1 detection unit with a black hose.
- 1 rigid tube with attachment screws.
- 1 remote alarm system.
- 4 1.5V LR20 alkaline batteries (supplied).
- 1 AC/DC Adapter (110V / 12V) for the remote system.
- 1 fixing kit (screws, washers, tapping inserts and joints) for the main unit
- 1 fixing kit (screws, tapping inserts and washers) for the remote unit.
- 1 testing sheet for validation of installation.
- 1 terms of guarantee.
Figure 1 : TRITON Pool Alarm

Installation and user guide- 4
3 Quick Start Guide
INSTALLATION
•Insert the batteries in your fall detector. (cf. §5.1)
•Position the rigid tube.
•Put in place your detection device on the edge of your pool at the proper place being careful
about the immersion depth of the tube: 8,5 in (+/- 1 in). Cut the rigid tube at the proper length
if necessary. (cf. §5.2)
•Perform a fall test : Simulate somebody falling into the pool by dropping a 2.5 US gallons jerry
can full of water (in order to weight 18 lbs) off the edge of the pool – the siren must sound a
maximum of 20 seconds after the fall. (cf. §5.3)
•Stop the siren by entering your password (Initially 1234).
•Wait for the reset of the product in “ALARM” mode during 20mn max. (The LED starts to
blink in green).
•Immobilize the TRITON
TM
alongside the edge of the pool with the supplied fixation kit. Your
device is now operational. (cf. §5.4)
UTILISATION All the LED indicate independent states.
SIGNAGE ACTIVATION CODE IDENTIFICATION
LED :
(blinks in green quickly)
One high tone sound: PIP
11 or 22 or 33 or 44
(A double hit on any key) « DETECTION » mode
LED :
(blinks in red quickly)
One low tone sound: BURP
1234
(or the password you entered) « INACTIVE DETECTION » mode
LED
:
(still)
122344
1111
« PASSWORDCHANGE» mode
(manual mode code followed by
password change)
LED
:
(blinks once in green)
One high tone sound: PIP
Any good entry GOOD ENTRY
LED
:
(blinks once in yellow)
One low tone sound: BURP Any wrong entry BAD ENTRY
LED :
(blinks in red quickly)
One low tone sound: BURP
(Once every minute)
None “LOW BATTERIES” mode
Please replace the batteries as soon as
possible

Installation and user guide- 5
4 Operating principle
How TRITON™ Works?
TRITON™ detects and analyses disturbances. It was designed to detect any fall of an 18+ lbs child
into your swimming-pool in the following conditions. It alerts you by triggering the powerful siren after a
few seconds.
For your security and convenience, the device has three major modes:
-« DETECTION »
MODE
:
oTRITON™ monitors the pool and the LED : blinks in green quickly.
oThe siren emits a 85+ dB signal at 10 feet when triggered by the fall of a 18+ lbs body in the
pool.
oThe device defaults to this mode when you switch it on.
-« I
NACTIVE DETECTION
»
MODE
:
oTRITON™ doesn’t monitor the pool and the LED : blinks in red quickly.
oThe alarm won’t trigger even if something or someone falls into the pool
oSelect this mode using the password (initially 1234) to deactivate the siren before using the
pool.
oThe device defaults to this mode when you insert the batteries
oWarning: the device leaves this mode 1 minute and 30 seconds after the pool becomes totally
still. Then, it goes back to “DETECTION” mode. (Be patient, because this can take more than
10 minutes to happen).
NEVER LEAVE THE POOL UNATTENDED IN THIS MODE.
oIn case of high winds, the device can’t monitor the pool and could switch automatically to
« INACTIVE DETECTION » mode.
-« R
EACTIVATION DETECTION
»
MODE
:
oTRITON™ monitors partially the pool and the LED : blinks alternately in red and in
green quickly.
oThe alarm can trigger if something or someone falls into the pool, but the performances required
by ASTM standard F2208e1 are not guaranteed.
oThis mode occurs when a manual activation of the system is required (cf. above) but that the
pool is still agitated, just after swimming for instance or just after something or someone fell into
the pool.
oThe system will switch automatically to DETECTION MODE after the pool becomes totally
motionless.
oThe device defaults to this mode when you insert the batteries.
NEVER LEAVE THE POOL UNATTENDED IN THIS MODE.
-« OFF »
MODE
:
oTRITON™ won’t monitor the pool. All the LEDs are OFF.
oNone of the accidental falls will be detected.
oYou can switch to this mode to change the batteries or to maintain the pool.
oWarning: there is no automatic switching into « DETECTION » mode.

Installation and user guide- 6
NEVER LEAVE THE POOL UNATTENDED IN THIS MODE.
To reduce your reaction time, TRITON™ includes a remote alarm system with a radio receiver
which can be set up near your living room (or other convenient location). This will also sound a siren in
case of fall in the pool. (Cf. §6)
Figure 2: TRITON Overview and command control

Installation and user guide- 7
TRITON™ signage :
IMAGE 1
SIGNAGE
MODE MAIN DEVICE
EXPLANATIONS
- Monitoring mode.
- The siren emits a 85+ dB signal at 10 feet when triggered by
the fall of a 18+ lbs body in the pool.
DETECTION
LED :
(blinks in green
quickly)
To switch to this mode :
- From the “INACTIVE DETECTION” mode: type any key twice.
(or wait for the automatic reactivation, it could take up to 10mn)
- From the “OFF” mode: type any key.
-Mode which allows swimming.
-The siren won’t trigger ON while you are swimming.
-TRITON™ could switch automatically to this mode if it
detects too much wind, and therefore monitoring can not be
guaranteed.
NEVER LEAVE THE POOL UNATTENDED IN THIS MODE.
INACTIVE
DETECTION
LED
:
(blinks in red
quickly)
To switch to this mode :
-From the “INACTIVE DETECTION” mode: type the password
(initially 1234).
- The siren CAN emits a 85+ dB signal at 10 feet when
triggered by the fall of a body in the pool.
-TRITON™ will switch automatically to this mode if
"DETECTION MODE" is activated so that it detects too
much movement in the pool.
NEVER LEAVE THE POOL UNATTENDED IN THIS MODE.
REACTIVATION
LED
:
(blinks in red /
green quickly)
To switch to this mode :
From the “INACTIVE DETECTION” mode: type twice on any key
-Mode which allows you to change the password.
-You have to enter the old password once, then, enter the
new one twice.
In case of a good password entry, the LED will blink in
yellow during one second for each try.
PASSWORD
CHANGE
LED :
(still)
To switch to this mode : type 122344 (manual mode code) +
1111 (password change code)

Installation and user guide- 8
Default Signage
Default Signage
LOW BATTERIES LED :
(blinks in red quickly)
+
One low tone sound once in a minute (BURP)
HARDER DEFAULTS
(the device requires
maintenance)
LED :
LED :
LED :
(all the LEDs are blinking in three different colors)

Installation and user guide- 9
5 TRITON™ installation
INSTALLATION PRECAUTIONS
•Check that the sirens are audible from inside your house.
•Your falling detector should be installed during a clear day and on a still pool.
•The alarm system should be installed in a place where the water depth is at least 12 in.
•The probe (rigid tube + flexible hose) should potentially be cut to have an immersion depth
of 8.5 in (+/-1 in). It’s advised to install a water level regulator. Please ask advice at your
local seller.
•Please make sure that your pool water is clear and clean before installing your new device.
•Few cleaning robots (for instance “diving” ones) are incompatible with falling detector
systems.
•The proper performance of TRITON™ is not correctly achieved if used in parallel with
tarpaulins.
•WARNING: TRITON™ is kitted up with a powerful siren (more than 100dB). Please be careful
and pay attention to your auditory system during the installation in case of triggering.
Necessary tools for the installation:
1 cross-shaping screwdriver.
1 tape measure.
1 2.5 US gal. jerry can.
1 6ft rope
1 Ø 0,31 in (8mm) concrete drill and the associate driller
1 hacksaw
1 pen
The installation of your falling detector happens in 6 steps:
5.1 – Replacing the Batteries
5.2 -- location choice
5.3 -- Temporary installation
5.4 -- Installation tests
5.5 -- Final installation
5.6 -- Validation tests
D
URING THE INSTALLATION OF YOUR FALLING DETECTOR
,
A RESPONSIBLE ADULT
/
GROWN UP
MUST
KEEP
WATCHING OVER THE POOL
.

Installation and user guide- 10
5.1 Placing the Batteries
CAUTION! The flexible hose and the main unit are fitted together, please handle with care.
-Remove the cover. IMAGE 1
-Return the cover and look at the batteries location.
-Insert the 4 LR20 batteries in their proper slot, respecting their polarities. IMAGE 2
- You can see the LED : (blinks in green). Your device is in “DETECTION” mode.
-Put back the cover on the base and hold down - without screwing down the screws - while
inserting the black hose in the rigid tube. IMAGE 3 et 4
5.2 Location choice
Before starting to install your device, please ensure choosing the most suitable location, by
following the guidelines thereby:
-- Avoid setting up your device on the edge of your pool before checking the proper position which will
allow the best monitoring place.
-- When choosing the proper detection place for the device, you should ensure that the siren is audible
from the inside of your house.
Your falling detector should be placed in the middle of the largest length on a brink
(recommended position for rectangular shaped pool). If your pool doesn’t fit any of the configurations
below, please ask for advice at your reseller.
Check that the access to the command keyboard is convenient and easy.
Please take the necessary precautions to ensure that the TRITON™ is at more than a
meter away from the filtration system (pushback noses, sluice gate, skimmer, and
vacuum cleaner plug), waterfall or any equipment which can locally commove the pool.
Your falling detector can be used on pools measuring 20x40 feet (6 x 12 m) maximum,
and it should not be at more than 28 feet (8.5m) from all the potential falling points.
For a swimming-pool with bigger dimensions or with a particular shape, please ask for
advices at your reseller.
EXAMPLES:
: Recommended location for your central detecting unit
IMAGE 1 : Appareil sans sonde rigide avec main + tournevis
8,
5
in
(+/
-
1 in)
2 potential locations
Max 28 ft
2 potential locations
Commentaire
:
En
Français ????

Installation and user guide- 11
IMAGE 2 : Couvercle retrourné – Visi zone bloc pile – 2 piles en place – Une 3
ème
dans la main en
approche
IMAGE 3 : Couvercle remis en place – sonde rigide en approche sur tuyau noir souple
IMAGE 4 : Sonde rigide mise en place avec main pour illustrer appareil fini
5.3 Temporary installation
-Put the 3 stabilizing foams under the unit. IMAGE 1
-Position the device at the chosen location paying attention to the minimum distance of 0.2 in
between the probe and the edge. IMAGE 2
-Check the immersion depth. If your probe is 8.5+ in. deep, cut it carefully using a hacksaw
(rigid tube and black hose at the same time) to get the proper immersion depth (If the water
level of the swimming pool is voluntarily decreased, adapted probe extensions are available at
your reseller store).
-Your device is in “INACTIVE DETECTION” mode: you shall push twice on any key to switch
him to “DETECTION” mode.
IMAGE 1 : Vue de dessous appareil avec MEP mousses
IMAGE 2 : Illustration distance 5mm sonde/bord margelle
5.4 Installation Tests
-Please check that the pool is calm. If you have upriver swimming system, stop it.
-Prepare a 2.5 US gal. Jerry can with enough water to weight18 lbs (8kg) and tie a 6 feet rope
to get it back after the falling tests.
NOTE: If desired, you have the opportunity to perform your tests in attenuated siren mode
(facultative). In this mode, the siren is attenuated and stops by itself after 5 seconds. See chapter
7.5 page X for more details.
-For these tests, TRITON™ should be in “DETECTION” mode (the LED : (blinks in
green)). If this is not the case, please type the “DETECTION” code (press any key twice).
-If despite these actions, the LED doesn’t blink in green, it means that the pool is too
commoved. You should wait for your pool to stabilize before performing your tests.
•Fall test
Check that your device is in « DETECTION » mode. (The LED : blinks in green)
-Choose the furthest position from your falling detector. IMAGE 3
-Simulate a body fall by making fall the 18 lbs jerry can from the top of the swimming pool’s edge.
oThe siren must ring out in less than 20 seconds after the fall.
oEnter your password to stop the siren.
Wait for the automatic reset of the falling detector. (The LED : blinks back in green)
-Choose a position 3 feet away from your falling detector. IMAGE 4
-Simulate the body fall by making fall the 18 lbs jerry can from the top of the swimming pool’s edge.
oThe siren must ring out in less than 20 seconds after the fall.
oEnter your password to stop the siren.
The test is achieved.
IMAGE 3 : Vue test chute point le + éloigné (coin opposé piscine rect.)
During these tests, after any fall, it is necessary to wait for the automatic reset of the
TRITON™ before making another one. Depending on the wind and quietness of the pool, this
reactivation could take more than 10mn.
If one of those tests fails:
- Consult the chapter 8.
Commentaire
:
Français ?

Installation and user guide- 12
- Contact your local reseller
- Contact our technical support : tech_support@safeblue.com
All those tests have been validated; you can proceed the final installation of your device.
5.5 Final installation
Remove the rigid tube a few centimeters to free the cover. IMAGE 1
-Remove the cover of your falling detector.
-Locate the 3 holes deep down the base.
-Place the base on the brink in order for the rigid tube to be at more than 5mm from the edge.
IMAGE 2
-Using something like a fibre tip pen, make 3 dots through the 3 holes to locate them and drill them
in your brink.
-Remove the base from the brink. IMAGE 3
-Drill the 3 holes with the Ø 0.3 drill and put in the tapping inserts. IMAGE 4 et 5
-Position the 3 white stabilization foams under the base in their designed locations. IMAGE 6
-Locate and settle the base with the 3 washers and screws (the 3 washers should be installed inside
the case). IMAGE 7
-Put in place the 4 little black joints on the base and screw securely. IMAGE 8
WARNING: The joints and foams installation should, like the fixation, be performed with care to
guarantee the waterproofness and the good operating state of your device.
-Check that the 2 main black joints are correctly positioned in their location on the base.
-Put back in place the cover and screw down the 4 screws. (Don’t use an electric screwdriver).
-Put in place the 4 protection caps. . IMAGE 9
-Put back the rigid tube and screw-down the small screw. IMAGE 10
-Check one more time the good operating state of the device:
- Switch on “INACTIVE DETECTION” mode by typing the password (initially 1234).
(The LED : blinks in red and you’ll hear a BURP)
oWait for the automatic reset (The LED : blinks back in green)
oMake a fall test from the furthest point
oIf the fall is detected within 20 seconds, your installation is complete.
- Wait for the automatic reset of the TRITON™ before leaving the pool side.
- Fill in the validation test form and send it to the following address :
TRITON™ Customer Care
SafeBlue
c/o Gestrust, 2 rue Thalberg
Case postale 1507
1211 Geneve 1 - Switzerland
IMAGE 1 : Tube retiré de 2 à 3 cm avec main
IMAGE 2 : Illustrer les 5mm
IMAGE 3 : Repère position trous margelles
IMAGE 4 : Perçage margelle
IMAGE 5 : MEP chevilles
IMAGE 6 : Mise en place mousses
IMAGE 7 : Fixation base sur margelle
IMAGE 8 : MEP petit joints
IMAGE 9 : MEP capuchons
IMAGE 10 : Fixation vis sur tube coudé

Installation and user guide- 13
6 Recommendations for remote siren installation
To install and use your remote siren, you will need the following elements and tools:
1 remote siren (the red and white case)
1 power supply 110V/12V, 450mA
1 fixation kit (bag including 2 screws and tapping inserts)
1 cross-shaping screwdriver.
1 Ø 0.25 in (6mm) concrete drill and the associate driller.
IMAGE 1
The remote siren shall be installed 70 feet max. away from TRITON™. This is not an outdoor siren
and so should be installed in premises away from bad weather.
- Operating principle
oThe remote siren is remotely driven by the TRITON™ via radio frequencies.
oIf a fall is detected by TRITON™ in the pool, the TRITON™ siren and the remote siren will trigger
simultaneously.
oIt is impossible to stop the sirens from the remote device. It is imperative to go to the pool, check
what triggered the sirens, act if necessary and stop the sirens by typing the password. (initially:
1234)
oLike the TRITON™ main device, if you don’t stop the siren by typing the password after a trigger,
the remote siren will stop automatically after 3 minutes.
- Synchronization
To enable a link between the TRITON™ and the remote siren, you should synchronize the two
devices.
a) Choose a location for your remote device
o70 feet away (max) from the TRITON™
oNear an electrical plug.
b) Plug the power supply to the remote siren. IMAGE 2
c) Plug the power supply on the electrical plug, a PIP sound, and your remote device is installed.
IMAGE 3
d) Launch the synchronization mode of the remote system by pressing the black button on the side
of the red and white case.
e) Switch on MANUAL mode by typing the manual code 112344 on your TRITON™. (The LED :
blinks in yellow). IMAGE 4
f) Launch the synchronization of the TRITON™ by pressing the synchronization code 3333 ((the
LED : blinks in green). The remote siren should beep.
g) Stop the synchronization mode of the remote system by pressing the black button on the side of
the red and white case.
h) Switch your TRITON™ to DETECTION mode by typing your password (initially 1234). Both
systems should beep.
i) Perform a falling test in your pool to validate your radio link. Stop both sirens by typing the
password (initially 1234).
oYou can synchronize one or more TRITON™ with one or more sirens. In that case you should
repeat on each TRITON™ the e) and f) steps followed by pressing the black button on each
remote siren(s).
oYou can reset the remote siren by pressing lengthily on the black button (3 seconds). You will
have to restart the whole synchronization process.
- Installation

Installation and user guide- 14
oOnce the location has been chosen and validated, drill 2 holes with the Ø 0.25 in. drill one on top
of the other at 3.5in. of distance. To ease the radio link, it is recommended to place the siren as
high as possible on your wall. (pay attention to the power supply wire).IMAGE 5
oInsert the 2 tapping inserts in the 2 new holes.
oScrew down the 2 screws through the siren in the tapping inserts.
IMAGE 1 : Images des composants de la sirèneIMAGE 2 : Connexion prise jack à la sirène IMAGE 3 :
Connexion adaptateur sur secteur IMAGE 4 : Appui bouton noir IMAGE 5 : Fixation murale

Installation and user guide- 15
7 TRITON™ Operating principle
PRÉCAUTIONS D’UTILISATION
•TRITON™ can NOT be a substitute for parents’ watchfulness and/or responsible grown-
ups, which remain the most reliable method of 5- years old children safety.
•The intervention of a responsible grown-up is mandatory while the alarm rings out.
•A few unfavorable meteorological conditions (strong wind, storms …) plus the use of a few
powerful cleaning tools could cause inopportune triggers.
•Your alarm system is inoperative if the water in the probe is frozen or if the swimming pool
surface is frozen. It is hard to know when the water starts to freeze in the pipe. In case of
doubt, please check the proper operating state of your falling detector.
•For the external cleaning of your device, please avoid using high pressure unit, abrasive
brush and/or any tool that can stripe or impair your falling detector.
•The proper performance of TRITON™ is not correctly achieved if used in parallel with
tarpaulins.
•To guarantee the good operating state of your device, please maintain the water clear and
clean. (Notably, to avoid the formation of algae in the probe).
•In case of restart of your falling detector after an extended stop, please proceed the tests
explained in § 5.4. In case of issue, please contact immediately your local seller.
•Regarding the maintenance of the device after the first installation, only replacing the
batteries is allowed.
•Check regularly, the proper performance of your falling detector by running monthly control
tests appearing at the end of this manual. (See §11).
•A few cleaning robots (for instance “diving” ones) are incompatible with falling detector
systems.
•The person setting up the device should be aware that another person should monitor the
pool.
•A person’s watchfulness and/or a responsible grown-up are necessary between the end of
the swim and the automatic reset of the alarm system.
7.1 I want to swim
- Your falling detector watches out (i.e. : « DETECTION » mode activated (The LED : blinks
in green)
- Type your password (initially 1234). (Inactive detection mode activated: The LED :
blinks in red and a low tone sound (BURP) is heard)
- You can swim.
After the swim, the pool won’t be monitored until the automatic reset which will occur while the pool is
quiet. Typically, the reset occurs after 10 mn approximately.
D
URING THIS PERIOD
,
A RESPONSIBLE ADULT
/
GROWN UP
MUST
KEEP WATCHING OVER THE POOL
.

Installation and user guide- 16
7.2 Automatic reset
- Your falling detector keeps on checking the agitation state of the pool. As soon as the pool is
sufficiently quiet, after a swim or a strong perturbation (strong wind, upriver swimming system …)
your falling detector switches automatically to REACTIVATION mode (the LED :
blinks in green / red). The fall detector is active but downgraded.
- As soon as the pool is fully quiet, your falling detector switches automatically to “DETECTION”
mode(the LED : blinks in green). This could take more than 10 minutes.
Your pool is now secured.
WARNING: It is possible that the device changes to DETECTION mode if you are in the pool
without making any disturbances.
7.3 Manual reset
After a swim, you can signal to your falling detector that your pool is let unused, in order for it to
restart the monitoring faster.
You are in one of the 3 cases below:
Commoved pool: Case1
Lightly commoved pool: Case 2
Quiet pool: Case3
Press twice on any key while leaving the pool.
Case 1: Your falling detector measures that your pool is too commoved. In that case, your device
understands your request by responding with a high tone sound (PIP) but can’t restart immediately
the monitoring. The LED : blinks in red. It will progressively start the monitoring as the
pool becomes quiet.
D
URING THIS PERIOD
,
A RESPONSIBLE ADULT
/
GROWN UP
MUST
KEEP WATCHING OVER THE POOL
.
Case 2: Your falling detector measures that your pool is lightly commoved. In that case, your device
understands your request by responding with a high tone sound (PIP) and restarts monitoring but
can’t guarantee the detection of a 8kg fall. The LED : blinks once in red followed by a
green blink and so on. It will progressively start the monitoring as the pool becomes quiet.
D
URING THIS PERIOD
,
A RESPONSIBLE ADULT
/
GROWN UP
MUST
KEEP WATCHING OVER THE POOL
.
Case 3: Your falling detector considers that your pool is quiet. It restarts the monitoring by switching
the LED : in green and validating the choice with a high tone sound (pip).
Y
OUR POOL IS SECURED
.
7.4 Too much wind
In some cases, while the meteorological conditions are too unfavorable (strong wind, heavy
rain, thunderstorms …), your falling detector is susceptible to stop its monitoring. The LED :
blinks in red.
D
URING THESE BAD CONDITIONS
,
YOU SHOULD
IMPERATIVELY
INCREASE YOUR WATCHFULNESS

Installation and user guide- 17
WARNING: TRITON™ performances are not guaranteed beyond the wind level specified in the ASTM
standard F2208-02
e1
.
7.5 Attenuated siren mode
In this (facultative) mode, your siren is sounding shortly and with a low power to enable you doing
your installation and monthly tests without annoying the neighborhood.
- The test mode lasts for 5mn.
- Entering and going out of test mode will be validated by a high tone sound (PIP) and a low tone
sound (BURP), respectively.
To enter the test mode, please enter the manual mode code (122344: the LED : blinks
slowly in yellow and a high tone sound is heard (PIP)) then enter the test code (1133) : the test mode
will be validated by the LED : blinking once in green and a high tone sound (PIP).
While the device goes out of the test mode, the siren makes a low tone sound (burp).
7.6 Password Change mode
In this mode, you can change the password that enables you to switch from “DETECTION” mode
to “INACTIVE DETECTION” mode.
To change the password:
-Enter the manual mode code (122344): the LED : blinks slowly in yellow and a high tone
sound is heard (PIP).
-Enter the password change code (1111): the mode will be validated by the LED : blinking
once in green and a high tone sound (PIP).
-Enter your new password. The new password will be validated by the LED : blinking once in
green and a high tone sound (PIP).
In case of bad entry or any entry which contents wrong key combinations (any password starting
with a double key (11xx, 22xx, 33xx, 44xx) or 1223 and 3444, already used for the OFF and MANUAL code ) The bad
entry will be cancelled and indicated by the LED : blinking once in yellow and a low tone sound
(BURP).
After a good or wrong password entry, the device goes out of the “password change” mode.
7.7 OFF mode
While the TRITON™ is OFF, all the LEDs are turned OFF.
While TRITON is OFF, a human or another safety system should keep watch of
the pool, if in use by children!
To stop the device, enter the 3444 code followed by your password (1234 initially). TRITON™
validates by the LED : blinking once in green and a high tone sound (PIP) will be heard.
IMAGE 2 idem P4
To reactivate TRTION™ :
oPress any key twice (for instance 11 or 22 …)
oTRITON™ will validate by the LED : blinking once in green, a high tone sound
(PIP), will be heard and the LED : blinks in red quickly.

Installation and user guide- 18
oWait for an automatic reset (the LED : switches in green and you hear a high
tone sound (PIP)) or type any key twice again. (Same signals as for the automatic
reset).
Please ensure that TRITON™ is activated and monitoring out the pool before leaving it.
Otherwise, the highest WATCHFULNESS of a responsible grown-up is mandatory.
7.8 Replacing the batteries
When batteries are low, TRITON™ will warn you by:
The LED : blinks in red quickly.
One low tone sound (BURP) beeps once in a minute.
In that case, replace immediately and as soon as possible the 4 alkaline batteries C (1.5V) by 4
new batteries of the same type. Check the expiration date of the new batteries.
To preserve nature, please dispose appropriately of the used batteries by taking them to your local
reseller or placing them in appropriate battery bins.
We advise you to change the batteries before every new summer season.
To replace the batteries, please follow the following instructions:
-Switch off the TRITON™ (see §7.6 upper)
-Remove with care the 4 caps with the help of a flat screwdriver.
-Unscrew the 4 screws and remove the cover.
-Remove the used batteries.
-Place the new batteries in their location respecting their polarities. IMAGE 2
-You will hear a validation signal. TRITON™ is in INACTIVE DETECTION mode.
-Put back the cover in place, screw down the 4 screws.
-Put back the rigid tube in position and screw back its screw on top of the tube. IMAGE 3
-It’s imperative to put back the protection caps on top of the screw wells.
Proceed with a few falling tests to validate the performance of your falling detector.
IMAGE 1 : Retirer tude qques cm IMAGE 2 : MEP piles neuves IMAGE 3 : Fixation tube rigide avec
vis
7.9 I have an issue with my falling detector
7.9.1 All the LEDs are blinking
LED :
LED :
LED :
All the LEDs are blinking in three different colors.
TRITON™ warns you that it has a hard operating issue.
TRITON™ needs to be returned to our after-sale service.
Please send back your device, with your address and a copy of proof of purchase, to the following
address: TRITON™ Pool Alarm Customer Care
SafeBlue
c/o Gestrust, 2 rue Thalberg
Case postale 1507
1211 Geneve 1 - Switzerland

Installation and user guide- 19
7.9.2 I can not find the origin of the problem
The LEDs of your device are not blinking like described above and you cannot find the origin
of the problem.
In this case, please contact our after-sale service by phone, mail or email:
E-mail : infoconso@safeblue.com
Address : TRITON™ Pool Alarm Customer Care
SafeBlue
c/o Gestrust, 2 rue Thalberg
Case postale 1507
1211 Geneve 1 - Switzerland
To enable us to give you a quick answer, please give us a short description of the problem.
Please send our technicians, your address and a quick drawing of your swimming-pool with its
dimensions (length, width, depth, special shapes if needed) plus the positions of the filtration system
(pushback noses, sluice gate, skimmer, vacuum cleaner plug) or anything you may have that can
create perturbations like an upriver swimming system. To finish, add to the drawing the position of
your falling detector on the edge of your pool.
All this information will help our technicians to understand the issue with your device and to
solve it quickly.

Installation and user guide- 20
8 FAQ Frequently asked questions
During the installation
QI2. When a 18+ lbs (8kg) body falls in the pool during the tests, my siren triggers after 20 s or doesn’t
trigger, why?
RI2.1. Your pool has dimensions bigger than 20 x 40 feet or a really special shape. One
detector isn’t sufficient. Ask advice at your local reseller.
RI2.2. Your falling detector isn’t installed in the recommended location. The fall is realized
beyond the 28 feet detection radius. Please move it to the recommended location. See §5.2
RI2.3. If none of these conditions seem to be the source of the problem, please ask advice at
your local reseller or contact our after sale service: tech_support@safeblue.com
During the utilization
QU1. The siren triggers in an inopportune way.
RU1.1. The meteorological conditions are too unfavorable (strong wind, thunderstorms…) and
disturb the functions of the device.
RU1.2. Your cleaning robot isn’t compatible with your falling detector. It creates an event
assimilated or identical to a child fall. Please ask advices to your local reseller.
RU1.3. If none of those conditions seems to be the dysfunction origin, please ask advices to
your local reseller or contact or after sale service: tech_support@safeblue.com
GENERAL SECURITY TIPS
This alarm system can not substitute for parents’ watchfulness and/or responsible grown-up, which
remains the essential factor for 5- years’ old children safety. It substitutes neither to horse sense nor to
individual responsibility.
WARNING
Improper installation, testing, maintenance or operation of this product can make the alarm fail
to sound, increasing the risk of drowning. Follow all instructions in this document to reduce this
risk.
IMPORTANT SAFETY INFORMATION ABOUT YOUR POOL ALARM
Even when correctly installed, maintained, tested, and operated, this alarm cannot completely
prevent drowning:
•In some situations, the alarm will not sound when a child enters the pool.
oIf a child enters the pool slowly or gradually, without disturbing the water much,
the alarm may not detect it.
oThe alarm may not detect very small child (under 18 lbs) entering the pool.
oWhen weather (e.g., wind) or other factors disturb the water, the alarm
automatically reduces sensitivity or becomes INACTIVE DETECTION, to prevent
excessive false alarms. When this happens, a child may enter the pool without
the alarm sounding.
oWhen the alarm is INACTIVE DETECTION to allow swimming, it will not sound if a
child enters the pool or if a child is drowning.
oAfter swimming with the alarm in INACTIVE DETECTION mode, the alarm will not
sound if a child enters the water until the device switches in DETECTION mode.
Depending on the time the water lasts to calm down, the reactivation may take
more than 10 minutes (depending on weather conditions).
Table of contents
Other Triton Security System manuals