TRS ONE RR 2020 User manual

User Manual
20”
2020
K I D S
User Manual ON-E kids 20’’ -2020 (Feb 2020)
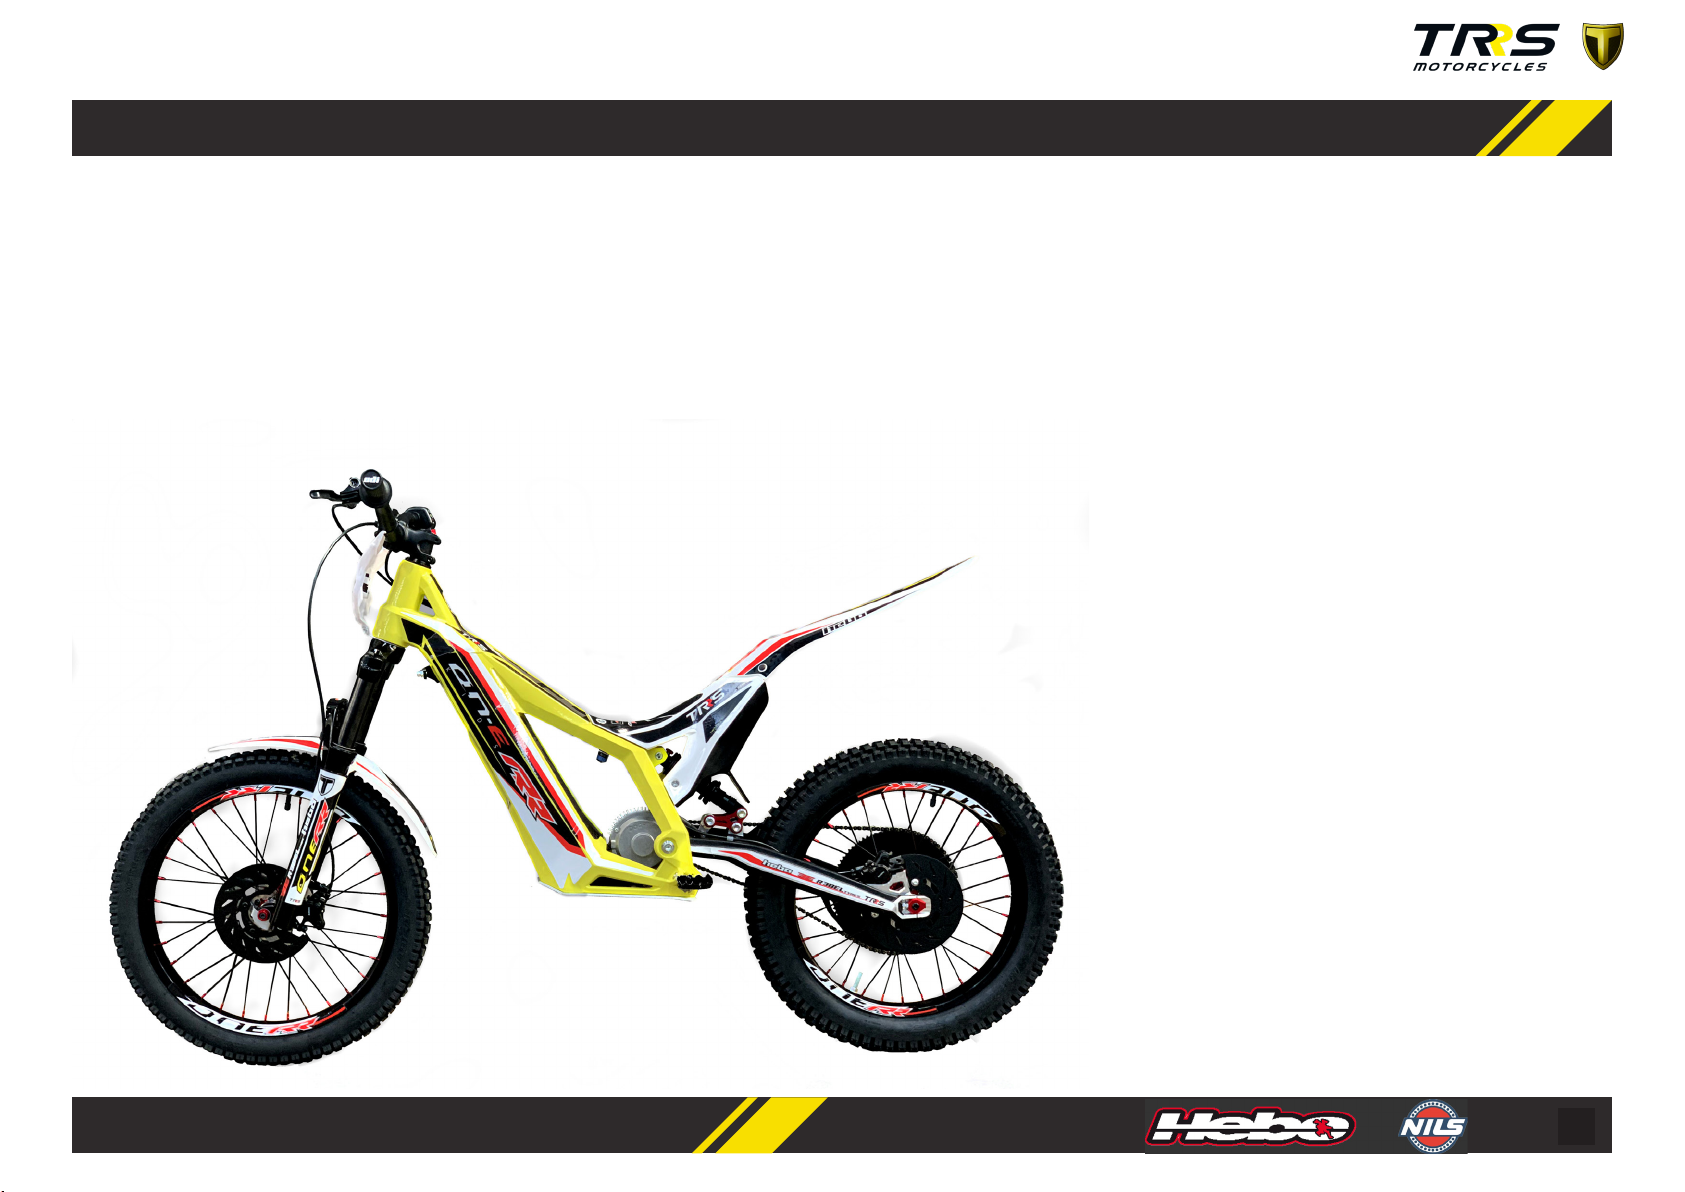
Picture: Motorcycle only for competition and closed circuit.

2
3
Dear customer,
Thank you for your condence in us, and congratu-
laons on the purchase of your new TRS ON-E.
Because of our experience, professionalism and
passion for trial bikes we are able to oer you an
innovave¬, reliable and up-to-date motorcycle. It
has a comprehensively checked technical perfor-
mance that has been tried and tested both by our
technicians and our high-level drivers worldwide.
The soluons we have used give the motorcycle an
unmistakable character, combining simplicity, re-
liability and design. We pay aenon to every last
detail to give you a unique bike.
At the same me, this manual gives you all the in-
formaon you need to use the motorcycle appro-
priately and safely. We recommend that you read it
carefully before you use the motorcycle.
In addion, you will nd ps and useful informaon
for the maintenance and upkeep your new TRS
ON-E.
Yours faithfully,
Jordi Tarrés
Welcome to TRS

4
Please read this user manual thoroughly before using your motorcycle. It details all
the instrucons for the correct handling of the motorcycle and for your safety, as
well as helping towards the best possible maintenance ¬and upkeep from day one.
Please pay special aenon to the notes agged up with the following symbols:
TRS advises you:
In addion to these specic warnings, the manual gives advice on the best use of
your motorcycle, as well as beer adjustment and control of its important features.
TRS reserves the right to make changes to this manual.
This symbol refers to points which, if ignored, could lead to physical danger for the
user.
This symbol refers to a note. The text accompanying to a note provide you useful
informaon or another informaon important about.
¡WARNING!
¡CAUTION!
NOTE
This symbol refers to points which, if ignored, could lead to some kind of damage to
your motorcycle. Non-observance of these warnings could render your motorcycle
warranty void.

5
If you have any doubts about adjustments to your motorcycle, refer to the manual and/or contact an
authorised TRS dealer.
Please carefully read through the informaon in the user manual to familiarise yourself with the features
of your motorcycle before driving it using the maximum power sengs
• This motorcycle is designed to carry just one person, and it is not permied to carry a passenger.
• For a long life of service, keep the motorcycle maintained as recommended¬ in this manual.
• This bike is designed to be safe when driving, provided that the driver is equipped with the appropriate sfety
equipment (helmet, protecve clothing, etc.). Be careful and drive sensibly.
TRS recommends:

6
01 - Descripon parts.......................................................................... 7
02 - Technical specicaons TRS ON-E kids ....................................... 9
03 - Safety responsibilies ............................................................... 10
04 - Serial number ........................................................................... 12
05 - Switches, Dials and Indicators.................................................... 13
06 - Drive chain ............................................................................... 18
07 - Suspension................. ............................................................... 19
08 - Shock absorber .......................................................................... 20
09 - Brake adjustment ......................................................................... 21
10 - Baery use, baery care and mantainance.................................. 22
11 - Maintenance and cleaning............................................................ 26
12 - Electrical wiring............................................................................. 27
13 - Riding Instrucons & safety ps .................................................. 29
14 - Limited Warranty ..........................................................................31
INDEX

7
1 - DESCRIPTION PARTS
01- Rear Lever brake
02- Front fork
03- Motor DC 48V
04- Shock absorber
05 - Swing arm
06- Front brake
07- Rear brake
08- Charger port
01
02
03
04
05
06 07
09- Front lever brake
10- Chain
11- Sprocket
12- Throle electric
13- Controller
14- Dial adjustment
15- Front fender
16- Baery
09
10
11
12
14
13
16
15
08

8
17- Adjustment front suspension
18- Footrests
19- Rear fender
20- LED Indicator
01
09
12
16
17
18
18
19
20

9
2 - TECNICHAL SPECIFICATIONS TRS ON-E
PERFORMANCE
Maximum Speed
25 Km/h
Autonomy Unl 3h
Weight Limit Rider 35kg
CHASSIS
Frame & Swing arm
Alloy Aluminium
Front Suspension
Telescopic air fork,
26’’ adjustable rebound /
100mm stroke/ Ø32mm aluminium
Rear Shock absorber
Spring & oil type, adjustable rebound
Connecng links
Progresive sistem links TRRS
Front Wheel
Rebel XBIKE trial 20x2.5
Rear Wheel
Rebel XBIKE trial 20x3
Brakes
Shimano Hydraulic brakes
Sprocket
86z
Footrests
Microfusion Steel
MOTOR
1350 W 48V magnet DC motor
CONTROLLER
4 dial adjustment controller
THROTTLE
Twist type with LED baery charge indicator.
BATTERIES
CHARGER
48V lithium with capacity 17,5 Ah
Lithium AC90V-260V DC54.6V 4A
SWITCH & DIALS AND PORTS
Switch ON /OFF
Dial adjustment controller
Kill switch
54.6V Charger port
DIMENSIONS & WEIGHT
GEARING
9T Front Sprocket / 68T Sprocket / 219 Chain
Maximum Lenght 160cm
Seat Height 56cm
Ground clearance 28cm
Handlebar Height 89cm
Weight 25 kg
Note: There are many factors eect speed and range capabilies. Terrain,
avarage, speed, rider weight, re pressure, wind, hills, etc.

10
3 - SAFETY RESPONSIBILITIES
Always follow the Pre-Ride Checklist before every ride.
Do not operate your ON-E if any damage is apparent. Immediately contact your local
retailer/distributor or ON-E Customer Service.
1. SUPERVISION: Riders must be supervised by responsible adults at all mes.
The rider should never be beyond eye and voice range. An adult must ALWAYS as-
sess and approve the riding condions and the bike preparedness before the bike
is ridden. Always ensure the rider is cauous, maintaining complete control and a
reasonable speed. Ensure the terrain is suited to the skills of the rider.
2. HELMETS & SAFETY ATTIRE: There is no single factor that works beer at
reducing the severity of injuries sustained in accidents more than a quality helmet.
Please don’t ever allow your ON-E to be ridden without one. Riders should also wear
suitable riding gear - gloves, eye protecon and boots. Boots should not have laces.
Shoe laces and loose clothing or even long hair could potenally get caught in whe-
els, chains or sprockets.
3. ONE RIDER ONLY: Your bike was engineered to carry one rider and no passen-
gers. Carrying a passenger would overload the machine and alter the handling. Do
not allow this to happen.
4. DON’T OVERLOAD THE BIKE: These motorcycle are designed for small, ligh-
tweight riders. Exceeding the weight limitaons will adversely aect the handling of
the machine, and potenally cause damage.
5. CONDITIONS OF USE: This motorcycle is limited to use only OFF-ROAD. This
means that this motorcycle cannot move on streets or public roads, as well as on
sidewalks. The owner of the motorcycle, is responsible for complying with this stan-
dard and others that the state where the on this type of machines resides.
6. VISIBILITY CONDITIONS: Do not ride the motorcycle, when the light condions
signicantly reduce visibility. Aenon at sunrise or sunset even with fog or cloudy
sky. Keep in mind that this motorcycle is not equipped with posion lights.
7. ADVERSE WEATHER CONDITIONS : When the ground is wet, the adhesion of
the wheels with the ground, as well as the eecveness of the brakes, lose ecien-
cy. For this reason it is important to know that driving should be much smoother
than in dry situaons, as the braking distance increases, as well as the danger of
skang and causing a fall. It is advised not to drive when it is raining or snowing. Take
into account these condions on at terrain and especially on steep ups an downs.
8. MAINTENANCE: Follow the maintenance of the motorcycle, it is important to
extend the life of the motorcycle, as well as ensure that the operaon is correct and
safe. Follow the instrucons in this manual. Before each use, check the operaon of
the brakes, condion of the res and ghten the related screws.
It is recommended that the motorcycle be checked by a TRS service, at least once
a year.

11
9. BATTERIES: Our motorcycles are equipped with lithium-ion baeries. The loca-
on of the baery on the motorcycle protects it from possible shocks and gives it
the necessary ghtness. Review this manual to nd more specic informaon on
this aspect.
10. READ THIS MANUAL: Leer este manual por completo para conocer las ca-
racteríscas y peculiaridades de una moto eléctrica. Si ene alguna duda que no lo
resuelve en este manual, no dude en contactar con su distribuidor TRRS local. Puede
consultar en la página web www.trsmotorcycles.com el distribuidor que le queda
más cercano.
SUMMARY
1. SUPERVISION: A responsible adult must supervise at all me.
2. WEAR A HELMET & SAFETY GEAR: The rider must wear a helmet & appropiate
safety gear every me.
3. NO PASSENGERS: It is totally forbidden to carry passengers.
4. DO NOT EXCEED THE WEIGHT LIMITATIONS OF THE MACHINE.
5. CONDITIONS OF USE: OFF-ROAD
6. VISIBILITY CONDITIONS
7. ADVERSE WEATHER CONDITIONS: The terrain may vary, so be responsible.
8. PLEASE MAINTAIN YOUR BIKE.
9. CARE FOR YOUR BATTERIES
10. READ, STUDY AND UNDERSTAND THIS ENTIRE MANUAL.
11. If you don’t understand any aspect of the use and care of your bike, please call TRS
costumer service.
12
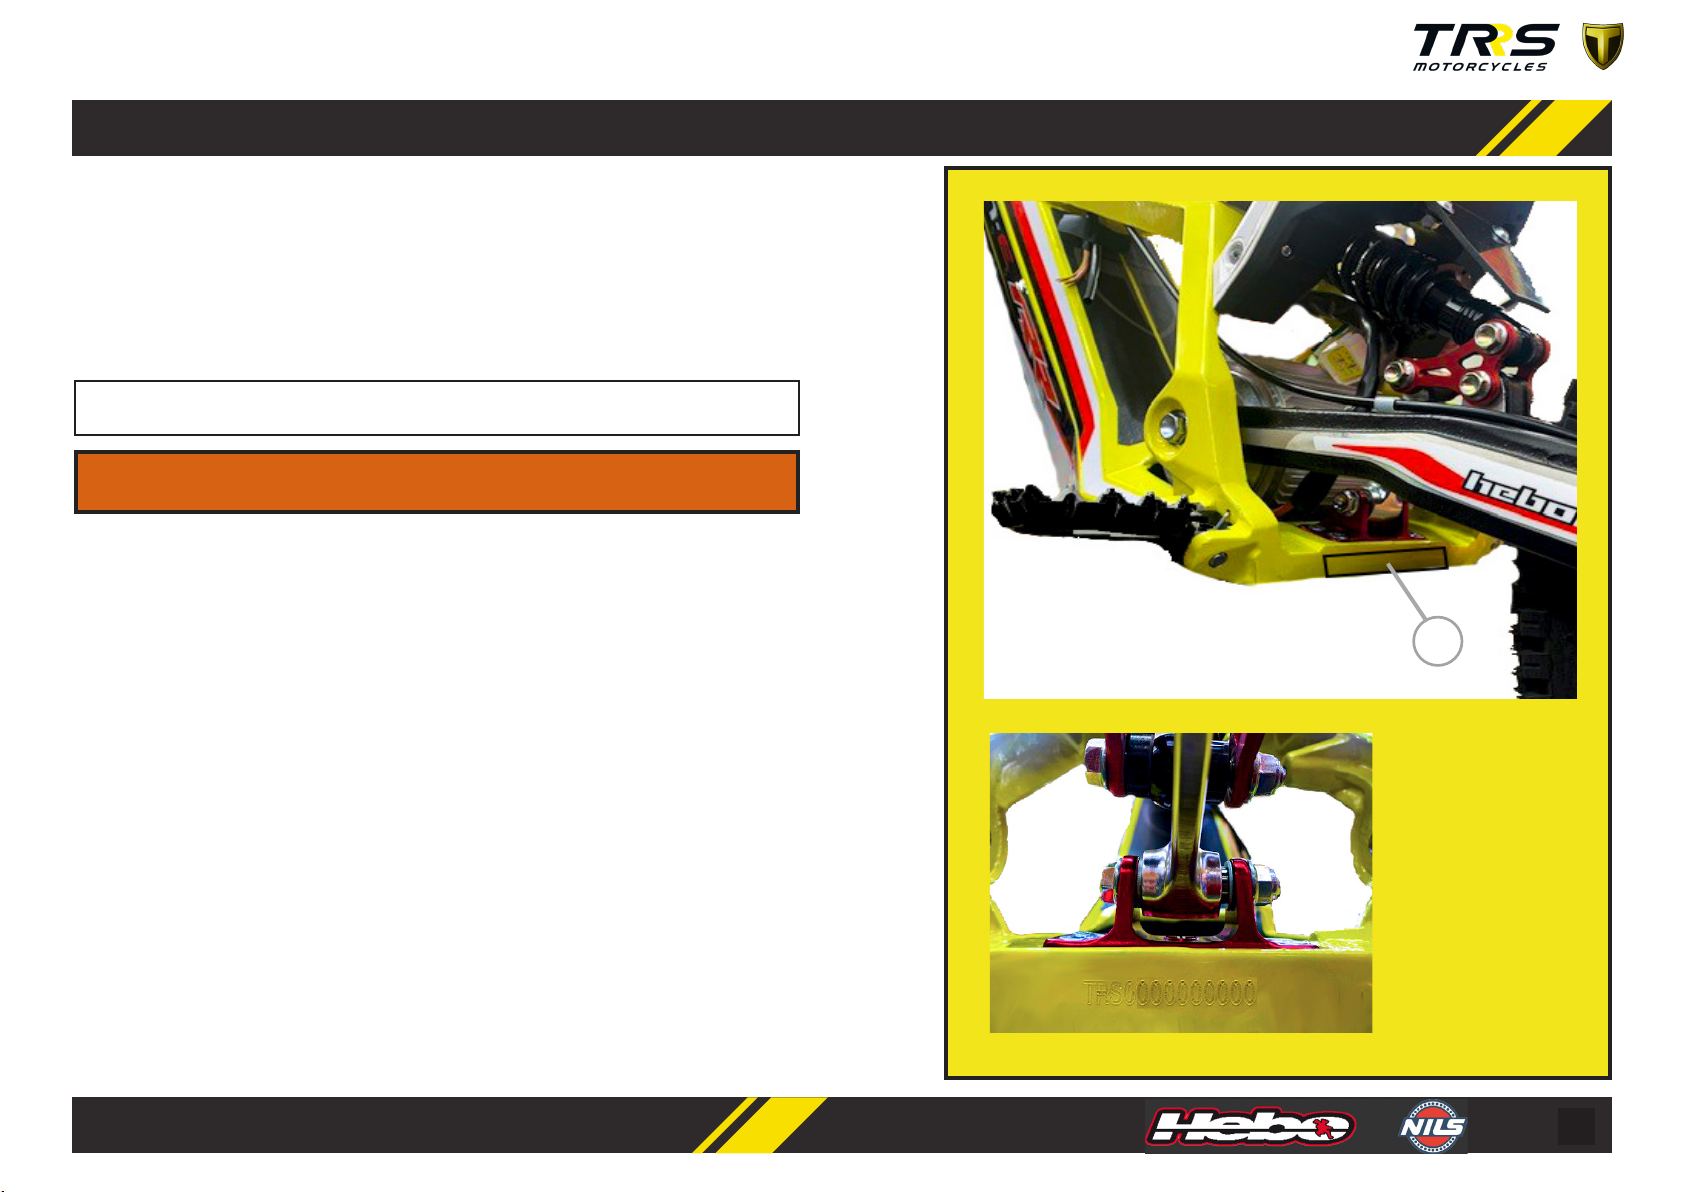
All motorcycles that manufacture in TRS come out with an idencaon number
engraved on the frame and that appears in the technical le of the documentaon
that we deliver to the user. This number cannot be replaced or modied under
any circumstances. This number is located at the boom of the chassis, under the
engine at the rear and may be required in any technical inspecon.
4 - SERIAL NUMBER
A) L
ocated at the
boom of the chassis,
under the engine at
the rear
It is advisable to keep the serial number and idencaon informaon of your
motorcycle noted to expedite procedures in case of the or supply of spare parts.
SERVICE / WARRANTY
If there is a need to make a warranty claim, it must be processed by an authorized
TRS dealer. (See the Warranty page 31)
For any quesons about your ON-E, please contact a local distributor or seller.
You can check the list of distributors and contact informaon at
www.trsmotorcycles.com
¡WARNING!
A

13
5 - SWITCHES, INDICATORS & DIALS
SWITCH ON / OFF
The switch allows you to turn the motorcycle ON and OFF. The buon is next to the
Throle (A), very accessible with the right thumb.
KILL SWITCH
This switch is connected in series with the switch on/o. The kill switch must be in
place for the switch to be in the on posion.
It is a safety element, so that, in the event of the pilot falling, the motorcycle is
disconnected. Make sure that the rider puts the elasc band on the le wrist and is
rmly secured, before starng the motorcycle.
With this switch you can also turn the motorcycle on and o, placing the red part
on the base placed on the le side of the handlebar. It also has the funcon of an-
the or use without consent, disconnecng the red part of the base and saving it
in another site.
If the accelerator is applied before connecng the kill switch, the motorcycle will
not move.
A
B
¡CAUTION!

14
DIAL ADJUSTMENT
This dial is to be adjusted by a responsible adult only.
The motorcycle is equipped with 4 posions rotary dial, which allows the power,
speed and response of the gas to be varied depending on the skill of the rider, as
well as the terrain condions. The switch is located inside the chassis, under the
seat. The conguraons are pre-congured in the factory with these characteriscs:
Map posion:
1. Beginner: A docile response, with reduced speed and low power. Ideal for beginner
riders, as well as recommended to take the rst contact with the motorcycle.
2. Interzone: Intermediate response, speed and average power. Ideal for interzone
and medium level areas.
3. Medium: Fast response, speed and average power. Mul-purpose conguraon
For slippery areas, with medium / high pilot level.
4. Racing: Fast response, speed and high power. Recommended use for experienced
pilots.
To change the map, it is necessary to follow this steps:
1. Turn o the motorcycle with the (ON / OFF) switch.
2. Change the posion adjuster, choosing between: 1, 2, 3 or 4. In the clockwise
direcon the posion increases. Being 1 counterclockwise and 4 clockwise the
posion.
3. Turn ON the motorcycle with the (ON / OFF) switch.
- This operaon should be carried out by an adult who knows the pilot’s ability and
the terrain condions.
- Take into account, during the me of turning OFF and ON the motorcycle, should
be minimum of 5 seconds. Otherwise, the map change won’t be performed correct-
ly or the controller can be locked. In this case, turn OFF the motorcycle and wait 5
seconds and turn ON again.
-Prolonged use of posion 3 and 4 reduces autonomy signicantly with respect to
posion 1 and 2.
NOTE
A
A) Dial adjuster, as we turn clockwise, the motorcycle response will increase, the
same happen with speed and the power will be higher.
A

15
CHARGE INDICATOR
The baery charge indicator is located next to the throle and indicates the state
of charge of the baery. This indicator also indicates whether the motorcycle is
running or not.
As the baery charge goes down, indicator lights go out. Being green full charge
and red without charge.
To extend the autonomy, it is recommended to choose lower power map selector
as the charger goes down.
When the motorcycle is not used, the motorcycle must be disconnected through
the switch.
During use, it can be seen that the indicator decline, when maximum power is
required, this phenomenon being normal.
It is very important to keep everyone clear of the bike when the motorcycle is
charching or response maps are being adjusted. The dial adjustment is sensive to
small adjustments. Don’t guess the changes. Always check before the adjustments
made are correct for the pilot’s skills.
¡WARNING!
NOTE
B
A) Full charged B) Half charged C) Empty charged
A
D
LED INDICATOR
The indicator LED is located inside the wheel arch and indicates if the motorcycle is
running normally, has normal operaon (green) and incorrect operaon or empty
baery (red).
This LED is located so that the person in charge can read from outside if the
motorcycle is on or is giving error code without riding on the motorcycle.
D) LED indicator, when it is green it indica-
tes that the operaon is correct, when the
LED is red, it indicates that the baery is
empty or that it is malfunconing.

16
In the event of a malfuncon, it is recommended turn o the motorcycle, wait 5 seconds and restart.
In case of persistent failure, check if the controller gives error code through the peephole placed inside the wheel arch.
Next we are going to describe all the codes that the operaon indicator window can give us.
To beer understand how the LED indicator works, The LED ashes once at power on as a condence check and then stays on for normal operaon. “1, 2” means it ashed
once and aer 0.5 second pause, ashes twice.The me between two ashes is 0.25 second. The pause me between mulple ash code groups is 1 second.Code groups is
1 second.
LED CODE EXPLANATION SOLUTION
OFF
No power or switched o
1.Charge the battery.
2. Check the condition of the connectors and ensure that they have good contact.
ON Normal operation. That’s great! You got solution! You can drive the motorcycle without any problem.
1,... 2
Over voltage error
1. The battery voltage is too high for the controller.
2. Check the battery voltage.
1,... 3 Low voltage error
1. The controller will reset after 5 seconds if the battery voltage returns to its normal state.
2. Check the battery voltage and recharge if necessary.
1,... 4 Temperature warning error 1. The temperature of the controller is above 90º.
2,...1 Throttle sensor fault 1. Check that the wiring is in good condition.

17
2,...2 Internal volts fault 1. The controller is damaged. Contact TRS motorcycles to solve the problem.
2,...3 Over temperature
error
1. The temperature of the controller has exceeded 100º. The controller will be stopped but will restart when it
is below 80º
2,...4 Throttle error at power-on 1. The gas control has been damaged by blow or water or dirt.
3,...1
Frequent reset 1. The fault will be cleared after the restart.
3,...2
Internal reset
1. It can be caused by some condition of transient failure such as temporary overcurrent, momentarily high
or low battery voltage. This may happen during normal operation.
3,...3
Hall throttle is open or short-circuit
1. When the gas control is repaired, the fault will be cleared with a reset.
¡WARNING!
When the baery is coming down (red light of the gas control) it is recommended
to change the map to posion 1 or 2 and charge the baery as soon as possible.
¡WARNING!
In case of "over-ride" or severe driving, the motorcycle could become blocked for
safety reasons. Press the ON / OFF switch to turn the motorcycle o and on again.
If the problem persists, disconnect the baery connector that we nd by remo-
ving the lower protecve plate.
¡WARNING!
When motorcycle use is intense, motorcycle power can be reduced to prevent
damage to electrical components. It is recommended to turn o the ON-E and
allow to cool to return to the inial power.

18
6 - DRIVE CHAIN
This motorcycle uses a chain of transmission, pinion and crown habitual in a
motorcycle of greater size. This motorcycle has no gears, it is direct transmission
from engine to wheel.
The chain must be checked before every ride and adjusted as necessary. There
should be very lile slack in the chain. Adjustment is done as follows:
1. Ensure power is turned o. Switch OFF and kill switch disconnecng.
2. Unscrew the rear wheel axle unl the wheel is free from lng. Don’t remove the
sha.
3. Chain tensioning procedure:
a) Unscrew the locknut with wrench 8mm between swingarm and wheel
tensioner. There is one on the right side and one on the le side.
b) Unscrew the screw with wrench 8mm by pushing the chain tensioner.
With lile twist, the displacement is large. Perform the operaon
symmetrically. Do not leave the chain too ght, keep in mind that when
the shock absorber is compressed, the chain tends to ghten.
c) Check that the rear wheel is aligned with the swingarm.
d) Fix the locknuts on both sides.
e) Screw the rear wheel axle.
f) Check the pinion and crown screws are correctly screwed.
g) Lubricate the chain with chain spray. TRS recommends the use of NILS
O road chain.
Unscrew the rear wheel axle with a 8mm
Allen wrench.
Unscrew the chain tensioner with a 8mm
wrench by pushing the chain tensioner.
Perform the same operaon on the other
side of the swingarm. Fix the locknuts
and screw the wheel axle. Check that the
pinion and crown screws are correctly
screwed.
19
7 - SUSPENSION
This motorcycle is equipped with pneumac suspension, to the front and rear
adjustable.
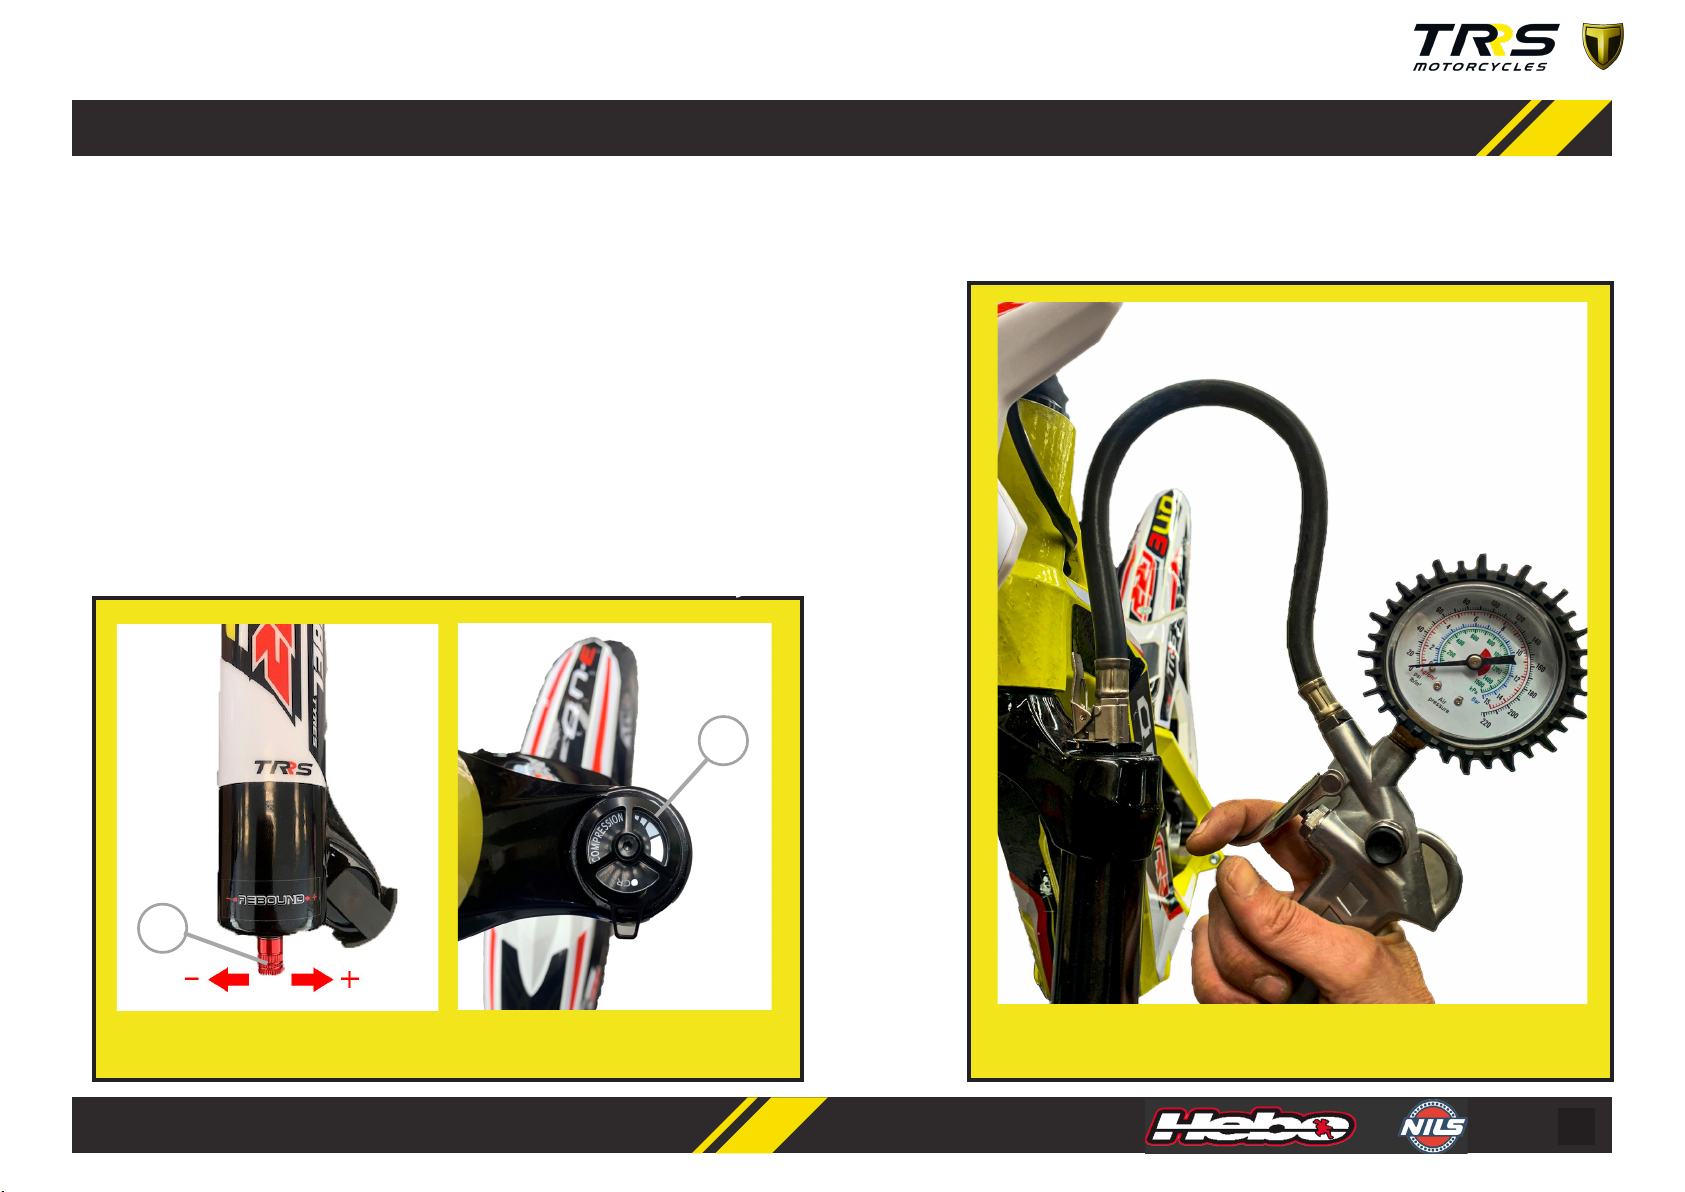
FRONT SUSPENSION
Possible sengs are:
A) Compression: Adjustable with the knob, located on the top of the right bole.
By turning the compression dial counterclockwise we can block the damping
completely or harden it, if we turn the dial clockwise we unlock the compression.
B) Rebound:
The rebound adjuster is located on the boom of the right bole. Turning counter
clockwise we get a faster bounce, otherwise clockwise the rebound is slower.
A
B) Rebound A) Compression
B
We can adjust the hardness or smoothness of our suspension with an air pump.
The front suspension is an "air" fork. A specic air pump is required to
add pressure. The air pump is not supplied with the motorcycle.
20
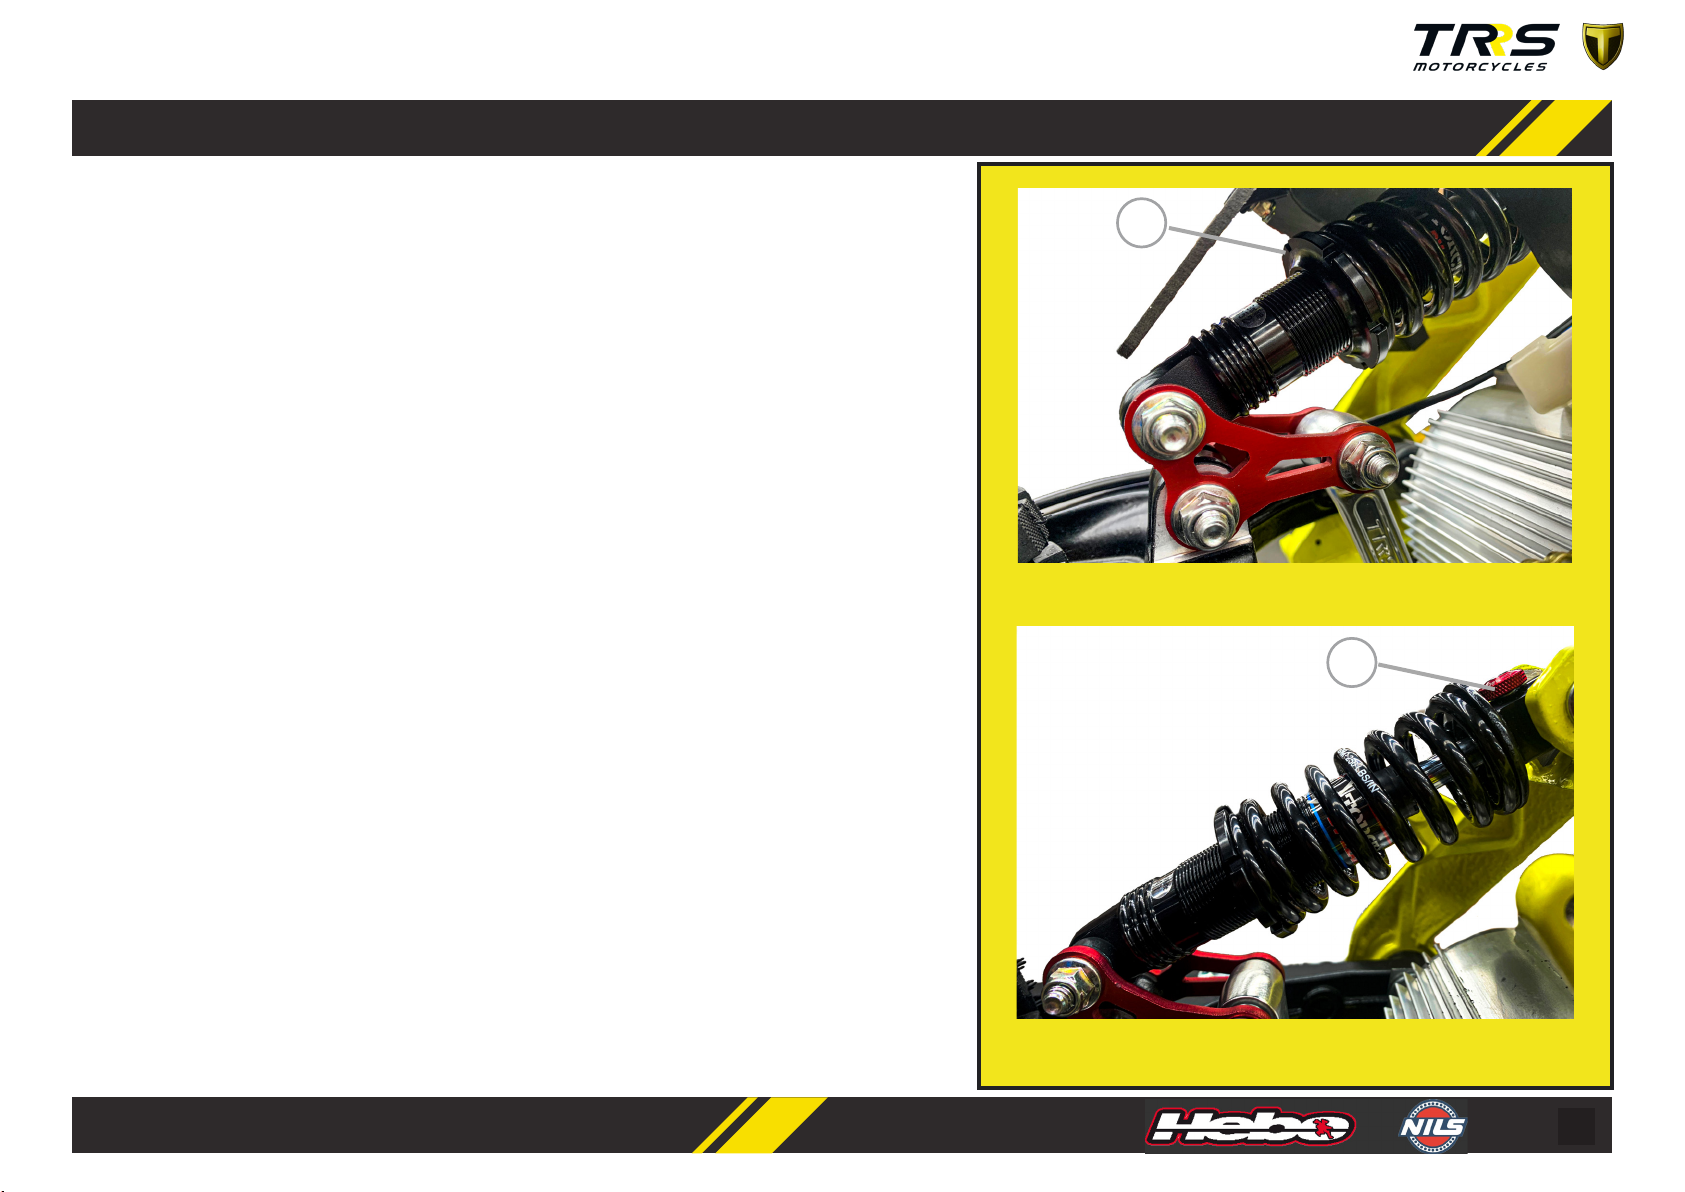
8 - REAR SHOCK ABSORBER
This motorcycle is equipped with an oil damper with coil spring located at the rear.
The shock absorber is connected to a system of connecng links that confers
progressivity in the travel, that is to say in the rst part of the travel the damping
is so and while in the nal part the damping hardens. This allows to increase the
tracon in the rst course and reduce the impact when the motorcycle makes a
jump.
The shock absorber has the possibility of two adjustments:
A) Spring preload. By adjusng the nut that holds the spring, the force of the
spring can be hardened or soened. By turning the nut clockwise, more hardness
is achieved, while turning counterclockwise, more smoothness is achieved.
There is another replaceable spring with dierent hardness as an accessory, to get
a beer t depending on the weight and skills of the pilot.
B) Rebound. There is a knob on the top of the shock absorber. It is under the
saddle. By adjusng this parameter, the shock absorber can recover the posion
aer compression, faster or slower. In the clockwise direcon the rebound is fast
while in the counterclockwise direcon the rebound is slow.
A) Spring preload
B) Rebound
B
A
Table of contents
Other TRS Motorcycle manuals


 owner's manual")


