Truper Expert CARBA-200X User manual
Lea este Instructivo por completo
antes de usar la herramienta.
ATENCIÓN
ESPAÑOL
ENGLISH
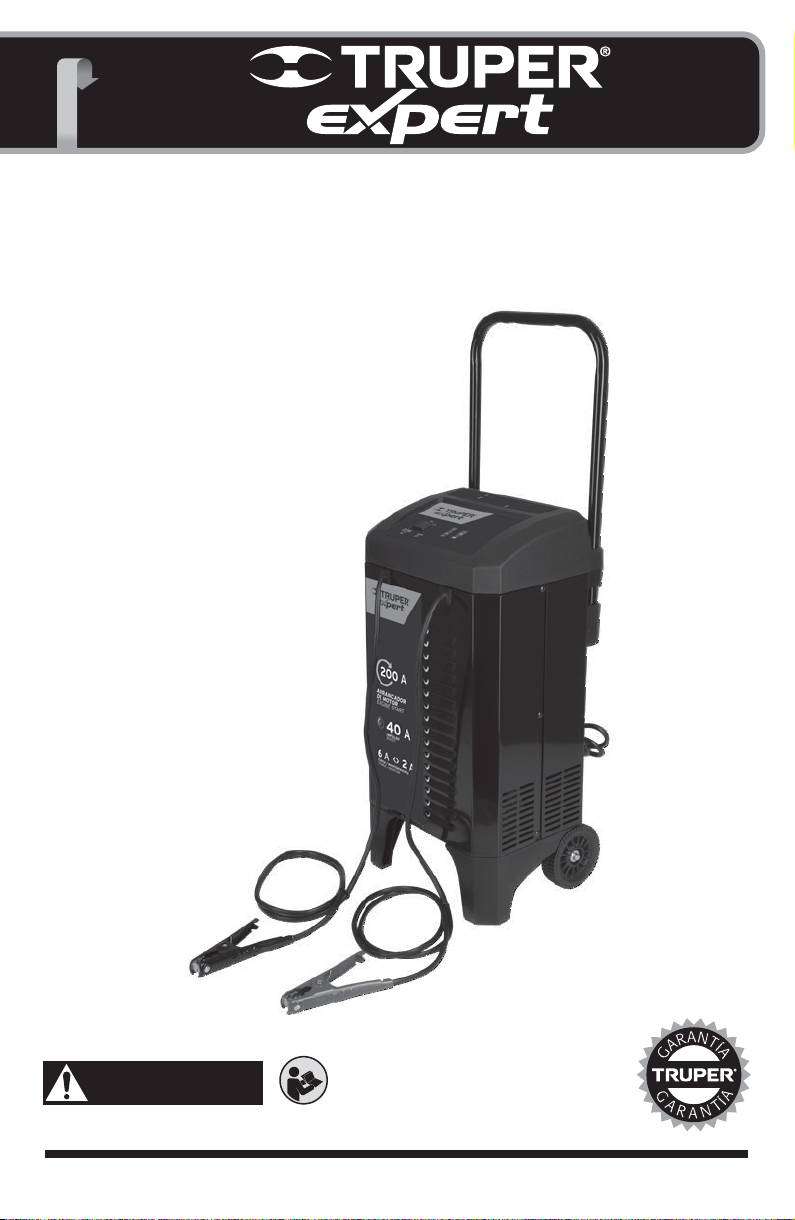
Modelo: CARBA-200X
Código: 19589
Instructivo
Cargador de batería automático
con arrancador

INSTRUCCIONES IMPORTANTES DE SEGURIDAD
1. Guarde estas instrucciones, este instructivo contiene
instrucciones operativas y de seguridad de importancia.
2. Este cargador no está destinado para ser usado por niños.
3. No exponga el cargador a la lluvia o a la nieve.
4. El uso de un accesorio no recomendado o suministrado por el
fabricante del cargador de baterías puede provocar riesgo de
incendio, descarga eléctrica o lesiones a personas.
5. Para reducir el riesgo de daños a la clavija y cable de
alimentación, jale de la clavija en lugar de jalar del cable al
desconectar el cargador.
6. No se debe utilizar una extensión a menos que resulte
absolutamente necesario. El uso de una extensión
inadecuada puede provocar riesgo de incendio o descarga
eléctrica. En caso de que deba utilizarse una extensión,
asegúrese de que:
• Los pines en el enchufe de la extensión posean el mismo
número, tamaño y forma que aquellos presentes en el
enchufe del cargador.
• La extensión se debe encontrar correctamente conectada
y en buenas condiciones eléctricas.
• El tamaño del cable debe ser lo suficientemente extenso
para la capacidad en la corriente alterna del cargador
como se especifica en la sección de conexiones a tierra y
energía de la corriente alterna (página 3)
7. No utilice el cargador si el cable de alimentación esta dañado;
reemplace el cable de alimentación en un Centro de Servicio
Autorizado Truper
8. No utilice el cargador si el mismo recibió un golpe fuerte, si
se cayó o si sufrió daños de cualquier otra forma; hágalo
revisar en un Centro de Servicio Autorizado Truper
9. No desarme el cargador; hágalo revisar por en un Centro de
Servicio Autorizado Truper cuando necesite servicio de
mantenimiento o una reparación. Volver a ensamblar el
cargador en forma incorrecta puede provocar riesgo de
incendio o descarga eléctrica.
10. Para reducir el riesgo de descarga eléctrica, desenchufe el
cargador del tomacorriente antes de intentar llevar a cabo
cualquier actividad de mantenimiento o limpieza. El simple
apagado de los controles no reducirá este riesgo.
RIESGO DE GASES EXPLOSIVOS.
a) Resulta peligroso trabajar en forma cercana a una batería de
plomo. Las baterías generan gases explosivos durante su
funcionamiento normal. Por este motivo, resulta de suma
importancia que siga las instrucciones cada vez que utiliza el
cargador.
b) Para reducir el riesgo de explosión de una batería, siga estas
instrucciones y aquellas publicadas por el fabricante de la
batería y por el fabricante de cualquier equipo que intente
utilizar en la proximidad de la batería. Revise las pautas de
precaución en estos productos y en el motor.
CONTENIDOS
Especificaciones técnicas ........................................................................
Instrucciones importantes de seguridad ............................................
Precauciones de seguridad personal ...................................................
Preparación para la carga .......................................................................
Ubicación del cargador .............................................................................
Precauciones de conexión en c.c. ..........................................................
Siga estos pasos cuando la batería esté colocada en el vehículo
Siga estos pasos cuando la batería se encuentre fuera del
vehículo .........................................................................................................
Conexiones a tierra y energía de c.a. ...................................................
Instrucciones de montaje .........................................................................
Panel de control ..........................................................................................
Instrucciones de operación .....................................................................
Mantenimiento y cuidado .........................................................................
Localización y resolución de problemas .............................................
Garantía y centros de servicios ..............................................................
ESPECIFICACIONES TÉCNICAS
Entrada
Tensión:
Frecuencia:
Corriente:
Salida
Tensión:
Impulso:
Carga / mantenimiento:
Arranque de motor:
Ciclo de trabajo:
Clase de aislamiento del transformador: Clase “H”
El cable de aislamiento tiene sujeta-cables tipo: “Y”
Todos los conductores son: 18 AWG x 3C con temperatura de
aislamiento de 105 ºC
NOTA IMPORTANTE: Si el cable de alimentación se daña, éste
debe ser reemplazado por el fabricante o Centro de Servicio
Autorizado Truper®, con el fin de evitar algún riesgo de descarga
o accidente considerable.
El tipo de sujeta-cables empleado para este producto es tipo “Y”.
La construcción de este producto está diseñada de manera que
su aislamiento eléctrico es alterado por salpicaduras o
derramamiento de líquidos durante su operación.
Antes de obtener acceso a las
terminales, todos los circuitos de alimentación deben ser
desconectados
Este aparato tiene protección contra sobrecarga por medio de
un fusible térmico el cual se activa para desactivar el suministro
de energía eléctrica.
Este símbolo indica que este
equipo cumple con la norma
oficial mexicana (NOM)
ADVERTENCIA
ADVERTENCIA
127 V~
60 Hz
0,29 A - 19,1 A
12 V
40 A
2 A - 6 A
200 A
5 segundos encendido
180 segundos apagado
Máximo 5 ciclos
2
2
2
3
3
3
3
4
4
4
5
5
5
7
8
9

PRECAUCIONES DE SEGURIDAD PERSONAL
1. Considere la idea de que alguna persona se encuentre cerca
suyo para poder ayudarlo cuando trabaje en forma cercana a
una batería de plomo-ácido.
2. Cuente con una gran cantidad de agua potable y jabón a
mano, en caso de que el ácido de la batería tenga contacto
con su piel, ropa u ojos.
3. Utilice protección visual y corporal completa,
incluyendo gafas de seguridad y prendas de protección.
Evite tocar sus ojos mientras trabaje en forma cercana
a la batería.
4. Si el ácido de la batería tiene contacto con su piel o su ropa,
lave de inmediato el área afectada con agua y jabón. En caso
de que ingrese ácido en un ojo, sumerja el mismo de
inmediato bajo agua potable corriente por al menos
10 minutos y obtenga atención médica en forma inmediata.
5. NUNCA fume o permita la presencia de chispas o
llamas en la proximidad de una batería o motor.
6. Tenga especial cuidado para reducir el riesgo de
dejar caer una herramienta de metal sobre la batería.
Esto podría provocar chispas o un cortocircuito en la
batería o en cualquier otra pieza eléctrica que podría
provocar una explosión.
7. No utilice elementos personales de metal tales como anillos,
pulseras, collares y relojes al trabajar con una batería de
plomo-ácido. Una batería de plomo-ácido puede producir una
corriente de cortocircuito lo suficientemente elevada como
para soldar un anillo o provocar efectos similares sobre el
metal, causando una quemadura de gravedad.
8. Utilice este cargador solamente para cargar baterías
recargables de tipo plomo-ácido (estándar o AGM) se
recomienda usar capacidad de la batería de 22 Ah - 59 Ah
(12 V ). Este cargador no está destinado a suministrar
energía a sistemas eléctricos de baja tensión más que en una
aplicación de un motor de arranque. No utilice este cargador
de batería para cargar baterías de pila seca que por lo
general se utilizan con artefactos domésticos. Estas baterías
podrían explotar y provocar lesiones a personas o daño a la
propiedad.
9. NUNCA cargue una batería congelada.
PREPARACIÓN PARA LA CARGA
1. Si resulta necesario extraer la batería del vehículo para
cargarla, siempre retire la terminal con descarga a tierra en
primer lugar. Asegúrese de que todos los accesorios en el
vehículo se encuentren apagados para evitar la formación de
arcos eléctricos.
2. Asegúrese de que el área que rodea a la batería se encuentre
bien ventilada mientras se carga la batería.
3. Limpie las terminales de la batería antes de cargar la batería.
Durante la limpieza, evite que la corrosión producida por aire
tenga contacto con sus ojos.
4. Agregue agua destilada a cada pila hasta que el ácido de la
batería alcance el nivel especificado por el fabricante de la
batería. No provoque derrames. En lo que concierne a
baterías que no cuentan con tapas extraíbles para pilas, tales
como baterías de plomo-ácido reguladas por válvulas (VRLA,
por sus siglas en inglés), siga cuidadosamente las
instrucciones de recarga del fabricante.
5. Lea, comprenda y siga todas las instrucciones para el
cargador, la batería, el vehículo y cualquier equipo que se
utilice cerca de la batería y el cargador. Controle todas las
precauciones específicas establecidas por el fabricante de la
batería al realizar la carga, así también como los índices de
carga recomendados.
6. Determine la tensión de la batería al consultar el instructivo
del usuario del vehículo y asegúrese de que el interruptor de
selección de la tensión de salida se encuentre establecido en
la tensión correcta (en su caso). Si el cargador posee un
índice de carga ajustable, cargue la batería en el menor
índice en primer lugar.
UBICACIÓN DEL CARGADOR
1. Ubique el cargador a la mayor distancia posible de la batería
como lo permitan los cables de corriente continua.
2. Nunca ubique el cargador directamente por encima de la
batería que se carga; los gases de la batería corroerán y
dañarán el cargador.
3. Nunca permita que el ácido de la batería gotee sobre el
cargador al leer el peso específico del electrolito o al cargar
la batería.
4. No utilice el cargador en un área cerrada o restrinja la
ventilación en cualquier forma.
5. No ubique la batería encima del cargador.
PRECAUCIONES DE CONEXIÓN EN CORRIENTE CONTINUA
1. Conecte y desconecte las pinzas de salida c.c. sólo después de
haber establecido todos los interruptores del cargador a la
posición de “apagado” (si es aplicable) y de haber
desconectado el enchufe de c.a. del tomacorriente eléctrico.
Nunca junte las pinzas de batería cuando el cargador está
conectado. Las pinzas están energizadas y pueden producir
chispas.
2. Sujete las pinzas a la batería y al chasis, como se indica en en
las secciones “Siga estos pasos cuando la batería esté
colocada en el vehículo” y “Siga estos pasos cuando la
batería se encuentre fuera del vehículo” en la página 4.
3

SIGA ESTOS PASOS CUANDO LA BATERÍA ESTÉ COLOCADA EN
EL VEHÍCULO
UNA CHISPA PROVOCADA CERCA DE LA
BATERÍA PUEDE CAUSAR LA EXPLOSIÓN DE LA BATERÍA.
PARA REDUCIR EL RIESGO DE PROVOCAR CHISPAS CERCA DE LA
BATERÍA:
1. Ubique los cables de corriente alterna y corriente continua
adecuadamente para reducir el riesgo de daños por la
cubierta, la puerta y las piezas móviles o calientes del motor.
2. Manténgase alejado de las paletas del ventilador, correas,
poleas y otras piezas que podrían provocar lesiones.
3. Verifique la polaridad de los bornes de la batería. El borne
POSITIVO (POS, P, +) de la batería generalmente posee un
diámetro mayor al borne NEGATIVO (NEG, N, -).
4. Determine qué borne de la batería hace descarga a tierra (se
encuentra conectado) con el chasis. Si el borne negativo
hace descarga a tierra con el chasis (como en la mayor parte
de los vehículos), ver el paso (5). Si el borne positivo hace
descarga a tierra con el chasis, ver el paso (6).
5. En un vehículo con descarga a tierra por borne negativo,
conecte la pinza POSITIVA (ROJO) del cargador de batería al
borne POSITIVO (POS, P, +) sin descarga a tierra de la batería.
Conecte la pinza NEGATIVA (NEGRO) al chasis del vehículo o al
bloque motor alejado de la batería. No conecte la pinza al
carburador, líneas de combustible o cuerpos metálicos.
Conecte a una pieza metálica de calibre grueso del marco o
del bloque motor.
6. En un vehículo con descarga a tierra por borne positivo,
conecte la pinza NEGATIVA (NEGRO) del cargador de batería
al borne NEGATIVO (NEG, N, -) sin descarga a tierra de la
batería. Conecte la pinza POSITIVA (ROJO) al chasis del
vehículo o al bloque motor alejado de la batería. No conecte
al carburador, líneas de combustible o cuerpos metálicos.
Conecte a una pieza metálica de calibre grueso del marco o
del bloque motor.
7. Al desconectar el cargador, apague todos los interruptores
(en su caso), desconecte el cable de alimentación, retire la
pinza del chasis del vehículo y luego retire la pinza del
terminal perteneciente a la batería.
8. Vea Instrucciones de Operación para duración de la carga.
SIGA ESTOS PASOS CUANDO LA BATERÍA SE ENCUENTRE
FUERA DEL VEHÍCULO
UNA CHISPA PROVOCADA CERCA DE LA
BATERÍA PUEDE CAUSAR LA EXPLOSIÓN DE LA BATERÍA.
PARA REDUCIR EL RIESGO DE PROVOCAR CHISPAS CERCA DE LA
BATERÍA:
1. Verifique la polaridad de los bornes de la batería. El borne
POSITIVO (POS, P, +) de la batería generalmente posee un
diámetro mayor al borne NEGATIVO (NEG, N, -).
2. Sujete al menos un cable aislado de batería de 61 cm (24”) de
largo con calibre 6 según el calibre americano de cables
(AWG, por sus siglas en inglés) al borne NEGATIVO (NEG, N, -)
de la batería.
3. Conecte la pinza POSITIVA (ROJO) del cargador al borne
POSITIVO (POS, P, +) de la batería.
4. Ubíquese junto con el extremo libre del cable que
previamente sujetó al borne NEGATIVO (NEG, N, -) de la
batería a la mayor distancia posible de la batería. Luego
conecte la pinza NEGATIVA (NEGRO) del cargador al extremo
libre del cable.
ADVERTENCIA
ADVERTENCIA
5. No se ubique en posición frontal a la batería al realizar la
conexión final.
6. Al desconectar el cargador, siempre hágalo en forma inversa
al procedimiento de conexión y realice la primera conexión
tan lejos de la batería como sea posible.
7. Una batería marina (para barcos) se debe retirar y cargar en
tierra. Para realizar una carga a bordo se necesitan
equipamientos especialmente diseñados para uso marino.
CONEXIONES A TIERRA Y CABLE DE ALIMENTACIÓN
1. Este cargador de batería está destinado a un uso en un
circuito con tensión nominal de 127 V c.a. y posee un enchufe
con descarga a tierra. El cargador debe poseer una descarga
a tierra para reducir el riesgo de descargas eléctricas. El
enchufe se debe conectar a un tomacorriente
adecuadamente instalado y que cuente con descarga a tierra
de acuerdo con todas las normas y códigos establecidos. Los
pines del enchufe deben adaptarse al receptáculo
(tomacorriente). No utilizar con un sistema que no posea
descarga a tierra.
2. Nunca altere el cable de alimentación
suministrado, si no se ajusta al tomacorriente, haga instalar
un tomacorriente adecuado con descarga a tierra por medio
de un electricista capacitado. Una conexión inadecuada
puede provocar un riesgo de descarga eléctrica.
NOTA: El uso de un enchufe como adaptador no se recomienda y
no debe ser utilizado
3. USO DE UN CABLE DE EXTENSIÓN
El uso de una extensión no se recomienda. Si debe usar una
extensión, siga estas pautas:
• Las clavijas del enchufe del cable de extensión debe ser el
mismo número, tamaño y forma que las del enchufe del
cargador.
• Asegúrese de que el cable de extensión esté conectado
correctamente y en buenas condiciones eléctricas.
• La longitud del cable debe tener un calibre adecuado de
acuerdo a la capacidad de corriente del cargador, como se
especifica a continuación:
Longitud de cables Calibre del cable AWG*
7,6 m (25 ft)
15,2 m (50 ft)
30,4 m (100 ft)
45,7 m (150 ft)
14
12
10
8
PELIGRO
*Se permite utilizarlo siempre y cuando las
extensiones mismas cuenten con un artefacto de
protección contra sobrecorriente.
AWG = Calibre de alambre estadounidense (American
Wire Gauge). Referencia: NMX-J-195-ANCE
4
INSTRUCCIONES DE MONTAJE
Desenrede todos los cordones y extienda los cables antes de
usar el cargador de baterías.
Extienda el asa desde la posición retraída tirando de él hacia
arriba hasta que encaje en su lugar. (Pulse los botones pequeños
de plata hacia el interior, si es necesario.)
PANEL DE CONTROL
• INTERRUPTOR DE ENCENDIDO / APAGADO (ON / OFF)
Utilice este interruptor para seleccionar entre la velocidad de la
carga / mantenimiento, la velocidad de impulso y el modo de
arranque del motor.
APAGADO (OFF)
Cuando el interruptor se encuentra en esta posición (en el
centro), el cargador se apaga.
• IMPULSAR o CARGA / MANTENIMIENTO
Cuando el interruptor se encuentra en esta posición, el
botón de selección de carga se puede ajustar a 6 A <> 2 A
carga / mantenimiento o la configuración de 40 A impulso.
• ARRANQUE DEL MOTOR
Cuando el interruptor esté en esta posición, la luz LED de
encendido del motor se activará y se mantendrá constante
cuando esté conectado a una batería.
• SELECCIÓN DE CARGA
Utilice este botón para establecer una de las siguientes
selecciones.
• 6 A <> 2 A CARGA / MANTENIMIENTO
Para la carga de baterías pequeñas y grandes. No se recomienda
para aplicaciones industriales.
• 40 A IMPULSAR
Para la incorporación rápida de la energía a una batería muy
descargada o de gran capacidad antes de arrancar el motor.
• 200 A ARRANQUE DEL MOTOR
Proporciona 200 A para el arranque de un motor con una batería
débil o agotada. Siempre utilizar en combinación con una
batería.
INDICADORES LED
• LED pinzas invertidas / batería defectuosa (LED rojo
parpadea)
Las conexiones están invertidas.
• LED pinzas invertidas / batería defectuosa (LED rojo
permance encendido)
El cargador ha detectado un problema con la batería. Consulte
localización y solución de problemas para obtener más
información.
• (AMARILLO/NARANJA) Encendido:
El cargador está conectado y la batería está recibiendo
alimentación.
• LED Cargado / Mantenimiento (VERDE) Encendido:
La carga de la bateria está completa, el cargador cambió a
modo mantenimiento
NOTA: Consulte la sección instrucciones de operación para
obtener una descripción completa de los modos del cargador.
INSTRUCCIONES DE OPERACIÓN
Una chispa provocada cerca de la batería
puede causar una explosión.
CARGA DE LA BATERÍA EN EL VEHÍCULO
1. Apague todos los accesorios del vehículo.
2. Mantenga el cofre abierto.
3. Limpie las terminales de la batería.
4. Ajuste el interruptor a la posición apagado (OFF)
5. Coloque los cables de corriente alterna / corriente continua
lejos de las aspas del ventilador, bandas, poleas y otras
partes móviles que pueden causar lesiones.
6. Conectar la batería según las instrucciones indicadas en la
sección “Siga estos pasos cuando la batería esté colocada en
el vehículo” en la página 4.
7. Conecte el cargador a la toma de corriente.
8. Con el cargador enchufado y conectado a la batería del
vehículo, ponga el interruptor en la posición Impulsar o
carga / mantenimiento
9. Seleccione la velocidad deseada.
10. Al desconectar el cargador, ajuste el interruptor a la
posición apagado (OFF), desconecte el cargador de la
corriente alterna, desconecte la pinza del chasis del vehículo
y quite la pinza de la terminal de la batería.
CARGA DE LA BATERÍA FUERA DEL VEHÍCULO
1. En primer lugar, coloque la batería en un área bien ventilada.
2. Ajuste el interruptor a la posición apagado (OFF)
3. Limpie las terminales de la batería.
4. Conectar la batería según las instrucciones indicadas en la
sección “Siga estos pasos cuando la batería se encuentre
fuera del vehículo” en la página 3.
5. Conecte el cargador a la toma de corriente.
6. Con el cargador enchufado y conectado a la batería del
vehículo, ponga el interruptor en la posición Impulsar o
carga / mantenimiento
7. Seleccione la velocidad deseada.
8. Al desconectar el cargador, ajuste el interruptor a la posición
apagado (OFF), desconecte el cargador de la corriente
alterna, desconecte la pinza del chasis del vehículo y quite la
pinza de la terminal de la batería.
9. Una batería marina (para barcos) se debe retirar y cargar en
tierra.
ADVERTENCIA
5

• (AMARILLO/NARANJA) Encendido:
El cargador está conectado y la batería está recibiendo
alimentación.
• LED Cargado / Mantenimiento (VERDE) Encendido:
La carga de la bateria está completa, el cargador cambió a
modo mantenimiento
NOTA: Consulte la sección instrucciones de operación para
obtener una descripción completa de los modos del cargador.
INSTRUCCIONES DE OPERACIÓN
Una chispa provocada cerca de la batería
puede causar una explosión.
CARGA DE LA BATERÍA EN EL VEHÍCULO
1. Apague todos los accesorios del vehículo.
2. Mantenga el cofre abierto.
3. Limpie las terminales de la batería.
4. Ajuste el interruptor a la posición apagado (OFF)
5. Coloque los cables de corriente alterna / corriente continua
lejos de las aspas del ventilador, bandas, poleas y otras
partes móviles que pueden causar lesiones.
6. Conectar la batería según las instrucciones indicadas en la
sección “Siga estos pasos cuando la batería esté colocada en
el vehículo” en la página 4.
7. Conecte el cargador a la toma de corriente.
8. Con el cargador enchufado y conectado a la batería del
vehículo, ponga el interruptor en la posición Impulsar o
carga / mantenimiento
9. Seleccione la velocidad deseada.
10. Al desconectar el cargador, ajuste el interruptor a la
posición apagado (OFF), desconecte el cargador de la
corriente alterna, desconecte la pinza del chasis del vehículo
y quite la pinza de la terminal de la batería.
CARGA DE LA BATERÍA FUERA DEL VEHÍCULO
1. En primer lugar, coloque la batería en un área bien ventilada.
2. Ajuste el interruptor a la posición apagado (OFF)
3. Limpie las terminales de la batería.
4. Conectar la batería según las instrucciones indicadas en la
sección “Siga estos pasos cuando la batería se encuentre
fuera del vehículo” en la página 3.
5. Conecte el cargador a la toma de corriente.
6. Con el cargador enchufado y conectado a la batería del
vehículo, ponga el interruptor en la posición Impulsar o
carga / mantenimiento
7. Seleccione la velocidad deseada.
8. Al desconectar el cargador, ajuste el interruptor a la posición
apagado (OFF), desconecte el cargador de la corriente
alterna, desconecte la pinza del chasis del vehículo y quite la
pinza de la terminal de la batería.
9. Una batería marina (para barcos) se debe retirar y cargar en
tierra.
MODO DE IMPULSAR
NOTA: La unidad cambiará automáticamente al modo
impulsar, dependiendo de la tensión. Para seleccionar el
modo carga / mantenimiento, pulse el botón de
selección de carga.
Para seleccionar el modo de impulsar, pulse el botón de
selección de carga hasta que se ilumine la luz LED
amarillo / naranja de impulsar de 40 A
La luz LED se iluminará si la batería está conectada
correctamente, y el proceso de impulsar se iniciará.
NOTA: El modo de impulsar permanecerá energizado hasta que
se pulse el botón de selección de carga o hasta que el
interruptor principal de encendido / apagado (ON / OFF) esté en
la posición de apagado (OFF)
MODO DE CARGA / MANTENIMIENTO
Para seleccionar este modo, presione el botón de selección
de carga hasta que la luz LED amarilla / naranja de 6 <> 2 A
de carga / mantenimiento se enciende.
La luz LED se iluminará si la batería está correctamente
conectada; entonces, el proceso de carga se iniciará.
Cuando la batería esté completamente cargada, la luz LED verde
de cargado / mantenimiento se iluminará.
Si no se puede completar la carga, la luz LED pinzas
invertidas / batería defectuosa (ROJO) se iluminará. La
batería puede encontrarse en mal estado; revísela.
NOTA: Si la tensión de la batería es inferior a 12,7 V , el
cargador entrará automaticamente en modo Impulsar para
agregar energía de manera rápida a la batería. Para abortar /
evitar el incremento temporal y forzar al cargador en el modo
de mantenimiento / carga, pulse el botón de selección de
carga nuevamente (mientras continua impulsar).
UTILIZAR LA FUNCIÓN DE ENCENDIDO DE MOTOR
El cargador de batería se puede utilizar para impulsar el auto si
la batería está baja. Siga todas las instrucciones y precauciones
de seguridad en la carga de la batería.
Use protección en los ojos así como hacer uso de ropa de
protección
Utilizando la función de arranque del motor
sin la batería instalada en el vehículo, dañará el sistema
eléctrico
NOTA: Bajo clima frío extremo o si la batería es inferior a 2 V,
impulsar la batería por 5 minutos antes de poner en marcha el
motor.
NOTA: Si usted ya ha cargado la batería y aún no arranca el
auto, no utilice la opción de arranque, ya que esto dañará el
sistema eléctrico del vehículo. Haga revisar la batería.
1. Coloque el selector a la posición apagado (OFF).
2. Con el cargador desenchufado del tomacorriente de
corriente alterna, conecte el cargador a la batería siguiendo
las instrucciones que figuran en la sección “carga de la
batería en el vehículo”
3. Enchufe el cable de alimentación de corriente alterna del
cargador al tomacorriente de corriente alterna.
4. Con el cargador enchufado y conectado a la batería del
vehículo, ajuste el interruptor de encendido / apagado (ON /
OFF) en la posición de arranque del motor.
5. Déle arranque al motor hasta que se ponga en marcha o
hasta que pasen 5 segundos. Si el motor no arranca espere
unos minutos antes de intentarlo de nuevo. Esto permite al
cargador y la batería que se enfríen.
NOTA: Después de 3 minutos en el modo de arranque del motor,
el cargador entrará en un período de enfriamiento de 180
segundos. El LED amarillo / naranja de arranque del motor
parpadeará durante el período de enfriamiento.
6. Si el motor no arranca, utilice el ajuste 40 A impulsar
por 5 minutos antes de darle arranque nuevamente.
7. Después de que el motor se puso en marcha, cambie el
selector a la posición de apagado (OFF) y desenchufe el
cable de alimentación de la corriente alterna antes de
desconectar las pinzas de la batería del vehículo.
8. Limpie y guarde el cargador en un lugar seco.
NOTA: Si el motor gira, pero no enciende, no existe un problema
con el sistema de arranque, sino en cualquier otra parte del
vehículo. DEJE de darle arranque al motor hasta que el otro
problema se diagnostique y se corrija.
TIEMPOS DE CARGA
Los tiempos están basados en un 50 % de descarga de la
batería y pueden cambiar, dependiendo de la edad y la
condición de la batería.
CARGA ANULADA
Si no se puede completar la carga normalmente, la carga se
anulará. Cuando la carga se interrumpe, la salida del cargador
se apaga y la luz LED pinzas invertidas / batería defectuosa
(ROJO) se iluminará. No continúe intentando cargar esta batería.
Revise la batería y reemplácela si es necesario.
MODO DE DESULFATACIÓN
La desulfatación puede durar 8 a 10 horas. Si la desulfatación
falla, la carga se abortará y la luz LED pinzas invertidas /
batería defectuosa (ROJO) se iluminará.
ADVERTENCIA
APLICACIÓN
Powersports 6 Ah
32 Ah
6
15
Automotriz
Marina
TIEMPO DE CARGA (HORAS)
2 A 6 A 8 A 10 A
TAMAÑO DE
LA BATERÍA
300 CCA
1 000 CCA
50 Ah
105 Ah
2
5
1,75
4,5
1,5
4
12
30
4
10
3,5
8,5
3
7
15
33
5
11
4,25
9,5
3,5
8
6

FINALIZACIÓN DE LA CARGA
La finalización de la carga se indica con el LED cargado
/mantenimiento (VERDE). Cuando está encendido, el
cargador ha pasado de modo de mantenimiento.
MODO DE MANTENIMIENTO (MONITOREO A MODO DE FLOTE)
Cuando la luz LED cargado / mantenimiento (VERDE) está
encendido, quiere decir que pasó al modo de mantenimiento.
En este modo el cargador mantiene la batería totalmente
cargada mediante una pequeña corriente cuando corresponda.
Si el cargador tiene que funcionar al máximo en corriente
continua de mantenimiento a un periodo de 12 horas, se
transladará al modo de interrumpir (véase la sección Carga
Anulada). Esto es ocacionalmente causado por una pérdida de
energía en la batería o la batería está dañada.
Asegúrese que no escape carga en la batería y si la hay evítela,
en caso contrario, verifique o reémplace la batería.
MANTENIENDO UNA BATERÍA
El CARBA-200X carga y mantiene las baterías de 12 V ,
manteniéndolas a carga completa.
NOTA: La tecnología de modo de mantenimiento le permite
cargar de forma segura y mantener una batería en buen estado
durante largos períodos de tiempo.
Ahora, los problemas con la batería, problemas eléctricos del
vehículo, conexiones equivocadas u otras condiciones que
surjan, podrían causar absorsión de corriente excesiva. De modo
que, dé ocasionalmente seguimiento a su batería y el proceso
de carga que se requiere.
FUNCIONAMIENTO DEL VENTILADOR
Es normal que el ventilador funcione continuamente. Mantener
el área cerca del cargador sin obstrucciones para permitir que
el ventilador funcione eficazmente.
MANTENIMIENTO Y CUIDADO
Con cuidados mínimos puede mantener el cargador de baterías
funcionando correctamente durante años.
• Limpie las pinzas cada vez que termine de usar el cargador.
Limpie el fluido de la batería que podría haber estado en
contacto con las pinzas para evitar la corrosión.
• De vez en cuando, limpie la carcasa del cargador con un paño
suave para conservar el acabado brillante y evitar la
corrosión.
• Enrolle los cables de alimentación y las pinzas
cuidadosamente cuando almacene el cargador. Esto ayudará
a evitar daños accidentales a los cables y el cargador.
• Guarde el cargador desenchufado de la toma de alimentación
de corriente alterna en posición vertical.
• Almacene en el interior, en un lugar fresco y seco. No guarde
las pinzas en el mango, unidas con un clip, en / o alrededor
del metal, o sujeta a los cables.
7

PROBLEMA
• El cargador no se enciende
incluso al estar bien conectado.
• Sin inicio al arrancar el motor.
• El LED rojo se ilumina.
CAUSA POSIBLE
• Tomacorriente de la corriente
alterna fuera de funcionamiento.
• Conexión eléctrica deficiente.
• Batería está defectuosa
• Consumo mayor a 200 A
• No espera 3 minutos (180
segundos) entre los arranques.
• El cargador podría encontrarse en
estado de recalentamiento.
• La batería podría encontrarse
severamente descargada.
• La tensión de la batería todavía
está debajo de 10 V después de
2 horas de carga.
• En el modo de mantenimiento, la
corriente de salida es de más de
1,5 A durante 12 horas.
• La batería no puede ser
desulfatada.
• Se detecta la falta de progreso y la
tensión de la batería está por
debajo de 14,2 V
• La tensión inicial de la batería está
por debajo de 12,2 V y la entrada
total es de menos de 1,5 Ah
• La tensión de la batería cae por
debajo de 12,2 V en el modo de
mantenimiento.
SOLUCIÓN
• Controle la posible presencia de fusibles
abiertos o disyuntores que suministren
energía al tomacorriente de la corriente
alterna.
• Controle la posible pérdida del enchufe
perteneciente a los cables de alimentación
o la extensión eléctrica.
• Haga revisar la batería
• El tiempo de arranque varía según la
cantidad de corriente consumida. Si el
arranque consume más de 200 A, el tiempo
de arranque podría ser menor a
5 segundos.
• Cuando parpadea el LED de arranque del
motor, esperar 3 minutos en tiempo de
descanso antes del próximo arranque.
• El protector térmico podría encontrarse
desconectado y necesitar un mayor tiempo
de descanso. Asegúrese de que los
ventiladores del cargador no se encuentren
bloqueados. Aguarde un momento y pruebe
nuevamente.
• Con baterías muy descargadas, utilizar el
ajuste de Impulsar durante 10 a 15
minutos, para ayudar en el arranque.
• La batería puede estar defectuosa.
Asegúrese de que no hay carga en la
batería, de ser así, elimínela. Si no hay
ninguna, verifíque o reempláce la betría.
• La batería puede estar defectuosa.
Verifíquela o reemplácela.
• La batería se puede sobrecalentar. Si es así,
deje que la batería se enfríe. La batería
puede ser demasiado grande o tener un
circuito en corto. Verifíquela o reemplácela.
• La capacidad de la batería es demasiado
baja o la batería es demasiado antigua.
Verifíquela o reemplácela.
• La batería no mantiene la carga. Puede ser
causada por una batería descargada o la
batería podría ser mala. La batería puede
estar defectuosa. Asegúrese de que no hay
cargas en la batería. Si hay eliminarlos. Si
no hay ninguna, verifíque o reempláce la
batería.
LOCALIZACIÓN Y RESOLUCIÓN DE PROBLEMAS
8

AGUASCALIENTES | DE TODO PARA LA CONSTRUCCIÓN
GRAL. BARRAGÁN #1201, COL. GREMIAL, C.P. 20030,
AGUASCALIENTES, AGS. TEL.: 44 9994 0537
BAJA CALIFORNIA | SUCURSAL TIJUANA
AV. LA ENCANTADA, LOTE #5, PARQUE INDUSTRIAL EL FLORIDO II,
C.P 22244, TIJUANA, B.C. TEL.: 66 4969 5100
BAJA CALIFORNIA SUR | FIX FERRETERÍAS
FELIPE ÁNGELES ESQ. RUIZ CORTÍNEZ S/N, COL. PUEBLO NUEVO,
C.P. 23670, CD. CONSTITUCIÓN, B.C.S. TEL.: 61 3132 1115
CAMPECHE | TORNILLERÍA Y FERRETERÍA AAA
AV. ÁLVARO OBREGÓN #324, COL. ESPERANZA C.P. 24080
CAMPECHE, CAMP. TEL.: 98 1815 2808
CHIAPAS | FIX FERRETERÍAS
AV. CENTRAL SUR #27, COL. CENTRO, C.P. 30700, TAPACHULA,
CHIS. TEL.: 96 2118 4083
CHIHUAHUA | SUCURSAL CHIHUAHUA
AV. SILVESTRE TERRAZAS #128-11, PARQUE INDUSTRIAL BAFAR,
CARRETERA MÉXICO CUAUHTÉMOC, C.P. 31415, CHIHUAHUA, CHIH.
TEL. 61 4434 0052
CIUDAD DE MÉXICO | FIX FERRETERÍAS
EL MONSTRUO DE CORREGIDORA, CORREGIDORA # 22,
COL. CENTRO, C.P. 06060, CUAUHTÉMOC, CDMX.
TEL: 55 5522 5031 / 55 5522 4861
COAHUILA | SUCURSAL TORREÓN
CALLE METAL MECÁNICA #280, PARQUE INDUSTRIAL ORIENTE, C.P.
27278, TORREÓN, COAH. TEL.: 87 1209 6823
COLIMA | BOMBAS Y MOTORES BYMTESA DE MANZANILLO
BLVD. MIGUEL DE LA MADRID #190, COL. 16 DE SEPTIEMBRE,
C.P. 28239, MANZANILLO, COL. TEL.: 31 4332 1986 / 31 4332 8013
DURANGO | TORNILLOS ÁGUILA, S.A. DE C.V.
MAZURIO #200, COL. LUIS ECHEVERRÍA, DURANGO, DGO.
TEL.: 61 8817 1946 / 61 8818 2844
ESTADO DE MÉXICO | SUCURSAL CENTRO JILOTEPEC
AV. PARQUE INDUSTRIAL #1-A, JILOTEPEC, C.P. 54240, JILOTEPEC,
EDO. DE MÉX. TEL: 76 1782 9101 EXT. 5728 Y 5102
GUANAJUATO | CÍA. FERRETERA NUEVO MUNDO S.A. DE C.V.
AV. MÉXICO - JAPÓN #225, CD. INDUSTRIAL, C.P. 38010, CELAYA,
GTO. TEL.: 46 1617 7578 / 79 / 80 / 88
GUERRERO | CENTRO DE SERVICIO ECLIPSE
CALLE PRINCIPAL MZ.1 LT. 1, COL. SANTA FE, C.P. 39010,
CHILPANCINGO, GRO. TEL.: 74 7478 5793
HIDALGO | FERREPRECIOS S.A. DE C.V.
LIBERTAD ORIENTE #304 LOCAL 30, INTERIOR DE PASAJE
ROBLEDO, COL. CENTRO, C.P. 43600, TULANCINGO, HGO.
TEL.: 77 5753 6615 / 77 5753 6616
JALISCO | SUCURSAL GUADALAJARA
AV. ADOLFO B. HORN # 6800, COL: SANTA CRUZ DEL VALLE,
C.P.: 45655, TLAJOMULCO DE ZUÑIGA, JAL.
TEL.: 33 3606 5285 AL 90
MICHOACÁN | FIX FERRETERÍAS
AV. PASEO DE LA REPÚBLICA #3140-A, COL. EX-HACIENDA DE LA
HUERTA, C.P. 58050, MORELIA, MICH. TEL.: 44 3334 6858
MORELOS | FIX FERRETERÍAS
CAPITÁN ANZURES #95, ESQ. JOSÉ PERDIZ, COL. CENTRO,
C.P. 62740, CUAUTLA, MOR. TEL.: 73 5352 8931
NAYARIT | HERRAMIENTAS DE TEPIC
MAZATLAN #117, COL. CENTRO, C.P. 63000, TEPIC, NAY.
TEL.: 31 1258 0540
NUEVO LEÓN | SUCURSAL MONTERREY
AV. STIVA #275, PARQUE INDUSTRIAL STIVA BARRAGAN, SAN
NICOLAS DE LOS GARZA ,C.P. 66420, MONTERREY, N.L.
TEL.: 81 8352 8791 / 81 8352 8790
OAXACA | FIX FERRETERÍAS
AV. 20 DE NOVIEMBRE #910, COL. CENTRO, C.P. 68300,
TUXTEPEC, OAX. TEL.: 28 7106 3092
PUEBLA | SUCURSAL PUEBLA
AV PERIFÉRICO #2-A, SAN LORENZO ALMECATLA, C.P. 72710,
CUAUTLACINGO, PUE. TEL.: 22 2282 8282 / 84 / 85 / 86
QUERÉTARO | ARU HERRAMIENTAS S.A DE C.V.
AV. PUERTO DE VERACRUZ #110, COL. RANCHO DE ENMEDIO,
C.P. 76842, SAN JUAN DEL RÍO, QRO. TEL.: 42 7268 4544
QUINTANA ROO | FIX FERRETERÍAS
CARRETERA FEDERAL MZ. 46 LT. 3 LOCAL 2, COL EJIDAL,
C.P. 77710 PLAYA DEL CARMEN, Q.R. TEL. 98 4267 3140
SAN LUIS POTOSÍ | FIX FERRETERÍAS
AV. UNIVERSIDAD #1850, COL. EL PASEO, C.P. 78320, SAN LUIS
POTOSÍ, S.L.P. TEL.: 44 4822 4341
SINALOA | SUCURSAL CULIACÁN
AV. JESÚS KUMATE SUR #4301, COL. HACIENDA DE LA MORA,
C.P. 80143, CULIACÁN, SIN. TEL.: 66 7173 9139 / 66 7173 8400
SONORA | FIX FERRETERÍAS
CALLE 5 DE FEBRERO #517, SUR LT. 25 MZ. 10, COL. CENTRO,
C.P. 85000, CD. OBREGÓN, SON. TEL.: 64 4413 2392
TABASCO | SUCURSAL VILLAHERMOSA
CALLE HELIO LOTES 1, 2 Y 3 MZ. #1, COL. INDUSTRIAL, 2A ETAPA,
C.P. 86010, VILLAHERMOSA, TAB. TEL.: 99 3353 7244
TAMAULIPAS | VM ORINGS Y REFACCIONES
CALLE ROSITA #527 ENTRE 20 DE NOVIEMBRE Y GRAL.
RODRÍGUEZ, FRACC. REYNOSA, C.P. 88780, REYNOSA, TAMS.
TEL.: 89 9926 7552
TLAXCALA | SERVICIOS Y HERRAMIENTAS INDUSTRIALES
PABLO SIDAR #132, COL . BARRIO DE SAN BARTOLOMÉ,
C.P. 90970, SN. PABLO DEL MONTE, TLAX. TEL.: 22 2271 7502
VERACRUZ | LA CASA DISTRIBUIDORA TRUPER
BLVD. PRIMAVERA. ESQ. HORTENSIA S/N, COL. PRIMAVERA
C.P. 93308, POZA RICA, VER. TEL.: 78 2823 8100 / 78 2826 8484
YUCATÁN | SUCURSAL MÉRIDA
CALLE 33 #600 Y 602, LOCALIDAD ITZINCAB Y MULSAY, MPIO.
UMÁN, C.P. 97390, MÉRIDA, YUC. TEL.: 99 9912 2451
CENTROS DE SERVICIO AUTORIZADOS TRUPER®
Venta de partes, componentes, consumibles y accesorios.

Póliza de garantía
Marca: TRUPER EXPERT Modelo: CARBA-200X Código: 19589
Este producto, sus piezas y componentes están garantizados por un año contra defectos de
fabricación, funcionamiento y mano de obra, excepto cuando: el producto haya sido usado en
condiciones distintas a las recomendadas, o no se haya operado de acuerdo al instructivo, o haya sido
alterado o reparado por personal no autorizado por
Para hacer válida la garantía o adquirir piezas y componentes deberá presentar el producto y su
comprobante de compra en Av. San Isidro #110, Col. Industrial San Antonio, Alc. Azcapotzalco,
C.P. 02760, CDMX, Méx. o en el establecimiento donde lo compró, o en algún Centro de
Servicio de los enlistados en el anexo de la póliza de garantía y/o en
www.truper.com
Los gastos de transportación que resulten para su cumplimiento serán cubiertos por
Para dudas o comentarios, llame al 800-690-6990.
Hecho en México
Fabricado por: Truper, S.A. de C.V. Parque Industrial #1,
Jilotepec, Edo. de Méx., Méx. C.P. 54240
10-2019
Sello del establecimiento comercial.
Fecha de entrega:

ENGLISH
ESPAÑOL
Model: CARBA-200X
Code: 19589
Manual
AUTOMATIC Battery charger
with jump starter
Read the user’s manual thoroughly
before operating this tool.
CAUTION

IMPORTANT SAFETY INSTRUCTIONS
1. Keep these instructions. This Manual content are important
operative and safety instructions.
2. This charger is not meant to be used by children.
3. Do not expose the charger to rain or snow.
4. Using an accessory not recommended or supplied by the
battery charger manufacturer is a risk of fire, electric shock
or personal injury.
5. To reduce the risk of damaging the plug or power cable, pull
the plug instead of the cable when disconnecting the
charger.
6. You shall not use an extension cable unless strictly
necessary. Using an extension that is not adequate may
start a fire or electric shock. In the event of needing to use
an extension cable make sure that:
• The pins in the extension cable plug are the same number,
size and shape as the ones in the charger plug.
• The extension shall be correctly connected and in good
electric conditions.
• The cable size shall be wide enough for the alternate
current of the charger as specified in the Ground
connections and alternate energy current (page 3)
7. Do not use the charger if the power cord is damaged; replace
the power cord at a Truper Authorized Service Center
8. Do not use the charger if it received a strong bump, it fell or
is damaged in any way. Only certified personnel shall check
it at a Truper Authorized Service Center
9. Do not disassemble the charger. Ask a trained person to
check at a Truper Authorized Service Center. If you assemble
it back it may cause fire or electric shock.
10. To reduce the risk of electric shock, disconnect the charger
from the power supply before carrying out maintenance or
cleaning service. Turning OFF the controls DOES NOT reduce
those risks.
RISK OF EXPLOSIVE GASSES.
a) It is risky working near a lead battery. Batteries generate
explosive gasses during the normal functioning. Therefore, it
is very important to follow the instructions each time you
use the charger,
b) To reduce the risk of the battery exploiting, follow these
instructions and the manufacturer instructions of any
equipment you will be using near the battery. Check the
caution measures in this product and the motor.
CONTENTS
Technical data ...............................................................................................
Important Safety Instructions ..................................................................
Personal Safety Cautions............................................................................
Preparation to charge .................................................................................
Charger Location ..........................................................................................
Connection Precautions in c.c. connection ..........................................
Follow these steps when the battery is set in the vehicle ..............
Follow these steps when the battery is set out of the
vehiclevehículo .............................................................................................
Ground Connections and a.c. power .......................................................
Mounting Instructions .................................................................................
Control Panel .................................................................................................
Operation Instructions ...............................................................................
Maintenance and Care ................................................................................
Troubleshooting ............................................................................................
Warranty Policy and Authorized Service Centers ...............................
TECHNICAL SPECIFICATIONS
Input
Voltage:
Frequency:
Current:
Output
Voltage:
Impulse:
Maintenance Load:
Motor kickoff:
Work Cycle:
Transformer insulation Class: Class “H”
Insulation cable cord grips type: “Y”
All conductors are: 18 AWG x 3 C with 221 ºF insulation
temperature
IMPORTANT NOTE: Avoid the risk of electric shock or severe
injury. When the power cable gets damaged it should only be
replaced by the manufacturer or at a Truper® Authorized Service
Center. Power grips used in this product is type “Y”
The build quality of the electric insulation is altered if while in
use splashing or liquid get into the tool. Do not expose to rain,
liquids and / or dampness.
Before gaining access to the terminals all
power sources should be disconnected.
This device is built with overload protection through a thermal
fuse that turn ON the electricity is OFF
WARNING
WARNING
127 V~
60 Hz
0,29 A - 19,1 A
12 V
40 A
2 A - 6 A
200 A
5 seconds ON
180 seconds OFF
Maximum 5 cycles
This symbol indicates this equipment
is in compliance with the Official Mexican
Standard (NOM)
2
2
2
3
3
3
3
4
4
4
5
5
5
7
8
9

PERSONAL SAFETY CAUTIONS
1. Consider the idea of a second person close to the user to
help, when working near an acid lead battery.
2. Have handy plenty of fresh water and soap in case battery
acid make contact with your skin, clothes or eyes.
3. Use full eye protection and protective clothes.
Avoid touching your eyes when working near the
battery.
4. In the event acid from the battery make contact with your
skin or clothes, wash immediately with water and soap. If
acid gets into your eyes, wash with plenty of cold water at
least 10 minutes and seek medical help immediately.
5. NEVER smoke or allow sparks or flames near the
battery or the motor.
6. Use extreme care when handling metal tools close
the battery. If dropped it can cause a spark or short
circuit in the battery or any other electric part and
cause an explosion.
7. Do not wear metal articles like rings, bracelets and watches
when working with an acid lead battery. An acid lead battery
may cause a short circuit with extremely high current
capable or welding a ring or any other metal article causing
severe burns.
8. Use the charger only to charge rechargeable batteries acid
lead type (standard or AGM). It is recommended using
22 Ah – 59 Ah (12 V ) battery capacity. This charger is not
designed to supply energy to low voltage, only in a motor
starting application. Do not use the battery charger to
charge dry batteries used commonly with domestic
appliances. These types of batteries may explode and injure
people and damage property.
9. NEVER recharge a frozen battery.
PREPARING TO CHARGE
1. If you need to remove the battery from the vehicle to charge,
always remove the battery ground terminal. Verify all the
vehicle accessories are OFF no avoid causing an arc.
2. Make sure the area around the battery is well ventilated
when charging the battery.
3. Clean the battery terminals before charging the battery.
While cleaning, prevent corrosion produced by air is not
making contact with your eyes,
4. Add distilled water into each cell until the battery acid is
reaching the specified level indicated by the battery
manufacturer. Do not cause spills. For batteries built without
extractible caps in the cells such as valve regulated acid lead
batteries (VRLA), follow carefully the recharge instructions
indicated by the manufacturer.
5. Read, understand and follow all the instructions for the
charger, the battery, the vehicle and any equipment used
near the battery and the charger. Control all the specific
caution measures established by the battery manufacturer
when charging, as well as the recommended load index.
6. Determine the battery tension checking the vehicle user
manual and make sure the output voltage selection switch is
established in the right voltage (if it is the case). If the
charger has an adjustable loading speed, charge the battery
first in the lowest speed.
PLACEMENT OF THE CHARGER
1. Set the charger as far away as the DC battery cables allow.
2. Never set the charger directly on top of the battery that is
been charged. Gasses in the battery may corrode and
damage the charger.
3. Do not let the battery acid drip over the charger when
checking gravity or when filling up.
4. Do not operate the charger in a closed area. Do not block
ventilation by no means.
5. Do not place the battery on top of the charger.
CAUTION MEASURES WITH THE DIRECT CURRENT
CONNECTION
1. Connect and disconnect the direct current output clamps
only after establishing all the charger switches to the OFF
position (if applicable) and after disconnecting the a.c. plug
from the power supply. Never set the clamps touching one to
the other when the charger is connected. The clamps are
energized and can produce sparks.
2. Set the clamps in the battery and chassis as indicated in the
section “Follow these steps when the battery is set in the
vehicle” and “Follow these steps when the battery is outside
the vehicle” in page 4.
3

FOLLOW THESE STEPS WHEN THE BATTERY IS INSTALLED IN
THE VEHICLE.
PRODUCING A SPARK, CLOSE TO THE BATTERY
MAY CAUSE AN EXPLOSION.
TO REDUCE THE RISK OF CAUSING SPARKS CLOSE TO THE
BATTERY:
1. Arrange the alternate current and continuous current cables
adequately to reduce the risk damages due to the hood, door
and mobile or hot parts of the motor.
2. Stay away of the fan blades, belts, pulleys or other parts
which could cause injuries.
3. Check the polarity of the battery posts. The POSITIVE (POS, P
+) battery post, usually is of a larger diameter than the
NEGATIVE (NEG, N, -) post.
4. Determine which of the battery posts is grounded
(connected) to the chassis. If the negative post is grounded
to the chassis (as it is in most vehicles, see step (5). If the
positive post is grounded to the chassis, see step (6).
5. In vehicles grounded through a negative post, connect the
POSITIVE (RED) clamp of the charger to the post that is not
grounded POSITIVE (POS, P +) post of the battery. Connect
the NEGATIVE (BLACK) clamp to the vehicle chassis or the
motor block that is away from the battery. Do not connect
the clamp in the carburetor, fuel lines or body metal sheets.
Connect into a metal part with tick caliber or a block in the
motor.
6. In vehicles grounded through the positive post, connect the
NEGATIVE (BLACK) clamp of the battery charger to the post
that is not grounded to the NEGATIVE (NEG, N, -) post of the
battery. Connect the POSITIVE (RED) clamp to the vehicle
chassis or to a block in the motor away from the battery. Do
not connect to the carburetor, fuel lines or non-metallic
bodies. Connect into a metal part with tick caliber or a block
in the motor.
7. When disconnecting the charger, also disconnect the power
cable. Remove the clamp from the vehicle chassis and then,
remove the clamp from the battery terminal.
8. See “Operation instructions” for charging times.
FOLLOW THESE STEPS WHEN THE BATTERY IS OUTSIDE OF
THE VEHICLE
A SPARK NEAR THE BATTERY MAY CAUSE AN
EXPLOSION IN THE BATTERY. TO REDUCE THE RISK OF
CAUSING SPARKS NEAR THE BATTERY:
1. Check polarity in the battery posts. The POSITIVE (POS, P +)
battery post of the battery, usually has a larger diameter
than the (NEG, N, -) post
2. Set at least one insulated battery cable 61 cm (24”) long and
a 6 gauge in accordance to AWG American gauge to the
NEGATIVE (NEG, N, -) battery post
3. Connect the POSITIVE (RED) clamp of the battery, to the
POSITIVE (POS, P +) post of the battery.
4. Your body as well as the free end of the cable previously
fastened to NEGATIVE (NEG, N, -) of the battery, shall be set
as far away as possible from the battery. Then, connect the
NEGATIVE (BLACK) clamp to the free end of the cable.
5. Do not stand in front of the battery when making the final
connection
6. When disconnecting the charger, do it in a reverse sequence
from the connection procedure and make the first
connection as far away as possible from the battery.
7. A marine (sea boat) battery shall be removed and charged on
ground. Charging on board, require equipment especially
designed to marine use
GROUND CONNECTIONS AND POWER CORDS
1. This battery charger is designed to be used in a 127 V rated
voltage circuit with a ground plug to reduce the risk of
electric shock. The plug shall be connected to a properly
installed power supply with ground discharge in accordance
with all the ordinances and codes. The plug prongs shall fit to
the socket. Do not use in a system that is not grounded
2. Never modify the power cable furnished. If not
fitting into the power supply, call a certified electrician to
install an adequate socket. An inadequate connection is a
risk of electric shock or electrocution
NOTE: Using an adapter plug is not recommended and shall not
be used.
3. USE OF AN EXTENSION CABLE
Using an extension cable is not recommended.
If you must use an extension cable follow these guidelines:
• The pins of the cable plugs shall be the same number, size
and shape of the charger plug.
• Make sure the extension cable is correctly connected and
in good electric conditions.
• The cable length shall have the right gauge according to
the charger current capacity, as specified below:
Length of cables Cable gauge AWG*
25 ft
50 ft
100 ft
150 ft
14
12
10
8
WARNING
WARNING
DANGER
*It is allowed to use it only if the extensions have an
overcurrent protection device.
AWG= American Wire Gauge. Reference:
NMX-J-195-ANCE
4
MOUNTING INSTRUCTIONS
Untangle all the wires and extend the cables before using the
battery charger.
Pull up the handle from the retracted position pulling upwards
until clicking in place (Push in the small silver buttons if
necessary)
CONTROL PANEL
• ON / OFF SWITCH
Use this switch to select between the charge speed / keep, drive
speed and start mode of the motor.
OFF - When the switch is in this position (in the center) the
charger is OFF.
• BOOST or CHARGE / MAINTENANCE
When the switch is in this position, the charge selector button
can be adjusted to 6 A <> 2 A charge / maintenance or the 40 A
impulse configuration.
• MOTOR START
When the switch is in this position, the LED light for motor start
will activate and will be constantly kept when connected to the
battery.
• CHARGE SELECTION
Use this button to establish the following selections.
• 6 A <> 2 A CHARGE / MAINTENANCE
For small and large batteries. It is not recommended for
industrial applications.
• 40 A BOOST
For a fast incorporation of energy to a discharged battery or big
capacity battery before starting the motor.
• 200 A MOTOR START
Delivers 200 A to start a motor with a weak or empty battery.
always use it in combination with a battery
LED INDICATORS
• LED inverted clamps / defective battery (Red LED
blinking)
The connections are reversed.
• LED inverted clamps / defective battery (Red LED
stays ON)
The charger is detecting a problem with the battery. See
Troubleshooting to learn more
• LED (YELLOW / ORANGE) ON:
The charger is connected and the battery is being “fed”
• LED Charging / Maintenance (GREEN) ON:
The battery charge is complete, the charger switched to
maintenance mode
NOTE: See the Operation instructions to learn about a complete
description of charger modes.
OPERATION INSTRUCTIONS
Provoking a spark near the battery may cause an
explosion.
CHARGING THE BATTERY IN THE VEHICLE
1. Turn OFF all the accessories in the vehicle.
2. Keep the hood open.
3. Clean the battery terminals.
4. Set the switch into the OFF position
5. Set the alternate current cables / continuous current cables
away from the fan blades, bands, pulleys and other mobile
parts that could cause injuries.
6. Connect the battery following the instructions indicated in
the “Follow these steps when the battery is set inside the
vehicle” section in page 4.
7. Connect the charger into the power supply.
8. Having the charges plugged and connected to the vehicle
battery, set the switch into the Boost or
Charge / Maintenance position
9. Select the desired speed.
10. When unplugging the charger, adjust the switch into the OFF
position. Disconnect the charger from the alternate current.
Disconnect the clamp from the vehicle chassis and remove
the clamp off the battery terminal.
CHARGING THE BATTERY OUT OF THE VEHICLE
1. Set the battery in a well-ventilated area.
2. Adjust the switch into the OFF position
3. Clean the battery terminals.
4. Connect the battery following the instructions indicated in
the “Follow these steps when the battery is out of the
vehicle” section in page 4.
5. Connect the charger to the power supply.
6. Having the charger plugged in and connected to the vehicle
battery, set the switch into the Boost or
Charge / Maintenance position
7. Select the desired speed.
8. When disconnecting the charger, adjust the switch into the
OFF position. Disconnect the charger off the vehicle and
remove the clamp from the battery terminal.
9. A marine (boats battery shall be removed and charge on
ground.)
WARNING
5

BOOST MODE
NOTE: The unit will change automatically to the boost
mode, depending on the voltage. To select the charge /
maintenance mode, press the charge selection button.
To select the boost mode, press the charge selection
button until the LED light is yellow / orange to boost to
40 A is lit
The light LED will light up if the battery is connected
correctly and the boost process will start.
NOTE: The boost mode will remain energized until pulsing the
charge selection button or until the ON / OFF main switch
is in the OFF position
CHARGE / MAINTENANCE MODE
To select this mode, press the charge selection button
until the yellow / orange 6 <> 2 A LED light for charge /
maintenance is ON.
The LED light will illuminate if the battery is correctly
connected; then, the charging process will start.
When the battery is completely charged, the green LED light for
charging / maintenance will illuminate. If the charge
cannot be completed, the LED light reversed clamps / defective
battery (RED) will illuminate. The battery may be in bad
repair. Check it.
NOTE: If the battery voltage is lower than 12,7 V , the charger
will automatically enter the boost mode to add in a fast manner,
energy to the battery. To abort / avoid temporary increase and
force the charger in the charge selection mode, press the
charge selection button again (while boost continues).
USING THE START MOTOR FUNCTION
The battery charger can be used to boost the automobile if the
battery is low. Follow all instructions and safety caution
measures in charging the battery.
Wear full eye protection and protective clothes.
Using the motor start function in the motor
when the battery is not installed in the vehicle will damage the
electric system.
NOTE:In extreme cold weather or if the battery is smaller than
2 V, boost the battery during 5 minutes before starting the
motor.
NOTE: If you have already charged the battery and the vehicle
still is not starting, do not use the motor start fuction. It will
damage the electric system in the vehicle. Have the battery
checked.
1. Set the selector into the OFF position.
2. Unplug the charger from the alternate current power supply.
Connect the charger to the battery following the instructions
in “charging the battery in the vehicle” section
3. Connect the charger alternate current power cable to the
alternate current power supply.
4. Having the charger connected to the vehicle battery, adjust
the ON / OFF switch into the motor start position.
5. Start the motor until it starts running or after 5 seconds. If
the motor is not starting, wait a few minutes before trying
again. This will cool down the charger and battery.
NOTE: After 3 minutes in the start motor mode, the charger will
enter a 180 seconds cooling period. The yellow / orange LED of
motor start will blink during the cooling period.
6. If the motor is not starting, use the adjust 40 A boost
during 5 minutes before starting again.
7. After the motor is running, turn the selector into the OFF
position and disconnect the power cable from the alternate
power supply before disconnecting the clamps from the
vehicle battery.
8. Clean and store the charger in a dry place.
NOTE: If the motor rotates but is not ON, there is no problem
with the starting system, but in any other part of the vehicle.
STOP starting the motor until the problem is diagnosed and
corrected.
CHARGING TIMES
These times are based in a battery 50% discharged and may
change depending of the age and condition of the battery.
OVERRIDE CHARGE
If the charge cannot be completed normally, the charge will
override. When the charge is interrupted, the charger output is
OFF and the LED inverted clamps (RED) will illuminate. Do
not continue trying to charge this battery. Check the battery
and replace if necessary
DESULPHURIZATION MODE
Desulphurization can take 8 to 10 hours. If desulphurization fails,
the charge will be aborted and the LED inverted clamp (RED)
will illuminate.
APPLICATION
Powersports 6 Ah
32 Ah
6
15
Automotive
Marine
CHARGING TIME (HOURS)
2 A 6 A 8 A 10 A
BATTERY
SIZE
300 CCA
1 000 CCA
50 Ah
105 Ah
2
5
1,75
4,5
1,5
4
12
30
4
10
3,5
8,5
3
7
15
33
5
11
4,25
9,5
3,5
8
WARNING
6

5. Start the motor until it starts running or after 5 seconds. If
the motor is not starting, wait a few minutes before trying
again. This will cool down the charger and battery.
NOTE: After 3 minutes in the start motor mode, the charger will
enter a 180 seconds cooling period. The yellow / orange LED of
motor start will blink during the cooling period.
6. If the motor is not starting, use the adjust 40 A boost
during 5 minutes before starting again.
7. After the motor is running, turn the selector into the OFF
position and disconnect the power cable from the alternate
power supply before disconnecting the clamps from the
vehicle battery.
8. Clean and store the charger in a dry place.
NOTE: If the motor rotates but is not ON, there is no problem
with the starting system, but in any other part of the vehicle.
STOP starting the motor until the problem is diagnosed and
corrected.
CHARGING TIMES
These times are based in a battery 50% discharged and may
change depending of the age and condition of the battery.
OVERRIDE CHARGE
If the charge cannot be completed normally, the charge will
override. When the charge is interrupted, the charger output is
OFF and the LED inverted clamps (RED) will illuminate. Do
not continue trying to charge this battery. Check the battery
and replace if necessary
DESULPHURIZATION MODE
Desulphurization can take 8 to 10 hours. If desulphurization fails,
the charge will be aborted and the LED inverted clamp (RED)
will illuminate.
COMPLETING THE CHARGE
Completing the charge is indicated with LED charging
(GREEN).
When the charger is ON it has passed from the function mode to
the maintenance mode.
MAINTENANCE MODE (FLOATING MODE MONITORING)
When the LED charging / maintenance (GREEN) light is
ON, it means it has passed to the maintenance mode. In this
mode the charger keeps the battery totally charged through a
small current when it corresponds. If the charger has to
function to the maximum in continuous current of maintenance,
during a 12-hour period, it will change into the interrupting
mode (see Override charge). This is occasionally caused by a
loss of energy in the battery or the battery is damaged. Make
sure the battery is not leaking charge and if so, prevent it,
otherwise, verify or replace the battery.
MAINTAINING A BATTERY
The CARBA – 200X charge and maintain 12 V batteries keeping
a full charge.
NOTE: Technology in maintenance mode allow to charge safely
and keep a battery in good repair during long periods of time.
Mow, problems with the battery, electric problems in the
vehicle, wrong connections or other condition that may arise,
could cause absorption of excessive current. So, occasionally,
follow up your battery performance and the charge process
required.
FAN OPERATION
It is normal for a fan to operate continuously. Keep the area
near the charger with no obstructions to allow the fan to work
correctly.
MAINTENANCE AND CARE
You can maintain your charger with minimum care and have it
functioning correctly many years.
• Clean the clamps each time you finish using the charger.
Clean the battery fluid that could have been in contact with
the clamps to prevent corrosion.
• Every now and then, clean the charger housing with a soft
cloth to keep the shiny finish and prevent corrosion.
• Roll carefully the input and output cables when storing the
charger. This will help to prevent accidental damage to the
cables and the charger.
• Store the charger unplugged from the alternate current
power supply and in a vertical position.
• Store indoors in a fresh and dry place. Do not store the
clamps in the handle joined with a clip in / or around the
metal or fasten the cables.
7

PROBLEM
• The charger is no ON even
when is well connected.
• No start when starting the
motor.
• The red LED is illuminated.
POSSIBLE CAUSE
• Alternate current socket is not
functioning
• Inadequate power connection
• Defective battery
• Consumption higher than 200 A
• It does not wait 3 minutes (180
seconds) between startups.
• The charger might be in reheating
status
• The battery might be severely
discharged.
• The voltage in the battery is still
below 10 V after 2 hours
charging
• In maintenance mode, the output
current is more than 1,5 A during
12 hours.
• The battery cannot be
desulphurated
• Progress fault is detected and the
battery tension is below 14,2 V
• The initial voltage of the battery is
below 12,2 V and the total input
es lower than 1,5 Ah.
• The battery voltage falls below
12,2 V in the maintenance mode.
SOLUTION
• Control the possible presence of open fuses
or disruptors supplying energy to the
alternate current socket.
• Control the possible loss of the plug
belonging to the power cables or electric
extension
• Send the battery to be checked
• The startup time varies, regarding the
amount of energy consumed. If the startup
consumes more than 200 A, the starting
time cod be lower than 5 seconds.
• When the motor startup LED is blinking, wait
3 minutes rest before the next startup.
• The thermal protector might be
disconnected and needs a higher rest time.
Make sure the charger fans are not blocked.
Wait one more minute and try again.
• If the battery has very low charge, use the
boost adjustment 10 to 15 minutes to
assist in the startup.
• The battery might be defective. Verify or
replace.
• The battery might be defective. Verify or
replace.
• The battery may overheat. If so, allow it to
cool down. The battery might be too big or
have a short circuit. Verify or replace.
• The battery capacity is too low or the
battery is too old. Verify or replace.
• The battery is not keeping the charge. It
might be caused by a discharged battery or
a bad battery. The battery might be
defective. Double check there are not loads
in the battery. If so, eliminate. If none,
verify or replace the battery.
TROUBLESHOOTING
8

AGUASCALIENTES | DE TODO PARA LA CONSTRUCCIÓN
GRAL. BARRAGÁN #1201, COL. GREMIAL, C.P. 20030,
AGUASCALIENTES, AGS. TEL.: 44 9994 0537
BAJA CALIFORNIA | SUCURSAL TIJUANA
AV. LA ENCANTADA, LOTE #5, PARQUE INDUSTRIAL EL FLORIDO II,
C.P 22244, TIJUANA, B.C. TEL.: 66 4969 5100
BAJA CALIFORNIA SUR | FIX FERRETERÍAS
FELIPE ÁNGELES ESQ. RUIZ CORTÍNEZ S/N, COL. PUEBLO NUEVO,
C.P. 23670, CD. CONSTITUCIÓN, B.C.S. TEL.: 61 3132 1115
CAMPECHE | TORNILLERÍA Y FERRETERÍA AAA
AV. ÁLVARO OBREGÓN #324, COL. ESPERANZA C.P. 24080
CAMPECHE, CAMP. TEL.: 98 1815 2808
CHIAPAS | FIX FERRETERÍAS
AV. CENTRAL SUR #27, COL. CENTRO, C.P. 30700, TAPACHULA,
CHIS. TEL.: 96 2118 4083
CHIHUAHUA | SUCURSAL CHIHUAHUA
AV. SILVESTRE TERRAZAS #128-11, PARQUE INDUSTRIAL BAFAR,
CARRETERA MÉXICO CUAUHTÉMOC, C.P. 31415, CHIHUAHUA, CHIH.
TEL. 61 4434 0052
MEXICO CITY | FIX FERRETERÍAS
EL MONSTRUO DE CORREGIDORA, CORREGIDORA # 22,
COL. CENTRO, C.P. 06060, CUAUHTÉMOC, CDMX.
TEL: 55 5522 5031 / 55 5522 4861
COAHUILA | SUCURSAL TORREÓN
CALLE METAL MECÁNICA #280, PARQUE INDUSTRIAL ORIENTE, C.P.
27278, TORREÓN, COAH. TEL.: 87 1209 6823
COLIMA | BOMBAS Y MOTORES BYMTESA DE MANZANILLO
BLVD. MIGUEL DE LA MADRID #190, COL. 16 DE SEPTIEMBRE,
C.P. 28239, MANZANILLO, COL. TEL.: 31 4332 1986 / 31 4332 8013
DURANGO | TORNILLOS ÁGUILA, S.A. DE C.V.
MAZURIO #200, COL. LUIS ECHEVERRÍA, DURANGO, DGO.
TEL.: 61 8817 1946 / 61 8818 2844
ESTADO DE MÉXICO | SUCURSAL CENTRO JILOTEPEC
AV. PARQUE INDUSTRIAL #1-A, JILOTEPEC, C.P. 54240, JILOTEPEC,
EDO. DE MÉX. TEL: 76 1782 9101 EXT. 5728 Y 5102
GUANAJUATO | CÍA. FERRETERA NUEVO MUNDO S.A. DE C.V.
AV. MÉXICO - JAPÓN #225, CD. INDUSTRIAL, C.P. 38010, CELAYA,
GTO. TEL.: 46 1617 7578 / 79 / 80 / 88
GUERRERO | CENTRO DE SERVICIO ECLIPSE
CALLE PRINCIPAL MZ.1 LT. 1, COL. SANTA FE, C.P. 39010,
CHILPANCINGO, GRO. TEL.: 74 7478 5793
HIDALGO | FERREPRECIOS S.A. DE C.V.
LIBERTAD ORIENTE #304 LOCAL 30, INTERIOR DE PASAJE
ROBLEDO, COL. CENTRO, C.P. 43600, TULANCINGO, HGO.
TEL.: 77 5753 6615 / 77 5753 6616
JALISCO | SUCURSAL GUADALAJARA
AV. ADOLFO B. HORN # 6800, COL: SANTA CRUZ DEL VALLE,
C.P.: 45655, TLAJOMULCO DE ZUÑIGA, JAL.
TEL.: 33 3606 5285 AL 90
MICHOACÁN | FIX FERRETERÍAS
AV. PASEO DE LA REPÚBLICA #3140-A, COL. EX-HACIENDA DE LA
HUERTA, C.P. 58050, MORELIA, MICH. TEL.: 44 3334 6858
MORELOS | FIX FERRETERÍAS
CAPITÁN ANZURES #95, ESQ. JOSÉ PERDIZ, COL. CENTRO,
C.P. 62740, CUAUTLA, MOR. TEL.: 73 5352 8931
NAYARIT | HERRAMIENTAS DE TEPIC
MAZATLAN #117, COL. CENTRO, C.P. 63000, TEPIC, NAY.
TEL.: 31 1258 0540
NUEVO LEÓN | SUCURSAL MONTERREY
AV. STIVA #275, PARQUE INDUSTRIAL STIVA BARRAGAN, SAN
NICOLAS DE LOS GARZA ,C.P. 66420, MONTERREY, N.L.
TEL.: 81 8352 8791 / 81 8352 8790
OAXACA | FIX FERRETERÍAS
AV. 20 DE NOVIEMBRE #910, COL. CENTRO, C.P. 68300,
TUXTEPEC, OAX. TEL.: 28 7106 3092
PUEBLA | SUCURSAL PUEBLA
AV PERIFÉRICO #2-A, SAN LORENZO ALMECATLA, C.P. 72710,
CUAUTLACINGO, PUE. TEL.: 22 2282 8282 / 84 / 85 / 86
QUERÉTARO | ARU HERRAMIENTAS S.A DE C.V.
AV. PUERTO DE VERACRUZ #110, COL. RANCHO DE ENMEDIO,
C.P. 76842, SAN JUAN DEL RÍO, QRO. TEL.: 42 7268 4544
QUINTANA ROO | FIX FERRETERÍAS
CARRETERA FEDERAL MZ. 46 LT. 3 LOCAL 2, COL EJIDAL,
C.P. 77710 PLAYA DEL CARMEN, Q.R. TEL. 98 4267 3140
SAN LUIS POTOSÍ | FIX FERRETERÍAS
AV. UNIVERSIDAD #1850, COL. EL PASEO, C.P. 78320, SAN LUIS
POTOSÍ, S.L.P. TEL.: 44 4822 4341
SINALOA | SUCURSAL CULIACÁN
AV. JESÚS KUMATE SUR #4301, COL. HACIENDA DE LA MORA,
C.P. 80143, CULIACÁN, SIN. TEL.: 66 7173 9139 / 66 7173 8400
SONORA | FIX FERRETERÍAS
CALLE 5 DE FEBRERO #517, SUR LT. 25 MZ. 10, COL. CENTRO,
C.P. 85000, CD. OBREGÓN, SON. TEL.: 64 4413 2392
TABASCO | SUCURSAL VILLAHERMOSA
CALLE HELIO LOTES 1, 2 Y 3 MZ. #1, COL. INDUSTRIAL, 2A ETAPA,
C.P. 86010, VILLAHERMOSA, TAB. TEL.: 99 3353 7244
TAMAULIPAS | VM ORINGS Y REFACCIONES
CALLE ROSITA #527 ENTRE 20 DE NOVIEMBRE Y GRAL.
RODRÍGUEZ, FRACC. REYNOSA, C.P. 88780, REYNOSA, TAMS.
TEL.: 89 9926 7552
TLAXCALA | SERVICIOS Y HERRAMIENTAS INDUSTRIALES
PABLO SIDAR #132, COL . BARRIO DE SAN BARTOLOMÉ,
C.P. 90970, SN. PABLO DEL MONTE, TLAX. TEL.: 22 2271 7502
VERACRUZ | LA CASA DISTRIBUIDORA TRUPER
BLVD. PRIMAVERA. ESQ. HORTENSIA S/N, COL. PRIMAVERA
C.P. 93308, POZA RICA, VER. TEL.: 78 2823 8100 / 78 2826 8484
YUCATÁN | SUCURSAL MÉRIDA
CALLE 33 #600 Y 602, LOCALIDAD ITZINCAB Y MULSAY, MPIO.
UMÁN, C.P. 97390, MÉRIDA, YUC. TEL.: 99 9912 2451
AUTHORIZED SERVICE CENTER TRUPER®
Sale parts, componets, supplies and accessories.

Model: CARBA-200X Code: 19589
Warranty Policy
Brand: TRUPER EXPERT
Stamp of the business:
Delivery date:
This product, its parts and components have a one year warranty against
defects in its manufacture, operation and workmanship, except when: the
product has been used in conditions other than those recommended, or has
not been operated according to the instructions, or has been altered or
repaired by personnel not authorized by . In order to make the
warranty valid or to purchase components and spare parts, you must present
the product and its proof of purchase at Av. San Isidro #110, Col. Industrial San
Antonio, ALC. Azcapotzalco, C.P. 02760, CDMX, Mex. or at the store where you
bought it, or at a service center listed in the attached warranty
policy and/or at www.truper.com. Transportation costs resulting from
compliance of this warranty will be covered by . For questions or
comments, call 800-690-6990.
Made in Mexico
Manufactured by: Truper, S.A. de C.V. Parque Industrial #1,
Jilotepec, Edo. de Méx., Méx. C.P. 54240
10-2019
This manual suits for next models
1
Table of contents
Languages:
Other Truper Batteries Charger manuals


