Truper TPN-722-2 User manual

TPN-722-2
ModelCode
TPN-722-2
Applies for:
16885
3/8”
Manual
Use oil continuously and
dosed to lubricate the tool.
Air impact wrench
WARNING
CAUTION Read this manual thoroughly
before using the tool.
ENGLISH
ESPAÑOL

2
TPN-722-2
ENGLISH
Contents
CAUTION
Keep this manual for future references.
The illustrations in this manual are for reference
only. They might be different from the real tool.
To gain the best performance of
the tool, prolong the duty life,
make the Warranty valid if
necessary, and to avoid hazards
of fatal injuries please read and
understand this Manual before
using the tool.
Technical data
Filtering and Lubrication Requirements
General Safety Warnings for
Pneumatic Tools
Risk Control When Using
Pneumatic Tools
Parts
Assembly
Start Up
Maintenance
Troubleshooting
Notes
Authorized Service Centers
Warranty Policy
3
3
4
5
7
7
8
9
9
10
11
12

3
TPN-722-2
16885
3/8”
2.5 CFM
Air impact wrench
90 PSI
10 000 RPM
Rocking Dog
75 lb-ft
1.88 lb
3/8”
1/4 NPT
On top
CAUTION
ENGLISH
Technical Data
Dust, water and lack of oil specific for pneumatic tools are the main cause of potential malfunction of the tool.
Setting up a Brand UNI-LL-1/4 centralized filter-oiler system is recommended. This system ensures
lubrication reducing oil consumption 80% increasing significantly the quality of air the operator is breathing.
Filtering and Lubrication Requirements
CAUTION
Please consider the increase in pressure in the line or the hose inner diameter to compensate
the use of too long hoses (more than 314.96 inches). The hose minimum inner diameter shall be 3/8” and the
connectors shall be 1/4 NPT. Use the right size and good quality couplers and accessories.
Air Hose
Code
Description
Impact Mechanism
Box Impeller
Maximum Torque
Air Ejection
850 bpm
Blows per minute
Free Speed
Weight Without Accessories
Air Pressure
Air Consumption
Air Inlet Connection
Hose Inside Diameter
UNI-LL-1/4
Centralized
Filter-Oiler
System
Quick
connector
(not included).
Air
Compressor
• The filter oiler system shall
be regulated to supply 3 to
6 drops per minute.
• Drain water from the air
compressor tank as well as
condensation in the hoses
before using the tool. See
the compressor
instructions.
1/2”
Screws Capacity

4ENGLISH
General Safety Warnings for
Pneumatic Tools
Keep your work area clean, tidy and well lit.
Cluttered and dark areas may cause accidents.
Never use the tool in explosive areas or in the presence
of flammable liquids or with no ventilation.
Sparks the tool generates could trigger an
explosion or start a fire.
Keep children and passersby at a safe distance while
operating the tool.
Distractions can cause losing control
and cause accidents.
Avoid making contact with power lines and circuits.
Find and avoid power lines and circuits, especially
hidden wiring as well as any grounded object.
Stay alert, use care and common sense.
Familiarity with the tool operation could lead to
distractions while using it. It could cause accidents.
Refrain from using the tool if tired or under the
influence of drugs, alcohol or medication.
Being momentarily distracted while using the
tool could cause severe personal injury.
Operate the tool with guards and protection devices in
place and in good working condition.
Failure to comply with this warning is a hazard
of severe personal injury.
Securely fasten and support the work piece.
Use brackets and a stable work surface.
Never force the tool.
Working within the tool’s working design
assures a better and safer job.
Keep the tool in a safe place and out of the reach of
children.
Power tools are dangerous to inexperienced
people.
Wear proper clothes.
Loose clothes, jewelry or long hair could get
caught in the mobile parts.
Keep hands away from rotating and/or mobile parts.
Failure to comply with this warning is a hazard
of severe personal injuries or crushing.
Wear adequate protective safety accessories.
Wear eye protection, dust mask, non-skid safety shoes,
helmet and ear plugs. In normal conditions, the risk of
injury is reduced.
Unplug the air hose from the tool before carrying out
maintenance or replacing accessories.
Prevent accidental startups that cause accidents.
Refrain from operating the tool if the switch is not
working or is not properly assembled.
Failure to complain with this warning is a hazard of
personal injury. Immediately send it to a
Authorized Service Center.
Do not overreach.
Good balance and support lead to better controlling
the tool in unexpected situations.
Never pull the air hose.
Do not use it to carry or unplug the tool from the air
outlet. Damaged or tangled hoses may burst and project
residues towards the operator.
Prevent unintentionally starting the tool.
Double-check the motor is OFF before lubricating,
setting up accessories or carry out maintenance.
Remove brackets before turning on the tool.
Additional tools or vices installed in a rotating
part could cause severe personal injury.
Double-check maintenance and good working
conditions before using the tool.
Carefully check mobile parts, alignment and assembly.
Do it periodically. Look for any damaged element or
parts not working properly. Repair immediately in a
Authorized Service Center.
Accessories.
Use only accessories or spare parts indicated in this
Manual or certified by .
Never leave a running tool unattended.
Turn off and disconnect tool after using. Set it in a safe
position to avoid severe injury.
CAUTION CAUTION
CAUTION
CAUTION
CAUTION
CAUTION
CAUTION
CAUTION
CAUTION
WARNING
WARNING
WARNING
WARNING
WARNING
WARNING
WARNING
WARNING
WARNING
DANGER
DANGER
DANGER
DANGER

5
ENGLISH
Risk Control When Using
Pneumatic Tools
• Compressed air out of pneumatic
equipment may be dangerous. Objects like brackets, burrs,
splinters, dust and other residues may be impelled towards
head and eyes due to high speed of the air flow. The air
flow itself can only injure soft tissue such as eyes, ears, etc.
• The tool attachments may get lose or
break and project particles towards the operator or other
operators in the work area.
Risk of injury in head and eyes
• Always, when operating pneumatic equipment wear
protection glasses in compliance with the ANSI Z87.1
Standard. As additional protection, wear a mask.
• Never aim the air flow towards people or animals.
• Disconnect the air hose from the tool when not in use.
• Never set a tool unattended when connected to the air
outlet.
• Before using the tool verify all the parts and accessories
are perfectly secured.
To prevent head and eyes injuries
• Abrasive tools like grinders, sanders
and cutting tools generate dust and particles that damage
the lungs and respiratory system.
• Some materials like resin or adhesive are made with
chemicals and the vapors emitted may cause serious
damage if the operator is exposed for long periods of time.
Risk of inhaling particles
• Always wear a face mask or breathing device when
operating these types of tools.
• Always work in a clean, well ventilated area.
To prevent inhaling particles
• Pneumatic tools do not have electric
insulation. If during the operation, the tool makes contact
with a source of electricity, the energy will be conducted to
the operator causing a fatal electrocution.
Risk of electric shock
• Never use pneumatic tools to work energized electric
wiring.
• Before operating the tool find the possible hidden wiring
in the work zone to prevent making contact.
• Avoid contact with grounded surfaces like pipes,
radiators o refrigerators. The risk of electrocution
increases if the operator’s body gets grounded.
To prevent electric shock
• Incorrect handling of pressure in
pneumatic equipment may cause an explosion causing
severe injuries.
Risk of explosion
• Before using the tool double check the compressed air
source is regulated to the tool specified pressure and
must not exceed 200 PSI.
To prevent explosions
• Being exposed long periods of time to
noise pneumatic tools produce may damage hearing
permanently causing hearing loss.
Risk of hearing loss
• Always, when operating pneumatic equipment
wear hearing protection in compliance with the
ANSI S3.19 Standard
To prevent hearing loss
• Pneumatic tools forced beyond the
capacity and lacking of adequate lubrication or used to
loosen rusted nuts (with impact wrench) will get damaged
and make the Warranty void.
Risk of damaging the tool
• Keep the tool duly lubricated.
• Do not force the tool.
• Apply “loose it all” liquid to rusted nuts or lugs before
trying to loosen with the tool (impact wrench).
To prevent damaging the tool
CAUTION
WARNING
WARNING
WARNING
WARNING
WARNING
WARNING

6ENGLISH
• Damaged hoses may burst and cause
serious injuries or deafness.
•Pneumatic tools connected to the compressed air source,
if operated by untrained staff or underage people, will
cause severe injuries.
• The compressed air used in pneumatic equipment may
be dangerous. Objects like vices, burrs, splinters, dust and
other residues may be impelled by the high-speed air flow
towards the operator or other people in the work area.
• Using inflation nozzles to clean or torch blowing may
cause severe injuries.
• Tools and accessories not suitable, damaged or low
quality like grinding discs, chisels, contacts, drills, brad
nailer, staplers, etc., may shoot out during the operation
and project particles causing severe injuries.
• Brackets may get lose and be projected causing severe
injuries or damage to property.
• Tools that accidentally start may cause severe injuries.
• Tools and accessories with no maintenance may cause
severe injuries.
• Tools using accessories without
certification may cause severe injuries.
• Damaged or banged tools may cause severe injuries.
Risk of injuries
• Do not abuse the hose or the connectors.
• Keep the hose away from sharp or abrasive edges.
• Unplug the hose when setting up accessories like
grinding discs or bits.
• Never use the hose to carry the tool.
• Never pull the hose to unplug it.
• Do not expose the hose to heat, oil or solvents.
• Before operating the tool, verify the hoses are not
damaged.
• Unplug the air hose when the tool is not in use. Store
the tool in a safe place away from children or untrained
people. Keep children and untrained people away from
the work area.
• Keep the work area clean, tidy and with good lighting.
• Remove any wrench or plier form the tool before
operating.
• Do not use inflation nozzles to clean or to torch
blowing.
• Use only parts, vices and accessories recommended by
.
• Double check all connections are correctly installed.
• Never carry the tool by the trigger.
• Disconnect the air hose out from the tool when not in
use.
• Never leave the tool unattended when connected to the
air outlet.
• Keep the tool handle clean and dry, free of oil or grease.
• Keep tools clean. A meticulously cleaned and oiled tool
delivers a more effective performance and is easier to
control.
• Any type of repair can only be carried out in a
Authorized Service Center.
• Use always accessories matching the tool speed.
• Use only certified accessories.
• Do not use damaged or banged tools.
To prevent injuries
WARNING
Risk Control When Using
Pneumatic Tools

1
2
3
4
5
6
7
8
9
Trigger
Air
Inlet
Nut or
Lug Inlet
Box Impeller
Inlet
Torque
Selector
Impact
Die
Retaining
Ring
Box Impeller
7
Parts
Assembly
ENGLISH
Die Set Up
• Disconnect the tool from the air outlet before replacing
the die.
• Select the die you need and set it in the box impeller.
• Always use impact dies with this tool. Do not use dies for
hand tools. Consult the catalog to
learn about our accessory’s variety.
• Use 3/8” dies for box impellers.
• Using adaptors for other sizes are not recommended.
Use only if strictly necessary.
• If the die has orifices always use rubber rings and steel
tips when setting it into de box impeller.
• When the box impeller is made with a retaining ring,
verify is in good repair. If damaged, replace immediately.
• When a die has not been secured and
adjusted as indicated, it can shoot out and injure the
operator.
WARNING

R F
1
2
3
4
5
6
7
8
9
8
Trigger
B
A
D
E
C
G
ENGLISH
Turning On
• Turn ON the air compressor and let it fill up.
• Regulate the air compressor outlet pressure to 90 PSI.
The tool operates with this pressure
range. If operating in a higher pressure range the tool
useful life will be shorter.
• Let run some air through the hose and coupling to
verify both are clean before connecting into the tool.
• Select the adequate rotation direction and torque.
• Press the trigger so that the die can rotate.
• Release the trigger to stop the die.
Rotation Direction and Torque Selection
• The direction of rotation depends on the side towards
which the trigger is pressed.
• To tighten a nut or lug, press the trigger to the right (F),
so that the die rotates clockwise. To loosen, press the trigger
to the left (R) so that the die rotates counter clockwise.
• To select torque and prevent from tightening too much a
nut or lug, turn the knob (G) until reaching the desired
torque level.
• Using the maximum torque is recommended when there
is no torque meter to verify the adequate torque.
• The torque value may vary depending on the air
compressor size and the quantity of air (CFM) it delivers.
Operation
• Set the die in the nut or lug you want to loosen or
tighten.
• Before operating the tool double check there is enough
space in the back of the tool to prevent getting your hand
trapped. The tool goes away from the nut / screw when
loosened or tightened.
• Do not try to make contact with the nut or lug with the
die moving. Do not press the trigger unless the nut or lug
is set correctly inside the die.
• Apply firm and constant pressure without forcing the
tool. Otherwise it can be damaged.
Air Outlet Connection
• Remove the plastic capo (A) covering the air inlet in the
handle base.
• Before each use add three to six drops of lubricant with
no detergent (B) into the air inlet (C).
• Screw the quick connector D(not included) to the air
inlet.
• Connect the air hose using a fast nipple E, (not
included) into the quick connector.
WARNING
Start Up

9
ENGLISH
Maintenance
Troubleshooting
• Pneumatic tools need constant lubrication along their
useful life and during the operation. Compressed air
needed in the tool to run carry humidity which could
oxidize the motor and bearing in the tool.
To prevent this possibility, it is necessary to constantly
deliver lubricating oil through a Brand
UNI-LL 1/4 centralized filter-oiler system installed between
the air compressor and the tool.
• Any excess of oil in the motor is
immediately expelled through the exceeding oil exhaust.
Keep the exhaust free of obstructions and never point it
towards people or objects.
• If not using the tool for long periods of time, it shall need
to be lubricated with care.
• After 60 hours of operation, the tool mechanism needs a
little greasing. Excessive grease may diminish power.
• Servicing the tool shall be carried out every 3 months
only in a Authorized Service Center.
Service and maintenance carried out by not certified
people mat y be dangerous and can cause severe personal
injuries as well as making the product Warranty void.
• Malfunction in the tool caused by no using the
recommended dose of lubrication, or not complying with
this Instructions, or repairs carried out by people not
certified by will not be covered with
the Warranty. We reserve the right to carry out technical
improvements without notice.
Lubrication Service
The tool runs too
slow or is not
working.
The tool rotor turns
without auctioning
the trigger.
Problem Possible Cause Solution
If the problems persist despite carrying out the recommended corrective actions,
contact a Authorized Service Center.
WARNING
• Grit or rubber on the tool.
• The tool has no oil.
• Low air pressure.
• The hose is leaking.
• Pressure drops.
• Ripped rotor blade.
• There is humidity coming out
through the tool exhaust.
• The “O-ring” in the inlet is broken.
• Drain the tool with pneumatic machine oil or rubber
solvent.
• Follow the lubrication instructions to lubricate the tool.
• Adjust the tool regulator in the highest position.
Adjust the compressor regulator to 90 PSI maximum.
• Tighten and seal the hose joints if you find any point of
leak. Use sealing tape.
• Confirm the hose is the right size. Long hoses or tools
using large volumes of air may need a hose with a 3/8”
inner diameter or larger, depending of the total length of
the hoses. Do not use many hoses connected with fast
mount accessories. This drops the additional pressure and
reduces the tool power. Connect hoses directly.
• Take the tool to a Authorized Service.
• Water in the tank (See the air compressor Instructions
Manual). Oil the tool and let it run until the water stops. Oil
again the tool and run it 1 to 2 seconds.
• Take the tool to a Authorized Service,
for change the broken “O-ring”.

10
Notes
ENGLISH

11
ENGLISH
Authorized Service Centers
In the event of any problem contacting a Authorized Service Center, please see our webpage
www.truper.com to get an updated list, or call our toll-free numbers 800 690-6990 or 800 018-7873 to get
information about the nearest Service Center.
AGUASCALIENTES
BAJA
CALIFORNIA
BAJA
CALIFORNIA SUR
CAMPECHE
CHIAPAS
CHIHUAHUA
MEXICO CITY
COAHUILA
COLIMA
DURANGO
ESTADO DE
MÉXICO
GUANAJUATO
GUERRERO
HIDALGO
JALISCO
MICHOACÁN
DE TODO PARA LA CONSTRUCCIÓN
GRAL. BARRAGÁN #1201, COL. GREMIAL, C.P. 20030,
AGUASCALIENTES, AGS. TEL.: 449 994 0537
SUCURSAL TIJUANA
AV. LA ENCANTADA, LOTE #5, PARQUE INDUSTRIAL EL
FLORIDO II, C.P 22244, TIJUANA, B.C.
TEL.: 664 969 5100
FIX FERRETERÍAS
FELIPE ÁNGELES ESQ. RUIZ CORTÍNEZ S/N, COL. PUEBLO
NUEVO, C.P. 23670, CD. CONSTITUCIÓN, B.C.S.
TEL.: 613 132 1115
TORNILLERÍA Y FERRETERÍA AAA
AV. ÁLVARO OBREGÓN #324, COL. ESPERANZA
C.P. 24080 CAMPECHE, CAMP. TEL.: 981 815 2808
FIX FERRETERÍAS
AV. CENTRAL SUR #27, COL. CENTRO, C.P. 30700,
TAPACHULA, CHIS. TEL.: 962 118 4083
SUCURSAL CHIHUAHUA
AV. SILVESTRE TERRAZAS #128-11, PARQUE INDUSTRIAL
BAFAR, CARRETERA MÉXICO CUAUHTÉMOC, C.P. 31415,
CHIHUAHUA, CHIH. TEL. 614 434 0052
FIX FERRETERÍAS
EL MONSTRUO DE CORREGIDORA, CORREGIDORA # 22,
COL. CENTRO, C.P. 06060, CUAUHTÉMOC, CDMX.
TEL: 55 5522 5031 / 5522 4861
SUCURSAL TORREÓN
CALLE METAL MECÁNICA #280, PARQUE INDUSTRIAL
ORIENTE, C.P. 27278, TORREÓN, COAH.
TEL.: 871 209 68 23
BOMBAS Y MOTORES BYMTESA DE MANZANILLO
BLVD. MIGUEL DE LA MADRID #190, COL. 16 DE
SEPTIEMBRE, C.P. 28239, MANZANILLO, COL.
TEL.: 314 332 1986 / 332 8013
TORNILLOS ÁGUILA, S.A. DE C.V.
MAZURIO #200, COL. LUIS ECHEVERRÍA, DURANGO,
DGO.TEL.: 618 817 1946 / 618 818 2844
SUCURSAL CENTRO JILOTEPEC
PARQUE INDUSTRIAL # 1, COL. PARQUE INDUSTRIAL
JILOTEPEC, JILOTEPEC, EDO. DE MÉX. C.P. 54257
TEL: 761 782 9101 EXT. 5728 Y 5102
CÍA. FERRETERA NUEVO MUNDO S.A. DE C.V.
AV. MÉXICO - JAPÓN #225, CD. INDUSTRIAL, C.P. 38010,
CELAYA, GTO. TEL.: 461 617 7578 / 79 / 80 / 88
CENTRO DE SERVICIO ECLIPSE
CALLE PRINCIPAL MZ.1 LT. 1, COL. SANTA FE, C.P. 39010,
CHILPANCINGO, GRO. TEL.: 747 478 5793
FERREPRECIOS S.A. DE C.V.
LIBERTAD ORIENTE #304 LOCAL 30, INTERIOR DE PASAJE
ROBLEDO, COL. CENTRO, C.P. 43600, TULANCINGO,
HGO. TEL.: 775 753 6615 / 775 753 6616
SUCURSAL GUADALAJARA
AV. ADOLFO B. HORN # 6800, COL: SANTA CRUZ DEL
VALLE, C.P.: 45655, TLAJOMULCO DE ZUÑIGA, JAL.
TEL.: 33 3606 5285 AL 90
FIX FERRETERÍAS
AV. PASEO DE LA REPÚBLICA #3140-A, COL.
EX-HACIENDA DE LA HUERTA, C.P. 58050, MORELIA,
MICH. TEL.: 443 334 6858
FIX FERRETERÍAS
CAPITÁN ANZURES #95, ESQ. JOSÉ PERDIZ, COL.
CENTRO, C.P. 62740, CUAUTLA, MOR.
TEL.: 735 352 8931
HERRAMIENTAS DE TEPIC
MAZATLAN #117, COL. CENTRO, C.P. 63000, TEPIC, NAY.
TEL.: 311 258 0540
SUCURSAL MONTERREY
CARRETERA LAREDO #300, 1B MONTERREY PARKS,
COLONIA PUERTA DE ANÁHUAC, C.P. 66052, ESCOBEDO,
NUEVO LEÓN, TEL.: 81 8352 8791 / 81 8352 8790
FIX FERRETERÍAS
AV. 20 DE NOVIEMBRE #910, COL. CENTRO, C.P. 68300,
TUXTEPEC, OAX. TEL.: 287 106 3092
SUCURSAL PUEBLA
AV PERIFÉRICO #2-A, SAN LORENZO ALMECATLA,
C.P. 72710, CUAUTLACINGO, PUE.
TEL.: 222 282 8282 / 84 / 85 / 86
ARU HERRAMIENTAS S.A DE C.V.
AV. PUERTO DE VERACRUZ #110, COL. RANCHO DE
ENMEDIO, C.P. 76842, SAN JUAN DEL RÍO, QRO.
TEL.: 427 268 4544
FIX FERRETERÍAS
CARRETERA FEDERAL MZ. 46 LT. 3 LOCAL 2, COL EJIDAL,
C.P. 77710 PLAYA DEL CARMEN, Q.R.
TEL.: 984 267 3140
FIX FERRETERÍAS
AV. UNIVERSIDAD #1850, COL. EL PASEO, C.P. 78320,
SAN LUIS POTOSÍ, S.L.P. TEL.: 444 822 4341
SUCURSAL CULIACÁN
AV. JESÚS KUMATE SUR #4301, COL. HACIENDA DE LA
MORA, C.P. 80143, CULIACÁN, SIN.
TEL.: 667 173 9139 / 173 8400
FIX FERRETERÍAS
CALLE 5 DE FEBRERO #517, SUR LT. 25 MZ. 10, COL.
CENTRO, C.P. 85000, CD. OBREGÓN, SON.
TEL.: 644 413 2392
SUCURSAL VILLAHERMOSA
CALLE HELIO LOTES 1, 2 Y 3 MZ. #1, COL. INDUSTRIAL,
2A ETAPA, C.P. 86010, VILLAHERMOSA, TAB.
TEL.: 993 353 7244
VM ORINGS Y REFACCIONES
CALLE ROSITA #527 ENTRE 20 DE NOVIEMBRE Y GRAL.
RODRÍGUEZ, FRACC. REYNOSA, C.P. 88780, REYNOSA,
TAMS. TEL.: 899 926 7552
SERVICIOS Y HERRAMIENTAS INDUSTRIALES
PABLO SIDAR #132, COL . BARRIO DE SAN BARTOLOMÉ,
C.P. 90970, SAN PABLO DEL MONTE, TLAX.
TEL.: 222 271 7502
LA CASA DISTRIBUIDORA TRUPER
BLVD. PRIMAVERA. ESQ. HORTENSIA S/N, COL.
PRIMAVERA C.P. 93308, POZA RICA, VER.
TEL.: 782 823 8100 / 826 8484
SUCURSAL MÉRIDA
CALLE 33 #600 Y 602, LOCALIDAD ITZINCAB Y MULSAY,
MPIO. UMÁN, C.P. 97390, MÉRIDA, YUC.
TEL.: 999 912 2451
MORELOS
NAYARIT
NUEVO LEÓN
OAXACA
PUEBLA
QUERÉTARO
QUINTANA ROO
SAN LUIS
POTOSÍ
SINALOA
SONORA
TABASCO
TAMAULIPAS
TLAXCALA
VERACRUZ
YUCATÁN

2
YEARS
12 ENGLISH www.truper.com
08-2022
16885
Warranty
policy
Stamp of the business. Delivery date:
Code
TPN-722-2
Model Brand
Warranty. Duration: 2 years. Coverage: parts, components and workmanship against manufacturing or
operating defects, except if used under conditions other than normal; when it was not operated in accordance
with the instructive; was altered or repaired by personnel not authorized by Truper®. To make the warranty valid,
present the product, stamped policy or invoice or receipt or voucher, in the establishment where you bought it
or in Corregidora 22, Centro, Cuauhtémoc, CDMX, 06060, where you can also purchase parts, components,
consumables and accessories. It includes the costs of transportation of the product that derive from its fulfillment
of its service network. . Phone number 800-018-7873. Made in Taiwan. Imported by Truper, S.A. de C.V. Parque
Industrial 1, Parque Industrial Jilotepec, Jilotepec, Edo. de Méx. C.P. 54257, Phone number 761 782 9100.

Instructivo de
TPN-722-2
ModeloCódigo
TPN-722-2
Este Instructivo es para:
16885
9.5 mm
3/8”
ADVERTENCIA
ATENCIÓN Lea este Instructivo por completo
antes de usar la herramienta.
Utilice aceite de forma continua y
dosificada para lubricar la herramienta.
Llave de impacto
neumática
ESPAÑOL
ENGLISH

Í
ndice
2
Guarde este Instructivo para futuras referencias.
Los gráficos de este Instructivo son para
referencia, pueden variar del aspecto real de la
herramienta.
TPN-722-2
Para poder sacar el máximo
provecho de la herramienta,
alargar su vida útil, hacer válida
la garantía en caso de ser
necesario y evitar riesgos o
lesiones graves, es fundamental
leer este Instructivo por
completo antes de usar la
herramienta.
ATENCIÓN
Especificaciones técnicas
Requerimientos de filtrado y lubricación
Advertencias de Seguridad
para uso de herramientas neumáticas
Control de riesgos
al usar herramientas neumáticas
Partes
Ensamble
Puesta en marcha
Mantenimiento
Solución de problemas
Notas
Centros de Servicio Autorizados
Póliza de Garantía
3
3
4
5
7
7
8
9
9
10
11
12
ESPAÑOL

El polvo, agua y la falta de aceite específico para herramientas neumáticas son la causa principal de las fallas
potenciales de la herramienta. Se recomienda la instalación de un sistema de filtro-aceitera centralizado UNI-LL-1/4 marca
. Este sistema asegura la lubricación reduciendo el consumo de aceite en un 80 %, lo que incrementa
significativamente la calidad del aire que respira el operador.
Manguera
de aire
3
TPN-722-2
16885
3/8” (9.5 mm)
70.8 L/min (2.5 CFM)
Llave de impacto neumática
621 kPa (90 PSI)
10 000 r/min
Código
Descripción
Rocking Dog
Mecanismo de impacto
Impulsor de cuadro
102 Nm (75 lb-ft)
Torque máximo
Desalojo de aire
Velocidad libre
0.85 kg (1.88 lb)
Peso sin accesorios
Presión de aire
Consumo de aire
3/8” (9.5 mm)
1/4 NPT
Conexión de entrada de aire
Diámetro interno de la manguera
Superior
Especificaciones técnicas
Requerimientos de filtrado y lubricación
Sistema de
filtro-aceitera
centralizado
UNI-LL-1/4
Conector
rápido
(no incluido)
Compresor
de aire
• El sistema de filtro-aceitera
debe regularse para que
administre de 3 a 6 gotas
por minuto.
• Drene el agua del tanque
del compresor de aire así
como la condensación de
las mangueras antes de
usar la herramienta.
Consulte el instructivo de
la compresora.
Se debe considerar el aumento en la presión de línea o el diámetro interior de la manguera para
compensar el uso de mangueras muy largas (más de 8 metros). El diámetro interior mínimo de la manguera debe ser de
3/8” (9.5 mm) y los conectores deben ser de 1/4 NPT. Use coples y accesorios de buena calidad y del tamaño adecuado.
ATENCIÓN
ATENCIÓN
ESPAÑOL
1/2” (13 mm)
Capacidad de tornillos
Golpes por minuto 850 gpm

Advertencias de Seguridad
4
para uso de herramientas neumáticas
Mantenga su área de trabajo limpia, ordenada y bien
iluminada.
Áreas desordenadas y obscuras pueden provocar
accidentes.
Nunca utilice la herramienta en ambientes explosivos, o
en presencia de líquidos inflamables o sin ventilación.
Las chispas que genera la herramienta podría
provocar una explosión o incendio.
Mantenga a los niños y a otras personas a una distancia
segura mientras utiliza la herramienta.
Las distracciones pueden hacerle perder el
control y provocar accidentes.
Evite hacer contacto con líneas y circuitos eléctricos.
Ubique y evite todas las líneas y circuitos
eléctricos, especialmente el cableado oculto.
Así como cualquier objeto conectado a tierra.
Esté siempre alerta, sea prudente y utilice el sentido común.
No deje que la familiaridad con el uso de la
herramienta lo distraiga mientras la utiliza.
Esto puede provocar accidentes.
No utilice la herramienta si está cansado, o bajo la
influencia de drogas, alcohol o medicamentos.
Un momento de distracción mientras utiliza la
herramienta puede provocar lesiones
personales graves.
Utilice la herramienta con todas sus piezas en su lugar
y en buen estado.
De no hacerlo se expone a lesiones personales graves.
Asegure y apoye adecuadamente la pieza de trabajo.
Utilice abrazaderas y una superficie de trabajo estable.
Nunca fuerce la herramienta.
Trabajar dentro del rango para el que fue diseñada
asegura un mejor trabajo y es más seguro.
Guarde la herramienta en un lugar seguro fuera del
alcance de los niños.
Las herramientas eléctricas son peligrosas en
manos inexpertas.
Utilice la indumentaria adecuada.
La ropa suelta, joyas o cabello largo pueden
ser atrapados por las piezas móviles.
Mantenga las manos alejadas de las partes giratorias
y/o móviles.
De no hacerlo se expone a lesiones personales graves,
como cortes, quemaduras o aplastamiento.
Utilice equipo adecuado de protección personal.
Utilice protección para los ojos. Mascarilla antipolvo,
zapatos de seguridad antideslizantes, casco y protección
para los oídos en condiciones adecuadas reducen
considerablemente el riesgo de lesiones.
Desconecte la manguera de aire de la herramienta antes
de darle mantenimiento o cambiar sus accesorios.
Para evitar encendidos accidentales que
deriven en accidentes.
Nunca utilice la herramienta si el interruptor no
funciona o no está debidamente ensamblada.
De hacerlo se expone a lesiones personales
graves, repárela inmediatamente en un
Centro de Servicio Autorizado .
No sobre extienda su campo de acción.
Un buen apoyo y equilibrio permiten un mejor control
de la herramienta en situaciones inesperadas.
Nunca tire de la manguera de aire.
No la use para cargar la herramienta o desconectarla de
la toma de aire. Las mangueras dañadas o enredados
pueden reventar y lanzar residuos al operador.
Evite encendidos accidentales.
Asegúrese de que la toma de aire está desconectada
antes de lubricar, colocar accesorios o dar
mantenimiento a la herramienta.
Retire cualquier llave de ajuste antes de encender la
herramienta.
Herramientas adicionales o llaves colocadas
en una pieza giratoria de la herramienta
puede provocar lesiones personales graves.
Déle mantenimiento a la herramienta y cerciórese que
se encuentra en condiciones óptimas antes de utilizarla.
Revise cuidadosamente sus partes móviles, su
alineación y montaje. Hágalo periódicamente.
Busque cualquier elemento dañado o pieza que no
funcione adecuadamente para su inmediata reparación
en un Centro de Servicio Autorizado .
Accesorios.
Utilice sólo los accesorios o refacciones
indicados en este Instructivo o
certificados por .
Nunca deje la herramienta en marcha sin supervisión.
Desconecte la herramienta de la toma de aire después de
operarla y antes de dejarla para evitar accidentes graves.
ATENCIÓN
ATENCIÓN
ATENCIÓN
ATENCIÓN
ATENCIÓN
ATENCIÓN
ATENCIÓN
ATENCIÓN
ATENCIÓN
ADVERTENCIA
ADVERTENCIA
ADVERTENCIA
ADVERTENCIA
ADVERTENCIA
ADVERTENCIA
ADVERTENCIA
ADVERTENCIA
ADVERTENCIA
PELIGRO
PELIGRO
PELIGRO
PELIGRO
ESPAÑOL

5
Control de riesgos
al usar herramientas neumáticas
• El aire comprimido que utilizan
los equipos neumáticos puede resultar peligroso. Objetos
como abrazaderas, rebabas, astillas, polvo y otros residuos
pueden ser impulsados por el flujo de aire a gran
velocidad a la cabeza o a los ojos. El flujo de aire por si
sólo puede provocar daño en tejidos blandos como ojos,
oídos, etc.
• Los aditamentos de la herramienta se
pueden aflojar o romperse y proyectar partículas al
operador u otras personas en el área de trabajo.
Riesgo de lesión en cabeza y ojos
• Siempre que opere equipo neumático utilice lentes
de protección que cumplan con la norma ANSI Z87.1
y como protección adicional utilice una careta.
• Jamás dirija el flujo de aire a personas o animales.
• Desconecte la manguera de aire de la herramienta
cuando no la esté utilizando.
• Jamás deje la herramienta conectada a la toma de aire
sin atenderla.
• Antes de utilizar la herramienta verifique que todas sus
partes y aditamentos estén debidamente asegurados.
Para prevenir lesiones en cabeza y ojos
• Las herramientas abrasivas, como
esmeriladoras, lijadoras y herramientas de corte generan
polvo y partículas que pueden causar daño a los pulmones
y el sistema respiratorio.
• Algunos materiales como adhesivos y resinas contienen
químicos cuyos vapores pueden causar daños serios si se
expone a ellos por tiempos prolongados.
Riesgo de inhalación de partículas
• Siempre utilice una careta o respirador cuando
opere este tipo de herramientas.
• Trabaje siempre en un área limpia y bien ventilada.
Para prevenir inhalación de partículas
• Las herramientas neumáticas no
cuentan con aislamiento eléctrico. Si durante su operación
llegan a hacer contacto con alguna fuente de electricidad,
conducirá la energía al operador provocando electrocución
incluso fatal.
Riesgo de choque eléctrico
• Jamás utilice herramientas neumáticas para trabajar
cableado eléctrico energizado.
• Ubique posible cableado oculto en la zona de trabajo
para evitar hacer contacto con él antes de operar la
herramienta.
• Evite el contacto con superficies aterrizadas como
tuberías, radiadores, o refrigeradores. Existe un mayor
riesgo de electrocución si su cuerpo está aterrizado.
Para prevenir choque eléctrico
• El manejo inadecuado de la
presión de los equipos neumáticos puede provocar una
explosión que ocasione lesiones serias.
Riesgo de explosión
• Antes de utilizar la herramienta asegúrese que la fuente
de aire comprimido esté regulada a la presión
especificada para la herramienta y no rebase ese nivel.
• Jamás conecte la herramienta a una fuente de presión
que exceda los 1380 kPa (200 PSI).
Para prevenir explosión
• Exponerse al ruido generado por
las herramientas neumáticas por largos periodos puede
dañar el oído permanentemente provocando pérdida de la
audición.
Riesgo de pérdida auditiva
• Siempre que opere equipo neumático utilice
protección auditiva que cumpla con la norma
ANSI S3.19
Para prevenir pérdida auditiva
• Las herramientas neumáticas que
no cuenten con la lubricación adecuada, sean forzadas
más allá de su capacidad o que se utilicen para aflojar
tuercas oxidadas (con Llave de impacto) se dañarán,
invalidando la garantía.
Riesgo de daño a la herramienta
• Mantenga la herramienta lubricada debidamente.
• No fuerce la herramienta.
• Aplique líquido “afloja todo” a las tuercas o birlos
oxidados antes de intentar aflojarlos con la herramienta
(Llave de impacto).
Para prevenir el daño a la herramienta
ATENCIÓN
ADVERTENCIA
ADVERTENCIA
ADVERTENCIA
ADVERTENCIA
ADVERTENCIA
ADVERTENCIA
ESPAÑOL

6
Control de riesgos
al usar herramientas neumáticas
• Las mangueras dañadas pueden
estallar y provocar lesiones serias o sordera.
•Las herramientas neumáticas conectadas a la fuente de
aire comprimido pueden ser operadas por personal no
capacitado o menores de edad, derivando en lesiones
serias.
• El aire comprimido que utilizan los equipos neumáticos
puede resultar peligroso. Objetos como abrazaderas,
rebabas, astillas, polvo y otros residuos pueden ser
impulsados por el flujo de aire a gran velocidad al
operador u otras personas en el área de trabajo.
• Usar boquillas de inflado para limpiar o sopletear puede
producir lesiones serias.
• Herramientas o accesorios no adecuados, dañados o de
baja calidad como discos de esmeril, cinceles, contactos,
taladros, clavadoras, engrapadoras, etc., pueden dispararse
durante la operación, proyectando partículas que pueden
causar serias lesiones.
• Las abrazaderas pueden soltarse y ser proyectadas
causando lesiones serias o daños a propiedad.
• Las herramientas que arrancan accidentalmente pueden
provocar lesiones serias.
• Las herramientas y accesorios que no reciben el
mantenimiento adecuado pueden provocar lesiones serias.
• Las herramientas que utilizan accesorios no certificados
por pueden provocar lesiones serias.
• Las herramientas y accesorios dañados o golpeados
pueden provocar lesiones serias.
Riesgo de lesiones
• No maltrate la manguera ni los conectores.
• Mantenga la manguera alejada se superficies afiladas o
abrasivas.
• Desconecte la manguera cuando instale accesorios
como discos de esmeril o brocas.
• Nunca use la manguera para cargar la herramienta
• Nunca jale de la manguera para desconectarla.
• No exponga la manguera al calor, aceite o solventes.
• Antes de operar la herramienta, verifique que las
mangueras no estén dañadas.
• Desconecte la manguera de aire cuando la herramienta
no esté en uso y almacene la herramienta en un lugar
seguro fuera del alcance de niños o personal no
calificado. Mantenga a los niños y al personal no
calificado lejos del área de trabajo.
• Mantenga el área de trabajo limpia, ordenada y bien
iluminada.
• Retire cualquier llave o pinza de la herramienta antes de
operarla.
• No use boquillas de inflado para limpiar o sopletear.
• Utilice sólo partes, abrazaderas, y accesorios
recomendados por .
• Asegúrese que todas las conexiones se encuentran
correctamente instaladas.
• Nunca cargue la herramienta tomándola por el gatillo.
• Desconecte la manguera de aire de la herramienta
cuando no la esté utilizando.
• Jamás deje la herramienta conectada a la toma de aire
sin atenderla.
• Mantenga el mango de la herramienta limpio y seco,
libre de aceite y grasa.
• Mantenga las herramientas limpias. Una herramienta
bien cuidada y lubricada brinda un funcionamiento mas
efectivo y es mas fácil controlarla.
• Cualquier reparación solo puede ser realizada en un
Centro de Servicio Autorizado .
• Utilice siempre accesorios que correspondan a la
velocidad de la herramienta
• Utilice accesorios certificados por .
• No utilice herramientas y accesorios dañados o
golpeados.
Para prevenir lesiones
ADVERTENCIA
ESPAÑOL

1
2
3
4
5
6
7
8
9
Gatillo de accionamiento
Entrada
de aire
Entrada para
la tuerca o birlo
Entrada para el
retenedor de cuadro
Selector
de torque
Dado de
impacto
Anillo
retenedor
Impulsor
de cuadro
Instalación del dado
• Desconecte la herramienta de la toma de aire antes
cambiar de dado.
• Seleccione el dado que necesita y colóquelo en el
impulsor de cuadro.
• Siempre utilice dados de impacto para esta herramienta.
No utilice dados para herramientas de mano. Consulte el
Catálogo para conocer nuestra gama
de accesorios.
• Utilice dados para impulsores de cuadro de 3/8” (9.5 mm).
• Los adaptadores para dados de otras medidas no se
recomiendan, utilícelos sólo si es estrictamente necesario.
• En caso de que el dado cuente con orificios, siempre
utilice anillos de goma y puntas de acero al colocarlo en el
impulsor de cuadro.
• Cuando el impulsor de cuadro cuente con anillo
retenedor, verifique que este se encuentra en buenas
condiciones y en caso de que este dañado reemplácelo
inmediatamente.
• Cuando un dado no ha sido
asegurado y ajustado como se indicó, puede salir
disparado y lesionar al operador.
7
Partes
Ensamble
ADVERTENCIA
ESPAÑOL

R F
1
2
3
4
5
6
7
8
9
8
Puesta en marcha
Palanca
reguladora
Encendido
• Encienda el compresor de aire y permita que se llene.
• Regule la presión de salida del compresor de aire a
621 kPa (90 PSI).
La herramienta opera a este nivel
de presión, de operarse a niveles mayores, la vida útil de
la herramienta será menor.
• Deje correr un poco de aire por la manguera y el cople
para verificar que ambos estén limpios antes de
conectarlos a la herramienta.
• Determine la dirección de rotación y torque adecuados.
• Presione el gatillo de accionamiento para que el dado
comience a girar.
• Deje de presionar el gatillo de accionamiento para que
el dado se detenga.
Dirección de rotación y selección de torque
• La dirección de rotación depende del lado hacia donde
se presiona el gatillo de accionamiento.
• Para apretar una tuerca o birlo, presione el gatillo de
accionamiento en sentido horario (F) para que el dado
gire hacia adelante. Para aflojar, presione el gatillo de
accionamiento en sentido antihorario (R) para que el
dado gire en reversa.
• Para seleccionar el torque y evitar apretar demasiado una
tuerca o birlo, gire la perilla (G) hasta el nivel de torque
deseado.
• Se recomienda utilizar el torque máximo, en caso de no
contar con un torquímetro para verificar el torque
adecuado.
• El valor de torque puede variar dependiendo del tamaño
del compresor de aire y de la cantidad de pies cúbicos
(L/min) de aire que entregue.
Operación
• Coloque el dado en la tuerca o birlo que desee apretar
o aflojar.
• Antes de operar la herramienta asegúrese que hay
suficiente espacio detrás de la herramienta, para evitar
que su mano pueda quedar atrapada. La herramienta se
aleja de la tuerca / tornillo cuando es aflojado o apretado.
• No trate de hacer contacto con la tuerca o birlo con el
dado en movimiento. No apriete el gatillo a menos que la
tuerca o birlo se encuentre debidamente dentro del dado.
• Aplique una presión firme y constante sin forzar la
herramienta, de lo contrario podría dañarla.
Conexión de la toma de aire
• Retire el tapón plástico (A) que cubre la entrada de aire
en la base del mango.
• Añada dos o tres gotas de lubricante sin detergente (B)
a la entrada de aire (C) antes de cada uso.
• Atornille el conector rápido (D, No incluido) a la entrada
de aire.
• Conecte la manguera de aire con un cople rápido (E, No
incluido) al adaptador rápido.
ADVERTENCIA
B
A
D
E
C
G
ESPAÑOL
This manual suits for next models
1
Table of contents
Languages:
Other Truper Impact Driver manuals
Popular Impact Driver manuals by other brands
Panasonic
Panasonic EYFLA3J - DRILL - MULTI LANGUAGE operating instructions
Clarke
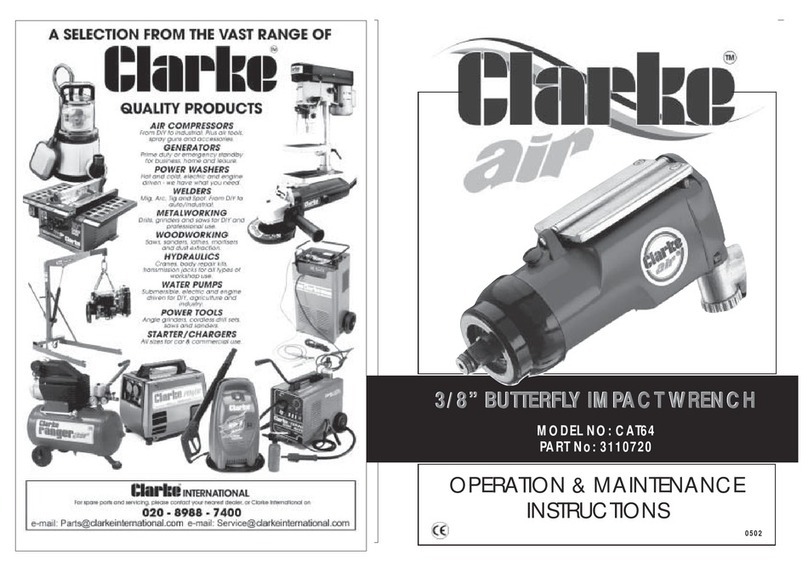
Clarke CAT64 Operation & maintenance instructions
Probuilder
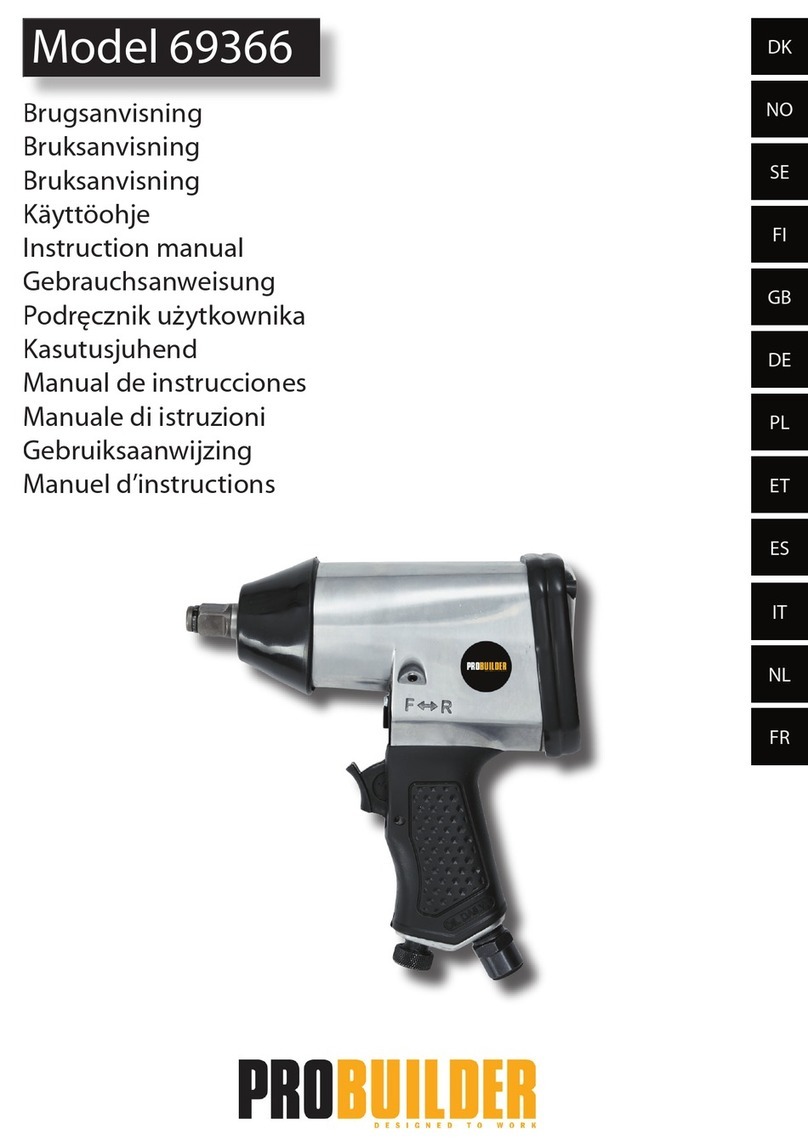
Probuilder 69366 instruction manual

Milwaukee
Milwaukee M18CHIWP12 Operator's manual

Makita
Makita BTL062 Brochure & specs
Milwaukee
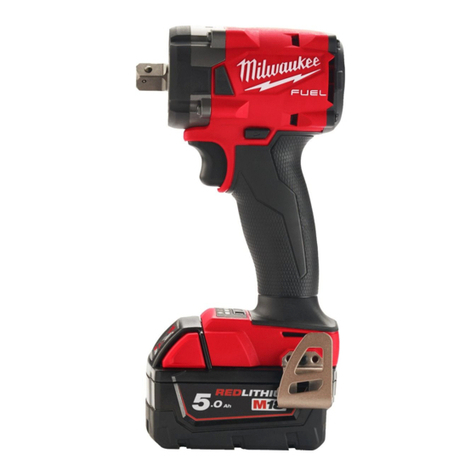
Milwaukee M18 FIW2P12 Original instructions
