TSO Products TDS-13 User manual
TDS-13 LOW PROFILE DOG STOP USER GUIDE
Publication 696-081 RevA ©2022 TSO Products LLC Page 1 of 2
A
B
C
D
Thank you for purchasing this genuine TSO Product. Should
you have any product questions or issues, please contact us
toll-free at 800-727-0311 (U.S.), 239-236-5526 (international),
email us at info@tsoproducts.com, or visit us online at
www.tsoproducts.com/support.
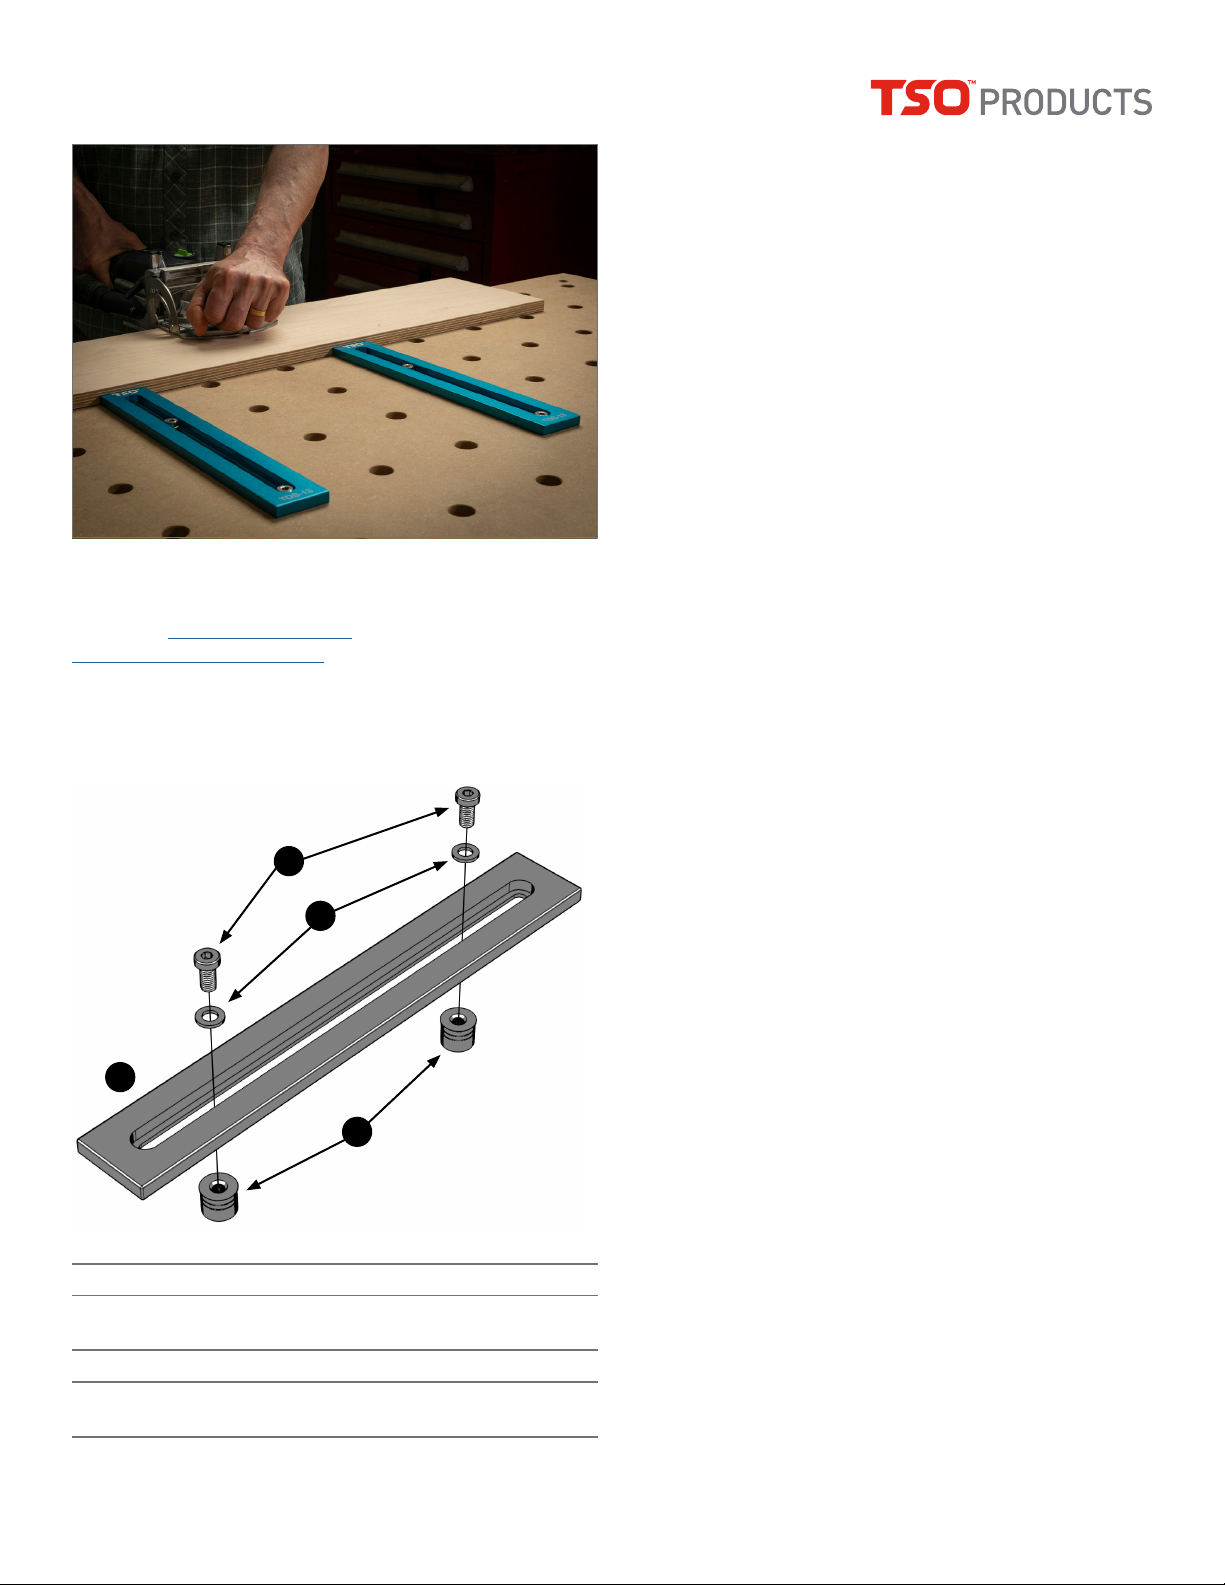
Product Assembly
Assemble for use as depicted in the image below. Note that
a 5mm hex driver is required for use. While not included,
the 5mm L-wrench stowed in many
track saw handles works well.
Item Qty Dwg. No Rev Description
A 2 610-541 A Dog Stop Body
B 4 610-530 A Smart Connect Dog,
Short
C 4 699-201 A Washer, M8, SS
D 4 699-202 A Screw, M8x1.25-16 Lo
Profile, SHCS, SS
Usage Considerations
Before you use a “clamp” to immobilize a workpiece on
your 20mm benchtop, consider:
1. What kind of restraint does your workpiece really
need for you to work on it?
2. Does it need to be clamped or merely immobilized?
3. Choose the least time consuming and workflow dis-
rupting method. Can a Dog Stop do it?
How to Arrange & Layout
1. Place Dogs in fixed positions, enough to immobilize
the workpiece on two sides which aligns with the
20mm dog hole pattern of the bench. This prevents
mis-orientation of the workpiece.
2. Place TDS-13 Dog Stops on sides where no 20mm
hole is ideally located.
How to Place the TDS-13
1. Loosen at least one of the dogs in each Dog Stop.
2. Tilt each TDS-13 so that the loosened dogs sits above
a 20mm hole, then move the other dog to line up
with the second dog hole.
3. Tilt the TDS-13 so both dogs can drop into a suitable
pair of 20mm holes.
4. With the TDS-13 body flat on the benchtop, slide the
body against the workpiece you want to restrain.
5. While holding the body in the desired position, mod-
erately tighten both socket head hex screws.
Repositioning or Removing the TDS-13
1. Loosen the 5mm socket head hex screw nearest the
“TDS-13” engraved name. Make this a habit as it
makes removal much easier.
2. To simplify removal, do not loosen the other hex
head cap screw unnecessarily.
3. Use both hands to liboth ends of TDS-13 clear of
dog holes and relocate as needed.
Position Memory
Consider saving the position of the dog nearest the en-
graved TSO logo by marking it on removable painterʼs tape
applied to the dog stop body. Also note the 20mm hole
location on your benchtop to enable you to re-use the same
location for repeatably accurate cuts without re-measuring
later.
Limitations
The TDS-13 is not designed to apply continuous clamping
pressure like a screw clamp; it is a repositionable “bench
stop.”

TDS-13 LOW PROFILE DOG STOP USER GUIDE
Publication 696-081 RevA ©2022 TSO Products LLC Page 2 of 2
Safety Warning
• Woodworking by its very nature involves health hazards
and risk of serious injury.
• Woodworking tools are not toys and are not suitable for
access by unsupervised children.
• Adhere to generally accepted safe working practice.
Spart Parts & Support
For product questions, customer service, or spare parts
requests, email info@tsoproducts.com.
Other TSO Products Tools manuals


Popular Tools manuals by other brands

Stahlwille
Stahlwille Manoskop 730N manual

Farmnavigator
Farmnavigator AvMap RTK quick guide

FEDERAL PACIFIC
FEDERAL PACIFIC PSE Supplement to Inspection and Maintenance Recommendations

Bostitch
Bostitch 750S5 Operation and maintenance manual

Powermate
Powermate PX instruction manual

Makita
Makita HR007G instruction manual


