TST TM-507 User manual

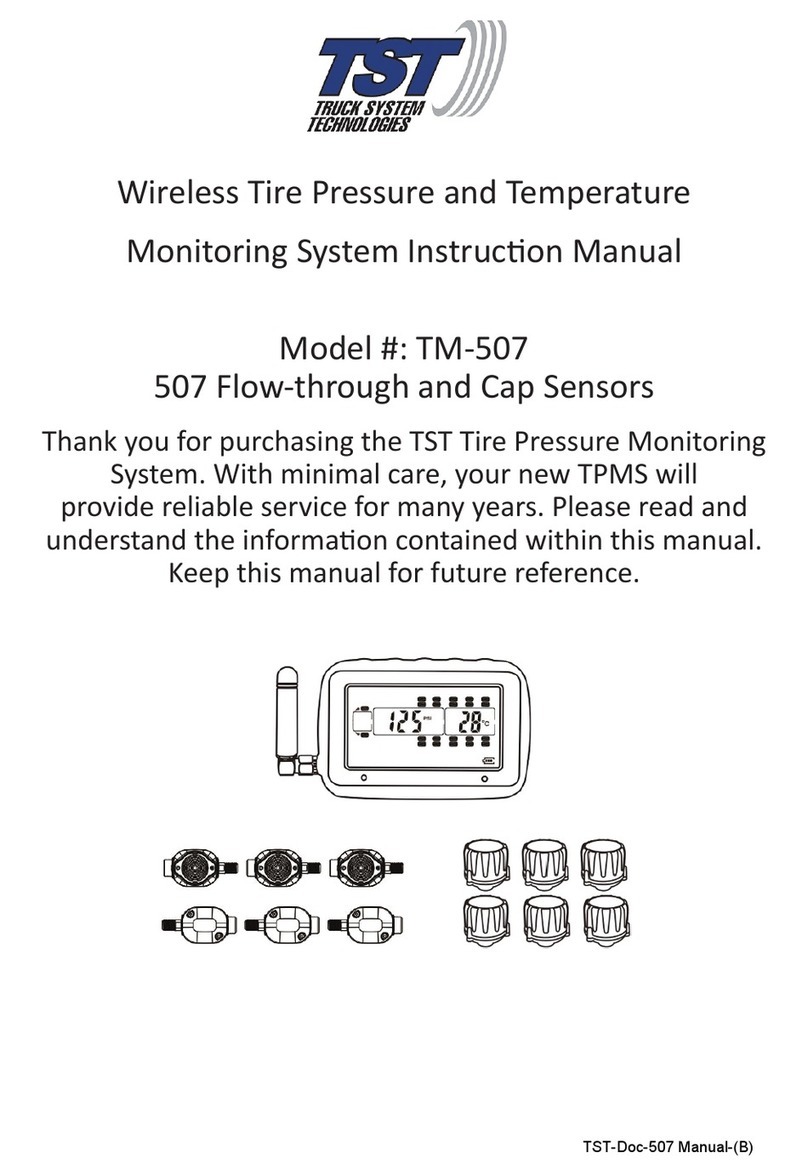
Wireless Tire Pressure and Temperature
Monitoring System Instruction Manual
Model#: TM-507 Wide Screen Display
507 Flow-through and Cap Sensors
Thank you for purchasing a TST Tire Pressure Monitoring System(TPMS).
With minimal care, your new TPMS will provide reliable
service for many years. Please read and understand
the information contained within this manual.
Keep this manual for future reference.
TST-Doc-507FT-RV WSD-C Manual-(D)
Telephone: 770.889.9102
Website: www.TSTtruck.com

Page 1 - Sensor Features
Page 1 - Display Features
Page 2 - System Components in Kit
Page 2 - Display Controls
Pages 3~6 - Programming Sensor Codes Into the Display
- Automatic Code Learning (Option #1)
- Pressure Coding (Option #2)
- Manual Coding (Option #3)
Pages 6 - Sensor Installation - Flow-through Sensor
Pages 7 - Sensor Installation - Cap Sensor
Page 8 - Display Installation
Page 8 - Display Buttons
Page 9 - Parameter Settings (Setting the sensor alarms)
Page 9 - Pressure Parameters
Pages 9~10 - Temperature Parameters
Page 10 - High Temperature Alarm Settings
Pages 10~11 - High Pressure Alarm Settings
Page 11 - Low Pressure Alarm Settings
Page 12 - Restore parameters to factory default settings
Pages 12~13 - Display Alerts
Pages 13~14 - Other Functions
Pages 15~16 - Replacing The Flow-through Sensor Battery (CR1632)
Page 17 - Replacing The Cap Sensor Battery (CR2032)
Page 18 - Additional Functions
Page 19 - Troubleshooting Tips
Pages 20~23 - Common Questions
Page 23 - Repeater
Page 24 - Specifications
TST-Doc-507FT-RV WSD-C Manual-(D)

SENSOR FEATURES
DISPLAY FEATURES
1) The sensors easily install on the valve stem.
2) Sensors are water resistant.
3) Pressure and temperature data is read every five (5) minutes.
4) Removal of a sensor (0 PSI pressure) will shut off the sensor battery.
5) The sensor batteries last approximately one (1) year and are user replaceable.
6) Tire leaks and high temperatures are detected quickly.
7) Tires can be inflated without removing the sensor.
8) Each sensor has a unique, six (6) digit code for programming.
9) Sensors feature an anti-theft design using the included hex nuts.
TST-Doc-507FT-RV WSD-C Manual-(D)
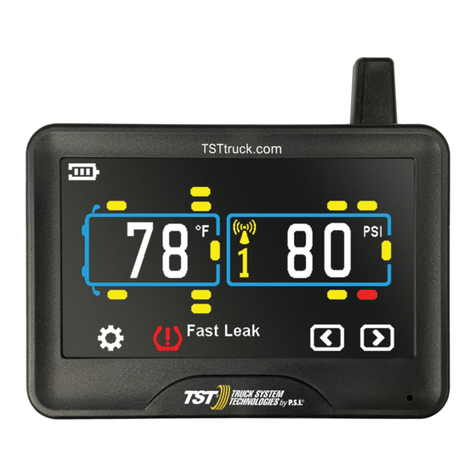
1) Large, wide screen LCD display of pressure and temperature.
2) Suction cup and cradle mount included.
3) Integrated lithium battery that is rechargeable with provided cord.
4) Wake-up activation of display when in motion.
5) Automatic monitor illumination in dark conditions.
6) Programmable high and low pressure alarm thresholds.
7) Programmable high temperature alarm.
8) Visual and audible warning alarms when temperature or pressure exceeds
thresholds.
9) Multiple pressure units: PSI or BAR.
10) Selectable temperature unit: °C or °F.
11) Program up to 110 tires.
12) Tire pressure and temperature is displayed simultaneously for quick viewing
of each tire.
13) When not in use the trailer tires can be hidden from the TPMS display.
14) The towing vehicle tires can be electronically removed from the screen when
parked.
15) Push button programming.

SYSTEM COMPONENTS IN KIT
Display and components
Color Display
Power Adapter
USB Cable Cradle Mount Suction Cup Mount Repeater
Cap Sensors components
Flow - through Sensors Components
Extra "o" rings
On
Off Power
Charging Port
Display Holder
FT Sensors Hex Nuts
16) A fully charged display will continuously operate 5-7 days on battery power.
17) Temperature and pressure settings are configured "per axle".
TST-Doc-507FT-RV WSD-C Manual-(D)
Cap Sensors Extra "O" rings Cap Wrenches
FT Wrenches
Hex Nuts
DISPLAY CONTROLS

Pressure unit: BAR or PSI, user-selectable.
Temperature unit: °C or °F, user-selectable.
Icon Description
Tire
Warning
Temperature unit (Selectable)
Pressure unit (Selectable)
Sensor low battery
Display battery indicator
PROGRAMMING SENSOR CODES INTO THE DISPLAY
Or use your own numbering pattern:
Red LED indicator
Antenna
TST-Doc-507FT-RV WSD-C Manual-(D)
Light Sensor
S1
S2
Repeater active
Note: Your sensors will begin reading as soon as they are coded into the display.
Returning to the Main Screen by pushing the"BACK"button twice, you
may hear an alarm and see a pressure reading of"0". This is"normal".
Once the high/low settings are in place and set up is complete, these
alarms will not sound. Simply press the (+) button quickly to silence the
alarm.
Note: It is recommended to label each sensor first with the provided numbering
code stickers, similar to the following pattern, before you code the sensors.
This allows you to know which sensor is programmed to which tire position.
You can also write in your sensor number pattern.

AUTOMATIC CODE LEARNING (Option#1)
TST-Doc-507FT-RV WSD-C Manual-(D)
Note: Code all the sensors to the display BEFORE screwing themon to the tire
valve stem unless otherwise noted.
1. Push and hold the "SET" button until it beeps. You are now in the programming
mode. The "HI PRESSURE SET" parameter will blink at the bottom of the screen.
Push the (+) button and scroll through the parameters until "LEARN ID" appears.
2. Quickly press and release the "SET" button. The first tire on the display will blink.
If you want to program a different tire, press the (+) button to move to the
correct tire. Push the "SET" button again and "FFF FFF" will flash. Touch the
desired sensor for that tire position to the bottom of the display, just to the left
of the TSTtruck.com web address and then press the "GO" button. The display
will capture the sensor code and show it on the screen. Press and release the
"SET" button to save the code to that position. When coded correctly, a six (6)
digit unique code will be shown.
3. Use the (+) button to move to the next tire position you want to program. Press
and release the "SET" button and "FFF FFF" will flash. Put the sensor for that tire
position next to the display, as in #2 above,and press the "GO" button to
capture the sensor code. Press "SET" again to save. Continue this process for
each tire position/sensor.
4. When you have finished learning the codes on all sensors, pressing the "BACK"
button twice will take you to the mainscreen. (Your sensors will begin reading
"0"pressure and an alarm will sound. This is part of the normal set up process.
Press the(+) button to silence the alarm while you continue your set up).
Note: To delete a single sensor code:
Press and hold the "SET" button until it beeps (approx. 3 seconds). Push the
(+) button and scroll through the parameters until "LEARN ID" appears.
Press and release the "SET" button. Use the (+) or (-) buttons to scroll to the
tire you wish to remove. Press the "SET" button to select that tire. The sensor
code will start flashing. Press and hold the "BACK" button for 3 seconds. You
will hear 3 beeps. The code will change to "FFF FFF" which will be flashing.
Press "SET" once. The flashing will stop and the ID code will be deleted. If
you do not want to delete the code, push the "BACK" button.
Note: To delete all the tire sensor codes and start over:
To delete all the sensor codes when in the "LEARN ID" mode, press and
release the "SET" button on any tire. Press and hold the "BACK" button. You
will hear 3 quick beeps, a pause and then 6 beeps. "DEL ALL" will appear on
the screen. Press "SET" once. "FFF FFF" will appear on the screen. All the

PRESSURE CODING (option #2)
TST-Doc-507FT-RV WSD-C Manual-(D)
sensor codes and tire icons are now deleted. This does not affect the
parameters set in the display. Press the "BACK" button to go to the Main
Screen.
Note: When in the coding mode, the display will time-out within approximately
one (1) minute if no buttons are pushed. At that point, you will have to start
the coding process again.
Note: Be sure to keep the sensors you are not currently coding 2-3 feet away from
the display and the sensor you are now coding.
1. Be sure your sensors are numbered. Screw the sensors partly onto each valve
stem in the order you numbered them. Do NOT screw them down far enough to
hear air hissing out.
2. Press and hold the "SET" button until it beeps. You are now in the programming
mode. The "HI PRESSURE SET" parameter will blink at the bottom of the screen.
Push the (+) button and scroll through the parameters until "LEARN ID" appears.
3. Quickly press and release the "SET" button. The first tire on the display will blink.
If you want to program a different tire, press the (+) button to move to the
correct tire. Push the "SET" button again and "FFF FFF" will flash.
4. Tighten the sensor down on the corresponding tire valve stem. The ID code will
display and flash.
5. To save the ID code setting. Press "SET" once. It will beep and the sensor code is
saved.
6. To remove the ID code setting, Press "BACK" once. "FFF FFF"will re-appear. The
setting will not be saved.
7. Press "BACK" twice to return to the Main Screen when done.
MANUAL CODING (option #3)
Note: This method is mainly used to program sensor codes from an old display to
a new display if you do not have the sensors available. This method is not
recommended for programming a new system.

SENSOR INSTALLATION - Flow-through Sensor
1. Screw the hex nut onto the valve stem threads until it bottoms out.
2. Screw the correctly marked sensor onto the valve stem for that tire position.
Tighten the sensor until the air stops leaking and the sensor bottoms-out on
the valve stem. Then give it a quarter turn more to seat it.Do Not Over Tighten!
3. Use your fingers to screw the hex nut up to the bottom of the sensor. Using the
provided wrench, tighten the hex nut against the bottom of the sensor. This will
prevent the sensor from being removed. Keep the wrench in a safe place for
future use.
TST-Doc-507FT-RV WSD-C Manual-(D)
1. Push the "SET" button until it beeps. You are now in the programming mode.
The "HI PRESSURE SET" parameter will blink at the bottom of the screen. Push
the (+) button and scroll through the parameters until "SET ID" appears.
4. You can now inflate or deflate the tire through the 507FT sensor without
removing it.
2. Quickly press and release the "SET" button. The first tire on the display will blink.
If you want to program a different tire, press the (+) button to move to the
correct tire. Push the "SET" button again and the first digit of "FFF FFF" will flash.
Press the (+) buttonto select the correct number or letter. Press "GO" to move
to the next position. Press the (+) button to change to the correct number or
letter. Continue this procedure until all six digits are changed.
3. Press "SET" once to save the new codes. You will hear a beep and the code will
stop flashing. Press the (+) button to move to the next tire position, if desired.
4. To stop the coding for any position, press "BACK" once. "FFF FFF" will reappear.
No settings will be saved.
5. Press "BACK" twice to return to the Main Screen.
1
Tire valve
Anti-theft hex nut
Sensor 2
Install the sensor onto the
tire valve clockwise.
Install the anti-theft hex nut
onto the tire valve.
1
12

SENSOR INSTALLATION - Cap Sensor
TST-Doc-507FT-RV WSD-C Manual-(D)
1. Screw the hex nut onto the valve stem threads until it bottoms out.
2. Screw the correctly marked sensor onto the valve stem for that tire position.
Tighten the sensor until the air stops leaking and the sensor bottoms-out on
the valve stem.Then give it a quarter turn more to seat it.Do Not Over Tighten!
3. Use your fingers to screw the hex nut up to the bottom of the sensor. Using the
provided wrench, tighten the hex nut against the bottom of the sensor. This will
prevent the sensor from being removed. Keep the wrench in a safe place for
future use.
4. To inflate or deflate the tire, you must remove the cap sensor.
4
Sensor valve cap
Install the sensor valve cap
onto the sensor.
4
Tighten the anti-theft hex nut
counterclockwise until the nut
is tightened against the
sensor.
3
3
Tighten the hex nut
Specified
wrench
Install the anti-theft hex
nut onto the tire valve.
1 Install the sensor onto the
tire valve clockwise.
2
Anti-theft hex nut
Tire valve 12
Tighten the anti-theft hex nut
counterclockwise until the nut
is tightened against the sensor.
3
Specified
wrench
Tighten the hex nut 3
3 4

DISPLAY BUTTONS
DISPLAY INSTALLATION
Power Switch
1. The provided suction cup mount can be used on the windshield, side window or
directly on any smooth nonporous surface. Snap the mount into the back tabs
on the display to use. Alternately, use the dash cradle to hold the display. Be
sure you do not cover either hole on the displays' lower bezel with the cradle
legs.
2. Plug the power cord into the vehicle's cigarette lighter/power port and then into
the side of the display to charge the internal lithium battery. Charge display for
four (4) hours the first time.
ŸThere are five (5) programming buttons on the display. They are: "GO","SET",
"BACK" on the left side of the display and (+) and (-) on the right side of the
display.
ŸThe power slide switch is located on the right side of the display. Slide it up to
turn on the display. Slide it down to turn off the display.
Note: The side power switch will not turn off the display when constant power is
applied to the unit.
Antenna
TST-Doc-507FT-RV WSD-C Manual-(D)

PARAMETER SETTINGS (Setting the sensor alarms)
PRESSURE PARAMETERS
TEMPERATURE PARAMETERS
TST-Doc-507FT-RV WSD-C Manual-(D)
Note: The factory default settings are:
Pressure Unit: PSI Temperature units: °F
High Pressure: 175 PSI High Temperature: 158°F (70°C)
Low Pressure : 100 PSI
Note: Be sure your display is ON and it is showing the Main Screen.
To choose the Pressure Parameter, pressandholdthe "SET" button until it beeps.
Press the (+) button three (3) times and "SET" will appear at the bottom of the
screen and BAR/PSI will be blinking on thescreen.Press the "SET" button again
and then use the (+) button to select "PSI" (or "BAR"). Press "SET" again to save it.
Press "BACK" to go back to the Main Screen.The default setting is PSI.
To set the Temperature Parameters (°F or °C), press and hold the "SET" button
until it beeps. Press the (+) button four (4) times and "SET" will appear at the
bottom of the screen and °F/°C will appear on the screen, blinking. Press the
"SET" button again and then use the (+) button to select °F or °C. Press "SET"
again to save it. Press "BACK" to go back to the Main Screen. The default setting is
°F.

HIGH PRESSURE ALARM SETTINGS
HIGH TEMPERATURE ALARM SETTINGS
TST-Doc-507FT-RV WSD-C Manual-(D)
To set the High Temperature Alarm, press and hold the "SET" button until it beeps.
Press the (+) button twice and "HI TEMP SET" will appear. Again, press the "SET"
button to enter that mode. Use the (+) or (-) buttons to adjust the High
Temperature parameter, if desired. Press "SET" to save. When done press the
"BACK" button.
Note: We recommend leaving this temperature setting at the default 158°F for all
types of tires.
To set up the High-pressure Alarm, press and hold the "SET" button until it beeps.
"HI PRESSURE SET" will appear at the bottom of the screen. Again,press the "SET"
button to enter that mode. Press the "GO"button to select the appropriate axle.
Use the (+) or (-) buttons to adjust the high-pressure alarm to20or25% over your
normal tire pressure for that axle. Press the "GO" button to move to the next axle.
When done setting each axle that you have sensors on, press the "SET" button to
leave that parameter and go back to the menu. When done, press the "BACK"
button to go to the Main Screen.
When you get to the Trailer section of the display, it is set up in three axle groups.
See Page 14 of this manual for more information.

LOW PRESSURE ALARM SETTINGS
TST-Doc-507FT-RV WSD-C Manual-(D)
Note: If your tire pressure is below 100 PSI, you must set the low-pressure alarms
first and then, when done, set the high-pressure alarms. The high pressure
cannot go below the default low pressure of 100 PSI until the low pressure is
reduced.
*Follow your tire manufacturers recommended cold tire pressure setting for the
actual weight on each tire of your vehicle/trailer/RV. Tire pressure data chartsare
available on your tire manufactures website. The low tire pressure alarmshould
be set approximately 10% below that setting. The weight on eachindividual
wheel can be determined by fully loading your vehicle/Trailer/RV asit would be
for a trip and having each wheel position weighed individually.
To set up the Low-pressure Alarm, press and hold the "SET" button until it beeps.
Press the (+) button once and "LOW PRESSURE SET" will appear. Press the "SET"
button again to enter that mode. Press the "GO" button to select the appropriate
axle. Use the (+) or (-) buttons to adjust the low-pressure alarm 10% below your
normal tire pressure for that axle. Press the "GO" button to move to the next axle.
When you get to the trailer section of the display, all the trailer axles on that
section will flash in groups of three. You can set the Low Pressure for that group.
Press "GO" again to move to the next group or the next trailer. The trailer number
will appear in the middle of the screen (#1 to #4). When done, press the "SET"
button to save all the parameters for Low Pressure. Press the "BACK" button to
return to the Main Screen.

RESTORE PARAMETERS TO FACTORY DEFAULT SETTINGS
DISPLAY ALERTS
TST-Doc-507FT-RV WSD-C Manual-(D)
Out of Parameter Alert
The sensors send the tire pressure and temperature readings to the display every
five (5) minutes. If a tire is outside of the parameters that were set, the audible
alarm will sound and the red LED light will immediately flash. The tire in question,
pressure or temperature for that tire, and warning type will also flash. The audible
alarm can be silenced for a short while by pushing any of the buttons on the front
of the display. The red warning light will continue to flash until the pressure or
temperature issue is resolved and brought back into your preset levels.
High Pressure Alert
(e.g.: High pressure threshold is 175 PSI)
Note: < >&<HI PRESSURE>displayed, the
faulty tire pressure is too high, deflate
the tire to the normal pressure.
Low Pressure Alert
(e.g.: Low pressure threshold is 100 PSI)
Note: < >&<LO PRESSURE>displayed, the
faulty tire pressure is too low, inflate the
tire to the normal pressure.
First, turn off the display. Hold the "BACK" and "SET" buttons at the same time and
turn the display back on. You will hear one beep. The display will power back on
and original factory parameters will be restored. Tire codes will not be erased or
changed.
High Temperature Alert
(e.g.: High temperature threshold is 158°F)
Note: < >&<HI TEMP>displayed, the faulty
tire temperature is too high, stop vehicle
to cool down to the normal temperature.

OTHER FUNCTIONS
TST-Doc-507FT-RV WSD-C Manual-(D)
Fast Leak Alert
When a fast tire leak is detected, the sensor will send that data immediately to the
display, The audible alarm will sound and the red LED light will immediately flash.
The tire in question, pressure for that tire, and "FAST LEAK" will also flash. The
audible alarm can be silenced for a short while by pushing any of the buttons on
the front of the display. The red warning light will continue to flash until the
pressure or temperature issue is resolved and brought back into your preset levels.
Sensor Low Battery Alert
The sensor low battery indicator will display when the sensor battery is low. The
tire affected will flash along with the pressure and temperature read-out and the
low battery symbol and ( ) on the left side of the display. Replace with a new
battery as soon as possible.
Note: This low battery alert will display for only a short time until the battery is
exhausted. If you do not have the display on often, the indicator signal will
be sent but not show on the display,since it was off. If your sensor is not
reporting to the display, check the battery voltage. If it is below 2.95 volts
(normally 3+ volts), you will have to change the sensor battery.
Normal Display Scrolling
The tire icons on the display will automatically scroll/cycle through, one by one.
Each tire will be displayed for approximately 5-6 seconds. You can manually cycle
through the displayed tires by pushing the (+) or (-) buttons on the display. The
display will show the tire you choose for approximately 10 seconds before
continuing to cycle.

TST-Doc-507FT-RV WSD-C Manual-(D)
Backlighting and Motion Detection
The display is equipped with a light sensor and a motion sensor. The backlight will
turn on when the vehicle is in motion and there is little ambient light. If the vehicle
has stopped for a while and the display is on the internal battery, the display will
"go to sleep" until the vehicle resumes motion.
Disconnecting and Reconnecting a Vehicle
When a towed vehicle is displayed on the screen and you want to temporarily
remove it (example: leaving a trailer at a campground), momentarily press the
"GO" and (-) buttons, the trailer section of the display will disappear, the sensors
on the trailer will not be read. To add the trailer back onto the display, again,
momentarily push the "GO" and (-) buttons and the towed vehicle will reappear.
Charging the Display
The display is powered by a non-replaceable, lithium-ion battery. A battery level
indicator is located on the left side of the display. When the indicator shows one
bar, it is recommended you charge the display as soon as possible to avoid
disruption when in use. It will take approximately four (4) hours to fully charge.
Display run time is 5-7 days on a full charge.
Do not keep a fully charged display plugged in constantly.
Trailer Selection
Four different trailers with sensors can be programmed into the display and each
trailer can be selected to be viewed on the screen and designated by numbers 1
to 4. On the Main Screen, press the "GO" button to select different trailers and
trailer wheel groups you have programmed sensors to. Note that when in the
High or Low Pressure areas, pushing the "GO" button will move you through the
four main axles, the front spare tire, the trailer 1 front - 3 axle group, the trailer 1
- rear axle group and spare, then to trailer 2, 3 and 4 with the same pattern. After
trailer 4, the front steer axles will again highlight. Each flashing tire group on the
trailer can have its own High or Low Pressure setting.
When a towing vehicle is displayed on the screen and you want to temporarily
remove it (example: leaving a truck or car at a campground and using another
vehicle to move the RV), momentarily press the "GO" and (+) buttons, the truck
(towing) section of the display will disappear, the sensors on the towing vehicle
will not be read. To add the truck (towing) section back onto the display, again,
momentarily push the "GO" and (+) buttons and the towing vehicle will reappear.

REPLACING THE FLOW-THROUGH SENSOR BATTERY (CR1632)
(1) Remove the sensor from the tire valve stem.
Waterproof
rubber seal
Battery
Battery cover
(2) Using a jewelers Phillip's screwdriver, remove the two screws from the battery
cover on the side of the sensor. The "+" side of the battery can now be seen.
(3) Remove the CR1632 battery and check that the metal contact points in the
sensor are not corroded. To clean the contact points, use a pencil easer and
lightly rub the two metal battery contacts in the sensor.
(4) Install a new battery. Be sure the "+" (positive) side is facing out.
Note: It is recommended that you check the voltage of the new battery before
installation. It should read 3+ volts when new. Do not install if the battery
reads less than 3 volts.
TST-Doc-507FT-RV WSD-C Manual-(D)
Loosen the hex nut
Specified
wrench

Waterproof
rubber seal
(5) Check the "O" ring that surrounds the battery compartment. This is the
waterproof seal. Replace if old or damaged. Additional "O" rings are provided
in your 507FT kit or can be purchased from TST by calling 770-889-9102.
(6) After the new battery installation replace the battery compartment cover and
snugly tighten the two screws. Do not Over Tighten.
(7) Screw the sensor on to the correct tire position.
Note: Changing the battery in the sensor does NOT affect the sensor
programming in the display. You will not have to reprogram the sensor into
the display.
16
TST-Doc-507FT-RV WSD-C Manual-(D)
Note: When removing a stubborn battery cover screw, first tighten the screw to
break it loose (you will feel a slight "pop") and then try loosening the screw.

REPLACING THE CAP SENSOR BATTERY (CR2032)
17
TST-Doc-507FT-RV WSD-C Manual-(D)
(1). Remove the sensor from the tire valve stem.
(2). Use the specified wrench to open the sensor cap counterclockwise.
(3). Slide the battery out of the cage sideways. Note that the (+) side is up. Replace
with a new CR2032 battery that is 3+ volts.
(4). At this time check the"O"ring at the base of the threads. Be sure it is in place.
If it is worn or broken, replace it.
Specified
wrench
Loosen the hex nut
Waterproof
rubber seal

ADDITIONAL FUNCTIONS
18
TST-Doc-507FT-RV WSD-C Manual-(D)
Set ID Truck (Three Digit ID Identifier)
ŸPress andholdthe "SET" button until the display beeps, then release.
ŸPress the (+) button 8 times until "SET ID TRUCK" appears.
ŸPress the "SET" button to enter that mode.
ŸPress "SET" again, the first digit will blink.
ŸUse the (+) or (-) buttons to set the first digit. Press "GO" to move to the next
digit.
ŸAgain, press the (+) or (-) buttons to select the next digit. Continue forthefinal
(3rd)digit.
ŸWhen done, push the "SET" button to save.
ŸPush the "BACK" button twice to get back to the Main Screen.
Swap Tire Sensor Positions
ŸPressandholdthe "SET" button until the display beeps and then release.
ŸPress and release the (+) button 7 times until "TIRE " appears. Press "SET".
ŸUse the (+) or (-) buttons to select the tire sensor code you want to swap.
ŸPress "SET" and then select the tire you want to swap the code to using the (+)
or (-) buttons.
ŸPress "SET" to move the sensor code to the new tire.
ŸPress the "BACK" button twice to get back to the Main Screen.
Set ID Trailer (Three Digit ID Identifier)
ŸPressandholdthe "SET" button until the display beeps, then release.
ŸPress the (+) button 9 times until "SET ID TRAILER" appears.
ŸPress the "SET" button to enter that mode.
ŸPress the "GO" button to select the trailer (1-4) to set the ID.
ŸPress "SET" again, the first digit will blink.
ŸPress "GO" to go to the first digit on the trailer section on the screen.
ŸUse the (+) or (-) button to set the 1st digit. Press "GO" to select the next digit.
Continue for the final (3rd) digit.
ŸPress "SET" to save the 3 digit code. To select the next trailer, press the "GO"
button.
ŸWhen done, press the "SET" button to save.
ŸPush the "BACK" button twice to get back to the Main Screen.
Other manuals for TM-507
2
This manual suits for next models
1
Table of contents
Other TST Automobile Accessories manuals
