TTK Manttra 22871 User manual


1
IMPORTANT SAFEGUARDS
To reduce the risk of personal injury or property damage when using
your 5 Pc. Multi Cooker Set, basic safety precautions should always
be followed. You can get total satisfaction from your Multi Cooker if
you follow the simple instructions given below:
1. Read all instructions carefully, paying special attention to the section
on “How to use your 5 Pc. Multi Cooker Set.”
2. Do not touch hot surfaces. Use handles or knobs.
3. Close supervision is necessary when this appliance is in use by or
near children.
4. Allow the unit to cool before putting on or taking off parts.
5. Extreme caution must be used when moving the Multi Cooker (pot
& lid) containing hot liquids.
6. Do not use the Multi Cooker for other than intended use.
7. This appliance cooks under pressure. Improper use may result in
scalding injury. Make certain the cooker is properly closed. Refer
instruction given under “How to use your 5 Pc. Multi Cooker Set.”
8. Do not use any other cooking pot other than the inserts provided
with the appliance.
9. Do not fill the cooker to more than two thirds of its capacity. For
solids like rice, meat and vegetables, which expand during cooking,
do not fill the unit over half full. Overfilling may cause a risk of
clogging the vent tube and developing excess pressure.
10. When you cook foods such as applesauce, cranberries, pearl barley,
oatmeal or other cereals, split peas, noodles, macaroni, rhubarb
or spaghetti; make sure to thoroughly clean the pressure release
device before cooking.
11. Always use the Multi Cooker with adequate liquid other than oil.
Do not allow the cooker go dry.
This is a listed appliance. The following safeguards are
recommended by most portable appliance manufacturers

2
12. Always ensure the pressure release device is not clogged and keep
the space around the multifunction safety plug on the inside of the
lid clean before use.
13. When you release the pressure using the Quick Release System
(QRS), release the steam gently when cooking rice, lentils/beans
or else the liquid may froth over. Please note that steam will release
and therefore to avoid serious injuries or burns, keep bare skin,
face and eyes away from the unit. Do not use the Quick Release
System for foods with a lot of liquid, as there could be an overflow.
14. Do not attempt to force the lid open or change the pressure settings
when the unit is in use and until the inside pressure is safely
released.
15. Do not use this appliance for pressure frying with oil.
16. Cleaning the body with organic solvents like thinner or benzene
will damage the surfaces.
17. Do not lift the Multi Cooker using the lid handle. Use only pot
handles.
18. Do not attempt to force the VPI down, when the cooker is under
pressure.
WARNING: This appliance generates heat and escaping
steam during use. Use proper precautions to prevent risk of
burns or other injury to persons or damage to property.
FOR HOUSEHOLD USE ONLY
SAVE THESE INSTRUCTIONS

3
Principle Of Pressure Cooking
Under normal circumstances, most foods cook at 2120F ( 1000 C). This is
because the water boils at this temperature in normal atmospheric pressure.
If the temperature of cooking is raised, foods cook much faster. For
example, 320F (180C) increase in temperature allows food to be cooked
approximately four times faster, retaining freshness and nutritional values
of the food.
By increasing the steam pressure inside a pressure cooker to 12 lbs per
square inch above the atmospheric pressure, the temperature inside the
pressure cooker increases by 320F (180C) roughly. Thus, at these higher
temperatures food cooks much faster.

4
Description 0f Parts
Note: Due to continuing improvement, actual parts in your cooker may
differ slightly from the illustration above. Optional items may not be
available in some models.
Glass Lid Wire Trivet
Steamer/Pasta Basket

5
Begin a Revolution In Your Kitchen
This cooker has the advantages of pressure-cooking over normal cooking,
such as saving of time, energy and retention of flavor and nutritive values.
In addition, this unique product is packed with advanced features, which
give you additional safety and reduce your drudgery.
Following are the features built in:
1. Pot and Lid: The Multi Cooker comes with a pressure pot made of
aluminum and powder coated with a pressure lid made of sparkling
stainless steel to last for a long time.
2. Safety Features:
a. The Pressure Regulator: This appliance is
equipped with a 3 stage pressure regulator which
is the first safety device. This operates at two
pressure settings at 8 lbs. per sq. inch and at 12
lbs. per sq. inch with the Quick Release System
(QRS) feature. If you want to cook at lower pressure
(8 psi) align the tang of the pressure regulator to
the notch on the cup in the pressure regulator
console marked by “I” (a single line) and for cooking
at higher pressure (12 psi) align the tang to the
notch on the cup in the pressure regulator console
marked by “II” (two lines). When the cooker
reaches the set pressure the pressure regulator will
release the steam with a hiss safely in one direction away from
you. After the cooking is over, for Quick release of steam, align the
tang of the pressure regulator to steam release position marked as
“” on the side of the console.
b. The Gasket Release System (GRS): In case of abnormal conditions,
when the pressure inside goes beyond the safe level due to clogging
of food in the vent tube, a portion of the gasket will get pushed
through the slot in the lid, safely releasing the steam through the
hole on the lid located under the pressure regulator console. This
is the second level safety device.
c. Multifunction Safety Plug: The first function of
this device is zero pressure operation. When the
cooking starts from cold, the air inside the cooker
is expelled.
As pressure builds up, you will initially see emission
of steam through the multifunction safety plug and
the slot on the lid console as it takes a little while for the safety
8 PSI
QRS
12 PSI

6
plug to seal the cooker. During this period the steam may
condense and a few drops of water may also drip. This will stop
once the safety plug seals with the pressure build up.
The second function is the fusible plug operation. In the unlikely
event of both the pressure regulator and the GRS failing to function,
the metallic fusible alloy in the plug melts to release the pressure.
d. Visual Pressure Indicator (VPI): For your additional
safety your Multi Cooker is equipped with a Visual
Pressure Indicator housed in the safety button
console. When the pressure starts building up inside
the cooker, the VPI is pushed above and will rise
above the surface of the console. This indicates that
your cooker is under pressure. Similarly, after cooking
is over and the issue of steam stops completely, the VPI drops
below the surface of the console, giving you a visible indication
that you can safely open the cooker by turning the safety button to
“OPEN” position by aligning the arrow mark on the button with the
“OPEN” indication of the cooker on the console.
e. Mechanical Interlock: The front safety button console houses a
2 way safety button, which works in conjunction with the
multifunction safety plug and the cam that locks the lid and body
together in the closed condition. This button can be set with the
arrow mark on it against 2 positions, namely “Open” position, and
“Close” position.

7
How To Use Your
5 Pc. Multi Cooker Set
The Multi Cooker can be used for your multiple cooking needs:
a) PRESSURE COOK: Cook even a whole chicken in this 8 qt. cooker.
b) BROWNING: Brown foods on the stovetop.
c) WARMING: Warm any food quickly.
d) MAKING PASTA: Make tasty pastas in minutes.
e) AS A STOCK POT: Make your own stock/sauce/soups in this large
pot, with fitted glass lid.
a) PRESSURE COOKING:
1. Fill the body of the cooker with required quantity
of food and water.
2. Turn the 2 way safety button on the lid handle
clockwise to align with the arrow mark on the button with the
“Open” indication of the cooker on the console.
3. Inspect the lid so that the vent tube passage is
clean and clear from any blockage and also the
area around the Safety Plug is clean inside the
lid.
4. Ensure correct fitting of the gasket inside the lid.
Now place the lid down on the body in such a
way that the arrow mark on the lid is in line with
the arrow mark on the left side body handle.
Press the lid down gently and turn the lid handle
clockwise till the lid stops and the lid handle is in
alignment with both the body handles.
5. Move the 2 way button counterclockwise to fully
align the arrow mark on the button with the
“Close” indication of the cooker on the console.
6. Place the pressure regulator on the vent tube in such a way that

8
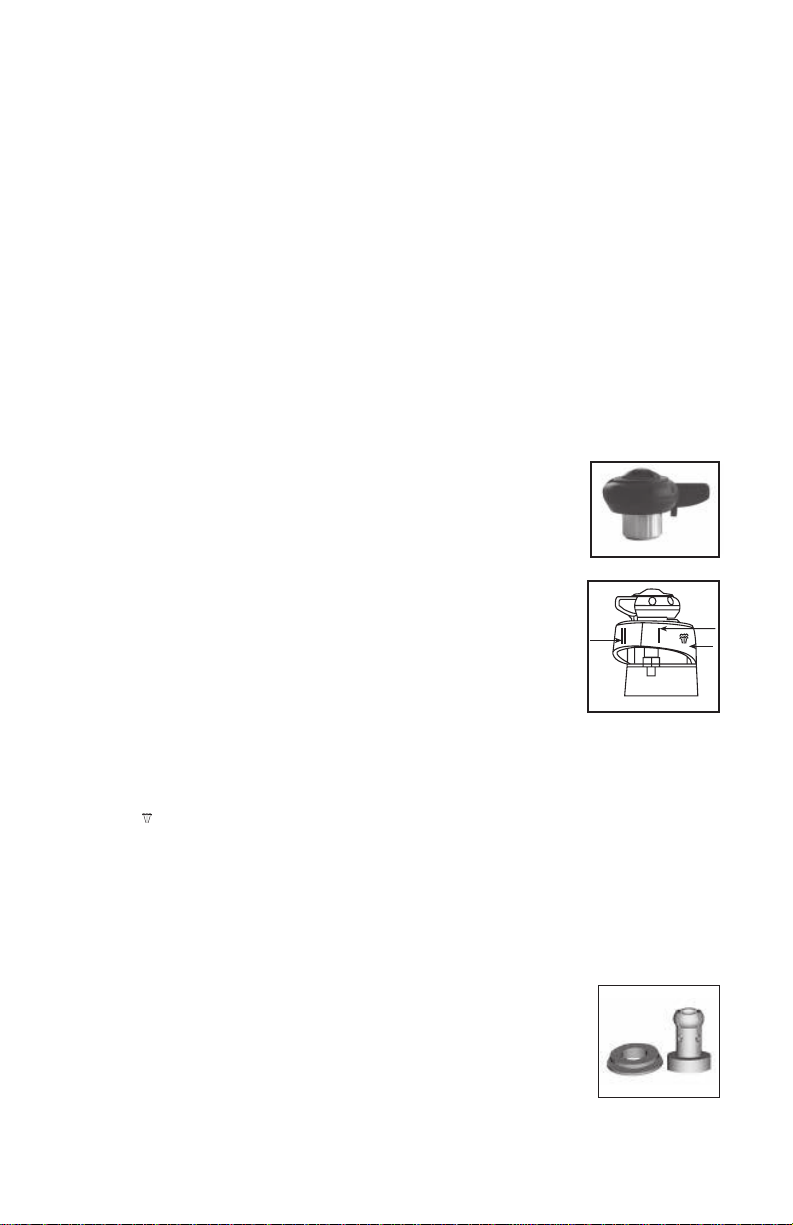
the steam outlet on the regulator cowl is away
from the lid handle and align the tang to one of
the recesses/ notches on the cup in the console
depending on the pressure at which you want to
cook. For cooking at low pressure (8 psi) set the
tang of the pressure regulator against the marking “I” and for
cooking at high pressure (12 psi) set the tang against the marking
“II” on the console depending on the recipe. Ensure that the
regulator sits properly and gets engaged to the vent tube with a
“click”. Remember, once the pressure regulator is set and the
appliance is kept on the heat source, pressure settings should
not be changed until the cooking is over and the internal pressure
is completely released.
7. Place the cooker on high heat.
8. Once the pressure starts building up inside the cooker, you will
initially see emission of steam through the safety plug hole as it
takes a little while for the safety plug to seal the cooker. During
this period, the steam may condense and a few drops of water
may also drip. This will stop once the safety plug seals with the
pressure build up. Now the VPI will get pushed above and will
ride above the surface of the console. This indicates that your
cooker is under pressure. In the unlikely event of the steam
continuing for a long time and the VPI not rising, tap the lid lightly
with the tip of a knife/fork. Even after tapping, if the VPI does not
rise, the reason could be due to one of the following:
i) The heat applied is not sufficient.
ii) The cooker is not fully closed and the 2 way safety button is
not turned to “close” position.
iii) There is insufficient liquid in the cooker for steam generation.
Determine the reason and take corrective action without touching
any hot parts of the cooker. Reset the cooker and start the cooking
process.
9. Once the pressure reaches the set level, the pressure regulator
will hiss continuously. Begin timing the cooking period from this
moment and lower the heat sufficiently to maintain a gentle hissing
sound and the occasional escape of steam from the regulator.
10. After cooking, turn off the heat source and use the handles of the
body to remove the cooker from the heat source. The lid and
body surfaces may be hot. Be careful not to touch any hot
surfaces.
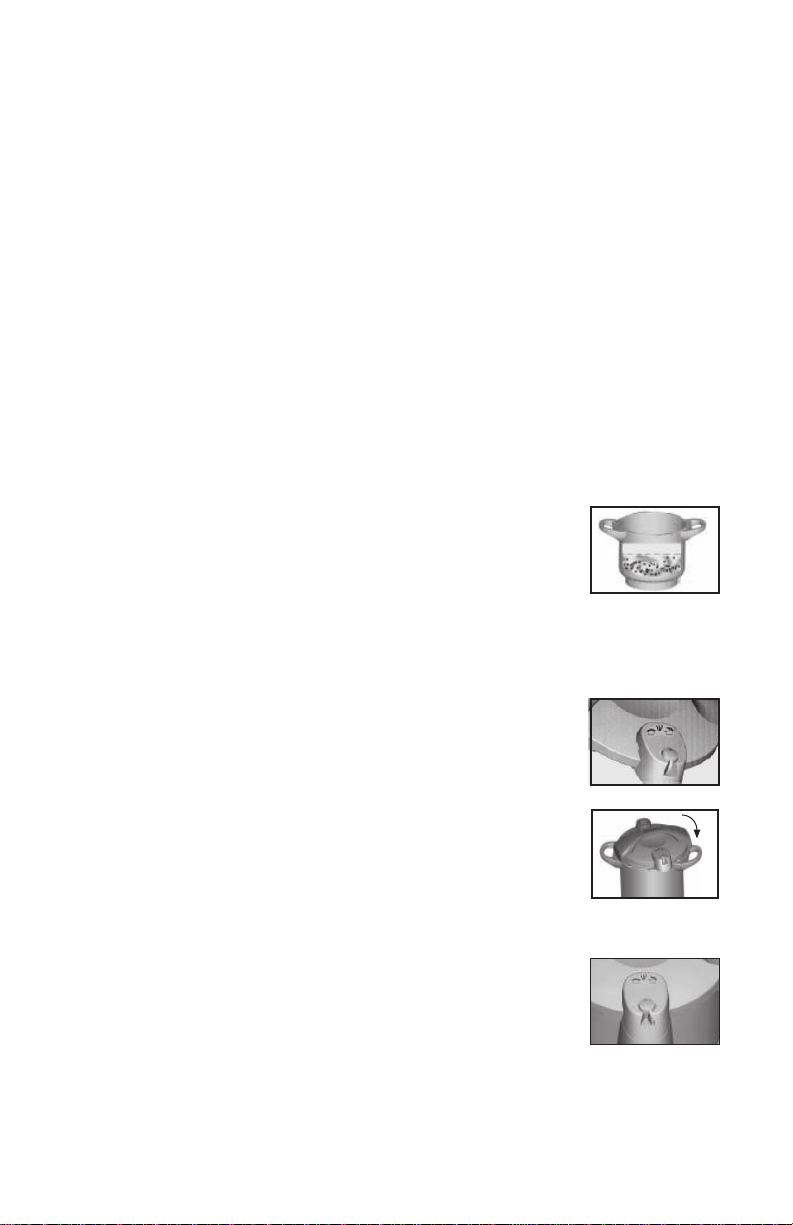
11. Your cooker is equipped with the Quick Release System (QRS). If
you wish to operate the QRS, turn the pressure regulator gently
to your right (anti-clockwise) to the steam release position marked
as “ ” on the console. As steam will release, remove your hands
and wait for all the steam to exhaust.
12. After the steam release stops completely and the VPI drops below

9
the surface of the console, turn the 2 way safety button to OPEN
position by aligning the arrow mark on the button with the “OPEN”
indication of the cooker on the console.
After the cooking is over and the steam release stops completely,
in the unlikely event of the VPI getting stuck in its risen position
for a long time, keep the button in the “CLOSE” position, tap the
lid lightly with the tip of a knife or fork. The VPI will drop down.
Now you can turn the button to “OPEN” position and then safely
open the cooker.
13. Open the cooker by turning the lid anti-clockwise
and take off the lid gently.
CAUTION:
•Do not operate the QRS when the cooker is on a heat
source.
•When you operate the QRS, the steam release will be very hot. To
avoid serious injuries or burns, keep bare skin, face and eyes away
from the unit.
•Do not remove the pressure regulator from the lid until the lid is
removed.
•Do not change the pressure settings when the cooker is in use, or
while there is pressure inside the cooker.
b) BROWNING:
Braised foods always taste better when browned before cooking in liquid.
Your Multi Cooker can also be used for this purpose following these simple
steps:
•Add required amount of oil in the pressure pot.
•Place the pot on the stove top.
•Place the ingredients in the pot.
•Brown the contents of your choice, by continuously stirring.
•Remove the pot from the heat source.
•Add remaining ingredients, including cooking liquids, and lock the
Pressure Lid into place. Proceed, as directed.
c) WARMING:
To reheat the cooked food:
•Pour one cup (8 oz) water into the cooker body.
•Place the cooked food to be warmed in any suitable stainless steel
pot and place it in the pressure pot, on the trivet.
•Lock the lid into place.
•Keep the 2 way safety button in the “OPEN” position and cook for 3-4
minutes.

10
d) PASTA MAKING:
•Fill the pressure pot halfway with water.
•Place pasta inside the steamer basket and carefully lower it into the
water in the pot. Ensure that the water level is above the pasta.
•Place the pot on the stovetop and bring water to a boil.
•When pasta is aldente, remove the pot from the heat source.
•Using the oven mitts, take out the steamer basket and drain the water.
e) AS A STOCK POT:
The pressure pot can also be used as regular pot with a fitted glass lid.

11
Guidelines To Use Your
5 Pc. Multi Cooker Set
Your cooker comes fully assembled and is ready to use.
1. WATER TO BE USED: Every recipe given in the Recipe Book includes
adequate quantity of liquid for cooking. When you are trying other
recipes, make sure that there is adequate liquid in the recipe for cooking.
As a guideline, when you are using the pressure cooker, a minimum
quantity of 1 cup (8 oz.) water must be used for the first 5 minutes of
pressure cooking. In addition to this, for every additional 5 minutes of
cooking time, add half cup (4 oz.) of extra water.
2. PRESSURE COOKING TIME: Pressure cooking time should be
calculated from the moment the pressure regulator starts hissing.
Note: Please follow the step by step instructions given under section “How
to use your Multi Cooker.”
The timings given in the recipe section should be taken only as a guideline.
You may experiment and arrive at suitable cooking times based on
individual preferences.
Your pressure cooker should not be filled more than two thirds its capacity
for solids and half for liquids. When cooking liquid foods, please use the
quantity of water as specified in the recipes.

12
How To Maintain Your
5 Pc. Multi Cooker Set
Your 5 Pc Multi cooker comes in two versions.
a) Polished stainless steel body and lid.
b) Hard anodised aluminum body with polished stainless steel lid.
To keep your cooker always looking new, please follow the instructions
given below:
1) Pressure Cooker Body and Lid
a) Avoid leaving food in the pressure cooker body overnight as it may
cause difficulty in cleaning.
b) After each use, wash the body and lid with hot soapy water, rinse
and dry thoroughly.
c) If the water you use in the cooker is hard water, then a salt deposit
will form in the base after cooking. Scrub this using a nylon scrubber
and wash.
d) For stubborn stains it is recommended that you use a nylon scrubber.
e) If the body has burnt food residue stuck on it, soak with a
strong solution of non-alkaline detergent powder overnight.
f) Your pressure cooker is dishwasher safe.
2) Pressure Regulator
To clean the pressure regulator, occasionally soak it in soapy water. Make
sure to rinse all traces of soap before reuse.
3) Gasket
After cooking, remove the rubber gasket from the lid. Wash and allow to
dry until next use. If after considerable use, the rubber gasket leaks, lightly
stretch the gasket diagonally to extend its life. The rubber gasket can also
be immersed in a basin of cold water to extend its life.
After 9 to 12 months use or if the appliance is not used for a period of
time, the gasket can harden and this will prevent the appliance from sealing
properly. Then the gasket must be replaced with a new one.
4) Storing
Always put the cooker away after drying it thoroughly. Do not store the
cooker with the lid sealed or in a closed condition. This will prevent

13
mustiness. Always store the pressure regulator separately on a shelf or
drawer and not on the lid in its place.
5) Serving
Avoid damage to the sealing rims of the lid and body while serving or
cleaning the cooker.
6) Service
If the Pressure Cooker malfunctions or for any service/spare
parts, call our Toll Free number. DO NOT ATTEMPT TO OPEN
THE CONSOLES OR REPAIR THE COOKER ON YOUR OWN.
7) Fixing of spare parts
a) If the multifunction safety plug of your cooker has fused, do not try
to repair it. Please purchase a new safety plug. Remove the safety
plug from the lid by pulling it from inside the lid. Also remove the
grommet. Now, insert the new grommet and position the safety
plug by pushing it firmly into the grommet from the inside of the lid.
Ensure that the safety plug floats freely along with the VPI.
b) To change the lid handle, unscrew the screws from inside the lid.
Align the new handle and tighten the screws firmly.
c) To change the body handles, remove the handles by unscrewing
the screws. Align the new handles and tighten the screws firmly.
For replacing spare parts other than mentioned above, please contact our
Toll Free number.
8) Ordering of spare parts
For genuine spare parts, write to the address given below, giving name of
part and SKU No.
For details on names of parts and SKU Nos., please see “List of Spare
Parts” in this book.
CUSTOMER SERVICE
MANTTRA INC.
P O Box 5053
Virginia Beach, VA 23471
Tel:757-318-7603
Fax:757-318-7604
Toll Free No:1-877-962-6887
email:[email protected]
Visit us at:www.manttra.com

14
Sl. No. Name of the Part SKU No. Illustration
1. Gasket 91008
2. Pressure Regulator Assembly 91411
3.
Body Handle with Screws 91108
4. Lid Handle with Screws and Nuts
91208
5. Multifunction Safety Plug with Grommet
91801
6. Glass Lid 91702
7. Wire Trivet 91700
8. Instruction Manual 91514
9. Recipe Book 91512
List Of Spare Parts
Ver. 2
May - 2004

This manual suits for next models
1
Table of contents
Popular Kitchen Appliance manuals by other brands

Jiffy
Jiffy Pro-Line J-4000C Specifications

Electrolux
Electrolux EKD60760 user manual

Bella Outdoor Living
Bella Outdoor Living Grande Series Operation and owner's manual

Princess
Princess CLASSIC MULTI SNACK 3-IN-1 Instructions for use

Axis
Axis AX-S9Ultra Installation & maintenance

Market Forge Industries
Market Forge Industries 30P-STGL Installation, operation and maintanance manual