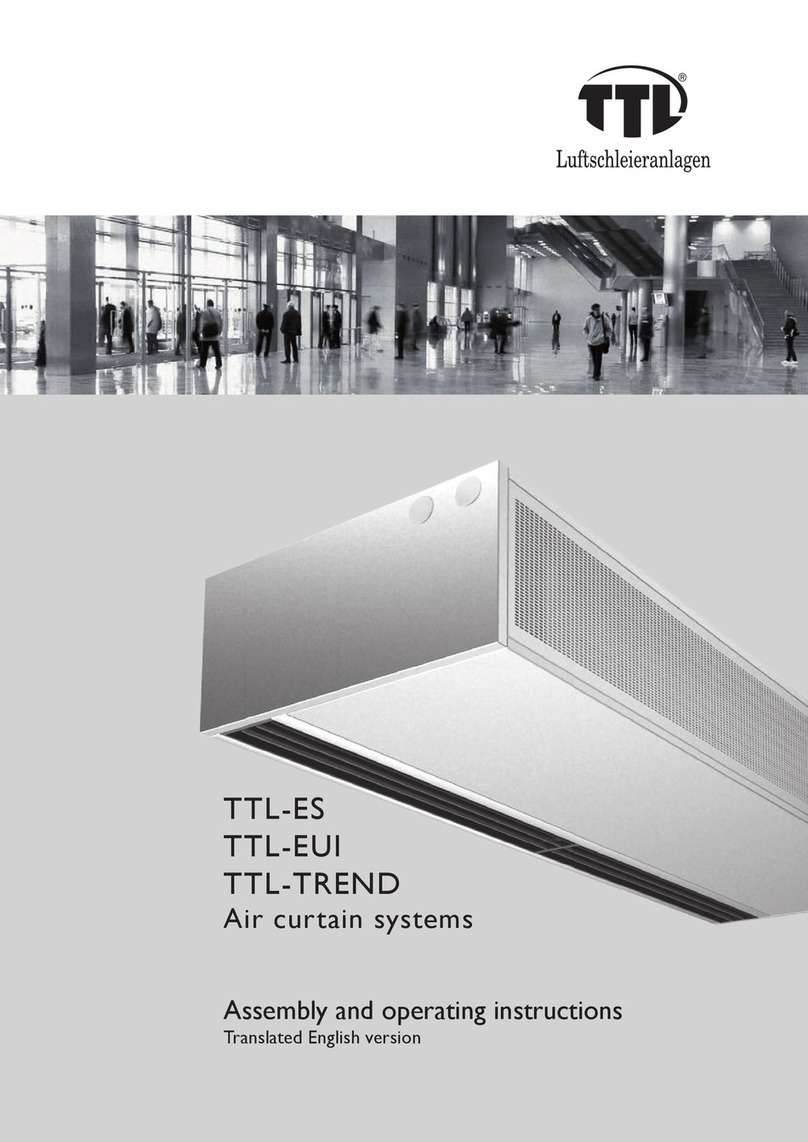
TTL TTL-ORBIS User manual

TTL-ORBIS
TTL-TWINOR
Air curtain systems
Assembly and operating instructions
Translated English version

Air curtain systems ORBIS / TWINOR
2
Imprint
Assembly and operating instructions for Air curtain systems type
TTL-ORBIS and TTL-TWINOR
Translated English version 01
Manufacturer: TTL Torluftschleier GmbH
1. Edition October 2016: 1.500, printed at chloreene-free paper
%\LEEWHFKQLVFKH'RNXPHQWDWLRQ*UDÀN*PE+&R.**HUPDQYHUVLRQ
&RS\ULJKW77/7RUOXIWVFKOHLHU*PE+
Reprint, also excerpts, only with written authorization.
Technical changes reserved.
Content
Imprint 3
1. Device model code 3
2. Safety information 3
2.1 Safety and warning symbols used 3
2.2 Proper use 3
4XDOLÀFDWLRQRISHUVRQQHO
*HQHUDOVDIHW\LQIRUPDWLRQ
6FRSHRIGHOLYHU\DFFHVVRULHV
7UDQVSRUWSDFNDJLQJVWRUDJH
5. Assembly 5
5.1 Mounting modalities 5
5.1.1 Fitting with wall mounting bracketsRQO\W\SH25%,6
5.1.2 Fitting with a ceiling mounting kit 7
5.1.3 Vertical mounting on a stand baseRQO\W\SH25%,6
5.2 &RQQHFWLRQWRWKHKHDWLQJ 10
5.3 &RQQHFWLRQWRWKHPDLQVHOHFWULFLW\VXSSO\DQGFRQWUROXQLWGDWDOLQH 12
5.3.1 &RQQHFWLRQWRWKHFRQWUROXQLWGDWDOLQH
5.3.2 &RQQHFWLRQWRWKHPDLQVHOHFWULFLW\VXSSO\
6. Start-up 16
7. Operation via the operating console 16
8. &KDQJLQJWKHDLUÀOWHU 16
Service 17
10. &OHDQLQJ 17
11. Maintenace 17
12. Fault analysis and remediation, measures and risks 18
13. (8'HFODUDWLRQRI&RQIRUPLW\
0DQXIDFWXUHU&RQWDFWVHUYLFHDGUHVV 20

3
Air curtain systems ORBIS / TWINOR
1. Device model code
TWINOR 100 N-LNS
3HUIRUPDQFHFODVV/16+(/1;
+HDWH[FKDQJHU1171;'.2'9(+:.:.
'HYLFHZLGWK
0RGHOUDQJHW\SH25%,67:,1OR
1ZLGHEDQG17ORZWHPSHUDWXUH1;H[WUD'GDPS
.2FRQGHQVHU'9GLUHFWHYDSRUDWRU(HOHFWULF
+:KRWZDWHU.:FROGZDWHU.GHYLFHZLWKRXWKHDWHU
2. Safety information
For safety reasons, these assembly and operating instructions, including their safety infor-
mation, must be carefully read and observed by all persons involved in assembly, start-up,
operation, maintenance and servicing.
All product information is to be kept for the entire service life of the air curtain device.
2.1 Safety and warning symbols used
Please observe the following safety information on the device and in the documentation:
Warning: Safety information aiming to avoid risks to persons and property!
For your own safety, read this information very carefully!
Warning: Risk posed by electrical voltage!
Risk of electric shock.Avoid contact!
:DUQLQJ5LVNRIÀUH
'RQRWXVHDQDLUÀOWHULQDLUFXUWDLQV\VWHPVZLWKHOHFWULFDOKHDWLQJ
Caution: Risk posed by hot surfaces!
5LVNRIEXUQLQJ$OORZWRFRROGRZQÀUVW$YRLGFRQWDFW
Caution: Risk posed by static charge!
The electrical circuit board can be destroyed. Remove static charge by touching an earthed
object!
Note: Observe information and tips!
Observe notes in the user instructions!
2.2 Proper use
Air curtain systems prevent the exchange of air in open doors.The TTL air curtain systems
types ORBIS and TWINOR can be mounted over doors – on ceiling or wall – or laterally
VWDQGLQJQRWW\SH7:,1OR,QRUGHUWRJXDUDQWHHRSWLPXPIXQFWLRQDOLW\WKHInformation and
notes on installation options of air curtain systems must be read and observed.
TTL-ORBIS and -TWINOR air curtain systems are designed for installation in dry rooms with
DLUFRQWDLQLQJDQRUPDOOHYHORISROOXWLRQ$PELHQWWHPSHUDWXUHPLQ&WRPD[&
humidity max. 75%..

Air curtain systems ORBIS / TWINOR
Any other use is not considered intended use, and is therefore not permissible. This parti-
cularly includes use as dryer. In such a case,TTL Torluftschleier GmbH does not accept any
OLDELOLW\IRUGDPDJHWKHXVHULVVROHO\UHVSRQVLEOHIRUWKHULVNV
2.3 4XDOLÀFDWLRQRISHUVRQQHO
Assembly, disassembly, start-up, repair and changes of and to the air curtain system must only
EHFDUULHGRXWE\TXDOLÀHGVSHFLDOLVWSHUVRQQHO5HSDLURIDQGFKDQJHVWRRUZLWKLQWKHGHYLFH
may only take place following consultation with the manufacturer or by TTL employees.
4XDOLÀHG VSHFLDOLVW SHUVRQQHO DUH SHUVRQV WKDW GXH WR WKHLU VXIÀFLHQW TXDOLÀFDWLRQV KDYH
been authorised by the person responsible for the safety of the system to carry out the
required activities.The required skills include know-ledge of electrics, mechanics and heating
installation, as well as the applicable provisions, standards, accident prevention regulations,
operating conditions and on-site safety mechanisms.
General safety information
Warning: Risk posed by electric shock or moving parts!
Air curtain devices contain dangerous, voltage-carrying exposed parts and/or moving or rota-
ting parts.These can cause very serious personal or material damage.
• Never open the covers during operation!
• $OZD\VFXWRIIWKHSRZHUVXSSO\EHIRUHRSHQLQJVZLWFKRIIUHSDLUVZLWFK
Caution: Risk of burning posed by hot surfaces!
Air curtain devices contain hot parts that can lead to severe burns upon contact.
• Before making contact, cut off the heating and power supply and allow the system to cool
down for at least 30 minutes.
• &KHFNWKHWHPSHUDWXUHEHIRUHWRXFKLQJSDUWV
Warning: Risk posed by opening, replacement parts and accessories!
7KHRSHUDWRULVVWULFWO\IRUELGGHQIURPRSHQLQJWKHDLUFXUWDLQGHYLFHFRPSVHFWLRQ
Original replacement parts and accessories approved by the manufacturer are designed for
safety.When using other parts or in the event of failure to observe the TTL documentation,
we decline all liability.
In the event of any ambiguities regarding technology, handling or use, we expressly recom-
mend checking with the manufacturer or his representative, citing the model designation.
3. Scope of delivery/accessories
TTL air curtain devices are delivered ready for use ex works.
Included accessories: depending on order, see delivery note.
2WKHUDYDLODEOHDFFHVVRULHVGHSHQGLQJRQHTXLSPHQWUHFRPPHQGHG
$LUILOWHUQRWIRUHOHFWULFKHDWLQJ 5HSDLUVZLWFK
0DJQHWLFYDOYHLISRVVLEOH 'RRUFRQWDFWLISRVVLEOH
5RRPWKHUPRVWDWLISRVVLEOH &RQWUROSDQHO
• Mounting kit • Attachment parts

5
Air curtain systems ORBIS / TWINOR
4. Transport, packaging, storage
&KHFNWKHGHOLYHU\IRUFRPSOHWHQHVVDQGGDPDJHLPPHGLDWHO\5HSRUWWUDQVSRUWGDPDJH
to the forwarder as appropriate. If in doubt, the air curtain device should not be used in the
event of any damage. Packaging serves the sole purpose of protecting the air curtain device
during transport to the place of use. It must always be removed before assembly. All unat-
tached parts, such accessories, must be removed from the packaging. Packing material must
be disposed of properly. Air curtain devices must only be stored in rooms protected from
the effects of the weather.
Caution: Risk of injury and damage during transport and when moving!
Dropping or tipping of the unit can lead to serious injury or death.
Hard landings can damage the fans and lead to unforeseen damage or destruction of the
wheels during later operation.
• Only lift or move the air curtain system with suitable lifting equipment. Weight details should be
taken from the shipping documents or rating plate.
• &KHFNWKDWWKHOLIWLQJHTXLSPHQWKDVVXIÀFLHQWORDGEHDULQJFDSDFLW\
• Secure the unit against sliding and falling.
• Do not walk beneath suspended parts.
• Wear gloves when doing any work with or on the air curtain device.
5. Assembly
5.1 Mounting modalities
:HUHFRPPHQGWKDW\RXXVHRXUZDOORUFHLOLQJIDVWHQLQJVHWDFFHVVRULHV
• &UHDWHWKHPLQLPXPQXPEHUVHHWDEOHRI RQVLWHPRXQWLQJSRLQWVHJERUHKROHVVHH
VNHWFKRQSLWHP
• Only use approved metal dowels.
Wall mounting &HLOLQJPRXQWLQJ
Modell/type ORBIS ORBIS TWINOR
Performance class RQO\/16QRWZLWK$. DOOQRWZLWK$. DOORQO\ZLWK$. all
100 cm 2 66
150 cm 66
200 cm 66
250 cm 6 6
300 cm 6 6
$.ZLWKDLULQWDNHXQGHUVLGH
Table Number of fastening points
Warning: Fire hazard posing by overheating!
$OZD\VÀWDLUFXUWDLQGHYLFHVZLWKHOHFWULFDOKHDWLQJZLWKDPLQLPXPGLVWDQFHRIPPIURP
the ceiling or wall.

Air curtain systems ORBIS / TWINOR
6
5.1.1 )LWWLQJZLWKZDOOPRXQWLQJEUDFNHWVRQO\W\SH25%,6
Wall mounting brackets are not available for the air curtain types ORBIS -8/HE, ORBIS
/1;DQG7:,1OR.
&RQVLGHUEHIRUHPRXQWLQJWKHGHYLFHWKHSRVLWLRQVDQGPHDVXUHVIRUWKHKHDWLQJFRQQHF-
WLRQVVHFWLRQDQGWKHSRZHUFRQQHFWLRQDQGWKHGDWDOLQHVHFWLRQ
$GGLWLRQDOPHDVXUHVWRWKHIROORZLQJVNHWFKHV\RXFDQÀQGLQWKHUHVSHFWLYHSURGXFW
brochures.
0HDVXUHVIRUZDOOIDVWHQLQJPP
Type ORBIS -5/LNS
Width B H &, & &; D DI
ORBIS 100 300 00 0
ORBIS 150 300 0 650 100 0
ORBIS 200 300 0 100 0
ORBIS 250 300 650 100 1200
ORBIS 300 300 100
33
7
75
3
4
6
8
2
1
3
• )L[ WKH DQJOHG PRXQWLQJ EUDFNHWV DW WKH XSSHU
À[LQJSRLQWV ZLWK ZDOO VFUHZV DQG PHWDOGRZHOV
• )L[WKHUXEEHUEXIIHUZLWKWKUHDGHGURGVDWWKH
ORZHUÀ[LQJSRLQWVZLWKPHWDOGRZHOV
• )L[WKHZDOOEUDFNHWVLQWRWKHVOLGLQJVWRQHVDW
XQLWVLGHZLWKKH[DJRQEROWV
• Using a suitable piece of lifting equipment, posi-
tion the air curtain system in such a way that the
EUDFNHWVOLHH[DFWO\DWWKHPRXQWLQJSRLQWVRIWKH
DQJOHGPRXQWLQJEUDFNHWV
• 6FUHZWKHDLUFXUWDLQGHYLFHZLWKZDOOEUDFNHWV
WRJHWKHUZLWKWKHDQJOHGPRXQWLQJEUDFNHWVE\
XVLQJQXWV0DQGKH[DJRQEROWV
& & &
&; & & &;
' '
'
%
+
1 Mounting bracket
:DOOVFUHZQRWLQFOXGHW
0HWDOOGRZHOZLWKDFFHVVRULHVQRWLQFOXGHW
5XEEHUEXIIHUZLWKWKUHDGHGURG
5 Wall brackets
7KUHDGDWXQLWVLGHVOLGLQJVWRQHV
7 Hexagon bolt M8x16 with accessories
8 Nuts M8

7
Air curtain systems ORBIS / TWINOR
5.1.2 Fitting with a ceiling mounting kit
&RQVLGHUEHIRUHPRXQWLQJWKHGHYLFHWKHSRVLWLRQVDQGPHDVXUHVIRUWKHKHDWLQJFRQQHF-
WLRQVVHFWLRQDQGWKHSRZHUFRQQHFWLRQDQGWKHGDWDOLQHVHFWLRQ
$GGLWLRQDOPHDVXUHVWRIROORZLQJVNHWFKHV\RXFDQÀQGLQWKHUHVSHFWLYHSURGXFWEURFKXUHV
0RXQWLQJPHDVXUHVFHLOLQJIDVWHQLQJDLULQWDNHIURQWDO²RQO\W\SH25%,6PP
%
&
& &
+
7
PLQ PLQ
01
0RXQWLQJPHDVXUHVFHLOLQJIDVWHQLQJDLULQWDNHXQGHUVLGH²W\SHV25%,6$.DQG7:,1ORPP
1 Thread M8 for ceiling mounting
2 Air intake grate foldable
3 Maintenance flap
+HDWLQJFRQQHFWLRQRQWRSRUVLGHZD\V
5 Electrical connection
6 Secundäry air outlet, outside oriented
RQO\W\SH7:,1OR
Types ORBIS -5/8/LNS/HE and TWINOR -5/LNS/HE, Height of case H = 300 mm
Ty p $XHQPDHPP 'HFNHQEHIHVWLJXQJPP
B T1 T2 T2 & & MN N O O
ORBIS TWINOR ORBIS TWINOR ORBIS TWINOR
ORBIS/TWINOR 100 718 0 50 -
ORBIS/TWINOR 150 718 0 50 -
ORBIS/TWINOR 200 718 0 50 -
ORBIS/TWINOR 250 718 1202 50 -
ORBIS/TWINOR 300 718 50 -

Air curtain systems ORBIS / TWINOR
8
Types ORBIS -10/15/LNX and TWINOR -15, Height of case H = 400 mm
Ty p $XHQPDHPP 'HFNHQEHIHVWLJXQJPP
B T1 T2 T2 & & MN N O O
ORBIS TWINOR ORBIS TWINOR ORBIS TWINOR
ORBIS/TWINOR 100 1251 1530 - 50 800 - 630
ORBIS/TWINOR 150 1251 1530 - 50 800 - 630
ORBIS/TWINOR 200 1251 1530 - 50 800 - 630
ORBIS/TWINOR 250 1251 1530 1202 50 800 - 630
ORBIS/TWINOR 300 1251 1530 50 800 - 630
25%,6/16+( 25%,6/1;
TWINOR -5/LNS/HE TWINOR -15
1
2
4
6
min.10
7
5
min.10
1
3
4
6
2
5
7
0HWDOGRZHOZLWKDFFHVVRULHVQRWLQFOXGHG /RFNLQJQXWV0
2 Soundproofing mounting M8 6 Turnbuckle M8x50, adj. range 30mm
3 Dubble length nut M8, self-locking 7 Threaded rod M8
7KUHDGHGSLQ0[ZLWKOHIWDQGULJKWWKUHDG 6OLGLQJVWRQHZLWKWKUHDG0PP
• 2QWKHFHLOLQJÀWWKHVRXQGSURRÀQJPRXQWLQJVDQGWKUHDGHGSLQVDQGVHFXUHWKHVH
ZLWKORFNLQJQXWV
• $UUDQJHWKHLQFOXGHGVOLGLQJVWRQHVLQFRUUHVSRQGHQFHWRWKHÀJXUHDWSDJH
• 6FUHZWKHH[SOLFLWQXPEHURIWKUHDGHGURGVFDPPLQWRWKHVOLGLQJVWRQHVVWUDLJKWWRWKH
ERWWRPRIWKHJLUGHUVHFWLRQDQGVDYHLWZLWKORFNLQJQXWV
• 7ZLVWDQRWKHUORFNLQJQXWRQWRHDFKWKUHDGHGURG
• Lift the air curtain system up to underneath the mounting using a suitable piece of lifting
equipment.
• &RQQHFWHDFKWKUHDGHGSLQDQGWKUHDGHGURGZLWKDWXUQEXFNOH
• 7LJKWHQWKHWXUQEXFNOHVLQVXFKDZD\WKDWDOOWKUHDGHGURGVDUHHTXDOO\ORDGHG
• 7RÀQLVKVHFXUHWKHWXUQEXFNOHVIURPEHORZZLWKWKHORFNLQJQXWVWKDWKDYHDOUHDG\EHHQ
twisted on.

Air curtain systems ORBIS / TWINOR
5.1.3 9HUWLFDOPRXQWLQJRQDVWDQGEDVHRQO\W\SH25%,6
&RQVLGHUEHIRUHPRXQWLQJWKHGHYLFHWKHSRVLWLRQVDQGPHDVXUHVIRUWKHKHDWLQJFRQQHF-
WLRQVVHFWLRQDQGWKHSRZHUFRQQHFWLRQDQGWKHGDWDOLQHVHFWLRQ
$GGLWLRQDOPHDVXUHVWRIROORZLQJVNHWFKHV\RXFDQÀQGLQWKHUHVSHFWLYHSURGXFWEURFKXUHV
0RXQWLQJPHDVXUHVIRUVWDQGEDVHPP
7$
7
7
7
&$
& &
&
&
7
7$
&$
&
Type & & & &$ T T1 T2 TA
ORBIS -5/8/LNS/HE 232 8 225 77 66 8
ORBIS -10/15/LNX 675 8 280 132 66 8
4
21
3
4
2
1
3
0HWDOGRZHOZLWKDFFHVVRULHVQRWLQFOXGHG +H[DJRQQXW0ZLWKDFFHVVRULHV
+H[DJRQEROW0[ZLWKDFFHVVRULHV 5LYHWQXWV0PLQPP
• Fix the stand base, unless completed by factory, on the stand side of the air curtain device.
• 3XOOWKHXQLWZLWKWKHSUHDVVHPEOHGVWDQGEDVHRYHUWKHPHWDOGRZHOVÀ[HGLQWKHÁRRU
• Save the stand base with screw nuts.
• 3URWHFWWKHDLUFXUWDLQGHYLFHDJDLQVWWLOWDQGÀ[LWÀUPO\RQWKHZDOO7KHUHWRULYHWQXWV
0SUHVVHGLQRQWKHRSSRVLQJVLGHRIWKHPDLQWHQDQFHÁDSRUHJRQWKHVPDOOFDVHVLGH
GHSHQGLQJRQWKHGHVLJQIRUXVLQJVWUDSVRUWKUHDGHGURGV

Air curtain systems ORBIS / TWINOR
10
5.2 &RQQHFWLRQWRWKHKHDWLQJ
Not for air curtains with electric heating.
Caution: Risk of hot surfaces or liquids!
Risk of burning or scalding. Switch off heating before, close water curcuit, cool down for at
least 30 minutes!
Heating and voltage connections are always situated opposite and depending on the design
at the right or left side.
0HDVXUHVIRUKHDWLQJFRQQHFWLRQVDLULQWDNHIURQWDO²RQO\W\SH25%,6PP
ORBIS
:
<
9
0HDVXUHVIRUKHDWLQJFRQQHFWLRQVDLULQWDNHXQGHUVLGH²W\SHV25%,6$.DQG7:,1ORPP
25%,6$.7:,1OR
:<
9
1 Thread M8 for ceiling mounting 3 Maintenance flap
$LULQWDNHJUDWHIROGDEOH +HDWLQJFRQQHFWLRQVRQWRSRUVLGHZD\V
VHFXQGDU\DLURXWOHWRQO\W\SH7:,1OR
Type VWY
ORBIS -5/8/LNS/HE
TWINOR -5/LNS/HE 27 57 515
ORBIS -10/15/LNX
TWINOR -15 72

11
Air curtain systems ORBIS / TWINOR
The air curtain systems ORBIS und TWINOR are equipped with a Vario connection point
´RUõµLQWHUQDOWKUHDGZLWKRSHQLQJVRQWKHWRSDQGVLGH
Variable heating connections sideways or on top
Å´25%,6$.UHVS7:,1OR
Because of reasons of appearance the air curtain systems will be delivered with closed side
SDQHOV3RVVLEO\QHHGHGRSHQLQJVVLGHZD\VIRUKHDWLQJFRQQHFWLRQKDVWREHRUGHUHG
• Remove possibly the seal plug.
• &RQQHFWWKHKHDWLQJSLSHVIRUÁRZDQGUHWXUQDERYHRUVLGHZD\V
• Only types EUI and TREND: screw the seal plugs on the open ports.
• Prove leakproveness of the connections and seal plugs.
:DUQLQJ5LVNRIÀUHLQWKHFDVHRIHOHFWULFDOKHDWLQJ
• 'RQRWXVHDQDLUÀOWHU
• .HHSWKHPLQLPXPGLVWDQFHRIPPIURPÁDPPDEOHPDWHULDOV
• 7KHÁRZRIDLUPXVWQRWEHSUHYHQWHG
• Always close the air intake grate after assembly.
• Dimension the electrical lines only in accordance with the details on the rating plate.
Mounting of a thermal static control valve
In case of delivery air curtain system with an thermostatic valve for output temperature
control these valve have to be integrated into the heating circuit and the temperature sensor
PXVWÀ[HGLQVLGHWKHDLUFXUWDLQGHYLFH
&RQYLQFHRQHVHOIWKDWDOOQHHGHGSDUWVDUHFRPSOHWHO\EHIRUHVWDUWPRXQWLQJ
7KHDVVHPEO\NLWÅ7KHUPRVWDWLFYDOYHDFFHVVRU\NLW´FRQVLVWVRI
• 9DOYHEDVHERG\VWUDLJKWZD\YDOYHRUZD\YDOYHLQFOXGLQJÀWWLQJVDQGVFUHZ-
caps
• 7HPSHUDWXUH FRQWUROOHU YDOYH KHDG ZLWK FDSLOODU\ WXEH P RU P LQFOXGLQJ
sensor cartridge
• Sensor panel with toggle screwing
Assembly
• 'XULQJFRQQHFWLQJWKHDLUFXUWDLQGHYLFHLQWHJUDWHWKHYDOYHEDVHERG\LQWKHÁRZSLSH
5HJDUGWKHÁRZGLUHFWLRQVKRZQRQWKHYDOYHEDVHERG\+DYLQJDZD\YDOYHFRPSOHWH
the requested entirely heating circuit. Observe the circumstance that the 3-way valves are
divider valves.

Air curtain systems ORBIS / TWINOR
12
• )L[WKHYDOYHKHDGFRQWUROOHU
on the valve body
WKUHDG0[
• Lever out the blind plug
on the top side or on
the side panel and
unscrew the two
neightboring screws.
• Put the sensor panel at
this place and screw down
it with these screws.
• Unroll the capillary tube,
avoid hard bends and turnings.
Snap off will destroy
the capillary tube!
• Insert the sensor cartridge
into the sensor panel
and lock the cartridge
by screwing the screwcap.
• Set the controller correspondending to the chart below. We recommend an air outlet
WHPSHUDWXUHRI&
Scale 1 2 3 567
Air outlet
temperature FD& FD& FD& FD& FD& FD& &
5.3 &RQQHFWLRQWRWKHPDLQVHOHFWULFLW\VXSSO\DQGFRQWUROXQLWGDWDOLQH
Warning: Risk posed by electrical voltage!
• Accomplish ultimate the needed electrical fusings provided by the customer before.
• Before doing any connecting works be shure that the main supply is disconnected: the
repair switch must be switched off and the fuses must be removed!
• &KHFNWKHFRUUHFWFRQQHFWLRQRIWKH3(SURWHFWLRQFRQGXFWRU
• Switch on the main supply after connecting all connections corresponding to the wiring
diagram.
• 7KHUHLVDQULVNRIIDWDOLQMXU\RUGHDWKIURPPLVFRQQHFWLRQFKDQJHGZLUHVQDNHGZLUHV
Caution: Risk posed by static charge!
The electrical circuit board can be destroyed. Remove static charge by touching an earthed
object!
Heating and voltage connections are always situated opposite and depending on the design
at the right or left side.
Einzelheit „X“
Einzelheit „X“
Heizungsanschlüsse
Geräteaufhängung
VL
RL
heating connections
suspension
GHWDLOÅ;´
GHWDLOÅ;´
ÁRZ
return

13
Air curtain systems ORBIS / TWINOR
7KHFRQQHFWLRQVDUHORFDWHGWRWKHOHIWEHQHDWKWKHDLULQWDNHJUDWHIURQWDORUXQGHUVLGH
The air intake grate of air curtain system ORBIS – air intake frontal:
Air intake grate of the air curtain system ORBIS
• Remove the air intake grate with the lower edge from the magnetic lock.
• Fold the air intake grate slight upwards and take it away from the case.
• Open the cover plate of the electronic unit with a Phillips screwdriver.
7KH JUDWHV RI WKH DLU FXUWDLQ V\VWHPV 25%,6$. DQG7:,1OR – air intake underside –
are equipped with the TTL easy-klick locking system and secured against unintended swing
out by an safety catch with arrester hook. Every grid is secured if the air curtain system is
equipped with multiple air intake grids.
Opening:
Air intake grate of the air curtain systems
25%,6$.DQG7:,1OR
with TTL-easy-klick locking system
• Open the air intake grate by pressing the punched point marks.
• Lift up the air intake grate for an gap and push the safety catch in relieved situation slightly back.
• Unhook the safety catch out of the notch and open the air intake grate fully.
• Open now the cover plate of the electronic unit with a Phillips screwdriver.

Air curtain systems ORBIS / TWINOR
Closing:
• Fold the air intake grate till the safety catch reaches the hook notch.
• Insert the safety catch into the hook notch and close the air intake grate at once. The hook
nose of safety catch must snap into the hook notch.
Note: Use of violence can bend the safety catch and render it useless!
• &ORVHWKHDLULQWDNHJUDWHIXOO\DQGORFNLWby pressing the punched point marks.
5.3.1 &RQQHFWLRQWRWKHFRQWUROXQLWGDWDOLQH
• Lead the data cable through one of the rubberised ducts.
• 6WLFNWKH:HVWHUQPRGXODUFRQQHFWRULQWRRQHRIWKHMDFNV
Note: Errors caused by incorrectly placed jumper (BR-CAN)!
• 2QO\RQHFRQQHFWLRQRFFXSLHG-XPSHU%5&$1PXVWEHLQVHUWHG
• %RWKFRQQHFWLRQVRFFXSLHG-XPSHU%5&$1PXVWEHUHPRYHG
1
1
22
'DWDOLQHLQVRFNHWVMXPSHUEULGJH%5&$1
5.3.2 &RQQHFWLRQWRPDLQVHOHFWULFLW\VXSSO\
&RQQHFWLRQ RI WKH DLU FXUWDLQ V\VWHPV ORBIS und TWINOR to single-phase alternating
FXUUHQWSHUIRUPDQFHFODVV25%,6/16+(DQG7:,1OR -5/LNS/HE and also the fan group of
the secundary air outlet of typeTWINOR -15
Alternative current connection
&RQQHFWLRQRIWKHDLUFXUWDLQV\VWHPVORBIS und TWINOR to 3-phase alternating/rotary
FXUUHQW SHUIRUPDQFH FODVV25%,6 /1; DQG WKH IDQ JURXS RI WKH KHDWHG DLU RXWOHW RI
typeTWINOR

15
Air curtain systems ORBIS / TWINOR
L1
L2
L3
N
N
PE
PE
PE
PE
3-phase-alternative current connection
With all connecting modalities:
• Lead the power cables through one of the rubberised ducts.
• Remove the insulation of the cable ends.
• Stick the earth, neutral and positive cables into the correspondingly marked free connec-
tion points.
• 6WLFNWKHSKDVHFDEOHVSKDVHDQGDW25%,6/1;DQG7:,1ORLQWRWKH
correspondingly marked free connection points.
• &KHFNWKDWDOOFRQQHFWLRQVDUHFRUUHFWO\LQSODFH
• 1RZVHWXS WKHSRZHUVXSSO\7KHSLORW ODPS/('RQWKHFLUFXLWERDUGPXVWQRZEH
blinking. If the status is permanent illumination or OFF, there is a problem with the bus
FRPPXQLFDWLRQ3URFHHGDVSHUSRLQWLQWKHWDEOHRQIDXOWDQDO\VLVVHFWLRQS
LED
LED on main board
• Switch off the power again and then close the cover plate and air intake grate.

Air curtain systems ORBIS / TWINOR
16
6. Start-up
Before start-up, the following checks must be carried out:
• &RUUHFWFRQQHFWLRQRIWKH3(FRQGXFWRUWRWKHPDLQV
• Power consumption of the fans corresponds to the details on the rating plate.
• All safety components, such as the air intake grate, covers and touch guard are properly
assembled.
• 1ROHDNLQJZDWHUWREHLGHQWLÀHG
• No blowing of fuses.
If the last two points are not in place, the damage must be remedied before
start-up!
7. Operation via the operating console
Operation is carried out exclusively via one of our electronic operating consoles and is
described in the relevant operating instructions.
Warning: Risk of electric shock!
The OFF button on the operating console does not interrupt the power supply! Before
assembly, maintenance and servicing work, the repair switch must be switched to OFF.
8. &KDQJLQJWKHDLUÀOWHU
:DUQLQJ5LVNRIÀUHWKURXJKÀOWHULQWKHFDVHRIHOHFWULFDOKHDWLQJ
$QDLUÀOWHUFDQQRWEHXVHGZKHQXVLQJHOHFWULFDOKHDWLQJ
Note: Observe cleaning and replacement intervals!
7KHDLUÀOWHUPXVWEHFOHDQHGHYHU\ZHHNV
7KHDLUÀOWHUPXVWEHUHQHZHGDIWHUD\HDUHDFKWLPH
7KHDLUÀOWHULVORFDWHGEHKLQGWKHDLULQWDNHJUDWH:HDUSURWHFWLYHJORYHVZKHQUHSODFLQJSDUWV
1
2
$LULQWDNHJUDWHZLWKÀOWHU
Figure shows air intake grate underside.The frontal air intake grate at type ORBIS is visual
different, but follows the same principle.
• 2SHQWKHDLULQWDNHJUDWHVHHVHFWLRQS
• 5HPRYHWKHWHQVLRQZLUHE\EHQGLQJLWVOLJKWO\
• 5HPRYHWKHROGÀOWHU
• ,QVHUWWKHQHZÀOWHUDQGVHFXUHLWZLWKWKHWHQVLRQZLUH
• &ORVHWKHDLULQWDNHJUDWHE\VLPSO\SUHVVLQJLW

17
Air curtain systems ORBIS / TWINOR
9. Service
1RVSHFLÀFVHUYLFHLVUHTXLUHG$VQHHGHGLWLVSRVVLEOHWRPDNHXVHRITTL factory service.
10. Cleaning
Caution: Risk posed by hot surfaces!
Risk of burning. Before cleaning, switch off the heating and the air curtain system and allow
WKHVHDQGLQSDUWLFXODUWKHKHDWH[FKDQJHUWRFRROGRZQÀUVWIRUPLQXWHV
Warning: Sharp or pointy edges.
Risk of cutting.When cleaning, in particular when cleaning the heat exchanger, wear gloves
and avoid direct contact with edges.
• 2QO\FOHDQWKHGHYLFHGU\RUZLWKDGDPSFORWK9ROWDJHFDUU\LQJSDUWVVZLWFKHVFRQQHF-
WLRQVVKRXOGQRWFRPHLQWRFRQWDFWZLWKZDWHU
• In the case of systems with a micro grate, this must be cleaned every 6-8 weeks with a dry
cloth to remove dust.
• The heat exchanger must be cleaned after a year of operation each time. To do this, use a
vacuum cleaner with a pointed nozzle.
11. Maintenance
:RUNLQJVDWWKHDLUFXUWDLQV\VWHPPXVWRQO\EHFDUULHGRXWE\TXDOLÀHGVSHFLDOLVWSHUVRQQHO
VHHVHFWLRQS
%HIRUHVWDUWLQJDQ\PDLQWHQDQFHZRUNGLVFRQQFWWKHXQLWIURPWKHPDLQVXSSO\UHSDLUVZLWFK
WRRIIDQGVDIHDJDLQVWUHVWDUW

Air curtain systems ORBIS / TWINOR
18
12. Fault analysis and remediation, measures and risks
6KRXOGWKHDLUFXUWDLQGHYLFHQRWEHZRUNLQJQRUPDOO\QRKHDWRXWSXWXQXVXDOQRLVHVRU
odours, blowing of fuses or triggering of protective mechanisms, leakage of heating media,
IDLOXUHRIGHYLFHWKHUHVSRQVLEOHVHUYLFHSHUVRQQHOPXVWEHLQIRUPHG
Fault Possible cause Remedy
1LED on circuit
board is not
blinking.
Jumper is incorrectly inserted to the
right beside the data connections.
1 connection: insert jumper.
2 connections: remove jumper
VHHVHFWLRQS
2Fault is illuminated Motor protection was triggered. Have motors checked by service.
3Device does not
output the desired
volume of air.
Motor rotation too low.
$LUÀOWHUVRLOHG
&KRRVHDKLJKHUURWDWLRQDOVSHHG
&KDQJHDLUÀOWHUVHFWLRQ
4Frost alarm and
fault are illuminated.
Frost protection was triggered. Proceed as per points 5 and 6.
5Air is too cold
during operation.
Heating operation not activated.
Only in case of electrical heating:
Protective temperature limiter
with lock-out was triggered.
Only in the case of water heating:
Too less or no water.
Heating switched off.
Solenoid valve faulty/closed.
Thermostatic valve faulty.
Switch ON heating.
Unlock protective temperature
limiter beneath air intake grate
by pressing the red button.
&UHDWHZDWHUVXSSO\
Switch on heating.
&KHFNVROHQRLGYDOYHDQGFRQWURO
&KHFNWKHUPRVWDWLFYDOYHDQGFRQWURO
6Device on but not
functioning, frost
alarm is illuminated.
Only in the case of water heating:
Frost protection thermo-
stat switches off due to the value
dropping below its setting.
&KHFNKHDWHUEDWWHU\
&KHFNKHDWLQJ
7Device on but
not functioning.
Operating lamp off.
No mains voltage.
Only in case of electrical heating:
Device fuse faulty.
&KHFNIXVHV,QWKHHYHQWRIDIDXOW
FKHFNDQGUHPHG\WKHFDXVH&KHFN
device fuse. In the event of a fault,
check and remedy the cause.

Air curtain systems ORBIS / TWINOR
13. EU Declaration of Conformity
ZLWKLQWKHPHDQLQJRIWKH(&0DFKLQHU\'LUHFWLYH(&
As the manufacturer:
TTL Torluftschleier GmbH
Fabrikstraße 3 • 73650 Winterbach/Germany
)RQ)D[
E-Mail: info@luftschleier.de • www.luftschleier.de
we hereby declare that the product described below corresponds to the applicable health and
VDIHW\UHTXLUHPHQWVRIWKHFLWHG(&'LUHFWLYHRQWKHEDVLVRILWVGHVLJQDQGFRQVWUXFWLRQDV
well as the work carried out by us. If the product is altered in a manner not approved by us,
this declaration shall lose its validity.
Product designation: Air curtain systems ORBIS and TWINOR
Model designation: TWINOR 100 N-LNS
3HUIRUPDQFHFODVV/16+(/1;
+HDWH[FKDQJHU1171;'.2'9(+:.:.
'HYLFHZLGWK
0RGHOUDQJHW\SH25%,67:,1OR
$SSOLFDEOH(&'LUHFWLYHV (&/RZ9ROWDJH'LUHFWLYH(&
(&(0&'LUHFWLYHV(&
Applied standards: DIN EN 60335-1
',1(1
In the event of any questions, please contact the manufacturer at the address above.
TTL GmbH reserves the right to undertake any change or improvement to parts or their
accessories without the obligation to update earlier products and existing documentation.
The German text is binding.Technical documentation is available in full.
Winterbach, 01.10.2016
Andrè Szameitat
Executive manager

TTL Torluftschleier GmbH
Fabrikstraße 3 • 73650 Winterbach
Fon +49 (0) 71 81 / 40 09 - 0
Fax +49 (0) 71 81 / 40 09 - 10
info@luftschleier.de • www.luftschleier.de
This manual suits for next models
1
Table of contents
Other TTL Heater manuals
Popular Heater manuals by other brands

Consort Claudgen
Consort Claudgen QZWP30N Installation, operation and maintenance instructions

MrHeater
MrHeater MHVFBI10LPT Operating instructions and owner's manual

DeLonghi
DeLonghi TRR0715 Instructions for use

Flama
Flama 2357FL instruction manual

Rinnai
Rinnai DD180 Operation and installation manual

Pinnacle Climate Technologies
Pinnacle Climate Technologies REMINGTON REM-16-TTC-O User's manual & operating instructions