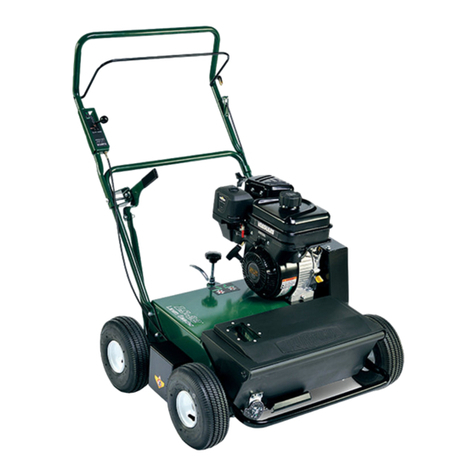
TURFCO Aerator Pro User manual

AERATOR PRO
OPERATOR'S MANUAL
MAINTENANCE MANUAL
PARTS LIST
TURFCO®
Aerator Pro
Product Numbers 85380, 85381, and 85382
85380 Briggs & Stratton 3.5 HP Industrial Plus Engine
85381 Honda 4.0 GX120 Engine
85382 Purchased Without Engine
Manual Number 660113
DANGER - IF INCORRECTLY USED THIS MACHINE CAN CAUSE
SEVERE INJURY. THOSE WHO USE AND MAINTAIN THIS MACHINE
SHOULD BE TRAINED IN ITS PROPER USE, WARNED OF ITS
DANGERS, AND SHOULD READ THE ENTIRE MANUAL BEFORE
ATTEMPTING TO SET-UP, OPERATE OR SERVICE THE MACHINE.
TURFCO MFG. INC.
1655 101st Avenue NE • Minneapolis, MN 55449-4420 USA
Phone (612) 785-1000 • FAX (612) 785-0556
© 1995 Turfco Mfg., Inc.

TABLE OF CONTENTS 2 AERATOR PRO
Table of Contents
Product Records ...............................................................................................................................2
How To Order Parts and Service ....................................................................................................2
Specifications ..................................................................................................................................3
Recognizing Safety Warnings and General Safety Practices .........................................................4
Assembly...........................................................................................................................................6
Description -
Intended Function and Use ....................................................................................................8
Location of Major Components ............................................................................................8
Description of Operator Controls ...........................................................................................8
Operation -
Pre-Operation Checklist..........................................................................................................9
Work Site Preparation .............................................................................................................9
Using Weights ........................................................................................................................9
Engine Starting Instructions ...................................................................................................9
Operating Instructions ............................................................................................................10
Lubrication .......................................................................................................................................11
Adjustments ......................................................................................................................................11
Storage ............................................................................................................................................11
Parts Lists..........................................................................................................................................12
Product Records
IMPORTANT: Record the information from the serial number plate of your Aerator Pro. It will be necessary
to furnish your Model Designation, Product Number, and Serial Number when ordering parts.
Model Designation Aerator Pro
Product Number Engine Type
Serial Number
Year of Manufacture Date Purchased
Purchased From
How To Obtain Parts and Service
To order parts, or to arrange repair service, contact
the nearest authorized TURFCO dealer. For a list of
authorized TURFCO dealers in your area, or for
additional information regarding the Aerator Pro, direct
inquiries to:
TURFCO Mfg. Inc.
1655 101st Avenue North East
Minneapolis, MN. 55449-4420 USA
Telephone (612) 785-1000
FAX (612) 785-0556
To ensure safety and proper operation, always
purchase genuine TURFCO replacement parts from
an authorized TURFCO dealer. Replacement parts
from other sources may damage the Aerator Pro
and/or create a safety hazard. Always refer repairs to
properly trained service personnel.
DO NOT ALTER the Aerator Pro in any manner.
Unauthorized alterations may affect its operation,
performance, and may result in injury or death to the
operator as well as other individuals in the work area.

AERATOR PRO 3 SPECIFICATIONS
Specifications
Intended Use: The Aerator Pro is a self-propelled tine type aerator. The Aerator Pro is intended to be used
for the aeration of the turf or soil at a properly prepared worksite. The Aerator Pro is NOT intended to be
used for any purpose other than the aeration of turf. If equipped with the optional Sod Roller Kit, the Aerator
Pro intended function changes from aeration to an intended function of sod rolling. The Aerator Pro is NOT
designed for or intended to accept riders.
Aerating Speed....................Up to 260 fpm (2.96 mph)
Aerating Rate ......................Up to 33,280 sq. ft. Per Hour
Aerating Depth....................To 2-3/4" Inches
Aerating Width ....................25.6" Inches
Aerating Hole Pattern.........3.2" Inches x 7.75" Inches
Transport Speed..................Up to 260 fpm (2.96 mph)
Aerator Width ......................38.25” Inches with Wheels Mounted, 32” Inches with Wheels Removed
Aerator Length....................60” Inches
Aerator Height.....................48” Inches (In Transport Position)
Chassis................................10 Gauge Welded Steel Construction
Engines
Aerator 85380.................Briggs & Stratton 3.5 HP Industrial With 6:1 Gear Reducer
Aerator 85381.................Honda 4.0 HP GX120 With 6:1 Gear Reducer
Aerator 85382.................Purchased Without Engine
Drive.....................................V-Belt to Jackshaft, Roller Chain to Tines and Drum
Clutch...................................Belt Idler Type, Controlled From Operating Position
Tines.....................................Coring Type, 3/4" Inch Diameter Heat Treated Alloy Steel
V-Belt....................................Goodyear 84500
Chain....................................Hardened RC-40 Sealed Roller Chain
Sprockets.............................Heat Treated Hardened Teeth
Bearings...............................Flange Mounted Style Self-Aligning Sealed Ball Bearings
Wheels .................................8" x 2.5" Inch Semi-Pneumatic Rib Tread Tires With 5/8" Inch Roller Bearings
Water Drum Capacity..........6.6 US Gallons
Weight, Dry..........................310 Lb.
Dry With Weight..............350 Lb.
Water in Drum ................365 Lb.
Water & Weight ..............405 Lb.
Shipping Weight..................435 Lb.
Shipping Dimensions.........40" Long x 35.5" Wide x 40.75" High
Registered Trade Mark
TURFCO®is a registered trademark of Turfco Manufacturing, Inc.
WARNING
The engine exhaust from this product contains chemicals known to the
State of California to cause cancer, birth defects or other reproductive harm.

SAFETY 4 AERATOR PRO
Recognizing Safety Warnings Used In Manual
LOOK FOR THE SAFETY HAZARD WARNING SYMBOL
The symbol is used to alert the operator of safety hazards.
It is used in conjunction with the words DANGER, WARNING, and CAUTION.
DANGER
WARNING CAUTION
“DANGER” identifies immediate hazards that will result in serious injury or death.
“WARNING” identifies potential hazards which could result in serious injury or death.
“CAUTION” identifies hazardous situations which may result in minor to moderate injury and/or could result in
damage or destruction of equipment.
General Safety Practices
Safety on the job should always be a top priority.
Training and experience are important factors in the
safe operation of equipment. Please consider the
following information and realize that safe operation is
a matter of using common sense as it relates to the
machine, its maintenance, the operator, the training,
and the operating conditions. These are general
safety instructions that apply to most turf maintenance
equipment.
TRAINING:
Always read the manual, the decals, and the safety
warning decals before operating a machine for the first
time.
Always check the location and use of each control
before operating a machine for the first time.
Practice operating the machine in a safe area with no
obstructions until becoming familiar with the controls.
If you have questions, ask your supervisor or call the
factory.
CLOTHING:
Clothes should be snug fit. Loose fitting clothing is
hazardous because it may get caught in the
mechanism during service or operation.
Remove jewelry before operation. Jewelry may get
caught in the mechanism.
Wear shoes that will protect your feet. The protection
of leather shoes, boots, or steel toed safety shoes, is
required and is strongly recommended.
Hard Hat: A hard hat should be considered when
using equipment on a golf course. The danger of being
hit by a golf ball should be a major concern as well as
protection needed while operating under trees or
around obstacles.
Eye Protection: Safety glasses and/or face shields
should be worn when operating, as well as working in
close proximity to high speed rotary equipment. Watch
for rotary mowers, edgers, brush and string trimmers.
Rotary mowers can throw debris at speed up to 320
Km/h.
Hearing: If the noise level of the equipment is too loud,
use ear protection.
Do not use stereo headsets during operation. This is a
distraction that may lead to an accident. Headsets also
make it difficult to hear other people and other
equipment while operating the machine.
Gloves: Use gloves to protect your hands. Use gloves
when handling sharp or hazardous objects.
Respirators: When operating in dusty, windy
conditions, wear a respirator. This is also an important
consideration if operating equipment while spraying
chemicals and fertilizers.
THE OPERATOR:
The operator should never use a machine while under
the influence of alcohol or drugs.
The operator should be aware of the hazards of
working in the sun and should take proper precautions
to avoid heat stress and dehydration. Use sun screen
products when necessary.
The operator should never attempt to ride a machine
that is not designed for that propose. Do not allow
others to ride a machine that is not designed for
passengers.
Do not operate any equipment at unsafe speeds.
Speeds should be reduced when turning or operating
on slopes. The operator must use common sense to
determine a safe speed based on the equipment, the
load, the slope, the surface, and other conditions that
may affect safe operation.
The operator must be aware of the conditions around
the machine. Be careful to observe other people and
machines in the area.
Beware of slippery conditions. Wet turf can be
encountered on slopes, when turning or stopping, or at
higher speeds.
Keep hands and feet away from cutting devices and
drive components. Shut off the engine and remove the
key or spark plug wire when servicing cutting devices
or drive components.

AERATOR PRO 5 SAFETY
Care should always be taken when mounting and
dismounting a riding machine. Prevent injuries and
falls by making sure the operator does not slip.
Unless it is an emergency, do not jump off a machine.
Injury may result when an operator's foot slips trying to
jump from a machine.
If required to lift, an operator should ask for help if the
object is too heavy. The operator should lift with the
legs instead of the back. Care should be taken to
avoid twisting the back while lifting a heavy load.
Never allow children to operate the machine.
THE MACHINE:
Do not modify the machine in any manner. Always
check the machine to make sure it is in good working
order.
Tow vehicles must have adequate hitches and brakes
to control any towed machine. Check the weight and
capacity of the machine that will be towed by that
vehicle.
Do not place hands or feet near moving or rotating
parts. Check that all guards are functional and
properly installed. Do not operate a machine without
all guards installed.
Check the condition of the hydraulic hoses. Leaks and
worn hoses should be fixed or replaced before the
machine is put into service. Do not use your fingers or
hands to check for hydraulic leaks. High pressure
leaks can puncture the skin and force oil into the body.
This can cause severe injury or death.
Check tires. Inflate to pressure shown on tire.
Check to assure that all controls are in good operating
condition.
Check to assure that the brakes are operating
properly.
Do not overload machinery. The components are
designed for certain weights and capacities.
Overloading machine will cause unsafe conditions.
Shut off the engine before servicing the machine.
Check machines on a level area. Machines on a slope
may roll when the engine is off.
Refer unfamiliar repairs and adjustments to mechanics
that have been trained to do them properly.
Replace decals that are damaged or illegible.
THE ENGINE:
Do not run the engine in an enclosed area. The
exhaust gases contain carbon monoxide, an odorless
and deadly poison. The engine exhaust from this
product contains chemicals known to the State
of California to cause cancer, birth defects or
other reproductive harm.
Do not refuel machines indoors or in an unventilated
area. Do not over fill. Do not add fuel while the
machine is hot because spilled fuel may cause a fire.
Pull the starter cord slowly until resistance is felt. Then
pull the cord rapidly to avoid kickback and to prevent
hand or arm injury.
Use fresh gasoline. Stale fuel can gum the carburetor
and can cause leakage. Check the fuel lines and
fittings frequently for cracks and leaks.
Do not remove the fuel tank cap or fill fuel tank while
the engine is hot or running. Allow the engine to cool
before refueling.
Do not operate the engine if gasoline is spilled. Do not
operate the engine when the smell of gasoline is
present or if any other explosive conditions exist.
Move the equipment away from the spill and avoid any
ignition until the gasoline has evaporated.
Do not store, spill, or use gasoline near an open flame.
Do not store, spill, or use gasoline near a stove,
furnace, water heater, or appliance that uses a pilot
light or can create sparks.
Do not choke the carburetor to stop the engine.
Whenever possible, gradually reduce the engine
speed before stopping.
Do not tamper with the governor springs, links or other
parts to increase the engine speed. Run the engine at
the speed set by the equipment manufacturer.
Keep the cylinder fins and the governor parts free of
dirt, grass, and debris which can affect engine speed.
Do not transport the engine with fuel in the tank.
Prevent accidental starting by removing the spark plug
wire(s) when servicing the engine or the equipment.
Disconnect the negative wire from the battery terminal
if the engine is equipped with an electric starting
system.
Do not strike the flywheel with a hammer or any hard
object. This may cause the flywheel to shatter during
operation. Use the correct tools to service the
machine.
Do not check for a ignition spark with the spark plug
removed. Use an approved tester.
Do not crank the engine with the spark plug removed.
If the engine is flooded, place the throttle in fast and
crank until the engine starts.
Do not start the engine with the air cleaner and/or the
air cleaner cover removed. Do not operate the engine
without a muffler. Replace the muffler if it is leaking or
worn. Replace only with correct muffler. Do not touch
a hot muffler, cylinder, or fin. It will cause burns.
Do not operate the engine with an accumulation of
grass, leaves, or other combustible material in the
muffler area.
Do not use the engine on any forest covered, brush
covered, or grass covered unimproved land unless a
spark arrester is installed in the muffler. The spark
arrester must be maintained in good working order. In
the State of California, the above is required by law
(Section 4442 of the California Public Resources
Code). Other state may have similar laws. Federal
laws apply on federal lands.
This list includes many, but not all, general
safety instructions as they relate to turf
equipment. Common sense must always be
used to determine the safest way to operate a
machine under specific conditions.
ASSEMBLY 6 AERATOR PRO
Assembly
WARNING
To avoid serious injury, remove wire from spark
plug. Do not attempt to use the engine to perform
or aid in any assembly procedures.
Always follow all safety precautions and wear the
appropriate safety gear when assembling the
Aerator Pro. Read and follow all safety decals.
Remove all loose components from the crate. Before
removing the Aerator Pro from the crate bottom, the
handlebar and transport wheels should be mounted to
the chassis. This will aid in the removal process and
will help to avoid possible damage.
ASSEMBLY OF HANDLEBAR TO AERATOR
CHASSIS (See Figure 1)
WARNING
TO AVOID SERIOUS INJURY,
KEEP HANDS AND FEET AWAY FROM TINES
To avoid serious injury, ensure that the tine reel
assembly is resting on a secure hard surface and will
not fall or drop on hands or feet. Use caution when
working around the tine reel assembly, tines may
have sharp edges that can easily cut hands.
STEP 1. Place the handlebar in its mounting position
(bottom of handlebar on the outside of the chassis)
and attach to the Aerator chassis with four 3/8"-16
x 7/8" screws with 3/8"-16 Flexloc nuts. Insert the
screws from inside the chassis and secure with
the Flexloc nuts on the outside of the chassis.
Tighten all handlebar mounting screws and nuts
securely.
STEP 2. Attach transport wheel lift tubes (both sides)
to wheel pivot linkage.
RIGHT SIDE LIFT TUBE: Place the right lift tube
on the inside of the wheel pivot linkage. Use
3/8"-16 x 1-1/8" inch screw with a flat washer
inserted from the inside. Place a spacer between
the lift tube and the wheel pivot linkage, (spacer
fits into the hole on the wheel pivot linkage) and
secure with a flat washer and 3/8"-16 Flexloc nut
on the outside of the wheel pivot linkage.
LEFT SIDE LIFT TUBE: Place the left lift tube on
the inside of the wheel pivot linkage. Use 3/8"-16
x 1-1/2" inch screw with a flat washer inserted
from the inside. Place a spacer between the lift
tube and the wheel pivot linkage, (spacer fits into
the hole on the wheel pivot linkage) Place a
large spacer between the lift side tube and the
left side wheel pivot linkage, and secure with a
flat washer and 3/8"-16 Flexloc nut on the outside
of the wheel pivot linkage.
Tighten the hardware on both lift tubes securely.
Check that the wheel pivot linkage pivots freely
when transport handle is raised and lowered.
INSTALLATION OF THE TRANSPORT WHEELS
STEP 3. Install transport wheels on the wheel pivot
linkage. Wheels and axles should be spaced with a
flat washer. Secure to wheel pivot linkage with a
hairpin.
ASSEMBLY OF CLUTCH CABLE
STEP 4. Install clutch cable. Attach spring to the
round end of the cable. Attach one end of the
"S"-hook to the spring. Attach the other end of the
"S"-hook in the hole on the clutch pivot linkage
(located between the engine and the top guard).
Attach the top end of the clutch cable to the right
hand side of the clutch handle. Insert a 1/4" x 1/2"
clevis pin thru the cable end and the clutch control
handle. Secure with a No. 2 hair pin. See “Clutch
Cable Adjustment” in the Service and Adjustment
section of this manual for adjustment of cable.
ASSEMBLY OF THROTTLE CABLE
STEP 5. Connect the throttle cable to the engine. See
the Engine Owner’s Manual for the proper
adjustment of the throttle cable (Page 5 of the
Briggs and Stratton Engine Owner’s Manual, or
page 7 of the Honda Engine Owner’s Manual).
Check movement of the throttle handle and throttle
cable. Ensure that the throttle cable does not bind
or that the handle requires excess force to operate.
Use the two tie-wraps to hold the throttle cable to
the handlebar. Trim off the excess ends.
CAUTION
DO NOT START ENGINE!!
Engine has been shipped from the factory without
oil in the engine crankcase and without oil in the
engine gear reducer. See lubrication instructions
in the engine manufactures engine manual and
chassis lubrication instructions in the Service and
Adjustment section of this manual.

AERATOR PRO 7 ASSEMBLY
HANDLEBAR
CLUTCH
CABLE CLUTCH
CABLE
ADJUSTER
CLUTCH
PIVOT
LINKAGE
SPRING "S"-HOOK REMOVABLE
WEIGHT
(ENGINE
NOT
SHOWN)
AERATOR
CHASSIS
AXLE
FLEXLOC
NUT
FLAT
WASHER
SMALL
SPACER FLEXLOC
NUT
7/8" LONG
SCREW
RIGHT SIDE
TRANSPORT WHEEL
LIFT TUBE
FLAT
WASHER
CLUTCH
HANDLE
CLEVIS
PIN HAIR
PIN
FLAT
WASHERS
HAIR
PIN
WHEEL
WHEEL
PIVOT
LINKAGE
1-1/8"
LONG
SCREW
FLEXLOC NUT
LEFT SIDE TRANSPORT
WHEEL LIFT TUBE
1-1/2"
LONG
SCREW
FLAT WASHER
LEFT SIDE WHEEL
PIVOT LINKAGE
FLAT WASHER
FLEXLOC NUT
SMALL SPACER
LARGE SPACER
(LEFT SIDE ONLY)
1-1/8" LONG SCREW
Figure 1
WARNING
To Avoid Serious Injury,
Read and Understand the Entire Operator's Manual Before Operating This Machine.

DESCRIPTION 8 AERATOR PRO
Description
INTENDED USE AND FUNCTION
The Aerator Pro is a self-propelled coring tine type
aerator. The Aerator Pro is intended to be used for
the aeration of the turf or soil at a properly prepared
worksite. The Aerator Pro is NOT intended to be used
for any purpose other than the aeration of turf. If
equipped with the optional Sod Roller Kit, the Aerator
Pro intended function changes from aeration to an
intended function of sod rolling. The Aerator Pro is
NOT designed for or intended to accept riders.
LOCATION OF MAJOR COMPONENTS
REMOVABLE
FRONT WEIGHT
FRONT
DRUM
AND
FILL
PLUG
HANDLEBAR
CLUTCH HANDLE
REMOVABLE TRANSPORT WHEELS
TINE REEL
ENGINE
LOCATION
TRANSPORT
WHEELS
HANDLE
ENGINE
THROTTLE
Figure 2
DESCRIPTION OF ENGINE AND OPERATOR
CONTROLS
The operator controls (See FIGURE 2) are located on
the handlebar. They consist of the engine throttle, the
clutch handle, and the transport wheels handle.
Ensure that all operator controls are in good
operating condition. Do not alter operator controls
and/or operate the Aerator with defective or
non-operational operator controls.
Engine Controls: The engine controls are all located
on the engine except for the throttle. The engine is
equipped with a On/Off switch, a fuel shutoff valve,
and a choke. Ensure that all engine controls are in
good operating condition. Do not alter engine controls
and/or operate the Aerator with defective or
non-operational engine controls.
Engine Throttle: The throttle is located on the right
hand side of the handlebar. Pull the throttle up to
increase the engine speed. Set the throttle at a speed
that is comfortable for the operator to walk safely
behind. Decrease throttle speed when operating in an
area of close obstacles.
Transport Wheels Handle: The transport wheels
handle, located across the rear of the of the
handlebar, raises or lowers the transport wheels.
Push on the transport handle to raise the transport
wheels and set the tines into the turf. To lower the
transport wheels and remove the tines from the turf,
pull back on the transport handle.
Clutch Handle: The clutch handle is located across
the top of the handlebar. Slowly pull back on the
clutch handle to engage the drive.
DANGER
To Avoid Serious Injury, Move To the Operator’s
Position Behind The Handlebar Before Engaging
Any Operator Control Handle.
Slowly Engage The Clutch Handle. Fast
Engagement On Uneven Ground Can Cause The
Aerator To Tip Or Roll Over.
The clutch will not act as a brake when released.
If the clutch is released or disengaged when the
Aerator is going up a slope, the machine will
freewheel and roll backwards towards the operator. If
the clutch is released or disengaged when going
down a slope, the machine will freewheel forward.

AERATOR PRO 9 OPERATION
Operation
WARNING
To Avoid Serious Injury,
Read and Understand the Entire Operator's
Manual Before Operating This Machine.
PRE-OPERATION CHECK LIST
Safety First –Wear the appropriate safety gear.
Gloves and safety shoes are recommended when
operating the Aerator.
Check –The oil level in the engine crankcase with
the engine horizontal. If necessary, fill the engine
crankcase in accordance with the engine
manufacturer's instructions. Engine is shipped from
the factory without oil.
Check –The oil level in the engine gear reducer
with the engine horizontal. Fill in accordance with
the engine manufacturer's instructions. Engine gear
reducer is shipped from the factory without oil.
Grease –The fittings in the wheel hubs.
Use fresh fuel of a type and grade recommended
by the engine manufacturer. Fill the tank 3/4 full.
Inspect –The tines and the V-belt for damage.
Check –All guards are in place.
Check –Retighten any loose nuts and screws to
ensure safe operation.
Check –The front drum is completely filled with
water.
Check –The work site for above and below ground
obstructions and/or dangerous areas.
WORK SITE PREPARATION
Under certain conditions, the Aerator tines can reach
a depth of 4-1/2" inches. Damage will occur to any
buried object that the tines may come in contact with.
Plan your path and know the location of any below
ground as well as above ground objects that could be
damaged by the aerating process.
Locate and mark all shallow buried electric service,
cable TV, telephone, outdoor lighting, and any other
buried cable that may be damaged by the aerating
process.
Locate and mark all irrigation heads, above and
below ground irrigation control boxes, and any
shallow buried irrigation lines that may be damaged
by the aerating process.
Locate and mark any shallow buried natural gas,
propane gas, or other gas or fuel line that may be
damaged by the aerating process.
Locate and mark any shallow buried roof drain pipes,
drain tiling, drain catch basins, or any other buried
drainage items that may be damaged in the aerating
process.
USING WEIGHTS The front drum should be filled with
water before operation. The weight of the water helps
the tines reach the proper depth as well as aiding in
traction and stability.
Rotate the front drum until the fill plug is at the top.
Remove the plug and fill the front drum with water.
The front drum must be completely filled with water.
A partially filled drum will cause the machine to
wander as the weight of the water shifts from side
to side.
If aerating in an area where hard soil conditions exist,
the removable weight may be needed to ensure that
the tines reach the proper penetration depth. Hang the
removable weight in the slots on the front of the
frame. The removable weight may not be needed
when working in soft soil conditions.
ENGINE STARTING INSTRUCTIONS
WARNING
To Avoid Serious Injury,
Do Not Operate Without Guards In Place.
Keep hands and feet away from tines and front roller.
Ensure that the engine oil levels are correct and that
the gas tank has been filled 3/4 full with the proper
grade of fuel.
Check that the fuel shut-off valve is in the "ON"
position.
Check that engine On/Off switch is in the "On"
position.
Set throttle. Set choke as needed.
Pull starter rope to start engine.
Reset throttle to desired speed.

OPERATION 10 AERATOR PRO
AERATOR OPERATION INSTRUCTIONS
DANGER
Always operate the Aerator safely.
Follow all safety precautions and wear the
appropriate safety gear. Read the entire Aerator
Pro Operator’s manual before operating this
machine
DANGER
To Avoid Serious Injury,
Move To Operators Position Behind The
Handlebar Before Engaging Any Operator
Control Handle.
Slowly Engage The Clutch Handle.
Fast Engagement On Uneven Ground Can Cause
The Aerator To Tip Or Roll Over.
Move the Aerator to the turf before raising the
transport wheels and lowering the tines. To prevent
damage to the front drum, do not drive the Aerator
across rock covered areas or over obstacles.
Do Not move from turf to pavement with the tines
down. Do not operate the Aerator with the tines down
across any hard surface as damage to the tines will
result.
With the engine running, lower the tines into the turf
and slowly engage the clutch. For best results, only go
in straight lines. Gentle sweeping turns can be made,
but the holes left by the Aerator will be enlarged.
To turn the Aerator at the end of a row, release clutch
and lower the transport wheels to remove the tines
from the turf. Push down on the handlebar and swivel
Aerator around on transport wheels. Another method
is to release clutch, pull up on the handlebar to
remove the tines from the turf, and swivel the aerator
around on its front drum. Do Not Attempt to make
turns with the clutch engaged.
DANGER
To Avoid Serious Injury,
Do Not Operate Aerator On Steep Slopes.
Aerator Can Tip, Roll Over, Or
Roll Back Onto Operator.
Do not operate the Aerator on steep slopes. Serious
injury can occur if the operator slips and gets feet or
hands caught in the revolving tine reel. When
operated on steep slopes or when operated in an
unsafe manner, the Aerator Pro can tip, roll over, or
roll back on to the operator, causing serious injury.
When aerating on minor slopes, never operate
straight up or down or across the slope. Approach a
minor slope moving up and down at a 45° degree
angle to the slope.
To back-up the Aerator, tines must be removed from
the turf. Release clutch, lower the transport wheels
and pull the Aerator backwards.
When aerating, check the depth of the holes by
checking the cores. If tines are not penetrating deep
enough, add the weight bar. Pushing down on the
handlebar while aerating will also increases the weight
on the tines.
For best results, aerate the turf more than once to
maximize the number of holes. Aerate the same work
site at least twice, changing direction of travel by 90°
degrees. Change to 45° degrees if aerating for a third
pass. For safety reasons, only do minor slopes at 45°
degree angles to the slope. Never operate the Aerator
on steep slopes.
DANGER
To Avoid Serious Injury,
Keep Hands And Feet Away From Tines.
Visually inspect the tines often during the aerating
process to ensure that they have not become plugged
with stones or debris. A plugged tine will still make a
hole, but will compact the soil in the hole instead of
removing a core. Compaction of the soil is the
opposite of the effect desired by the aerating process.
When inspecting or cleaning the tines, stop the
engine and move to a level surface. Use caution and
wear the proper protective items when working
around the tines.
After aerating is complete, remove the removable
weight from front of Aerator and drain the water from
the front drum. Do Not store the Aerator with the
front weight on the machine.

AERATOR PRO 11 SERVICE
Lubrication
WARNING
TO AVOID SERIOUS INJURY,
DO NOT LUBRICATE OR ADJUST THE AERATOR
PRO WITH ITS ENGINE RUNNING.
REMOVE THE WIRE FROM THE SPARK PLUG.
All of the following lubrication and adjustment
procedures involve or are near rotating part and
moving parts.
Always follow all safety precautions and wear the
appropriate safety gear.
LUBRICATION
GREASE FITTINGS Every 20 Hours of Operation
Two (2) fittings, one located on each wheel hub.
AERATOR DRIVE TRAIN COMPONENTS,
CHAIN, SPROCKETS, AND PIVOT POINTS
All bearings in the drive train are sealed and
require no further lubrication. Periodic inspection
should be done to insure that any worn bearings
are detected and replaced.
The chain has sealed rollers and requires no
lubrication. Protect chain from rust and moisture
with a very light coating of machine oil. The chain
sprockets should be cleaned of any dirt build-up to
ensure proper chain contact. Periodically inspect
the chain and sprockets for wear or damage.
Replace if necessary.
Periodically clean the entire machine of dirt,
grease and grass build-up and lubricate all pivot
points with light machine oil.
ENGINE AND GEAR REDUCTION UNIT
CHECK OIL LEVELS DAILY. Follow the engine
manufacturer's manual for intervals of oil change,
proper oil types, and fill levels for the engine and
the gear reduction unit.
Adjustments
The Aerator operates with vibration. Check and
retighten nuts and screws frequently to ensure safe
operation.
CHAIN IDLER ADJUSTMENT
The chain idler sprocket (located under the side chain
guard) can be adjusted to remove excess slack in the
chain caused by chain wear or stretch. Before
adjusting idler sprocket position, ensure that the chain
and all sprockets have been cleaned and that the
chain seats properly on the sprockets. A build-up of
dirt on the sprockets or chain can cause the chain to
become too tight. Inspect all the sprockets, bearings,
and the chain for wear or damage. With the tine reel
elevated, loosen the idler sprocket and adjust to the
proper tension setting. Chain should have a up and
down movement of 1/2" inch to 1" inch total. Take
measurement at a center point on the chain between
the front drum sprocket and the tine reel sprocket.
Retighten idler sprocket and recheck tension setting
measurement.
CLUTCH CABLE ADJUSTMENT
The clutch cable has an adjuster (located midpoint on
the cable) to increase or decrease the V-belt tension.
If the V-belt is slipping, the V-belt tension needs to be
increased. If machine will not freewheel when the
clutch is released, the V-belt tension needs to be
decreased. Before adjusting, inspect the V-belt, clutch
cable, and the clutch cable spring for damage and
wear. Replace any damaged or worn items. To adjust
the clutch cable for V-belt slippage, loosen the lock
nut on the cable adjuster and shorten the cable by
turning the adjuster one turn at a time until slippage is
corrected. Ensure that the machine will freewheel
when the clutch is released (belt guard must be on
machine). Secure adjustment by tightening lock nut
against adjuster. Test and repeat adjustment if
required. Replace V-belt if proper operation cannot be
reached with cable adjustment.
Storage
To store the Aerator over a extended period, clean all
surfaces and remove any remaining cores from the
tines. Apply a film of light machine oil to the tines to
control rust. See the lubrication directions and follow
the procedures for lubrication of drive train
components and grease fittings.
Ensure that the front drum is empty of all water. If
water freezes in the drum, damage to the drum will
occur. To avoid getting a flat spot on the front drum,
store with the front drum elevated and the removable
weight removed from the machine.
Remove fuel from gas tank and run engine until
carburetor is empty. Prepare engine in accordance
with engine manufacturer's directions.

PARTS LISTS 12 AERATOR PRO
Handlebar Assembly
9
24 (LEFT SIDE ONLY)
23
LONG END OF
LIFT TUBE
TOWARDS THE
BOTTOM
6
6
6
1
14
15
6
3
3
25
12
6
16
18
6
19
4
6
18
2
618
37
7
8
19
6
5
2
9
6
3
21
17
22
20
10
11
13

AERATOR PRO 13 PARTS LISTS
Handlebar Assembly
Item Part Description Qty.
No. No.
1 660093 Handlebar..................................................................................................1
2 400260 Screw, Hex, 3/8"-16 x 7/8"........................................................................6
3 444810 Nut, Hex, 3/8"-16, Flexloc Full ................................................................10
4 660104 Handle, Wheel Lift.....................................................................................1
5 446142 Washer, Lock, 3/8"....................................................................................2
6 452006 Washer, Flat, .375" ID x .875" OD x .078" Thick ....................................14
7 658630 Bushing, Pivot...........................................................................................2
8 657027 Washer, Spring, .625" ID x 1" OD x .021 Thick ........................................2
9 658559 Lift Tube ....................................................................................................2
10 658605 Control, Throttle ........................................................................................1
11 499244 Nut, Hex, No. 10-24 KEPS........................................................................2
12 499333 Screw, Hex, No. 10-24 x 1/2"....................................................................2
13 658101 Tie, Cable..................................................................................................2
14 658569 Mount, Clutch Handle................................................................................1
15 658240 Bolt, Carriage, 5/16"-18 x 3/4"...................................................................2
16 444808 Nut, Hex, 5/16"-18, Flexloc Full ................................................................2
17 660107 Handle, Clutch...........................................................................................1
18 499226 Screw, Hex, 3/8"-16 x 1-1/8".....................................................................5
19 650790 Bushing, Spacer........................................................................................4
20 658604 Cable, Clutch.............................................................................................1
21 658542 Pin, Clevis, 1/4" x 1/2"...............................................................................1
22 658638 Pin, Hair, No. 2..........................................................................................1
23 658631 Bushing, Pivot...........................................................................................2
24 660110 Spacer, Offset, Upper ...............................................................................1
25 400268 Screw, Hex, 3/8”-16 x 1-3/4” .....................................................................1

PARTS LISTS 14 AERATOR PRO
Transport Wheels
12
624
412
23
22 21
1
2
34
5
7
7
8
9
14
8
11
16
14
15
15
17
2
17
10
16
119
10
11 2225
4
20
23
19
22
26
23 18 22
23
21
25
22
25
22
13
11

AERATOR PRO 15 PARTS LISTS
Transport Wheels
Item Part Description Qty.
No. No.
1 660091 Tube, Pivot, Wheel (Includes Item 2) ......................................................1
2 650586 Oilite, Wheel Pivot Tube, AA-839-13........................................................2
3 658240 Bolt, Carriage, 5/16-18 x 3/4"....................................................................4
4 444808 Nut, Hex, 5/16"-18 Flexloc Full .................................................................6
5 660098 Shaft, Wheel Pivot.....................................................................................1
6 660109 Spacer, Offset, Lower ...............................................................................1
7 660084 Arm, Wheel OBSOLETE...........................................................................2
8 461408 Pin, Spring, 1/4" x 1-1/2"...........................................................................2
9 658539 Wheel, Transport, 8" x 2.5" (Includes Grease Fitting) ..............................2
10 660106 Axle, Removable.......................................................................................2
11 499024 Washer, Flat, .641" ID x .1.188 OD x .062 Thick......................................4
12 660076 Hairpin, Wheel...........................................................................................2
13 471215 Fitting, Grease, 1/4"-28, 45° Degree (See Note A)...................................2
14 658608 Spring, Wheel Lift......................................................................................2
15 657995 S-Hook ......................................................................................................2
16 499170 Screw, Hex, 5/16"-18 x 1-3/4", Grade 8....................................................2
17 443106 Nut, Hex, 5/16"-18.....................................................................................2
18 658617 Link, Left Hand..........................................................................................1
19 658618 Link, Right Hand........................................................................................1
20 400262 Screw, Hex, 3/8"-16 x 1"...........................................................................1
21 446142 Washer, Lock, 3/8"....................................................................................2
22 452006 Washer, Flat, .375" ID x .875" OD x .078" Thick ......................................6
23 658631 Bushing, Pivot...........................................................................................4
24 660110 Spacer, Offset, Upper ...............................................................................1
25 400266 Screw, Hex, 3/8"-16 x 1-1/2” .....................................................................3
26 444810 Nut, Hex, 3/8"-16 Flexloc Full ...................................................................2
Note A: Grease Fitting Size Is For Reference Only, Listed Size May Not Fit All 658539 Wheels.

PARTS LISTS 16 AERATOR PRO
Tine Reel Assembly
10
SPROCKET END
OF TINE REEL
CARRIAGE
BOLTS
TINE
TINE REEL DIAGRAM
FORWARD
ROTATION
5
7
FRONT OF MACHINE
9
8
7
6
5
4
32
1
Item Part Description Qty.
No. No.
1 660087 Tine Reel .................................................................................................1
2 87305 Tine, 1 Each ..........................................................................................48
3 658599 Bolt, Carriage, 5/16"-18 x 1-1/2"............................................................96
4 658600 Nut, Hex, 5/16"-18 Thin Nyloc...............................................................96
5 658541 Bearing, Flange (Includes Set Screws)...................................................2
6 499051 Screw, Set, 1/4"-28 x 1/4" (See Note A)..................................................4
7 458035 Ring, Retaining, 1-1/4 External ...............................................................2
8 440118 Bolt, Carriage, 3/8"-16 x 1"......................................................................4
9 444810 Nut, Hex, 3/8"-16 Flexloc Full..................................................................4
10 463031 Key, Woodruff, 1/4" x 1" ..........................................................................1
Note A: Set Screw Size Is For Reference Only, Listed Size May Not Fit All 658541 Bearings.

AERATOR PRO 17 PARTS LISTS
Front Drum Assembly
13
8
11
9
8
12
11
10
8
7
6
9
5
4
3
2
1
Item Part Description Qty.
No. No.
1 660089 Shaft, Tank ..............................................................................................1
2 658595 Gasket, 4-1/2"..........................................................................................1
3 658593 Ring, Split ................................................................................................2
4 658351 Tank, Water 20”.......................................................................................1
5 658538 Plug, Expansion, 1" .................................................................................1
6 658596 Gasket, 2-7/8"..........................................................................................1
7 658592 Flange, 2-7/8"..........................................................................................1
8 444808 Nut, Hex, 5/16"-18 Flexloc Full..............................................................16
9 655774 Bearing, Flange (Includes Set Screws)...................................................2
10 499051 Screw, Set, 1/4"-28 x 1/4" (See Note A)..................................................4
11 458021 Ring, Retaining, 1" External ....................................................................2
12 658240 Bolt, Carriage, 5/16"-18 x 3/4".................................................................4
13 463031 Key, Woodruff, 1/4" x 1" ..........................................................................1
Note A: Set Screw Size Is For Reference Only, Listed Size May Not Fit All 655774 Bearings.

PARTS LISTS 18 AERATOR PRO
Clutch and Drive Train
312
41
22
25
23
25
26
27
19
24
28
34
42
26
27
28
15
16
38
37
30
11
36 35 33
33
20
5
8
7
6
19
17
19
18
11
12
9
30
32
33
10 13 31
8
7
6
40
39
4
40
8
7
6
43 21
14
29

AERATOR PRO 19 PARTS LISTS
Clutch and Drive Train
Item Part Description Qty.
No. No.
1 656162 Pulley, Engine, V-belt (Includes Set Screw) .............................................1
2 415519 Screw, Set, 5/16"-18 x 3/8" (See Note A) .................................................1
3 499086 Key, 3/16" x 1"...........................................................................................1
4 660111 Guard, Belt................................................................................................1
5 660112 Guard, Chain.............................................................................................1
6 400106 Screw, Hex, 1/4"-20 x 5/8"......................................................................12
7 446128 Washer, Lock 1/4"...................................................................................12
8 452002 Washer, Flat, .25 ID x .562 OD x .047 Thick ..........................................12
9 499126 Nut, Clip, 1/4"-20 Tinnerman...................................................................12
10 650811 Sprocket, Idler .........................................................................................1
11 400270 Screw, Hex, 3/8"-16 x 2"..........................................................................2
12 499059 Washer, Flat, .391 ID x 1.25 OD x .094 Thick.........................................1
13 499059 Washer, Flat, .391 ID x 1.25 OD x .094 Thick................................Note B
14 452006 Washer, Flat, .375 ID x .875 OD x .078 Thick.........................................1
15 658611 Sprocket, RC-40, 12 Tooth (Includes Set Screws) .................................1
16 415509 Screw, Set, 1/4"-20 x 1/4" (See Note A)..................................................2
17 658545 Sprocket, RC-40, 23 Tooth (Includes Set Screws) .................................1
18 658546 Sprocket, RC-40, 34 Tooth (Includes Set Screws) .................................1
19 415553 Screw, Set, 5/16"-18 x 5/16" (See Note A)..............................................5
20 658547 Chain, RC-40, 110 Pitch (Includes Master Link).....................................1
21 658659 Master Link, RC-40-LL ............................................................................1
22 658549 Pulley, 9" Inch (Includes Set Screw) .......................................................1
23 660102 Jackshaft .................................................................................................1
24 463021 Key, Woodruff, 1/4" x 7/8" .......................................................................2
25 458021 Ring, Retaining, 1" External ....................................................................2
26 655774 Bearing, Flange (Includes Set Screws)...................................................2
27 499051 Screw, Set, 1/4"-28 x 1/4" (See Note A)..................................................4
28 658240 Bolt, Carriage, 5/16”-18 x 3/4” .................................................................4
29 444808 Nut, Hex, 5/16"-18 Flexloc Full................................................................2
30 658552 Block, Bearing .........................................................................................4
31 441632 Bolt, Carriage, 3/8"-16 x 2-1/4"................................................................4
32 452008 Washer, Flat, .438" ID x 1" OD x .078 Thick ...........................................4
33 444810 Nut, Hex, 3/8"-16, Flexloc Full.................................................................6
34 658574 Arm, Clutch..............................................................................................1
35 658399 Pulley, Idler..............................................................................................1
36 452006 Washer, Flat, .375" ID x .875" OD x .078 Thick.............................Note C
37 657995 S-hook .....................................................................................................1
38 658610 Spring, Clutch Return..............................................................................1
39 658648 Pin, Belt Guide.........................................................................................1
40 658649 Push Nut, 1/4" Cap..................................................................................2
41 658548 V-belt, Goodyear 84500 ..........................................................................1
42 458013 Ring, Retaining, 3/4" External .................................................................2
43 660103 Cover, Jackshaft......................................................................................1
Note A: Set Screw Sizes Are For Reference Only, Listed Size May Not Fit All Applications.
Note B: As Required To Align Chain Idler With Chain.
Note C: As Required To Align Clutch Idler Pulley With V-belt.

PARTS LISTS 20 AERATOR PRO
Engine, Removable Weight, and Front Bumper
1
2
3
7
8
6
4
5
6
9
10
Item Part Description Qty.
No. No.
1 658636 Engine, Briggs and Stratton, 3.5 HP Industrial Plus
with 6:1 Gear Reducer................................................................1
2 658602 Engine, Honda, GX120 with 6:1 Gear Reducer.............................1
3 658646 Defector, Exhaust ..........................................................................1
4 658599 Bolt, Carriage, 5/16"-18 x 1-1/2"....................................................4
5 452004 Washer, Flat, .312" ID x .750" OD x .062" Thick...........................4
6 444808 Nut, Hex, 5/16"-18 Flexloc Full......................................................8
7 660101 Bumper, Front................................................................................1
8 658240 Bolt, Carriage, 5/16”-18 x 3/4” .......................................................4
9 660096 Weight, Removable, Aerator Pro...................................................1
10 659138 Pad, Rubber Vibration Bumper......................................................4
This manual suits for next models
3
Table of contents
Other TURFCO Lawn And Garden Equipment manuals

TURFCO
TURFCO TurnAer-26 User manual

TURFCO
TURFCO TurnAer XT5 Installation instructions

TURFCO
TURFCO LS-22 User manual

TURFCO
TURFCO WIDESPIN 1530 User manual

TURFCO
TURFCO TurnAer XT5 Installation instructions

TURFCO
TURFCO TurnAer XT8 User manual

TURFCO
TURFCO TurnAer 6 User manual

TURFCO
TURFCO WIDESPIN 1540 TEC User manual