TV.Ears V6 Grab-n-Go™ Digital Hearing Aid
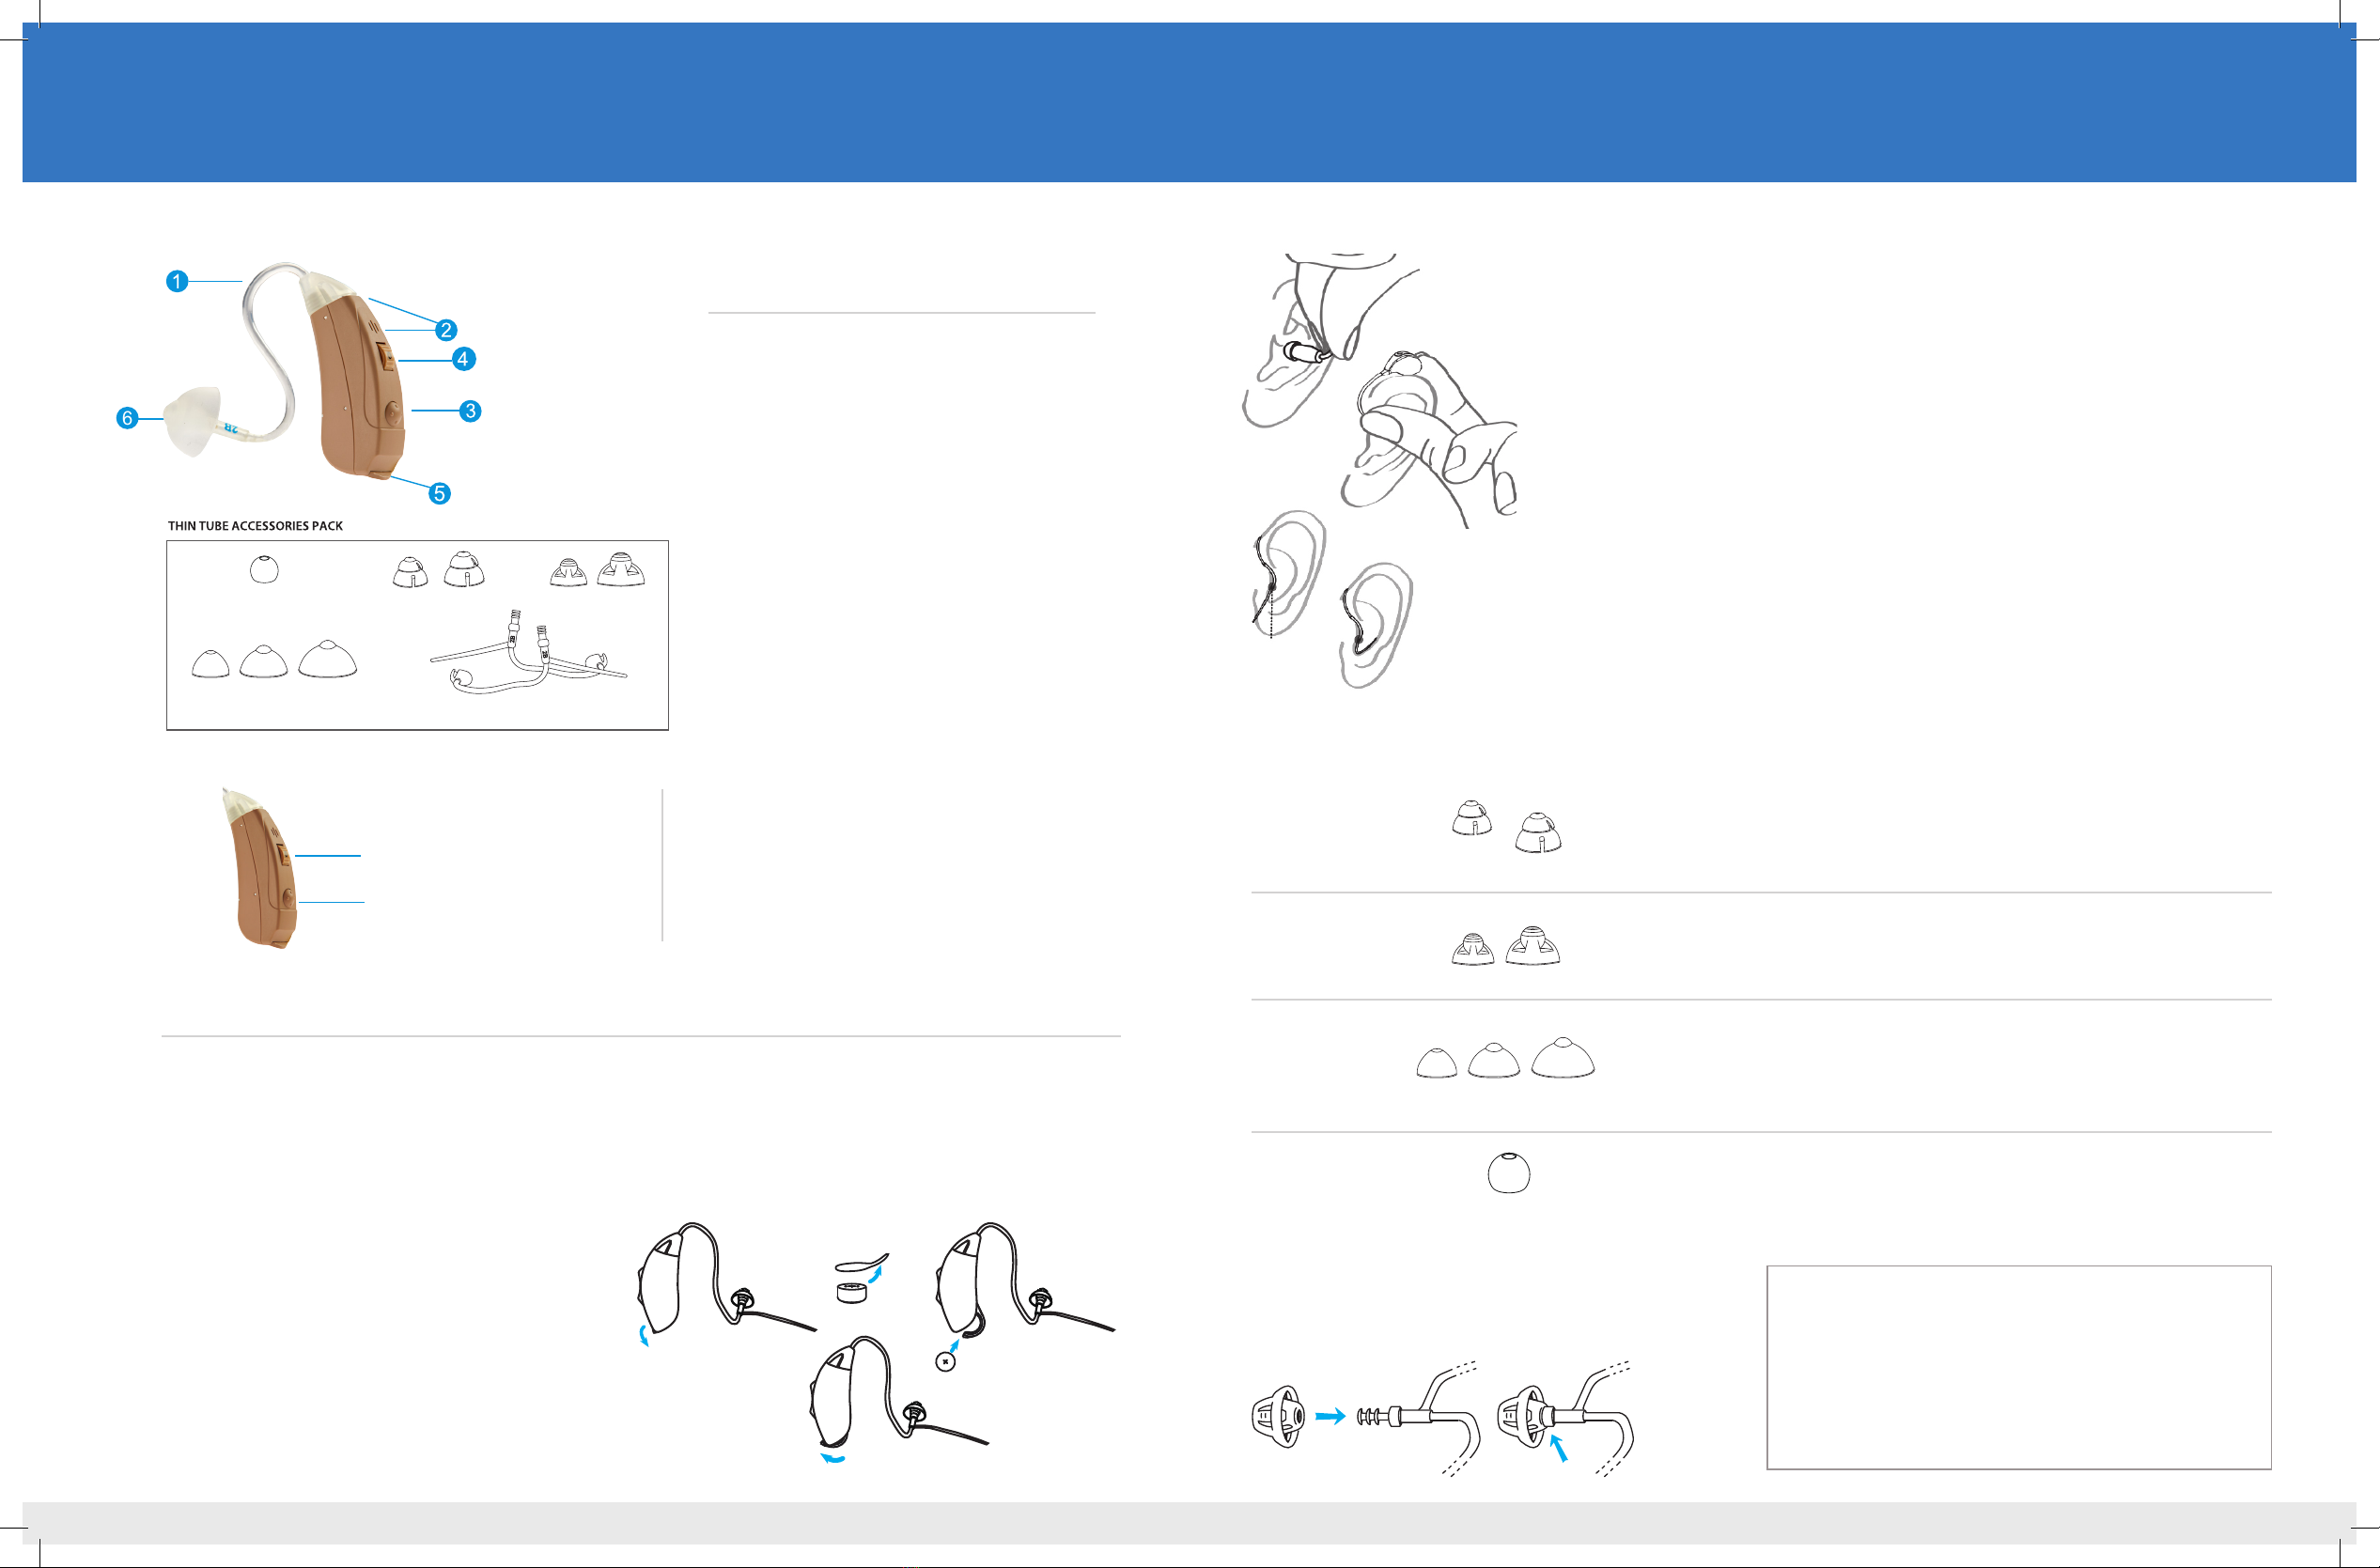
Features
Operation
Put on your Hearing Aid
Before putting on your Hearing Aid, please clean your ear and make sure
the battery door is closed properly. Follow the procedure for inserting your Hearing
Aid.
Step 1: Hold the sound tube
Step 2: Place the Hearing Aid over the top of the ear.
Step 3: Gently insert the dome into ear canal.
Step 4: Move the retention lock and place it into the bowl of your ear.
Help with Whistling
Whistling may occur if the Hearing Aid is turned on, but not securely seated in your
ear. This is normal. The whistling will stop once the Hearing Aid is properly seated in
your ear. Other causes include a blockage of wax, or damaged ear piece or tubing,
or excessive volume. Please take appropriate measures to stop the whistling.
Find the Perfect Fit!
Your new hearing aid comes with a variety of dome tips. Use this guide to nd the best t for you.
Medium Magic Dome comes pre-attached on your Hearing Aids. This tip is a
mix of an Open and a Closed dome tip. It is best for rst time users. Louder
than an Open, yet quieter than a Closed.
Best for mild amplication. Overall better quality of sound.
Good for the very common higher frequency losses.
Best for moderate to severe amplication. Helps with background
noise reduction. Overall louder sound. Helps eliminate feedback
on higher volume levels.
Best for very mild amplication and issues with volume being too loud.
Need more Dome Tips?
For best use, it is recommended that the
dome tips be changed on a monthly basis.
To order more dome tips, please give us
a call at 1 (888) 883-3277
Turning your Hearing Aid On/O
Your Hearing Aid has two dierent ways it can be turned on and o. The device automatically turns ON whenever
the battery door compartment is closed and OFF when the battery door is opened. Additionally, the power can be
controlled by the volume wheel. Turn the wheel all the way down to ‘0’ and the device will turn o. This eliminates the
need to open and close the battery door. To turn back on, slide the volume wheel up from ‘0’ to increase the volume
and the device will power on after a 3 second delay,
To insert a battery
Open the Battery Compartment Door by
gently swinging it into the open position.
Remove the tab from a new #13 size battery.
Place the new battery in the Battery Compartment Door
with the positive (+) or at side up as pictured.
Close the battery compartment door until you hear it click
Four Pre-Set Program Levels!
Program 1: Normal, Universal Use
Program 2: Noise Reduction, Dual Microphone
Program 3: Noise Reduction, Single Microphone
Program 4: Severe Noise Mode, Dual Microphone
1. Sound tube
2. Dual
3. Program switch
4. Volume Control
5. Battery Door
6. Dome Tip
6
Two magic domes Two open domes
Three closed domes
One memory foam dome
Two tubes
Spin the volume wheel up or down to
increase the volume as well as turn the
device on and off.
Hold down to switch between the
different program levels.
1. Sound tube
2. Dual Microphone
3. Program switch
4. Volume Control
5. Battery Door
6. Dome Tip
6
Two magic domes Two open domes
Three closed domes
One memory foam dome
Two tubes
Spin the volume wheel up or down to
increase the volume as well as turn the
device on and off.
Hold down to switch between the
different program levels.
Dome
Attach the dome
Push the dome over the grooves on the tubes to mount it.
Magic Domes
Open Domes
Closed Domes
Foam Dome
Volume Control
The volume can be adjusted up or down.
Simply adjust the volume wheel up or down to
increase or decrease.
On/O
The volume wheel also turns the dervice on and
o.
Program Switch
Press and hold either part of the switch for
3 seconds to change the current program.


