- 4 -
Our experience, as well as the experiences of our customers worldwide,
of other manufacturers’ best tonearms, led us to the conclusion that a TW
Acustic tonearm should work with any current high end pick-up system and
should be adjustable in all the relevant parameters.
From the very beginning it was established that the concept would be a
straight, pivoted-type arm. The rigorously selected precision bearings are
ultra-precisely adjusted during the production process in order to eliminate
any interference in the pick-up process. Our chosen bearing type is funda-
mentally immune to the notorious stick and slip effect.
To keep effective mass to a minimum, the tonearm is predominantly construc-
ted from a special black-anodised aluminium alloy which intrinsically ensures
the necessary stiffness and torsional strength. The effective mass is approxi-
mately 14g, which allows partnering with the majority of currently available
MC and MM cartridges. This universal compatibility is further underlined
by the inclusion of two different polished stainless steel counterweights as
standard, allowing any cartridge with an operating weight of between 5g
and 20g to be perfectly counterbalanced.
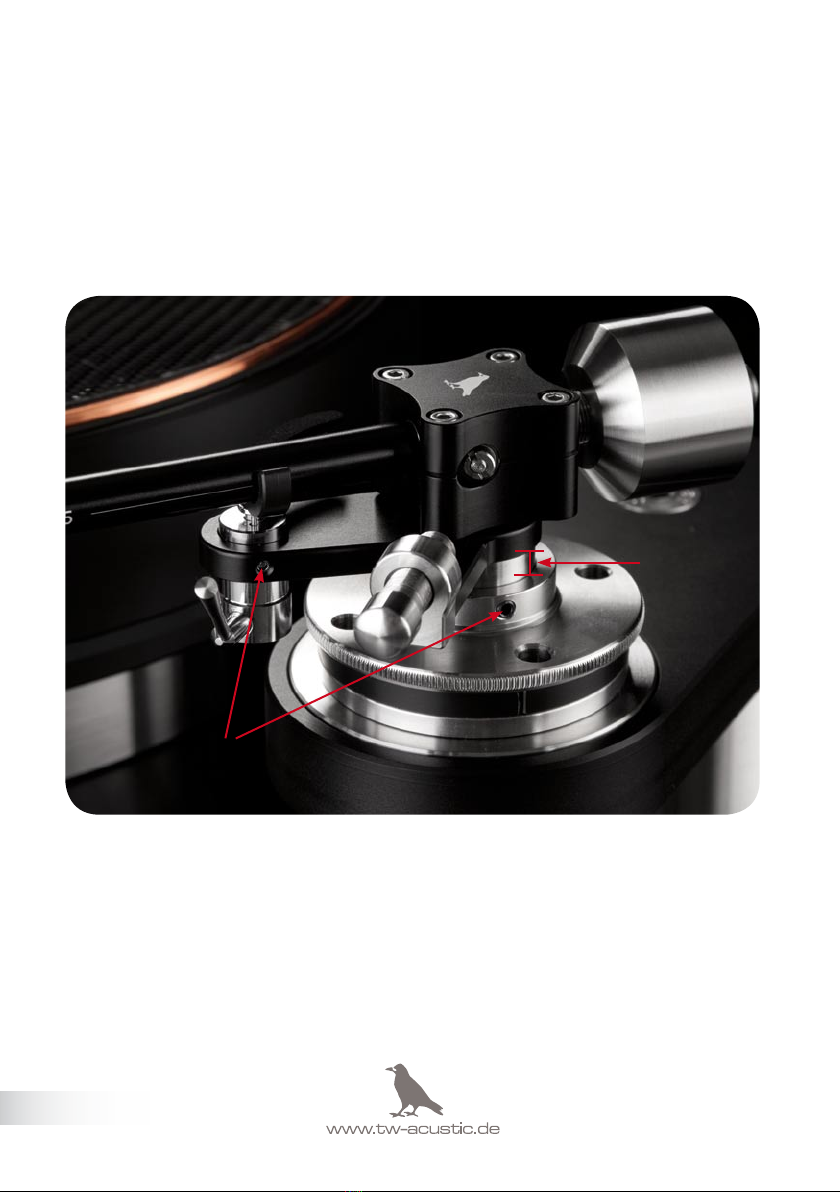
Of course, thanks to its 4-hole ange mount, the Raven 10.5 can easily be
used with other manufacturers’ turntables. Tonearm height is adjustable with
the zero-oat VTA adjuster. This VTA adjuster, derived from that found on
our agship Raven Black Night turntable, allows adjustment of 10 mm on
the y. The headshell is not detachable, but nonetheless allows for azimuth
correction. This means that any cartridge system can be adjusted in every
parameter! The integral one-piece sonically optimised copper tonearm
cable (from the cartridge tags right through to the phono plugs) does the
rest, ensuring that the delicate signals arrive at your phono stage pure and
interference-free.
1. Raven 10.5 design philosophy
- 5 -
To set up the cartridge you will need the following additional tools that are
not included in the package: a small pair of combination or needle nose
pliers or a pair of tweezers and a stylus pressure gauge.
Always use the cueing device to lower the stylus onto the record.
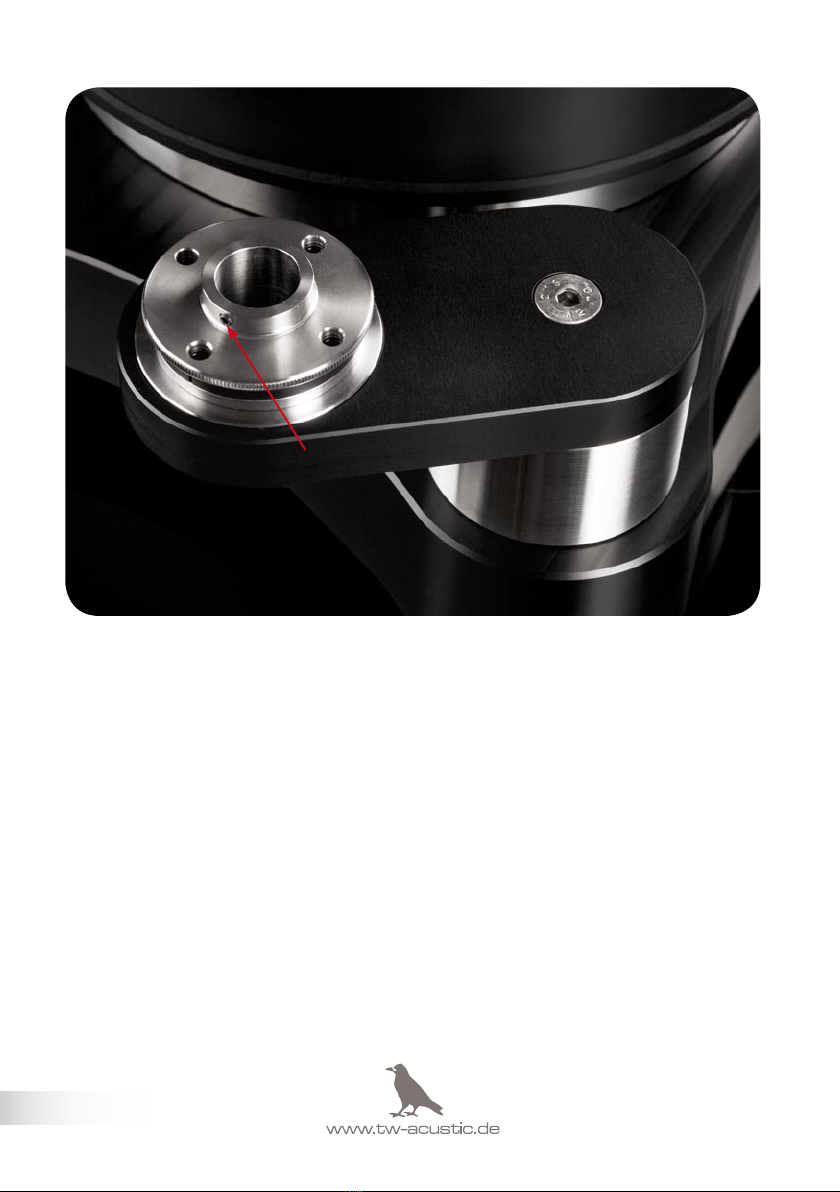
Never loosen the four screws that hold the bearing cover in place. These
screws hold the bearings in position, which is carefully set by us during
assembly. Should these screws have been loosened for any reason, the arm
will have to be returned to us for readjustment.
Each tonearm is a precision instrument. Always avoid the use of excessive
force – when setting up the cartridge for example. The leverage will multiply
the force many times, which could lead to potential damage of the precision
bearing.
When mounting the tonearm always disconnect the tonearm cable phono
plugs from the preamplier’s phono inputs. Failure to do so could overdrive
the phono stage and could potentially damage your loudspeakers.
Never attempt a repair of the tonearm yourself as this will void the war-
ranty. Should problems occur that cannot be resolved by referring to the
troubleshooting guide in chapter 7 of this user guide, please immediately
contact your dealer, the authorized distributor for your country, or contact
TW Acustic Germany direct.
Avoid using any cleaning agents. Your tonearm should only be cleaned
using a soft, lint-free, lightly moistened cloth. Cleaning agents could potenti-
ally penetrate the delicate bearing and adversely affect its function.
2. Important information