TW Steel TW-525 User manual

User Manual
Last revised on Jan 2011
TW-525 WLAN 802.11n
Ethernet Access Point

Safety Warnings
1. Do not use the adapter in high humidity or high temperature environment.
2. Do not open or repair the case yourself.
3. Avoid using this product and all its accesories outdoor.
4. Place the adapter on a stable surface.
5. Plug your Ethernet Access Point device directly to the AC outlet on the wall. It is best to avoid
using extension power cable as it may possess noise lter or surge protector functions that may
cause interference that may impact the performance of the device.

Table of Contents
Chapter 1: Product ............................................................................1
1.1 Introduction ...........................................................................1
1.2 Features................................................................................2
Chapter 2: Installing the Adapter .....................................................3
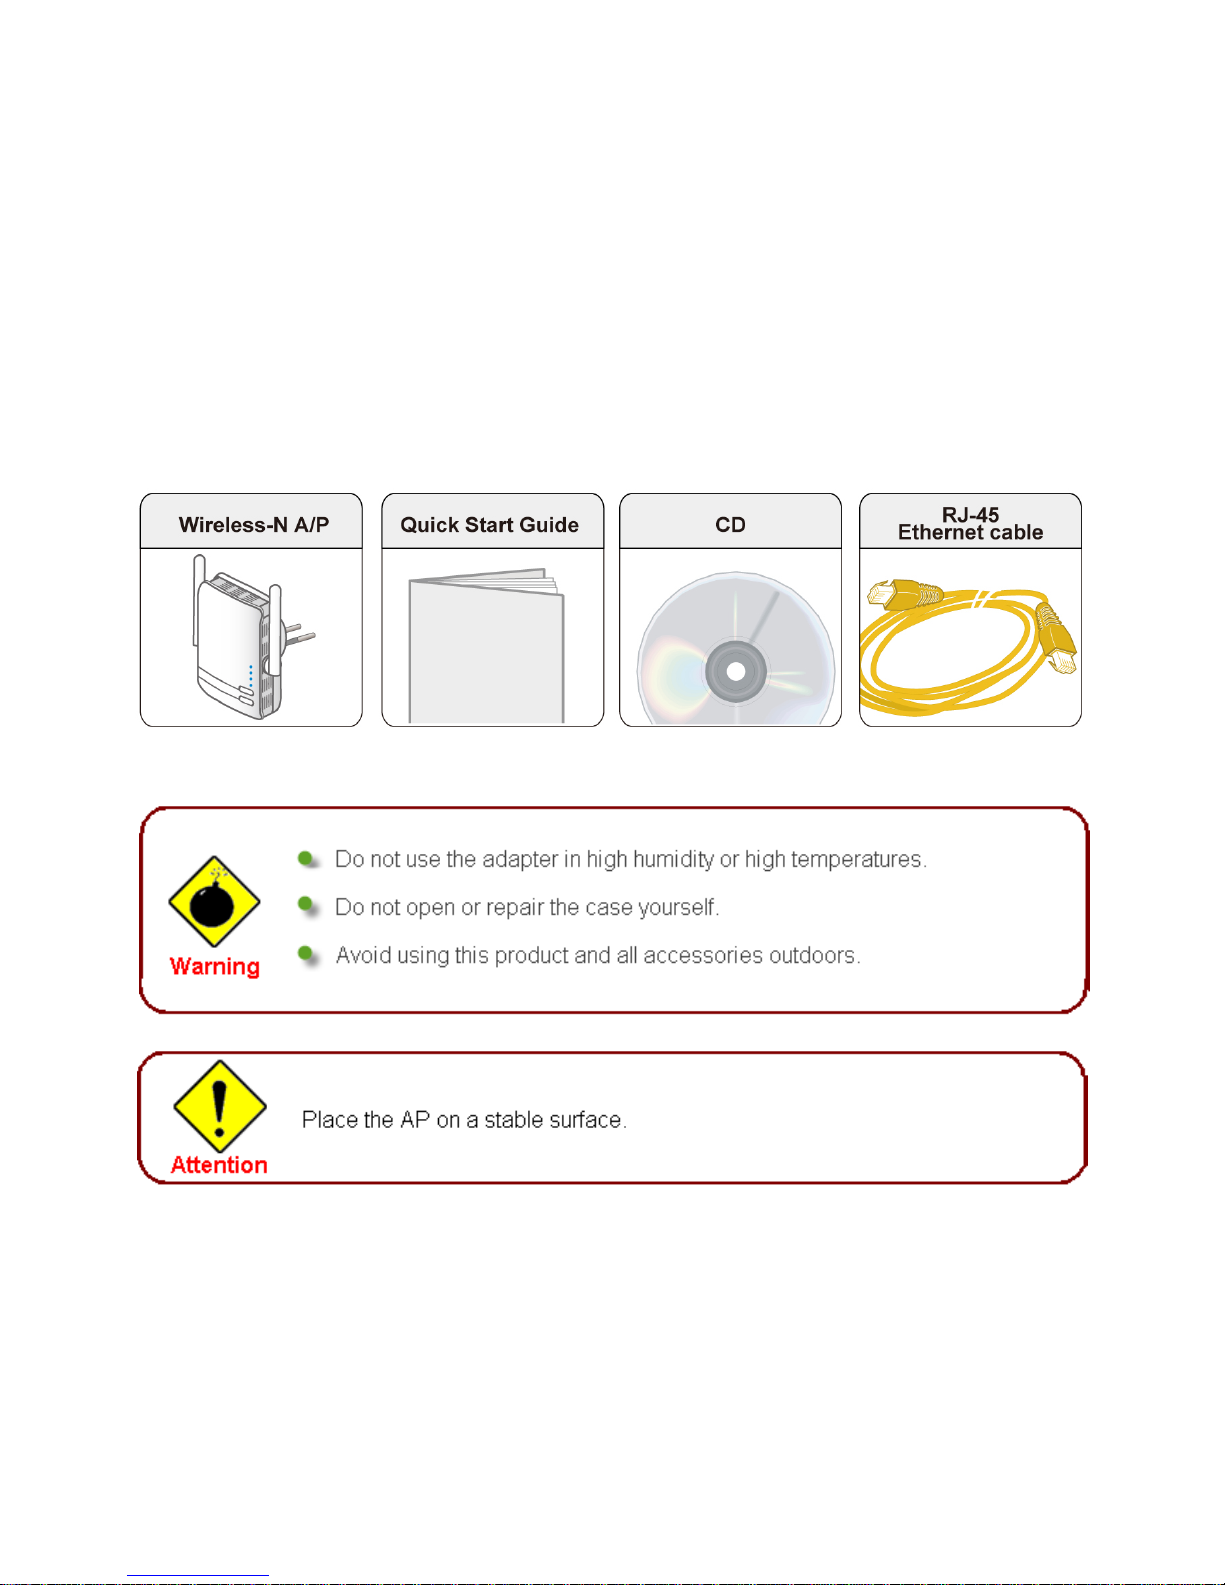
2.1 Package Content...................................................................3
2.2 Device Overview ...................................................................4
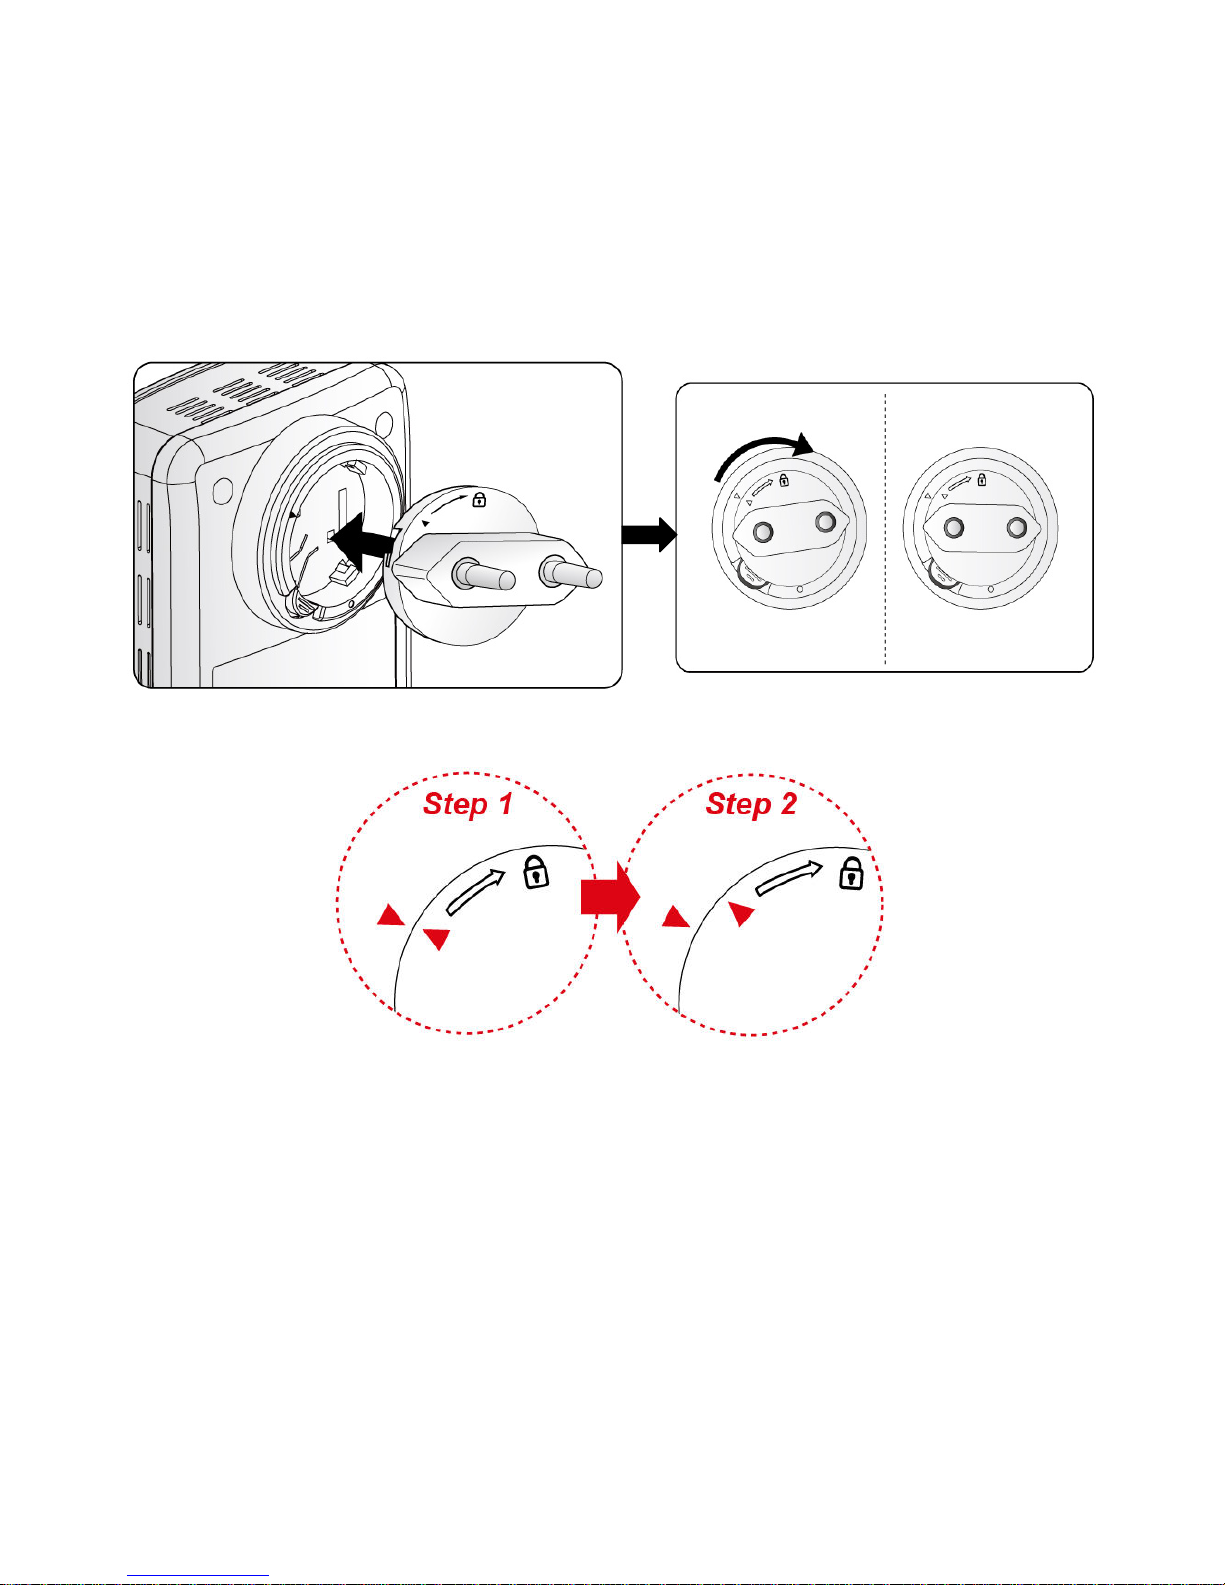
2.3 Hardware Installation ............................................................6
2.4 Connecting the Access Point ................................................8
2.4.1 Power Connection......................................................................8
2.4.2 LAN & Wireless Connection.......................................................8
2.4.3 Product Application ....................................................................9
Chapter 3: Basic Network Installation ..........................................10
3.1 Network Conguration......................................................... 11
3.1.1 Conguring PC in Windows 7 .................................................. 11
3.1.2 Conguring PC in Windows Vista.............................................13
3.1.3 Conguring PC in Windows XP................................................15
3.1.4 Conguring PC in Windows 2000.............................................16
3.1.5 Conguring PC in Windows 95/98/Me......................................17
3.1.6 Conguring PC in Windows NT4.0...........................................18
3.2 Factory Default Settings...................................................... 19
3.3 Internet Access Conguration .............................................20
3.3.1 Conguring with your Web Browser.........................................20
Chapter 4: Conguration ................................................................21
4.1 Status..................................................................................22
4.1.1 Status.......................................................................................22
4.1.2 Statistic ....................................................................................23
4.2 LAN Setting.........................................................................24
4.2.1 LAN ..........................................................................................24
4.3 Wireless Settings ................................................................25

4.3.1 Basic Wireless Settings............................................................26
4.3.2 Wireless Security/Encryption Settings .....................................30
4.3.2.1 Secuirty Mode..................................................................................... 31
4.3.3 Advanced Wireless Settings.....................................................33
4.3.4 Wi-Fi Protected Setup..............................................................34
4.3.5 AP Client ..................................................................................36
4.3.6 Station List ...............................................................................37
4.4 Administration .....................................................................38
4.4.1 System Management ...............................................................38
4.4.2 Firmware Upgrade ...................................................................39
4.4.3 Settings Management ..............................................................40
4.4.4 Restart .....................................................................................41
Chapter 5: Troubleshooting ............................................................42
Appendix: Product Support & Contact ..........................................43

1
Chapter 1: Product
1.1 Introduction
Thank you for purchasing the Wireless-N Wall Plug Ethernet Access Point. Your new device is
an unit that extends your wireless coverage.
The Wireless-N Wall Plug Ethernet Access Point can be used to bridge Ethernet devices such
as modems, routers, PCs, set-top-boxes, and game consoles, allowing users to share network
access via existing in-home power cabling.
What’s unique is that the device has an extra built-in 802.11n Access Point, enabling users to
enjoy mobility, high-speed wireless connection and better coverage with no more dead zones. Just
plug the adapter into any wall power socket, and you can easily set up a secure wireless network
by pressing the Wi-Fi Protected Setup (WPS) button. Thus, the adapter can extend your wireless
coverage for multimedia applications such as online games, IPTV and audio streaming from room
to room.
• Extended Wireless Coverage
With an integrated 802.11n Wireless Access Point, the adapter can bridge wireless connections
of up to 6 times the speed and 3 times the wireless coverage of an 802.11b / g network device. It
supports a data rates up to 300Mbps and is also compatible with 802.11b / g equipment.
• 802.11g / 802.11n Wireless AP with WPA / WPS Support
With an integrated 802.11g / 802.11n Wireless Access Point, the device The supported features of
Wi-Fi Protected Access (WPA-PSK/ WPA2-PSK) and Wired Equivalent Privacy (WEP) enhance
the security level of data protection and access control via Wireless LAN. The device also supports
the Wi-Fi Protected Setup (WPS) standard, allowing users to establish a secure wireless network
by simply pushing a button.
• Rich Management Interfaces
It supports exible management interfaces with LAN and WLAN. Users can use WEB GUI through
the above interfaces to congure and manage the device.
• Web based GUI
It supports web based GUI for conguration and management. It is user-friendly.
• Firmware Upgradeable
Device can be upgraded to the latest rmware through the WEB based GUI.

1.2 Features
• Provides physical layer data rate of up to 300Mbps over wireless
• Deliver up to 6 times speed and extended 3 times wireless coverage of a 802.11b/g network de-
vice
• WPS (Wi-Fi Protected Setup) for easy setup
• Auto channel select
• Supports Triple Play applications such as IPTV, VoIP and high-speed Internet access
• Supports 10/100 BaseT Ethernet
• Ideal for residential users
2

Chapter 2: Installing the Adapter
2.1 Package Content
• Wireless-N Wall Plug Ethernet Access Point
• Quick Start Guide
• CD (containing user manual and QSG)
• Ethernet (CAT-5 LAN) cable
3

4
2.2 Device Overview
The Description of each labeled part is described in the table below.
WLAN LED Lit green when the wireless function is enabled.
Blinking when data is transmitted or received via WLAN.
Blinking quickly when WPS is proceeded.
Power LED Lit green when the device is power on.
Lit off when power is off.
ETH (Ethernet
Link/Act) LED
Lit green when connected to an Ethernet device.
Blinking when data is transmitted or received via Ethernet port.
WPS Button Push this button to trigger Wi-Fi Protected Setup function.
Reset Button Press this button for more than 2 seconds until WLAN LED blinking and then
release this button to reset device to factory default settings.
Ethernet Port Connect the Ethernet Access Point device with an Ethernet device
(e.g. computer, router, hub/switch, IP pone, IPTV set-top-box, gaming
consoles…), using the RJ-45 Ethernet cable included.
Power Plug / AC
Power Cord
Plug into an AC outlet for power supply.
Clip Socket Install the clip into this socket.
Note: Please DO NOT remove or disassemble the socket clip frequently
as this may cause serious damage on your Ethernet Access Point
device.
Ethernet Port
Power Plug
Reset Button
WLAN LED
Power LED
ETH LED
WPS Button
Clip Socket

5

6
2.3 Hardware Installation
Refer to the following diagrams and instructions to install the clip with the device:
Example 1: EU clip
• Please check the lock instruction on your clip.
• If you got the “Triangle Lock”, refer to right diagram.

Example 2: UK clip
• Please check the lock instruction on your clip.
• If you got the “Circle Lock”, refer to right diagram.
7

8
2.4 Connecting the Access Point
It is easy to connect the device simply by performing the following instructions:
2.4.1 Power Connection
Plug the device into the wall outlet/socket.
2.4.2 LAN & Wireless Connection
Connect the supplied RJ-45 Ethernet cable to the Ethernet port on the device and the other side to
the device’s Ethernet interface.
You can enable wireless function to connect to the Wi-Fi devices through WPS conguration
interface or by pushing the WPS button of your device.
Note: For WPS conguration please refer to Wi-Fi Protected Setup section for more detail
description.

2.4.3 Product Application
9

Chapter 3: Basic Network Installation
The Ethernet Access Point can be congured through your web browser. A web browser is included
as a standard application in the following operating systems: Linux, Mac OS, Windows 98/NT/2000/
XP/Me/Vista/7, etc. The product provides an easy and user-friendly interface for conguration.
Please check your PC network components. The TCP/IP protocol stack and Ethernet network
adapter must be installed. If not, please refer to your Windows-related or other operating system
manuals.
There are ways to connect the device, either through an external repeater hub or connect directly
to your PCs. However, make sure that your PCs have an Ethernet interface installed properly prior
to connecting the device. You ought to congure your PCs to obtain an IP address through a xed
IP address that must be in the same subnet as the device. The default IP address of the device is
192.168.1.253 and the subnet mask is 255.255.255.0 (i.e. any attached PC must be in the same
subnet, and have an IP address in the range of 192.168.1.1 to 192.168.1.252). If you encounter any
problem accessing the Ethernet Access Point web interface it is advisable to uninstall your rewall
program on your PCs, as they can cause problems accessing the IP address of the device. Users
should make their own decisions on what is best to protect their network.
Please follow the following steps to congure your PC network environment.
10

3.1 Network Conguration
3.1.1 Conguring PC in Windows 7
1. Go to Start. Click on Control Panel.
2. Then click on Network and Internet.
3. When the Network and Sharing
Center window pops up, select and
click on Change adapter settings
on the left window panel.
4. Select the Local Area Connection,
and right click the icon to select
Properties.
11

12
5. Select Internet Protocol Version 4
(TCP/IPv4) then click Properties.
6. In the TCP/IPv4 properties window,
click Use the following IP address
and Use the following DNS server
address radio buttons. Then click
OK to exit the setting.
7. Click OK again in the Local Area
Connection Properties window to
apply the new conguration.

3.1.2 Conguring PC in Windows Vista
1. Go to Start. Click on Network.
2. Then click on Network and
Sharing Center at the top bar.
3. When the Network and Sharing
Center window pops up, select
and click on Manage network
connections on the left window
column.
4. Select the Local Area Connection,
and right click the icon to select
Properties.
13

5. Select Internet Protocol Version 4
(TCP/IPv4) then click Properties.
6. In the TCP/IPv4 properties window,
click Use the following IP address
and Use the following DNS server
address radio buttons. Then click
OK to exit the setting.
7. Click OK again in the Local Area
Connection Properties window to
apply the new conguration.
14

3.1.3 Conguring PC in Windows XP
1. Go to Start > Control Panel (in Classic
View). In the Control Panel, double-click
on Network Connections
2. Double-click Local Area Connection.
3. In the Local Area Connection Status
window, click Properties.
4. Select Internet Protocol (TCP/IP) and
click Properties.
5. Click Use the following IP address and
Use the following DNS server address
radio buttons.
6. Click OK to nish the conguration.
15

3.1.4 Conguring PC in Windows 2000
1. Go to Start > Settings > Control Panel.
In the Control Panel, double-click on
Network and Dial-up Connections.
2. Double-click Local Area Connection.
3. In the Local Area Connection Status
window click Properties.
4. Select Internet Protocol (TCP/IP) and
click Properties.
5. Click Use the following IP address and
Use the following DNS server address
radio buttons.
6. Click OK to nish the conguration.
16
Table of contents
Languages:
Popular Wireless Access Point manuals by other brands

Ruckus Wireless
Ruckus Wireless SmartCell Gateway 200 Getting started guide

Lanpro
Lanpro LP-C290N manual

Motorola solutions
Motorola solutions AP-7522 installation guide

Cisco
Cisco MERAKI MR34 installation guide

Asus
Asus WL-330GE - Wireless Access Point user guide

Westermo
Westermo Ibex-RT-280 Series user guide