SAFETY PRECAUTION
SAFETY PRECAUTION
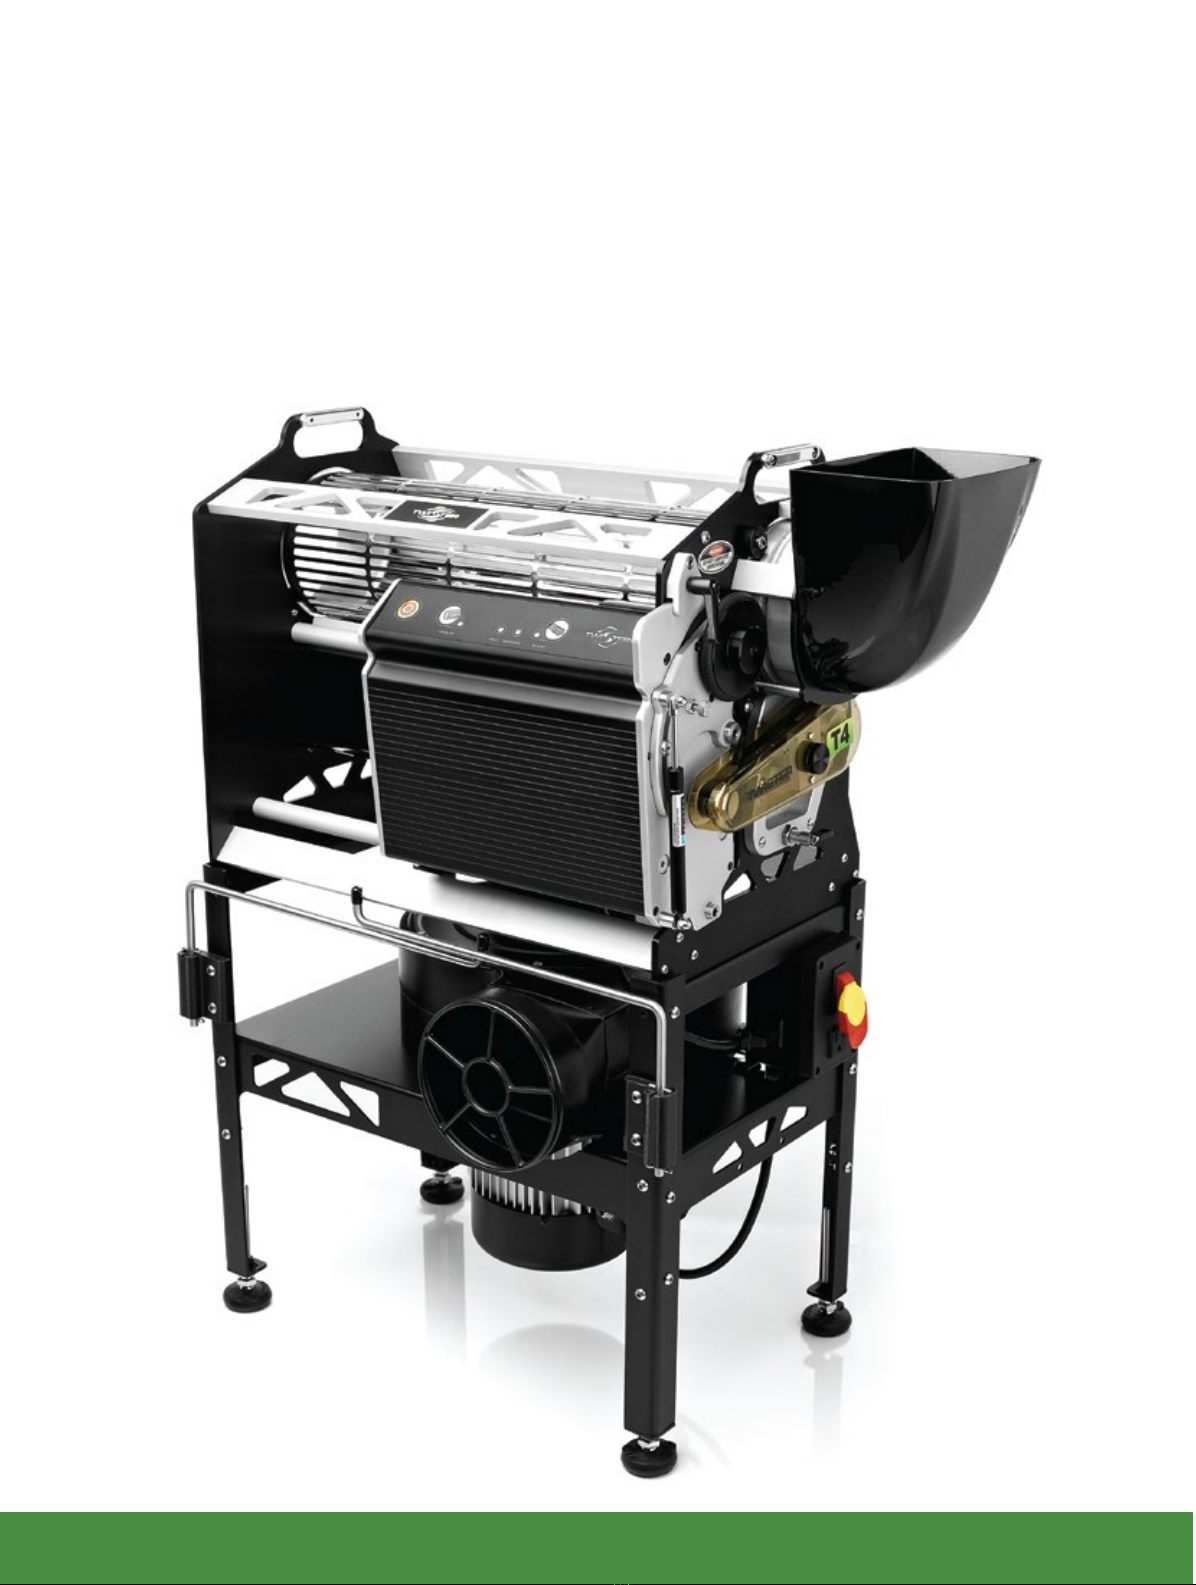
General
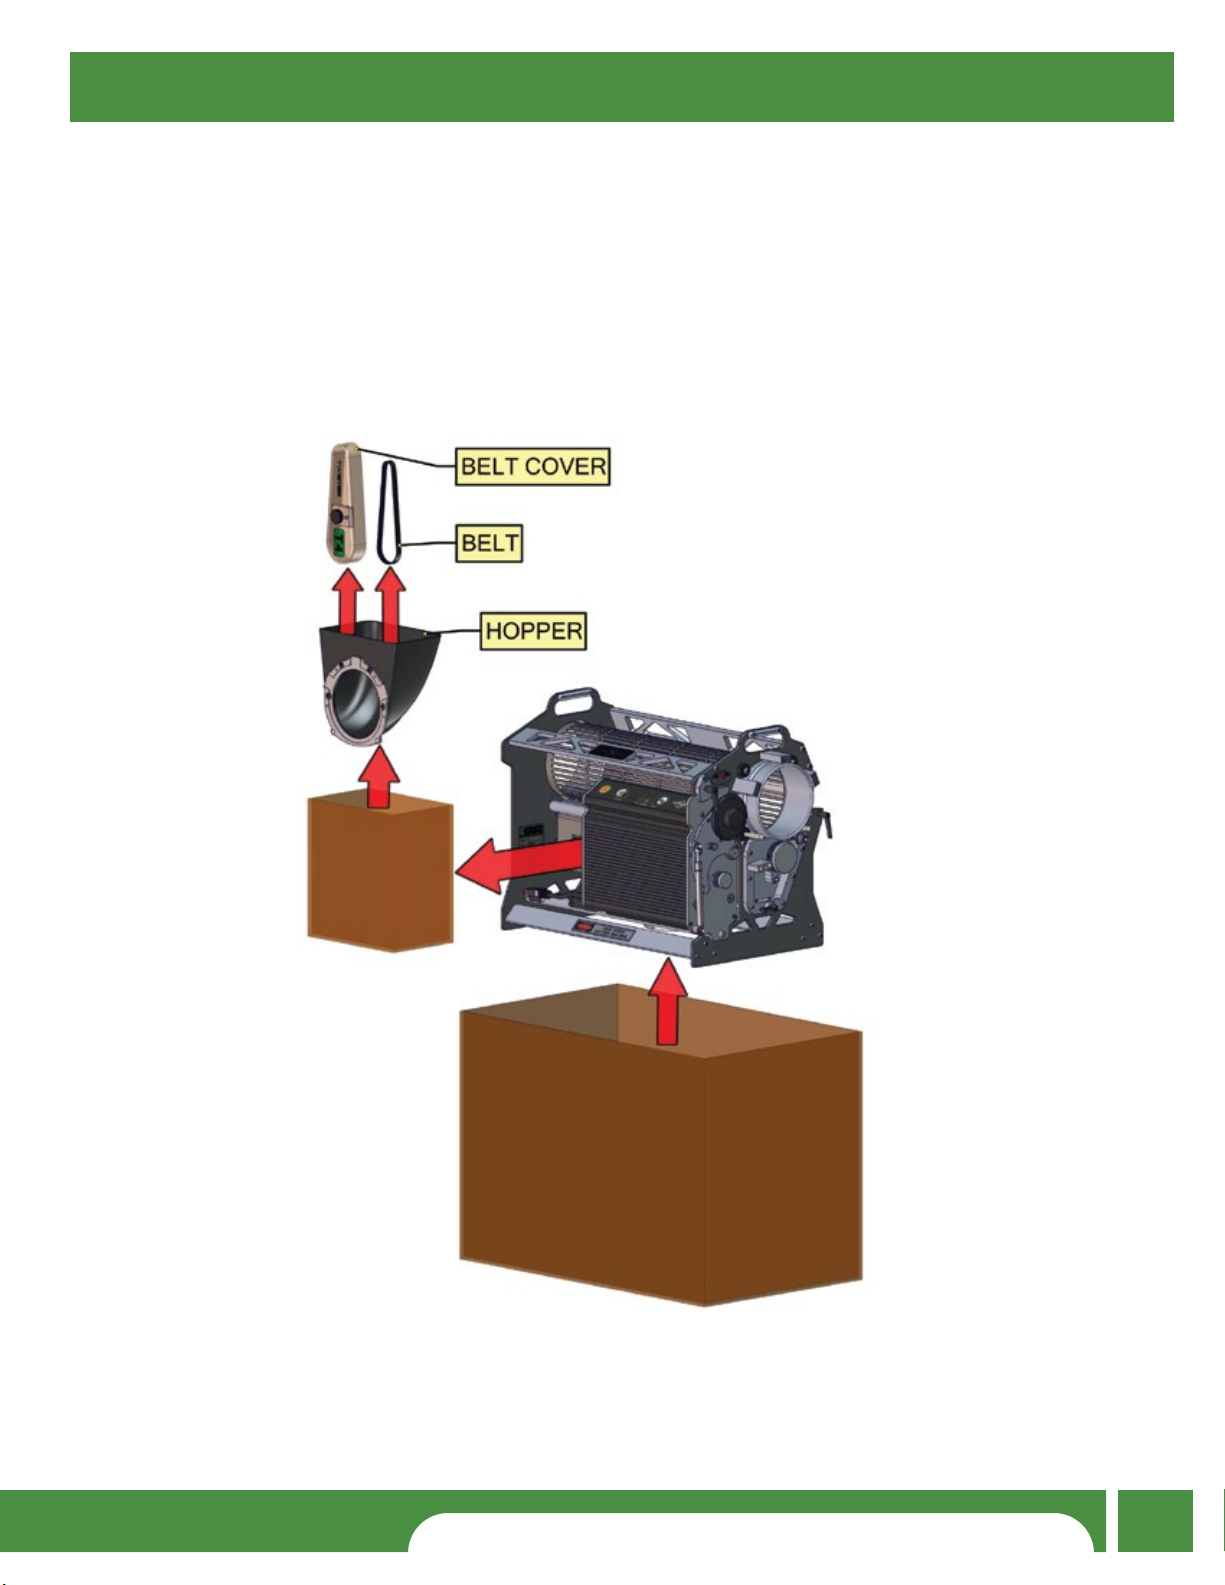
Installation
Connection
Operation
Maintenance
General
Connection
Operation
Operating the machine without reading the instructions that accompany a “Caution”
symbol may result in bodily injury or property damage.
Do not move, install, connect or inspect the machine while power is supplied to the machine.
Replacement parts must be specific to this machine and supplied by the manufacturer only.
Unauthorized substitutions may result in bodily injury or equipment damage.
Do not allow lubricants or mineral oils to collect on the ground around the machine. This could cause
a slipping hazard for the operator and others.
Keep visitors a safe distance from work area. Keep children away.
Do not remove safety labels from the machine. Replace safety labels if they become obscured or removed.
→
→
→
→
→
Refer to the machine labeling to determine correct electrical requirements.
→
→
→
Machine must be used with a properly grounded receptacle.
Never plug in the machine with protective shrouds removed.
Do not put objects into the tumbler that cannot be processed by the machine as this may cause bodily
harm or property damage.
Never let the machine run unattended.
→
→
The T4 must be unplugged before any protective covers can be removed.
Turn off and unplug machine before cleaning.
→
→
All users should retain instructions for future reference to ensure safe use.
Damage requiring service must be referred to qualified service personnel.
If the machine does not operate normally by following operating instructions, adjust only those controls
that are covered in the instructions. Improper adjustment may result in damage and may require extensive
work by qualified service personnel to restore the unit back to its normal operation.
→
→
Do not overload outlets or extension cords as this can result in fire or electric shock.
For safe use of your machine, DO NOT change or modify any part of the machine or accessories.
Do not use an extension cords over 15m (50ft) in length to power the machine – longer cords increase
electrical resistance, which will interfere with the T4’s efficiency.
→
→
→
Keep unit well ventilated to prevent overheating.
→
www.twistertrimmer.comwww.twistertrimmer.com 3