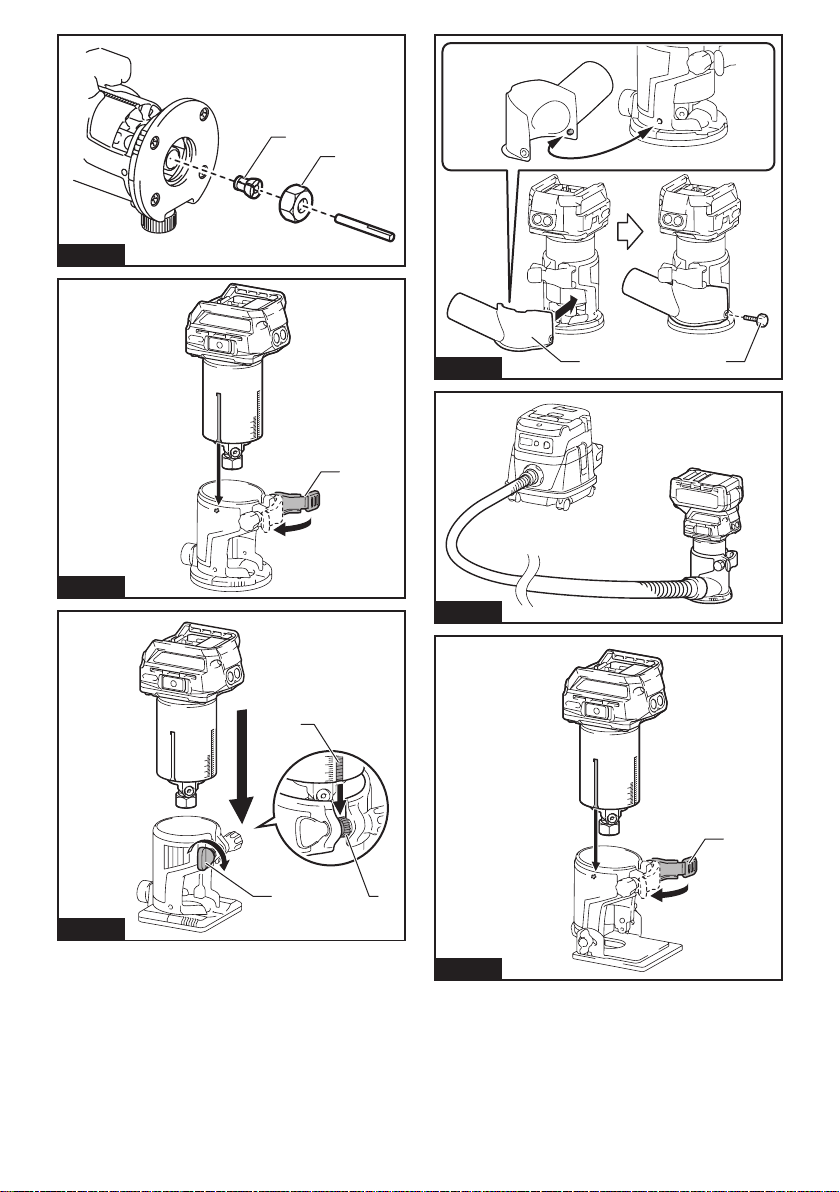
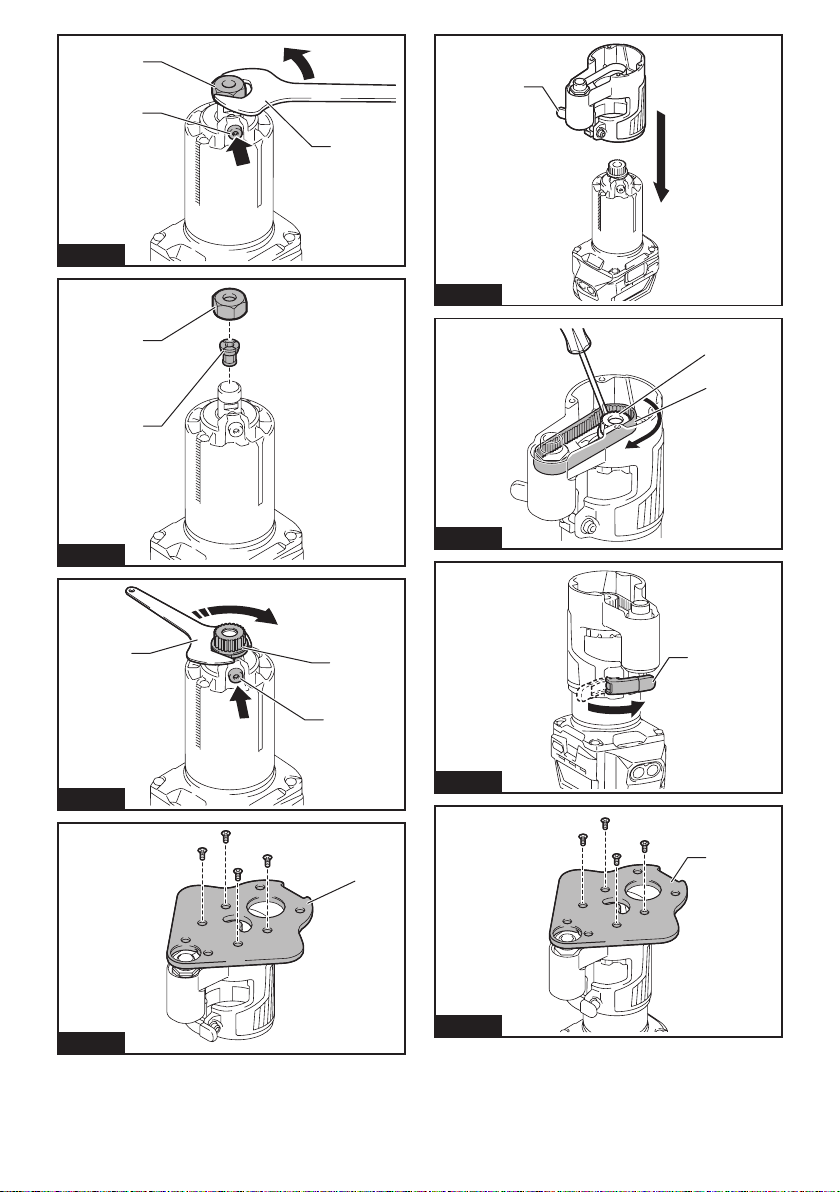
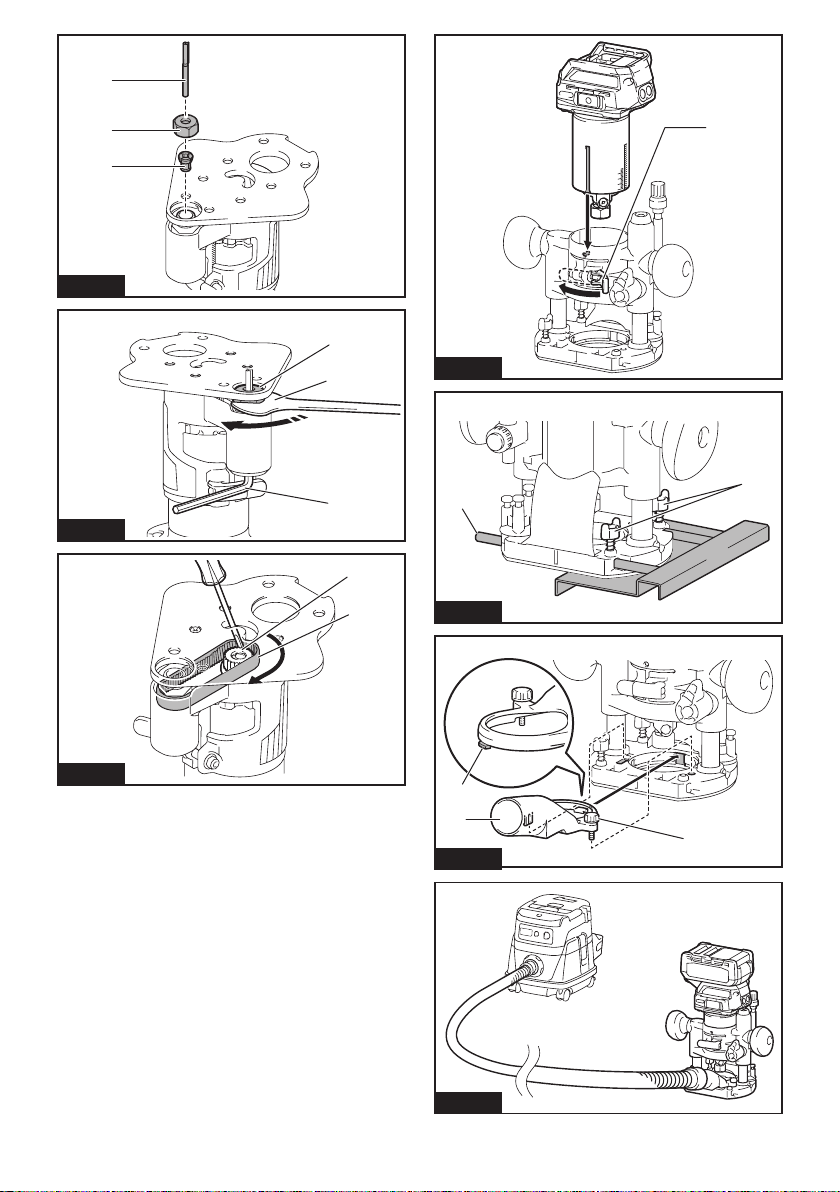
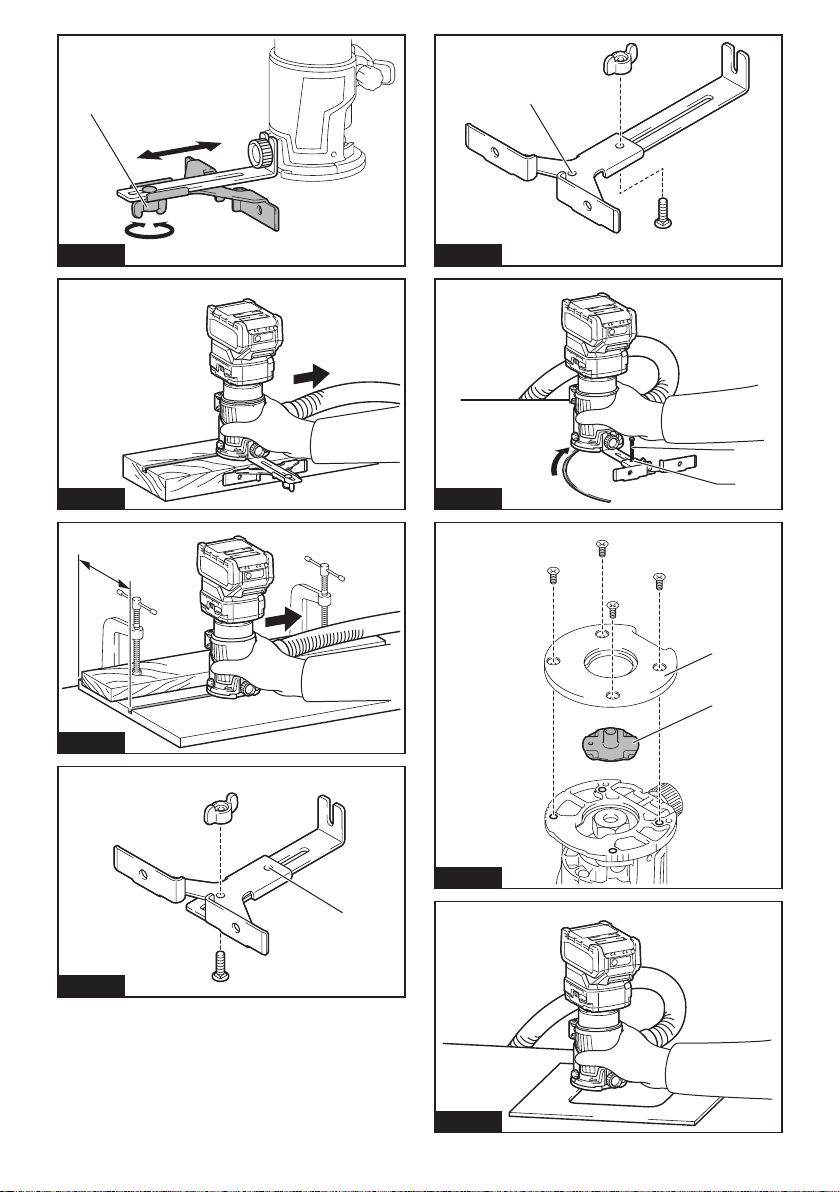
Makita RT001G User manual
Other Makita Trimmer manuals

Makita
Makita DUR365U User manual

Makita
Makita DUH501 User manual

Makita
Makita RBC252 User manual

Makita
Makita DUR187U User manual

Makita
Makita 3701 User manual

Makita
Makita N3701 User manual

Makita
Makita DUR187U User manual

Makita
Makita GRU04 User manual

Makita
Makita 3710 User manual

Makita
Makita GRU02 User manual

Makita
Makita DUH506 User manual

Makita
Makita 3700D User manual

Makita
Makita BUH550 User manual

Makita
Makita UH 4030 User manual

Makita
Makita UN460WD User manual

Makita
Makita EM4250 User manual

Makita
Makita DUR192L User manual

Makita
Makita DUR184L User manual

Makita
Makita UH4570 User manual

Makita
Makita 3708 User manual