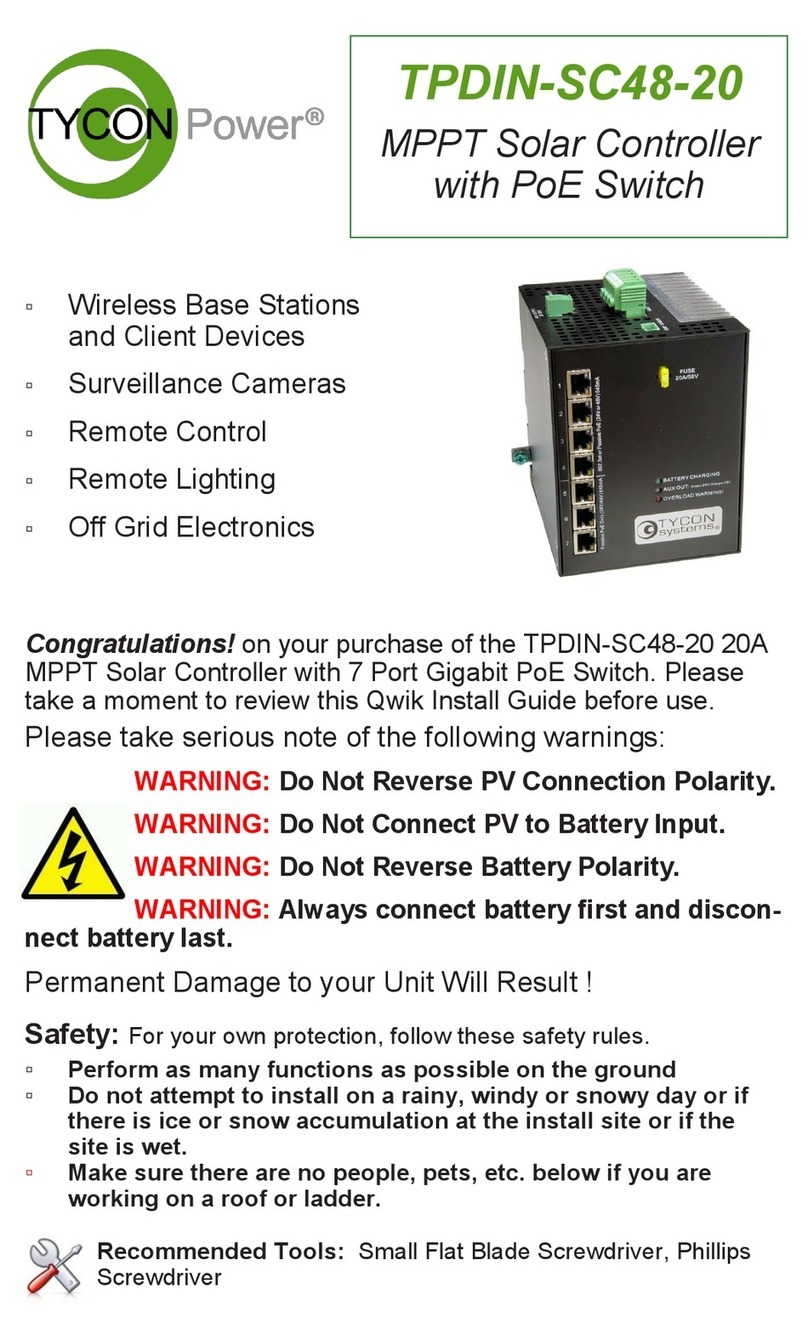
Tycon Power Systems TPDIN-SC48-20 User manual

TPDIN-SC48-20
MPPT Solar Controller
with Passive PoE Switch
▫Wireless Base Stations
and Client Devices
▫Surveillance Cameras
▫Remote Control
▫Remote Lighting
▫Off Grid Electronics
Congratulations! on your purchase of the TPDIN-SC48-20
20A MPPT Solar Controller with 7 Port Gigabit Passive PoE
Switch. Please take a moment to review this Qwik Install Guide
before use.
Operation Modes: Solar Only operation, Solar with DC Back-
up, DC Only operation.
Key Features: Industrial Strength, Manageable, 24VDC or
48VDC Output, 7 Gigabit Passive PoE ports, 48V 20A MPPT So-
lar, Automated Alerts, Removable Connections
Safety: For your own protection, follow these safety rules.
▫Perform as many functions as possible on the ground
▫Do not attempt to install on a rainy, windy or snowy day or if
there is ice or snow accumulation at the install site or if the
site is wet.
▫Make sure there are no people, pets, etc. below if you are
working on a roof or ladder.
Recommended Tools: Small Flat Blade Screwdriver, Phil-
lips Screwdriver
Please help preserve the environment and return
any used batteries to an authorized depot

2
Qwik Install
STEP 1: Remove Large 4 Pin and Small 2 Pin Green connectors from
the top of the unit.
STEP 2: Attach the TPDIN-SC48-20 to a DIN Rail mount. To mount to
a flat plate remove the DIN Rail bracket from the back by removing 5
screws and mount to a plate using the two wall mount tabs provided.
There is a green ground screw for connecting one of the tabs to earth
or chassis ground. Important! Please make sure that the air flow to the
bottom and top of unit is not blocked or unit may overheat and shut
down.
Note: The Unit is removed from the DIN rail by pushing up on the
unit and at the same time moving the bottom of the unit forward.
STEP 3: Attach 48VDC battery wires (BAT+ and BAT-) and solar panel
wires (PV+ and PV--) to the Large Green connector. Make sure the 4
connections are tight in the connectors and not clamping on wire insula-
tion. IMPORTANT! Make sure the polarity is correct. Damage to the unit
can occur if polarity is reversed.
STEP 4: Plug Large Green connector into the top of the controller. The
Charging LED on the front panel should light for about 60 sec.
Note: All LED’s except the Charging LED will initially be off until the
settings are changed in the web user interface.
STEP 5: If you will be using the Aux Output, connect your load wires to
the Small Green 2 Pin Connector. Be sure the wire connections are
tight. Be sure the voltage polarity is correct. Plug the Aux connector into
the Aux Output socket. If you won’t be using the Aux Output, just plug
the empty connector back into the socket.
STEP 6: Connect Thermocouple cable to the 2 pin green connector.
The Thermocouple does not have a polarity. Connect the Thermocou-
ple cable assembly ring lug to one of the battery terminals. It can be
connected to the + or - terminal. Plug the thermocouple 2 pin green
connector to the socket labelled “Temp Sensor”.
STEP 7: There is an amber LED which will light on any PoE port
that is powered. If the amber LED is off it means the power is off to that
port. By default all ports are off. Connect your network or PC to one of
the unpowered ports.
STEP 8: The default IP address is 192.168.1.6 The unit may also
get an IP address from a DHCP server. We have a free discovery tool
available at http://tyconsystems.com/index.php/support/tpdin-firmware
This tool will find the controller no matter what IP address it is on, even
across subnets. Your computer IP address will need to be on the same
subnet as the controller in order to access the web browser control pan-

3
el of the controller.
Note: System and Control pages are broken into small sections. If
you make changes to the small section you need to save each section
individually.
STEP 9: Open your browser and type the IP address of the con-
troller into the browser address field. Navigate to the System Page. This
where you can setup the port output voltages (24V or 48V), set port
labels, set port startup states, set Aux Port control, set time, set log file
options and set IP address options.
Load Power: Enable or disable all power to the loads. This disa-
bles all output power and overrides all other port power settings.
Save Port Names: Customize names for each port like CAM1, WIFI,
PUMP, FAN, BHAUL, etc. There is a 6 character limit.
Set Port Startup States: Set each ports default startup state (OFF,
24Vor 48V). This is the state the port will revert to after a reset. There is
an LED on the front panel which shows the voltage of the Aux port.
Green = 24V, Amber = 48V. RJ45 Connectors have an amber LED to
indicate power. Brighter = 48V, Dimmer = 24V.
AUX Port Control: The AUX Port can be turned on or off using

4
manual control or auto control (time, voltage or temperature).
Time Settings: Enable and set Network Time Protocol (NTP) and
set time zone (Mountain time is GMT –7). Sync internal clock with PC.
Misc Settings: Set log file write interval. Data Logger holds up
to15,000 records. Set cycle delay: When cycle is clicked on a port on
the monitor page, the port will cycle to the opposite state and wait till
the cycle time expires, then revert to it’s original state. Power Off and
Power On Volts: When the battery voltage falls below the Power Off
voltage, the load is turned off and when it rises above the Power On
voltage, the load is turned back on. We recommend using the default
values. Set temperature default as deg F or C.
Network Settings: Set IP Address to DHCP or Static. Set Host
Name: The “host name” will show in the discovery tool and the browser
tab. This can help you identify certain units if more than one unit is on
the network.
Set Username and Password to secure the user interface from unau-
thorized access
STEP 10: Navigate to the Control Page. This is where you can set-
up ping control and email alerts.

5
Ping Control: There are two ping controls which can be setup to
ping any of the ports. If the ping fails then that port will be power cycled.
Email Alerts: The controller supports emailing alerts via any smtp
mail server. Alerts can be set for under voltage, over current, ping fail-
ures or periodic status emails.
Balance Charge: A balance charge is used to balance the cells in a
battery array. Normally this isn’t required and is not preferred because it
can reduce the life of batteries if used too often. The system allows you
to setup an automatic balance charge every 90days or 60days. We rec-
ommend 90 days.
STEP 11: The Monitor Page is the main status and port control
page. Port voltage can be changed and ports can be turned On or Off
manually or they can be cycled.
Battery Voltage: Shows the present battery voltage
Battery Current: Shows current flowing into or out of the battery. A
positive current means the battery is charging. A negative current
means the battery is discharging.
Input Voltage: Shows the solar panel or DC input voltage.
Input Current: Shows the solar panel or DC input current.
Load Watts: Shows the total power being supplied to all loads.
Battery Temperature: Shows the temperature of the battery.
FAULT means the temp probe is disconnected.
Battery Status: Shows charge state when charging (Bulk, Absorb,
Float) and shows capacity % when discharging.
STEP 12: Double check the port voltage setting for each port and

6
then connect all your devices to the controller switch ports.
IMPORTANT! Please be sure to make sure you are using the cor-
rect PoE voltage. Do not turn on the port power to the specific port until
you double check that the device that is plugged in is compatible with
the passive PoE voltage selected. Passive PoE voltage is supplied on
Ethernet pins 4,5(V+) and 7,8(V-).
SPECIFICATIONS Subject to change without notice
TPDIN-SC48-20
Controller Type MPPT
Solar Input Voltage 62VDC to 85VDC
Solar Input Current 20A Maximum
Battery Voltage 48VDC
Fuse Type
58V Fast Blo Auto Blade
Type (Littlefuse
142.6185.5206)
Low Voltage Disconnect 45.8V to 47.8V
Low Voltage Disconnect recovery 48.1V to 49.2V
Battery Type GEL or AGM
External DC Input 62V to 75VDC, 3A
External DC Input Connector 4p mini DIN
PoE Switch Qty 7 10/100/1000Mb
PoE Output Power (Numbers shown are
for 48V PoE. Divide by 2 for 24V PoE)
Port 1-3 35W Passive PoE+
Port 4-7 18W Passive PoE
Port Surge Protection 15KV
Auxiliary Output 3A Max
Measurement Accuracy (V / I / T) +/-0.1V, +/- 0.1A, +/- 1Deg
Power Consumption 3W typ
Data Logger FIFO, 15,000 records
Wire Size 8AWG Solar/Batt
12AWG Aux Output
Operating Temperature -40C to +65C
-40F to +149F
Operating Humidity 0% to 90%
Warranty 2 Years

7
TECH CORNER
Additional Information you may find useful
RESET TO FACTORY DEFAULTS: There is a button on the top of
the controller labelled FACTORY DEFAULT. Pressing and holding this
button for over 5 seconds will reset to factory defaults.
RESET the CONTROLLER: There is a button on the top of the
controller labelled RESET. Pressing this button immediately resets
the controller. This is the same as power cycling the controller.
FRONT PANEL LED’s:
Charging—Green
Aux Output—24V Green / 48V Yellow
Ext Input—Green (powered from 4 pin mini DIN)
Overload—Red (The load is drawing too much power)
DC INPUT: The unit can be powered via the solar input or a sec-
ondary DC Input. By using the DC input you can create a hybrid pow-
er system which uses the sun when available or a DC source like a
Grid connection or generator when the sun isn’t available. The power
on the solar input always takes priority so the DC input won’t be used
unless there is no sun.
UPS (non solar) Operation: The unit can also be used as a high
powered UPS or battery backup system by providing 65VDC 18A into
the PV +and - inputs. Tycon offers a AC to DC power supply to ac-
complish this.
SNMP: The controller can be accessed via HTTP or SNMP. SNMP
enables remote management via an SNMP control server. MIB file
can be found at http://tyconsystems.com/index.php/support/tpdin-
firmware
Graphs: The graphs show the data in the LOG file. If there is no
data in the log file there will be no graph display. Turn on logging on
the System page by setting a Log Interval. Graphs can be captured
to a graphics file using any screen capture program including the
Snipping Tool supplied with Windows.
LOG: The log displays all the important events which happen in the
device in addition to the data logging. The log file will show when the
system went through a reset or power cycle. It will also show when a
port was turned on or off. Please note that after a reset or power cy-
cle the log file may show a random date and time until it can recap-
ture the correct time.

8
To export the log file to Excel, Copy and Paste the log file records to
a text editor like Windows Notepad. Save the text file. Open excel
and then open the text file in Excel. Choose space delimited when
opening the file. This will import to excel with all the data columns
intact.
Limited Warranty
The TPDIN-SC48-20 Solar Controller with PoE Switch is supplied with
a limited 24 month warranty which covers material and workmanship
defects. This warranty does not cover the following:
Parts requiring replacement due to improper installation, misuse,
poor site conditions, faulty power, etc.
Lightning or weather damage.
Physical damage to the external & internal parts.
Products that have been opened, altered, or defaced.
Water damage.
Usage other than in accordance with instructions and the normal
intended use.
Tycon Systems Inc.
14641 S 800 W Suite A
Bluffdale, UT 84065
support@tyconsystems.com
PH: 801-432-0003
Table of contents
Other Tycon Power Systems Controllers manuals