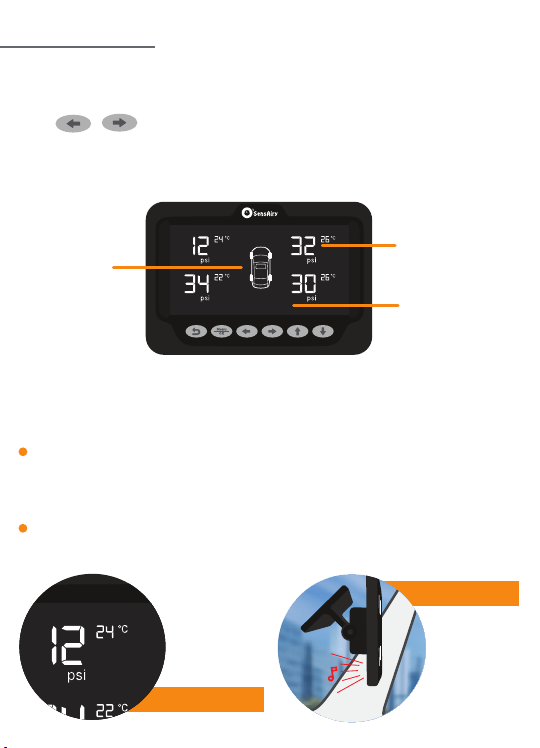
To customize safe zone alerts, brightness
control etc., please continue reading the
following sections.
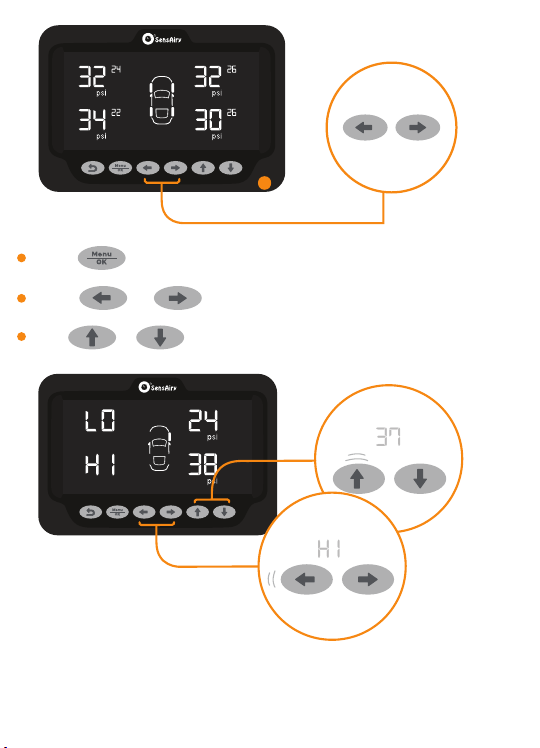
Setting Safe Zone
You can set pressure and temperature safe zone as per your needs by setting
lower and higher threshold values by following below instructions. When
pressure or temperature of a tyre goes beyond this safe zone, HUD will alert you
with audio alarm and visual notification.
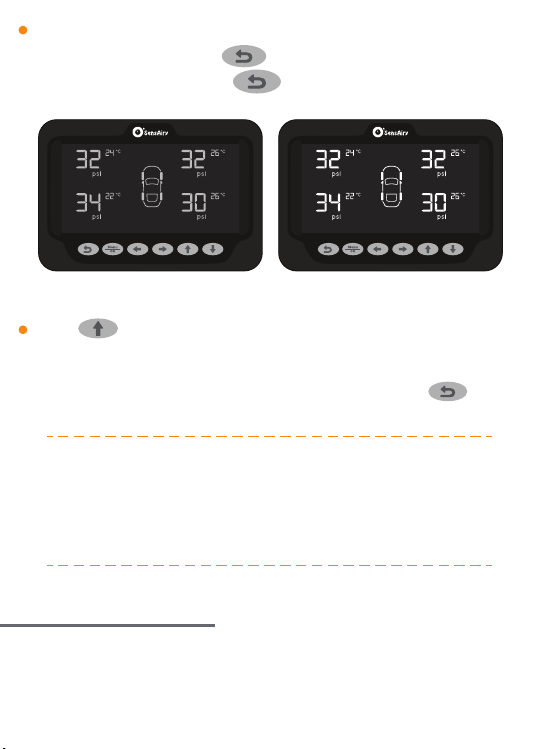
Minimum Brightness Set Brightness
Press button to see last updated time of each sensor. Last updated
time will be displayed where temperature is displayed and it will
be displayed for 90 seconds. Use this feature for troubleshooting purpose
to make sure sensors are communicating with HUD. Press button
anytime to display temperature again.
During dark time, if the display is too bright, you can instantly reduce
the brightness by pressing button. To come back to currently
saved brightness value, press button again.
6