U-FLY W606-3 User manual


3
Blade Replace method
Matters:
1.Take out to replace the tail blade,
according to the figure change
corresponding to the tail blade.
If change error, will not be able to
control.
2.Tail blade A turn counterclockwise
direction,Tail blade B turn clockwise
direction.
R/C BATTERY INSTRUCTION
Notes:
Recommended to install or replace the battery under the parental guidance.
Avoid replace the battery only when the products weakened.
Keep the instruction for future reference.
Use this product in strict accordance with the instructions.
In a static environment,the product may cause malfunction.
Recommended to use new batteries to play the best features.
1.Non-rechargeable battery can not be charged.
2.Rechargeable battery can only be charged under the supervision of adults.
3.Rechargeable battery shall be taken out from the tool before charging. (only applicable for
remote controller)
4.Batteries with different types or new and used batteries can not be used together.
5.Only same or suggested batteries can be used.
6.Install battery with correct polarity.
7.Take exhausted battery out of the tool.
8.Avoid short circuit at terminals of battery.
9.Before charging, check if the charger is damaged; and if it is damaged, please use it after
repair all damages.
10.Do not contact the rotating propeller directly with hand, or it may cause injury.
11.When playing flying tool, please keep your hair and loose clothes away from the propeller.
12.Please check the wire, plug, shell and other parts of charger periodically, and if there is any
damage, stop using it till it is repaired.
Warning:
Bladev A
Blade B
Blade A
Install the battery on
given instruction and
tight the cover again.
Use the screwdriver
according to the given
direction of the arrow
to open.
Blade B


5
110V/220V
BATTERY CHARGING USING INSTRUCTIONS
1. When playing the drone,please connect the drone’s power with two wires( positive and negative pole )
to the battery with two wires(positive and negative pole). (figure 1).
2. When charging,please unplug the two wires (positive and negative pole) plug at first,then connect the
drone’s three wires plug to the charger. (figure 2).Remarks:Red LED is lighting up while charging.After
charging completely.Then the LED extinguish to green.The charging time is about 180 mins.
Distance of 3M
Distance of 2.5M
Distance of 3M
Distance of 2M
Distance of 3M
Warning on Li-poly battery:
1. Do not put the battery into fire or heat source.
2. Keep the battery away from heat source, and do not use it by the side of heat source.
3. Do not place the battery on the surface of hot matter.
4. Do not soak the battery in water and keep it in a dry and low-temperature environment.
5. Only the charger specified for the product can be used for charging the battery.
6. Do not over-charge the battery.
7. Do not connect the battery with other circuit.
8. Do not fix battery with bolt or any sharp matter.
9. Do not place the battery together with metal parts or jewelry.
10.Do not disassemble the battery.
11.Charge the battery at least once per six months.
12.Turn off the power of product immediately after using.
13.After use the battery,please use PE bags to wrap or use insulation sheet to isolation
battery positive and negative.
Environment for flight
Do not fly in extreme temperature. Do not fly in temperature above 113 degrees Fahrenheit/45 degrees
centigrade,or below 50 degrees Fahrenheit/10 degrees centigrade.Flying in extreme heat and/of cold
will affect performance and may damage the model.
Do not fly in strong wind. Windy conditions will limit,or disturb the flying control.In very windy conditions,
your drone may become lost and/or damaged.
2.Select large,wide-open area for flying,and make sure there is no obstacles,animals or people nearby.
1.Fly on a sunny day,without wind.
1
2
LOM[XK
Battery holder
Battery Socket
Drone
socket
LOM[XK
1. Before charging,the drone shall be stopped for 10-15 minutes to ensure the inbuilt
Li-poly battery is cooling completely.
2. Before continuous flight, the drone shall be stopped for 10-15 minutes to ensure the
inbuilt motor is cooling completely.
Notes:
7.4V 1800 MAH Li-po battery

6
OPERATING METHOD
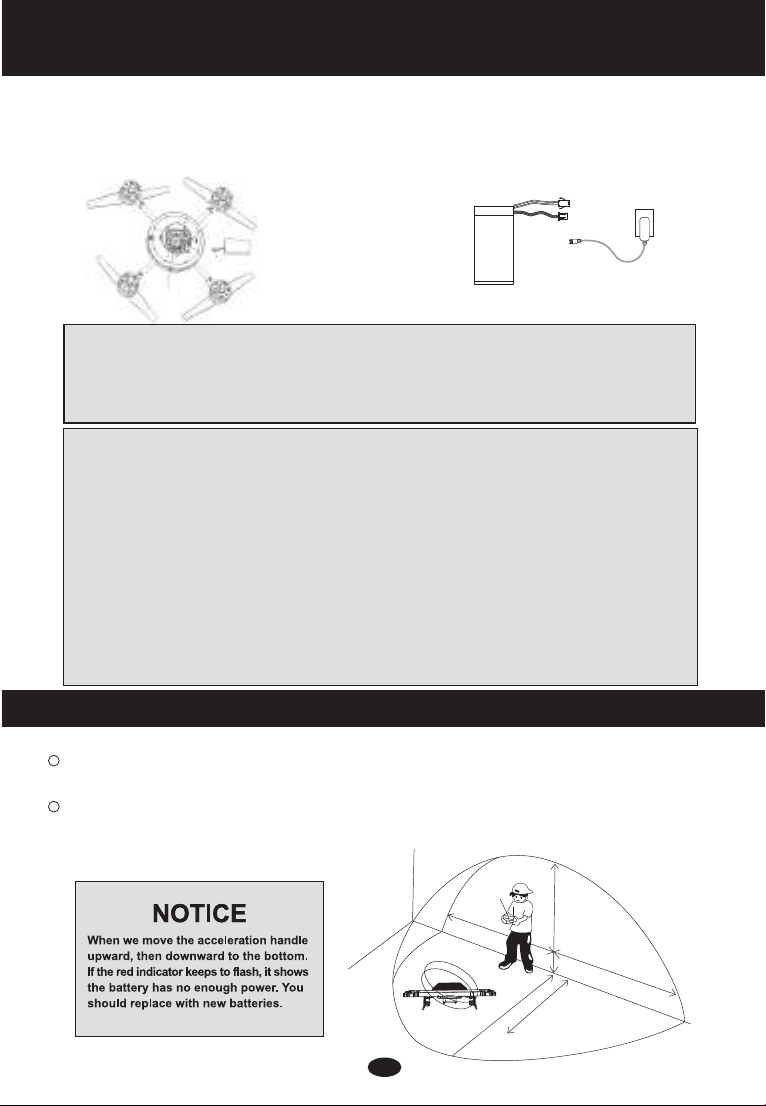
1.Put the power into the drone slot,open the drone power switch and placed on level ground
smoothly,and then open the remote controller switch.The remote controller indicator light
will flash frequency for the state.After the frequency of state succeed,the controller's
indicator light will be bright.The drone head lights will be bright after flashing 2-3 times and the back
lights will flash all the time.At this time,you can control the drone fly.
2.Gyroscope Connection : Insert the power wire into the drone slot.And stably placed at ground.
Turn on the remote controller power switch.The acceleration handle up and down.Then the
acceleration handle and direction pull in the lower right corner.Drone lights will flash before
constant light.At the same time,release handle,illustrated manual successfully(Gyroscope have
been connected before shipping.No need to connect again.)
3.When the drone is flying beyond the remote control distance,and is out of control state(drone lights
flashing),As long as the drone is in the receiving signal,then refuels the throttle,the drone can fly again.
Ascend
Descend
Change
direction
Forward
Backward
When you push upward of the
left handle,the main blades speed
increases,the drone ascends.
When push downward of the left
handle,the main blades speed
slow down,the drone descends.
When push the left handle to left,the drone's
head turn to left.When push the left handle
to right,the drone's head turn to right.
When push upward of the right
handle,the drone's head down
and moving forward.
When push downward of the right
handle,the drone's head up and
moving backward.
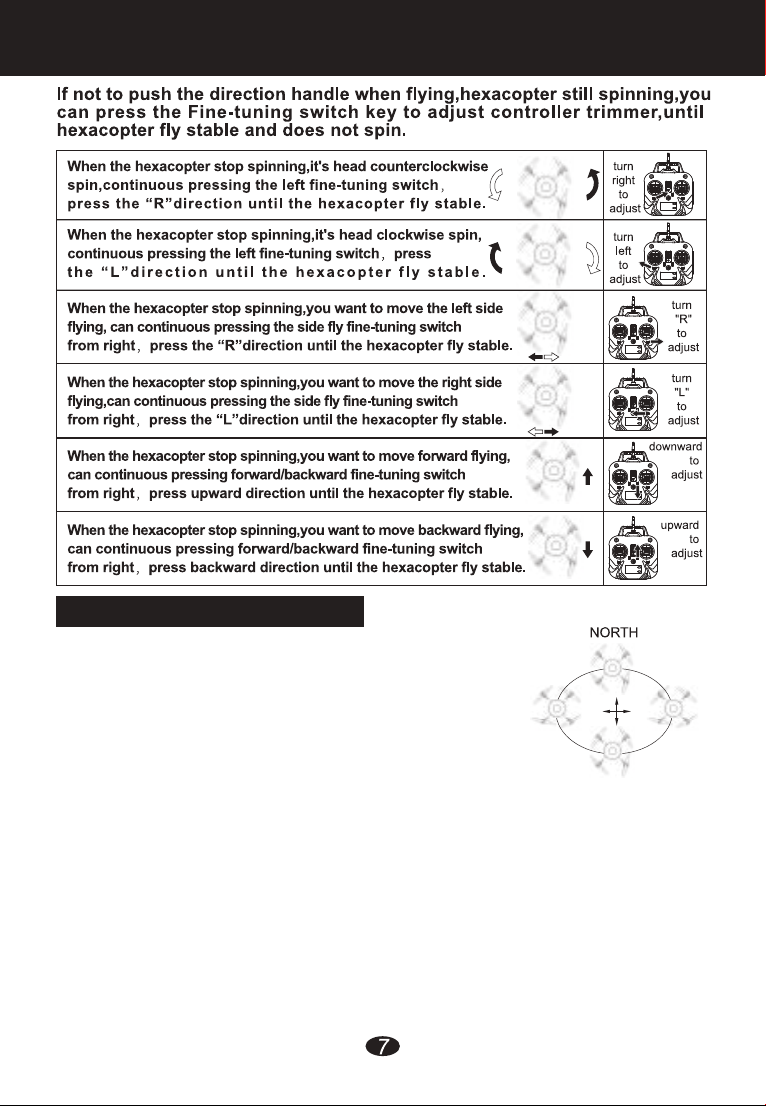
2.4G FREQUENCY FOR INSTRUCTIONS
side to
side fly
Forward
tumbling
key
Backward
tumbling
key
Left
tumbling
key
Right
tumbling
key
When the right operating rod is pushed towards
to left,the left side of drone down and forward.
When the right operating rod is pushed towards
to right,the right side of drone down and forward.
When the drone stop spinning in the air,press the key
button on the left side back of the controller,then control
the forward handle,it will turn forward 360 degrees.
When the drone stop spinning in the air,press the key
button on the left side back of the controller,then control
the backward handle,it will turn backward 360 degrees.
When the drone stop spinning in the air,press the key
button on the left side back of the controller,then control
the left side fly handle,it will turn left side 360 degrees.
When the drone stop spinning in the air,press the key
button on the left side back of the controller,then control
the right side fly handle,it will turn right side 360 degrees.

TRIMMER ADJUST THE DESCRIPTION
How Does Headless Mode Work:
The functioning of headless mode is pretty simple.
The only pre-requisite is that before taking off, you’re
required to position the drone in such a way that its
front is your front. Since yaw (the left stick) anyway
doesn’t have anything to do with orientation (left
is left and right is right all the time, regardless of
where your drone is pointing at), it is how the drone
reacts to rudder (the right stick) that changes. In other words, even when you
turn your drone 90 degrees to the left, it’ll still go forward when you push the
rudder forward (on a non-headless mode drone, this would make the drone go
left).
One key return is the function which help to save your drone to lost or crash
when you fly far away from you, like you are flying the drone 100 meters away
from you, and it's going to out of control, just push down the key on upper right
side, drone will come to you.
One Key Return:

CALIBRATION METHOD
1.When the hexacopter appear rotation flying and blades can not normal rotate.Put
the hexacopter in the horizontal place,calibrate the transmitter,move both joysticks
simultaneously down and to the right to their maximum positions. At this time,
hexacopter light flashing, let go of the joysticks. It means calibration successful.
2.when the hexacopter has been in a direction rotation or move,controller trim is
also can not be transferred to the midpoint. Meanwhile,calibrate the transmitter,
move throttle joystick down and put the direction joystick up to the right to their
maximum positions. At the same time, turn off the switch and then turn on. Hear
the continuous sound beep beep twice,on behalf of the trim calibration successful.
3. When start headless mode, the orientation of hexacopter is confuse. Put the
hexacopter head in the specified direction, then using a connected frequency
controller to calibrate the transmitter. Move both joysticks simultaneously
down and to the left to their maximum positions. At this time, hexacopter light
flashing, Let go of the joysticks. It means headless mode calibration successful.
SPARE PARTS
Part-01 Part-02 Part-03
Upper Body Down Body
Part-04 Part-05 Part-06
Main Blade A /B 2.4G Remote Controller Charger
Part-07 Part-08 Part-09
Landing Gear Main Frame
Part-13
Part-10 Part-11 Part-12
Main Motor Main Motor(Red/Blue Wire) Main Motor(Red/Black Wire)
7.4V 1800 MAH Li-po battery
PCB Board
Motor cover up and down
Part-14
5.8Ghz FPV LCD Screen

一、CAMERA INSTALLATION INSTRUCTION:
2.TF Card Slot
3
4
5
6
7
Camera Camera
TF Card Slot
(Built- in Camera )
Socket
8.TF Card
Reader Slot
Screen
1.Video/Photo 5.Slow Backward / Down
2.TF Card Slot 6.OK
3.ON /OFF 7.Menu
4.Fast Forward / Up 8.TF Card Reader Slot

Table of contents
Popular Drone manuals by other brands

GoPro
GoPro KARMA Get started

IDENTIFIED TECHNOLOGIES
IDENTIFIED TECHNOLOGIES FLIGHT IQ INSPIRE user manual

ehang
ehang GHOST Drone Advanced manual

SAB Heli Division
SAB Heli Division Goblin 700 manual

Juguetronica
Juguetronica RACING DRONES GAME instruction manual

DELTA-SPORT
DELTA-SPORT DL-5650 Instructions for use