U-Line H-9234 User manual

PAGE 1 OF 8 0221 IH-9234
H-9234, H-9246
20 x 20' EVENT TENT
1-800-295 -5510
uline.com
PARTS
TOOL NEEDED
Sledge Hammer
(for H-9234)
Drop Cloth
(recommended)
Pole
6'8" Leg (LG) – Black x 8
9'4" Eave (EV) – White x 8
10'6" Full Rafter (FR) – Green x 4
14'4" Hip Rafter (HR) – Red x 4
Corner x 4
Steel Stake x 8
(for H-9234)
Barrel x 8
(for H-9246)
2" Ratchet
Strap x 8
Canopy Top x 1
8-Way Crown x 1 4-Way Side Tee x 4
Frame Pin x 48Base Plate x 8
Two Person Assembly
Recommended
SAFETY
IMPORTANT! Please read carefully
.
• Keep away from all flame and heat sources.
• Do not cook underneath or near canopy.
• Do not store or use flammable liquids underneath or
near canopy.
• Do not ignite or store fireworks underneath or near
canopy.
• Do not use bleach to clean cover.
• Do not dry clean cover.
• Do not wash cover in washing machine or dry in
dryer. Hand wash with mild soap and water only.
• Do not allow rain water, snow or ice to accumulate
on top of cover.
• Do not hang or suspend anything from the frame,
grommets or truss system of the unit.
• Remove rain water, snow and ice from canopy
cover.
NOTE:
This is a temporary structure and is
not recommended for use as a permanent
structure.

PAGE 2 OF 8 0221 IH-9234
ASSEMBLY
IMPORTANT!
Before setting up tent, contact
Diggers Hotline (8-1-1) or a local authority to
verify that it is safe to set up tent in desired
location. Be aware of weather conditions, and
always evacuate tent during periods of high
winds or lightning.
1. Ensure all parts are present before assembly. Lay
frame parts on ground in approximate locations
they will be when frame is assembled. (See Figure 1)
2. Place frame pins in 8-way crown.
a. Each protrusion on crown has two holes. The
alignment hole is closer to the center; the
placement hole is further down the protrusion.
(See Figure 2)
b. Place a pin in every other alignment hole. This
pin prevents the rafter from moving too far onto
crown. (See Figure 3)
3. Align four hip rafters (HR) with 8-way crown.
(See Figure 4)
a. Slide tubing onto protrusion until it meets pin.
(See Figure 5)
Figure 1
LG LG
EV EV
HRHR
FR
EV EV
HRFR EVHREV
FR
EV EV
FR
5'
7'
20'
Figure 2
Alignment Hole
8-Way Crown
Placement Hole
Figure 4
HR
HR
HR
HR
Alignment
Hole
Figure 3
Pin
Figure 5

PAGE 3 OF 8 0221 IH-9234
ASSEMBLY CONTINUED
b. Align placement hole in the crown with hole in
rafter and insert pin. (See Figure 6)
c. Remove alignment hole pin and place in
adjacent protrusion alignment hole.
(See Figure 7)
4. Repeat steps b-c to connect the four full rafters (FR)
to the 8-way crown. (See Figure 8)
5. Beginning at a corner fitting, attach eave poles (EV)
to corner fittings and 4-way side tee fittings, working
clockwise around the assembly. (See Figures 9-10)
6. Loop end of each ratchet strap to fitting at each leg
location. (See Figure 11)
Figure 7
Figure 6
Placement
Hole
Figure 9
EV
EV
HR
Figure 10
F i g u re 11
Ratchet
Strap
Figure 8
FR
FR
HR
FR
FR
HR
HR
HR

PAGE 4 OF 8 0221 IH-9234
ASSEMBLY CONTINUED
7. Unroll the tent top. (See Figures 12-13)
NOTE:
It is recommended to place tent top on a
drop cloth to protect from dirt and abrasions.
8. Pull tent top over frame, lifting up on fabric to create
air cushion under tent top. (See Figure 14)
9. Center tent top on frame by aligning the seams
behind hip rafters. (See Figure 15)
10. Loosely fasten the alligator straps attached to
canopy top at each side of the corners around EV
tubing to secure tent top. (See Figure 16)
11. Attach base plates to legs securing with frame pin.
(See Figure 17)
12. Lift downwind side of frame and keep all sides level.
Attach leg poles to the lifted side. (See Figure 18)
NOTE:
Always lift the downwind side of tent first.
Figure 13
Figure 12
Drop Cloth
Figure 14
Figure 15
F i g u re 17
Frame
Pin
Leg
Base
Plate
Figure 16
Alligator Strap
Figure 18 Wind

PAGE 5 OF 8 0221 IH-9234
13. Raise other side of tent and attach remaining legs.
(See Figure 19)
14. Fasten the rest of the alligator straps around EV
tubing by tugging on the valence to keep the
material taut and firmly pulling the straps. Slide
excess strap through the metal slide on the alligator
clip. (See Figure 20)
CAUTION! Yanking on straps will cause undue
wear and tear as well as wrinkling of tent top
fabric.
IF USING STAKES (H-9234)
1. Place stakes 5' out from each leg. Drive stakes into
the ground until 6" or less of the stake shows.
(See Figure 21)
2. Attach ratchet straps to the stakes loosely.
(See Figure 22)
a. Attach ratchet buckle with loop strap to stakes
by turning the 6" loop at the end of the ratchet
inside out and pulling strap through the loop.
b. Pull slipknot tight over stake.
c. Take loop strap attached to tent and pull it
through reel bars slot of ratchet.
NOTE: Keep ratchet buckle handle facing up
at all times.
3. Tighten ratchet straps by holding strap and pulling
all slack through ratchet reel. Then, with one hand,
crank ratchet handle with the other.
4. Roll excess ratchet straps
and secure into the ratchet
buckle. (See Figure 23)
ASSEMBLY CONTINUED
Figure 20
Figure 19
Figure 21
abc
Figure 22
Completed Assembly
with Stakes
Figure 23
Pull to tighten.

PAGE 6 OF 8 0221 IH-9234
ASSEMBLY CONTINUED
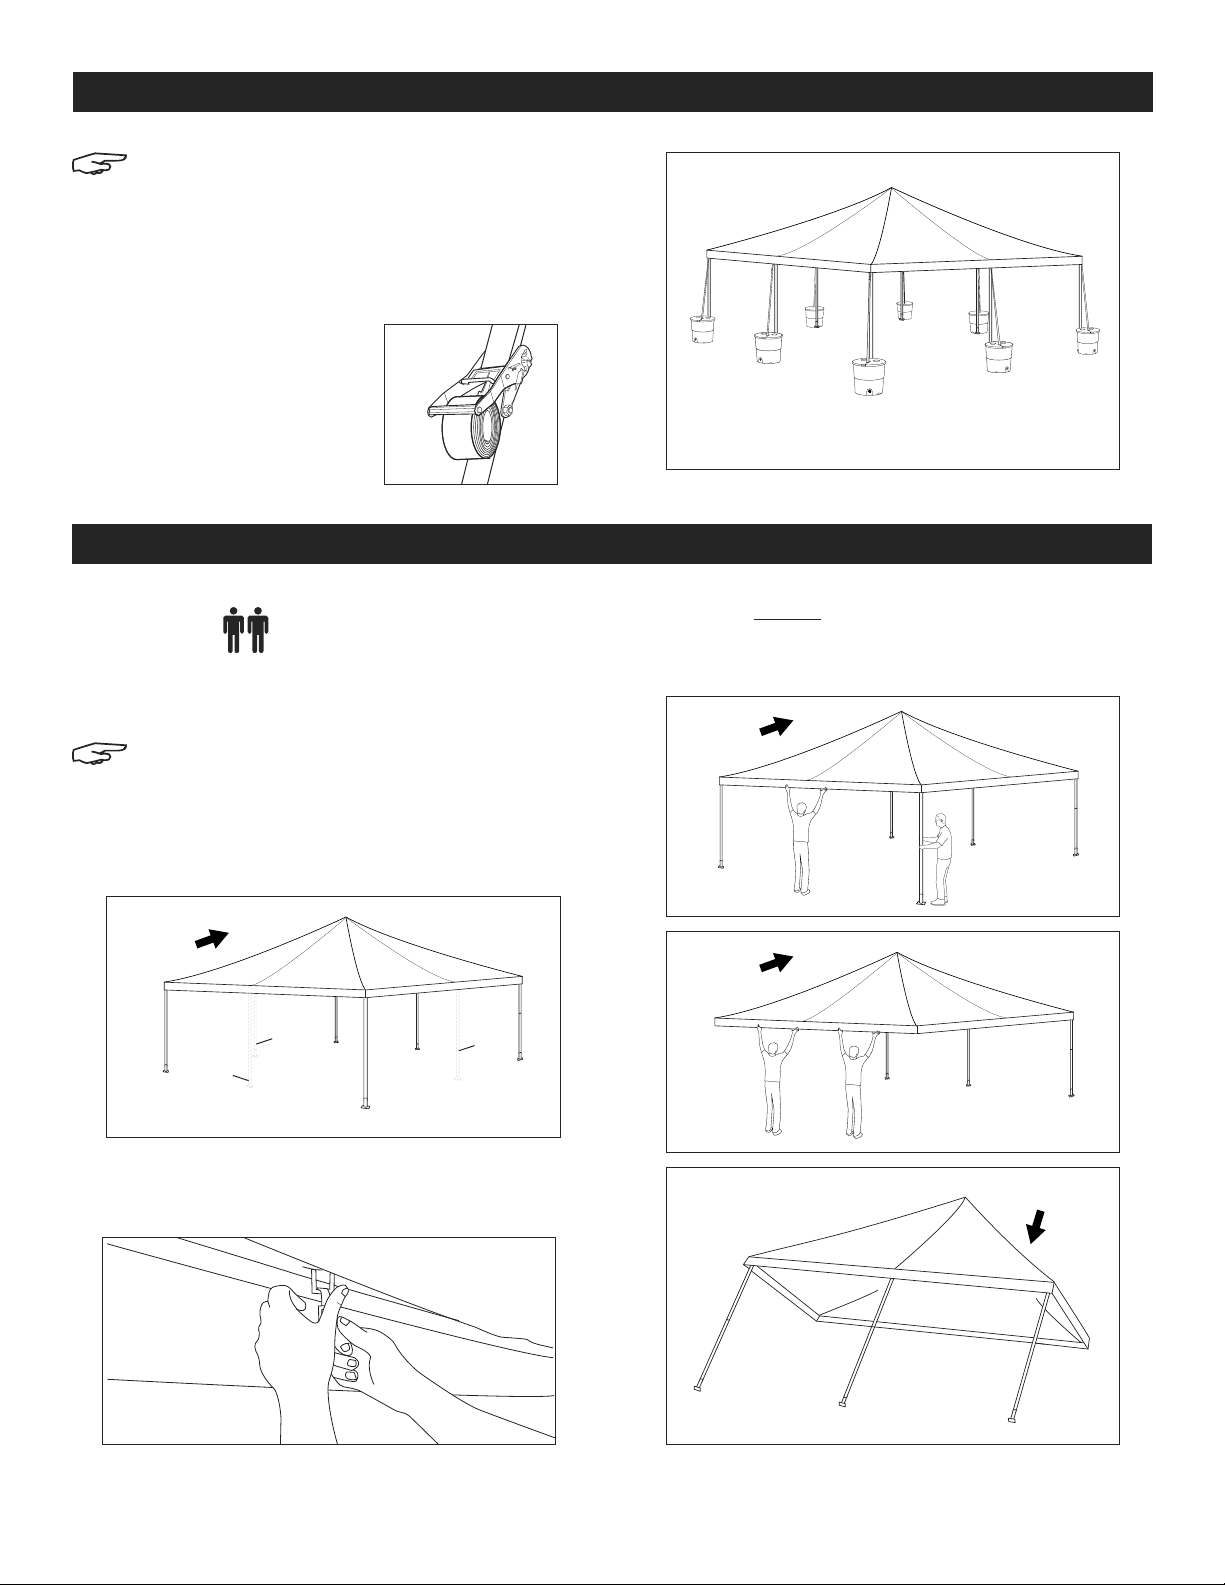
IF USING BARRELS (H-9246)
1. Turn the barrel upside down to connect the
mounting plate. (See Figure 24)
a. Put a large washer (1) over the nut and bolt.
b. Place the plate (2) over the washer.
c. Place another large washer (3) followed by a
smaller washer (4).
d. Place and tighten the nut (5).
e. On the opposite end of the plate, which hangs
over the barrel, place the extra bolt (6) through
the slit, securing it with a washer (7) and a nut (8).
f. Flip the barrel right side up and insert the
T-shaped bar (9) through the slit in the plate.
2. Place a pole over the T-shaped bar that has been
inserted into the plate. It will go over just the "T", not
the bolt that is attached at the back of the plate.
Put bail pin (10) through pole and T-shaped bar to
secure. (See Figure 25)
NOTE: Attach strap at bottom of barrel before
filling barrel with water. (See Figure 26)
3. To connect the strap to eye bolt in bottom of barrel,
pull looped strap through the eye bolt. Take the
other end of strap and pull it all the way through the
loop. Pull long end tight to secure strap to eye bolt.
(See Figure 27)
4. Pull strap through cover slit. (See Figure 28)
5. Connect the opposite end
of the strap to the fitting
at the top of the pole, not
around the tent frame
poles. This forms a strong
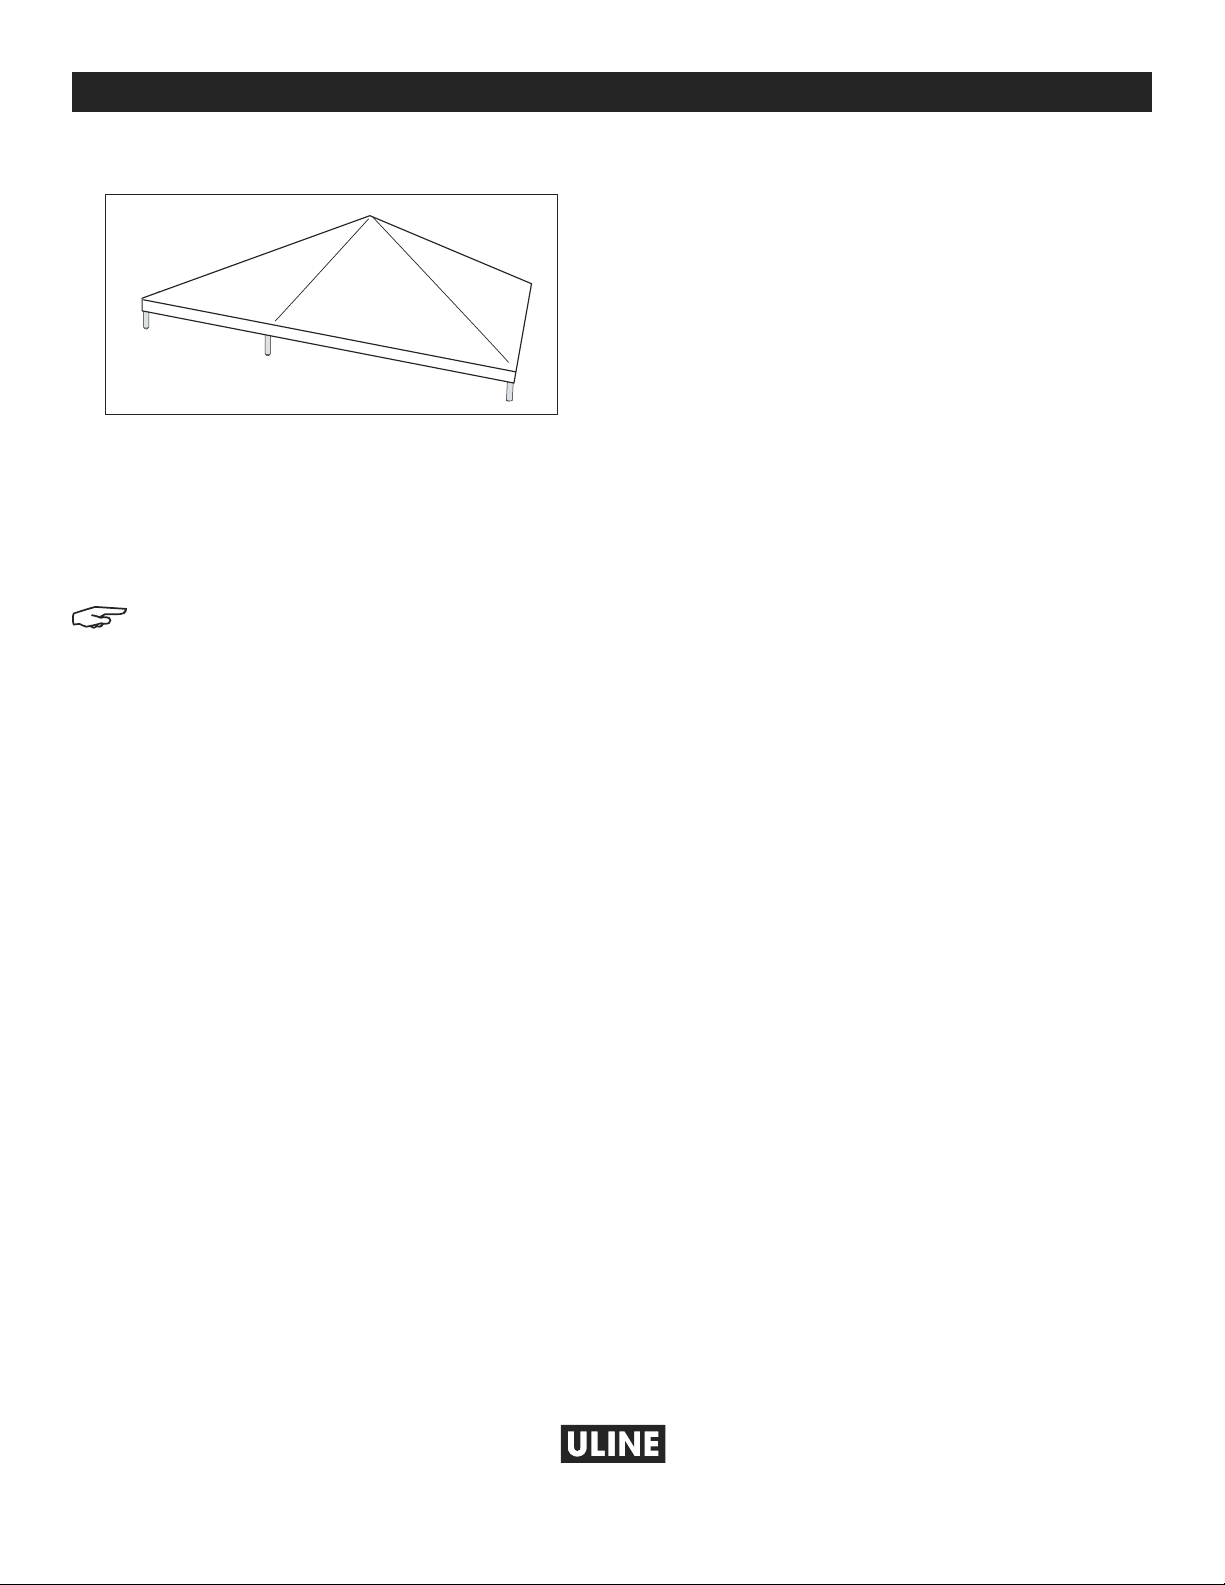
triangle. (See Figure 29)
6. Fill barrel with water.
Figure 25
Figure 28
Figure 26
Loop
Strap
Barrel
Figure 27
Figure 29
Figure 24
6
2
9
10 5
4
3
7
8
1
Bail Pin

PAGE 7 OF 8 0221 IH-9234
ASSEMBLY CONTINUED
NOTE: Keep ratchet buckle handle facing up
at all times.
7. After barrel is full, tighten ratchet straps by first
pulling all slack through ratchet reel, holding strap
with one hand and cranking ratchet handle with the
other.
8. Roll excess ratchet straps
and secure into the ratchet
buckle. (See Figure 30)
Completed Assembly
with Ballasting System
Figure 30
TAKING DOWN TENT
1. Loosen ratchet strap assemblies and remove straps
from stakes or barrels.
NOTE: If using barrels, drain them. Lift every leg
and remove pin from barrel, setting legs on
ground not back on barrel. Move the barrels
away from tent to make room for lowering tent.
2. Remove three adjacent side legs. (See Figure 31)
3. Unfasten all alligator straps except the two at each
corner (one at each side of corner). (See Figure 32)
4. Start with upwind side. Have another person remove
two corner legs from one side and carefully set tent
frame on the ground. (See Figures 33-35)
Figure 32
Figure 33
Figure 34
Figure 35
Figure 31
3
1
2
Wind
Wind
Wind
Two Person Takedown
Recommended
Wind

PAGE 8 OF 8 0221 IH-9234
TAKING DOWN TENT CONTINUED
Figure 36
1
-800-295-551
0
uline.com
5. Remove remaining legs. (See Figure 36)
6. Unfasten remaining straps until all are completely
disconnected.
7. Remove the tent top from the frame.
8. Fold and roll the tent top pieces as tightly as
possible. Use a fan fold or a z-fold for best results.
NOTE:
For longevity of the tent, do not stand or
walk on top of the tent top. It is recommended
to dry and wipe clean the tent top fabric
before folding for storage.
9. Bagging:
a. Place the folded tent top in an upright vertical
position.
b. Pull tent bag over the upright tent top.
c. Turn the tent top and bag over.
10. Disassemble all corner, side tee and center crown
fittings by removing pins and sliding tubing off
fittings. Work from perimeter of frame inward.
11. Remove all stakes. If using ballasting system, empty
water from barrels for storage.
Other manuals for H-9234
1
This manual suits for next models
1
Other U-Line Tent manuals
Popular Tent manuals by other brands

Blumfeldt
Blumfeldt Partyzelt 10029437 quick start guide

Active Grow
Active Grow Walden installation guide

Magellan Outdoors
Magellan Outdoors FSMGCT4003 instruction manual

Ozark Trail
Ozark Trail WF-1414V owner's manual

Skandika
Skandika Copenhagen 6 Setup & maintenance

Bestway
Bestway Pavillo Ramble X2 owner's manual