05 ©2016 Hubsan
哈博森科技 版权所有
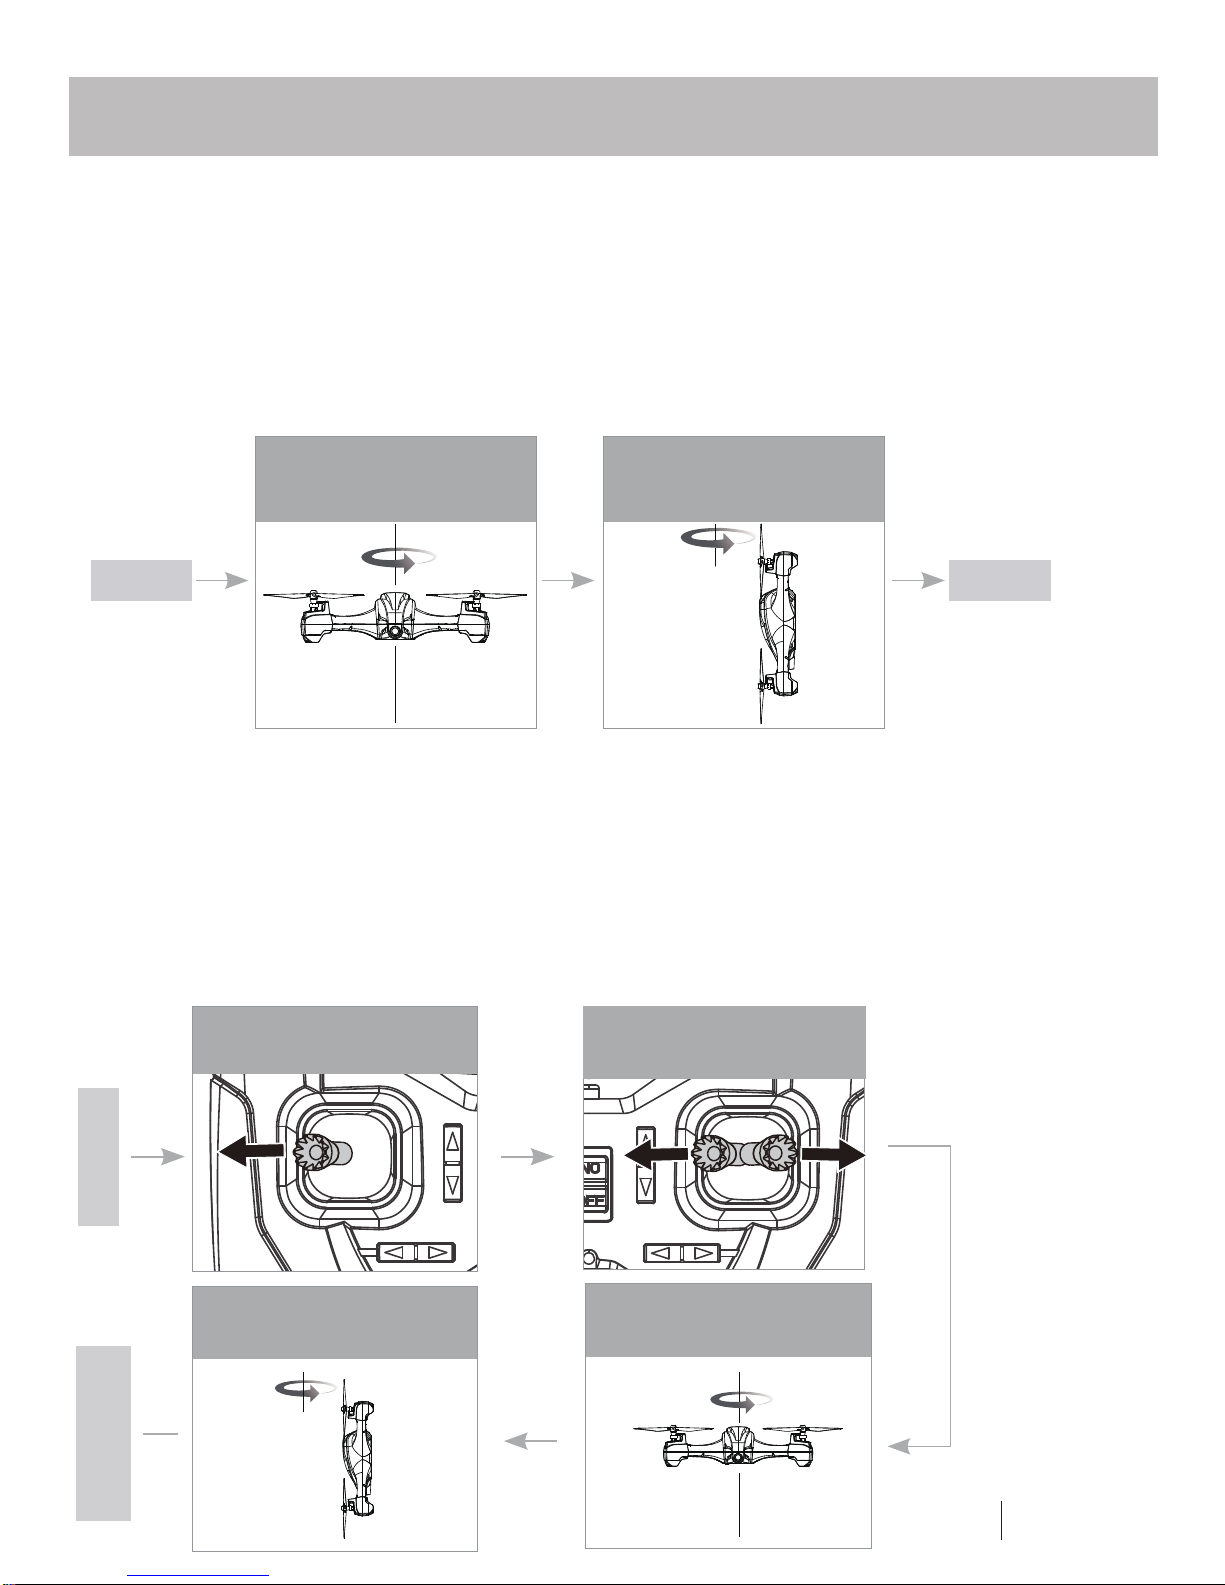
Do not try to fix the quad by yourself, please contact Hubsan directly or
Safety Advisory Notice for Lithium-Polymer (LIPO) Batteries
LiPo batteries are different from conventional batteries in that their chemical contents
are encased in a relatively lightweight foil packaging. This has the advantage of
significantly reducing their weight but it does make them more susceptible to damage
if roughly or inappropriately handled. As with all batteries, there is a risk of fire or
explosion if safety practices are ignored:
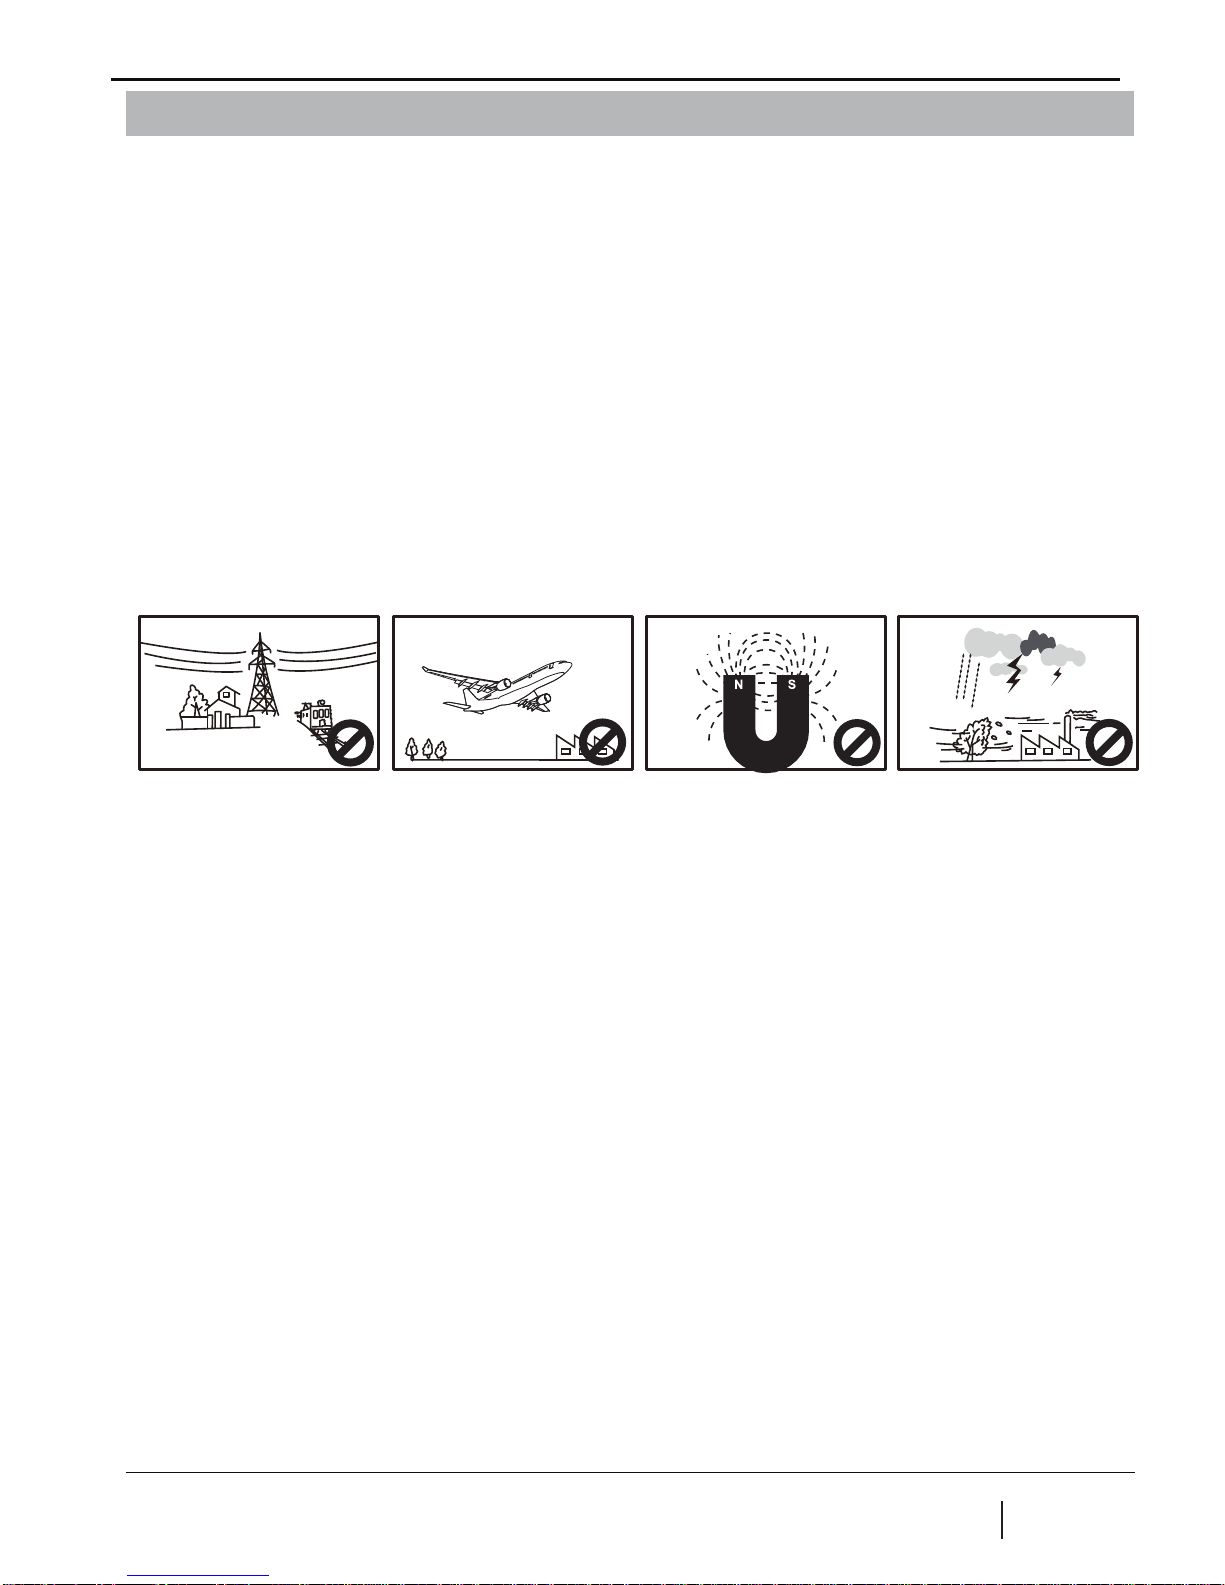
●If you do not plan to fly the quad for a long time, store the battery approximately 50%
charged to maintain battery performance and battery life.
● Please use Hubsan chargers for battery charging.
● Discharging the battery within 5C current , do not over-discharging.
● Do not charge on carpet to avoid fire.
● Batteried need to be recharged if not in use for over 3 months.
1.Charge and store LiPo batteries in a location where a battery fire or explosion
(including smoke hazard) will not endanger life or property.
2.Keep LiPo batteries away from children and animals.
3.Never charge the LiPo battery that has ballooned or swelled.
4.Never charge the LiPo battery that has been punctured or damaged.
5.After a crash, inspect the battery pack for signs of damage. Discard in accordance
with your country’s recycling laws.
6.Never charge the LiPo battery in a moving vehicle.
7.Never overcharge the LiPo battery.
8.Never leave the LiPo battery unattended during recharging
9.Do not charge LiPo batteries near flammable materials or liquids.
10.Ensure that charging leads are connected correctly. Reverse polarity charging can
lead to battery damage or a fire or explosion.
11.Have a suitable fire extinguisher (electrical type) OR a large bucket of dry sand near
the charging area . Do not try to extinguish electrical (LiPo) battery fires with water.
12.Reduce risks from fire/explosion by storing and charging LiPo batteries inside a
suitable container.
13.Protect your LiPo battery from accidental damage during storage and
transportation. (Do not put battery packs in pockets or bags where they can short
circuit or can come into contact with sharp or metallic objects.).
14.If your LiPo battery is subjected to a shock (such as a crash), place it in a metal
container and observe for signs of swelling or heating for at least 30 minutes.
15.Do not attempt to disassemble or modify or repair the LiPo battery.


 user manual")


