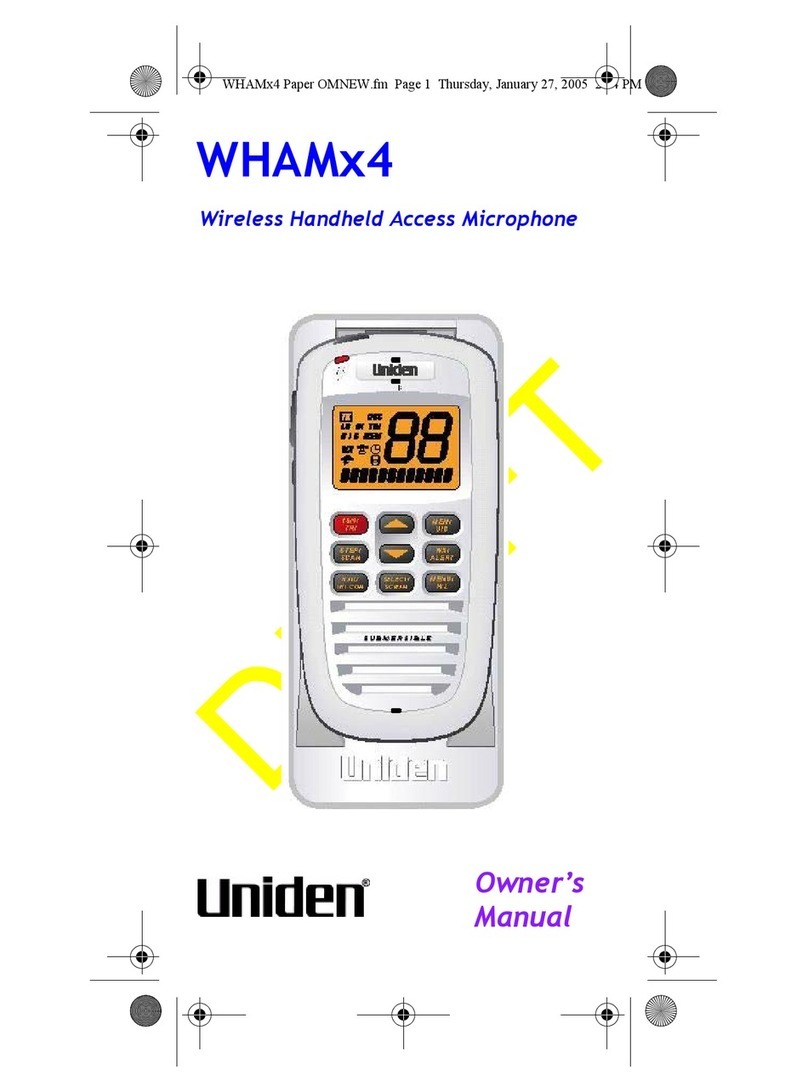
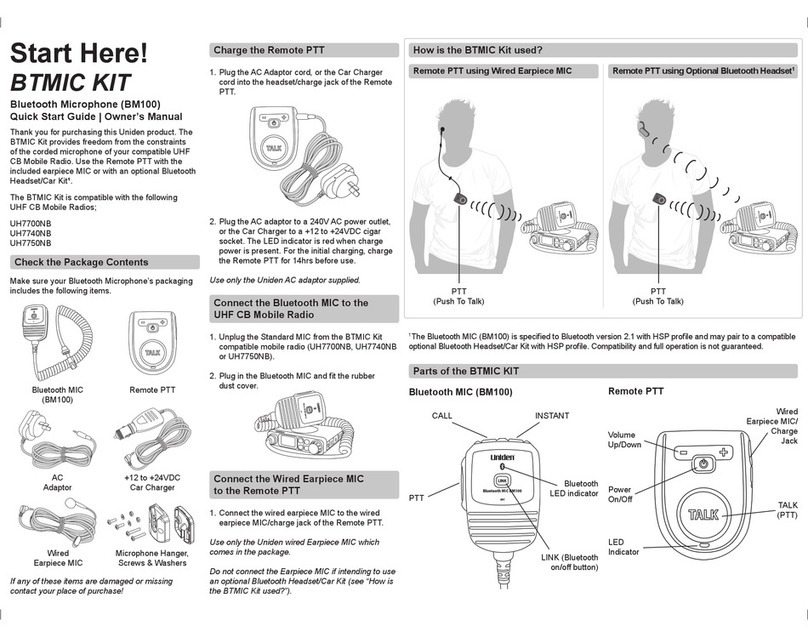
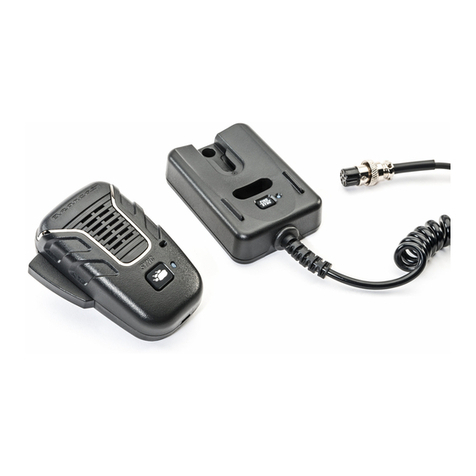
Uniden WHAMx4BK User manual


FCC/Industry Canada Information
2
FCC/Industry Canada Information
This device complies with Part 15 of the FCC Rules.
Operation is subject to the following two conditions: (1)
This device may not cause harmful interference. (2) This
device must accept any interference received, including
interference that may cause undesired operation.
Important: Changes or modifications to this unit not
expressly approved by Uniden could void your authority to
operate this unit.
The term “IC:” before the radio certification number only
signifies that Industry Canada technical specifications
were met.
Operation is subject to the following two conditions: (1) this
device may not cause interference, and (2) this device
must accept any interference, including interference that
may cause undesired operation of the device.
FCC RF Exposure Information
Warning! Read this information before using the radio.
In August 1996 the Federal Communications
Commission (FCC) of the United States with its action
in Report and Order FCC 96-326 adopted an updated
safety standard for human exposure to radio frequency
electromagnetic energy emitted by FCC regulated
transmitters.
Those guidelines are consistent with the safety
standard previously set by both U.S. and international
standards bodies. The design of the radio complies
with the FCC guidelines and these international
standards.
FCC/Industry Canada Information

FCC/Industry Canada Information 3
Warning! It is up to the user to properly operate this
radio transmitter to insure safe operation. Please
adhere to the following:
Use only the supplied or an approved antenna.
Unauthorized antennas, modifications, or attachments
could impair call quality, damage the radio, or result in
violation of FCC regulations.
Do not use the radio with a damaged antenna. If a
damaged antenna comes into contact with the skin, a
minor burn may result. Please contact your local dealer
for a replacement antenna.
Body-Worn Operation
This device was tested for typical body-worn operations
using the supplied belt clip.
To maintain compliance with FCC RF exposure
requirements, body-worn operations are restricted to the
supplied belt clip.
For hand-held operation, the radio should be held 1 inch
from the user’s face. The use of accessories that do not
satisfy these requirements may not comply with FCC RF
exposure requirements and should be avoided.
For more information about RF exposure, please visit the
FCC web site at www.fcc.gov.

Contents
4
Contents
Introduction .............................................................6
Supplied With Your Microphone ............................ 6
Feature Highlights ...................................................7
Understanding Your Microphone ............................7
About This Manual ...............................................7
How The Microphone’s Controls Appear
in This Manual ......................................................8
Setting Up the Microphone .....................................8
Mounting the Microphone ....................................8
Installing the Battery ............................................9
Charging the Batteries .......................................10
A Look at the Microphone ..................................11
A Look at the Display .........................................13
Basic Operation ....................................................14
Turning the Microphone On and Off ..................14
Setting the Base/Microphone ID ........................14
Adjusting the Volume and Squelch ....................14
Checking the Battery Level ................................14
Using Triple Watch .............................................15
Tuning Weather Channels .................................15
Using Weather Alert Mode .................................15
Using Channel Step ...........................................15
Using Channel Scan ..........................................16
Saving Channels to Memory ..............................16
Deleting Channels From Memory ......................16
Changing UIC Mode ..........................................16
Selecting Menu Items ........................................16
Displaying Time/Position/Course Info ............... 16
Using the Scrambler ..........................................17
Using the Hailer .................................................17
Using the Intercom .............................................17
Turning the Backlight On and Off .......................17
Using Keylock ....................................................17
Using Distress ....................................................17
Changing Output Transmit Power ..................... 18
Contents

Contents 5
Resetting the Microphone ..................................18
Using Setup Options .............................................18
Using the Directory ............................................ 18
Using Channel Names ...................................... 19
Adjusting the Local Time ................................... 20
Turning Daylight Saving On or Off .................... 20
Programming a FIPS Code ............................... 21
Using Auto Channel Switch ............................... 21
Using Position Reply ..........................................22
Using a Group MMSI ..........................................22
Setting Up the Scrambler ...................................23
Using Exit .......................................................... 23
Using System Options ......................................... 23
Adjusting the Contrast ....................................... 23
Adjusting the Key Beep ..................................... 24
Adjusting the VOX Sensitivity Level .................. 24
Care and Maintenance .........................................24
Appendix ...............................................................24
Reference Information ........................................25
Three Year Limited Warranty ................................27

Introduction
6
Introduction
Your Uniden WHAMx4 2.4 GHz Wireless Microphone is
the next generation in wireless handheld microphones,
and is compatible with new Uniden Marine radios.
It combines state-of-the-art technology with rugged durability
and ease of use. The microphone's all solid-state design
and conservatively-rated components and materials make
it an ideal choice for harsh marine environments. The
microphone's large display and backlit control buttons
make it easy to use even in extreme lighting and weather
conditions.You can use up to four WHAMx4 microphones
with the same marine radio. You should read the rest of
this Owners Manual thoroughly to acquaint yourself with
all of your microphone's features and functions. Save your
receipt as proof-of-purchase in case you ever need to
have warranty service on the microphone.
Features, specifications, and availability of optional
accessories are all subject to change without notice.
Note: Your microphone meets the stringent JIS7
waterproof specification. The supplied cradle meets the
JIS4 waterproof specification. This means that the
microphone can be submerged to a depth of 1 meter for
up to 30 minutes without incurring damage.
Introduction
Microphone
Cradle
Battery
Mounting Hardware
Owner’s
(not shown)
Manual
(shown assembled)
Alkaline Hand
Strap
(not shown)
Battery
Tr ay
Supplied With Your Microphone

Feature Highlights 7
Feature Highlights
Intercom Input - You can use the microphone to control a
radio from almost anywhere aboard your vessel, and each
WHAM x 4 user can communicate with each other. You
can also use the radio's intercom function to communicate
with each WHAM x 4 user. You can use the microphone to
call handset-to-handset, handset to radio, handset to
multiple stations including the radio, handset to second
radio, and radio to individual, group, or all handsets. You
can even use a second base radio as an intercom.
VOX - You can talk without pressing PTT when you connect
a headset to the microphone and use its microphone.
Handset Paging - You can send a tone to the
microphone, to make it easier to find it if it gets lost.
Display Backlight/Key Light Adjustment - You can
adjust the brightness of the display and the keys on the
microphone to make them easier to see in extreme
conditions.
Key Beep Volume Adjustment - You can adjust the
volume of the tone you hear when you press a key.
Battery Level Display - The microphone displays the
status of the battery.
Contrast Adjustment - You can set the microphone’s
display to make it easier to see in different conditions.
Floating Handset - The microphone floats, making it
easy to retrieve if you drop it.
About This Manual
The screen displays used in this manual are representations
of what might appear when you use your microphone.
Since what you see depends on the frequencies for your
area and the settings you select, you might notice some
differences between what is in this manual and what
appears on your microphone's display. Buttons you press
and text that appears on the display appear in bold type.
Feature Highlights
Understanding Your Microphone

Understanding Your Microphone
8
Understanding Your Microphone
How The Microphone’s Controls Appear in
This Manual
To help navigate the microphone's menus, the steps shown in
this manual describe the displays you see and the keys you
press or control you operate to get a desired result.
Mounting the Microphone
You can mount the microphone’s cradle on any convenient
mounting surface such as a bulkhead, flying bridge, or
chart table. The mounting surface you choose must have
12V DC power available nearby. Because the cradle has no
power switch, you will need to wire it directly to a power
source such as the boat’s battery or to a power distribution
panel connection that receives power all the time.
Warning: Please keep metal objects away from the
WHAMx4 charger.
1. Connect the wires on the back of the cradle to a 12-volt
battery. You may extend this cable as necessary, but
you must observe proper polarity (i.e., red is
positive and black is negative).
2. Connect the black wire to the negative (-) battery
terminal.
3. Connect the red wire to the positive (+) battery terminal.
4. Make sure the connections are clean and tight so they
do not vibrate loose during the boat’s operation.
Occasionally clean any accumulated corrosion from the
battery terminals.
5. Use the template at the back of this
Owner’s Manual and the supplied
mounting screws to secure the
back of the cradle to the mounting
surface, then snap the front of the
cradle onto the back.
6. Slide the microphone into the cradle to
secure it and charge its batteries.
Setting Up The Microphone
Mounting
Screws

Setting Up the Microphone 9
Setting Up the Microphone
To remove the cradle from its
mounting location, use a flat
screwdriver to lift up the top of the
back cover on the cradle until it
snaps off. Then remove the
mounting screws on the back
of the cradle.
Installing the Battery
Your microphone uses a rechargeable battery (supplied) for
power. You can also use three optional rechargeable AAA
batteries to power it.
1. Use a coin to unscrew the belt clip on
the back of the microphone.
2. Lift up the case clips on both
sides of the microphone, then
lift up the cover over the
battery compartment.
3. If you are installing AAA batteries
in the supplied battery holder,
make sure the polarity symbols (+ -)
inside the battery compartment match.
Otherwise, insert the supplied rechargeable battery’s
plug into the connector inside the battery compartment.
4. Replace the battery compartment cover.
Caution: Be sure the rubber gasket around the battery
compartment is clean and completely seals the battery
compartment. This helps keep water out of the inside
of the microphone.
5. Push down both case clips then reinstall the belt clip.
Recharge the batteries when the microphone stops
working or its range is too short.
Lift Here
Case Clips
Battery
Connector

Setting Up the Microphone
10
Charging the Batteries
Before you use rechargeable batteries, you must charge
them.
The microphone has a built-in circuit that lets you
recharge batteries while they are in the microphone. To
charge the batteries, install the batteries in the
microphone then slide it into the supplied cradle.
WARNING!
Before you use rechargeable batteries for the first time,
charge them for 14 hours to bring them to a full charge.
Discharged batteries take about 14 hours to fully
recharge.
Caution: To ensure proper charging and avoid accidental
release, always firmly lock the handset into the charger.
Engine Noise Suppression
Interference from the noise generated by the electrical
systems of engines is sometimes a problem with micro-
phones. Your microphone has been designed to be
essentially impervious to ignition noise and alternator
noise. However, in some installations it may be necessary
to take measures to further reduce the effect of noise
interference.
In severe cases of noise interference, it may be necessary
to install a noise suppression kit. Contact the dealer where
you purchased the microphone for more information.

Setting Up the Microphone 11
A Look at the Microphone
POWER/VOLUME - Hold down for 2 seconds to turn
the microphone on or off. Briefly press to select the
volume setting mode.
LED - The LED on the front of the microphone lights
green when the microphone is receiving a transmission,
red when it is transmitting, and orange when it is charging.
- Press to scroll up through the channels and menu
options. Hold down to increase scrolling speed.
- Press to scroll down through the channels and
menu options. Hold down to increase scrolling speed.
MENU HI/LO - Press to enter and exit the menu mode.
Hold down to change transmit power from high to low.
Hold down again to change transmit power to high.
1
8
2
12
14
3
6
9
7
5
10
11
4
13
1
2
3
4

Setting Up the Microphone
12
SELECT/SCRAM - Press in normal channel mode to
display the time, date, latitude, longitude, SOG (speed
over ground), and COG (course over ground). Press in
menu mode to select menu items. Hold down to turn on
the Scrambler for the current channel.
16/9/TRIPLE WATCH - Press to tune to Channel 9
and Channel 16 and to use Triple Watch.
HAIL/INTERCOM - Press to turn the hailer on or off.
Hold down for 2 seconds to use the radio’s intercom
feature.
SQUELCH/BATTERY - Press to turn on the squelch
setting mode. Hold down to display the battery level.
STEP/SCAN - Hold down to scan through all channels
in memory.
MEM/UIC - Press to place the currently selected
channel in memory. Press again to delete a channel from
memory. Hold down to change UIC mode.
WX/ALERT - Press to listen to the active weather
channel in your area. Hold down in weather alert mode to
turn on weather alert.
PTT - Press to transmit.
DISTRESS - Hold down for 5 seconds to turn on
distress transmit. The microphone counts down during
distress. If you release DISTRESS before the countdown
is finished, distress is automatically cancelled.
LIGHT/LOCK - Repeatedly press to change the
display and keypad backlight level. Press again when the
backlight is set to its highest level to turn off the backlight.
Hold down for 2 seconds to turn on keylock. All keys are
locked except PTT. To unlock the keypad, press
DISTRESS, hold down LIGHT/LOCK for 2 seconds, or
turn off the microphone then turn it on again.
5
6
7
8
9
10
11
12
13
14

Setting Up the Microphone 13
A Look at the Display
- Appears while the microphone is transmitting.
DSC - Appears when the microphone is in the DSC mode,
including receiving DSC calls. It also shows that the
microphone is connected to the main radio (by RF).
DSC blinks when the microphone is close to out of range,
or when completely out of range.
LO - Shows the transmit output power is set to 1 watt on
the output channel.
HI - Shows the transmit output power is set to 25 watts on
the output channel.
TRI - Appears when the microphone is on a working
channel or the weather channel and is watching Channel
16 and Channel 9.
U I C - Shows the channel mode (USA, INT, or CAN).
MEM - Indicates if a channel has been placed into
channel scanning memory.
WX - Appears when the microphone is in the weather mode.
- Shows that GPS is connected to the microphone.
blinks when the GPS data being received is valid.
- Appears when the weather alert channel watch is
active and blinks when the alert is activated.
- Shows when the microphone is communicating with
the main radio (by RF). blinks when another microphone
is in use.

Basic Operation
14
Basic Operation
Turning the Microphone On and Off
Hold down POWER/VOLUME for about 2 seconds. If the
main radio is turned on, the channel that appears on the
microphone is the channel currently selected on the main
radio. Hold down POWER/VOLUME for about 2 seconds
again to turn off the microphone.
Setting the Base/Microphone ID
You must set the microphone ID to the same setting as
your radio’s base ID so the microphone and radio can
communicate with each other. If you set the ID correctly,
you see similar information on both the radio’s and
microphone’s display.
1. To set the base or microphone ID briefly press MENU,
repeatedly press or until LOCAL MENU appears,
then press SELECT/SCRAM.
2. Repeatedly press or until ID SETTING appears,
then press SELECT/SCRAM.
3. Repeatedly press or to select the ID you want to set
(BASE ID or HANDSET ID). Then press SELECT/SCRAM.
4. Repeatedly press or to select the ID you want
(00-99 for BASE ID or 1-4 for HANDSET ID). Then
press SELECT/SCRAM.
Adjusting the Volume and Squelch
Briefly press POWER/VOLUME, then repeatedly press
to turn up the volume or to turn it down. Briefly press
POWER/VOLUME to turn off volume mode.
To adjust the squelch, briefly press SQUELCH/BATTERY,
then repeatedly press to turn up the squelch or to
turn it down. Briefly press PTT, 16/9/TRIPLE WATCH, or
DISTRESS to turn off squelch mode.
Checking the Battery Level
Hold down SQUELCH/BATTERY for about 2 seconds. A
number from 0-4 (0 is low, and 4 is full) appears showing
the battery level. If 0 appears, the radio does not have
enough battery power to operate. Briefly press any key to
turn off battery mode.
Basic Operation

Basic Operation 15
Using Triple Watch
Tune to a channel other than Channel 9 or Channel 16,
then hold down 16/9/TRIPLE WATCH for about 2 seconds.
TRI appears and the radio checks Channel 16 every 2
seconds then Channel 9 afterward, then tunes to the
original working channel, checking all 3 channels in order.
Notes:
• If the original working channel is a weather channel,
the radio automatically enters Triple Watch mode.
• If weather alert is activated (see “Tuning Weather
Channels” on Page 15), the radio tunes from the
original working channel to Channel 9 then Channel
16. The radio also checks the active weather channel
for the weather alert tone every 7 seconds.
• If one or more FIPS codes are assigned and weather
alert is activated, the SAME weather function does not
work while the radio is set to Triple Watch mode. The
radio searches only for a 1050 Hz tone.
• The radio also activates Triple Watch when channel
scan is active (see “Using Channel Step” on Page 15
for more information).
Tuning Weather Channels
Briefly press WX/Alert to tune to the active local NOAA
weather channel from any channel. The active weather
channel number and WX appear.
To change the weather channel, repeatedly press to
increase it or to decrease it. The radio always returns
to the last weather channel selected. This applies even if
the radio is turned off then turned back on again.
Using Weather Alert Mode
Hold down WX/Alert for about 2 seconds. When the radio is
in weather alert mode, flashes. If FIPS codes are pro-
grammed (see “Programming a FIPS Code” on Page 21),
flashes and the nature of the alert appears on the display.
Using Channel Step
Briefly press STEP/SCAN. The radio steps to the channel
saved into its memory each time you press STEP/SCAN
(see “Saving Channels to Memory” on Page 16).

Basic Operation
16
Using Channel Scan
Hold down STEP/SCAN for about 2 seconds. The radio
scans all channels stored using the memory feature,
starting with the lowest channel number to the highest.
The channel numbers appear on the display.
Notes:
•TRI appears and the radio activates Triple Watch
when channel scan is active. During channel scan, the
radio automatically checks Channel 16 and Channel 9
every two seconds.
• Hold down 16/9/TRIPLE WATCH to take the radio out
of Triple Watch mode. The radio continues to scan.
Saving Channels to Memory
Briefly press MEM/UIC. The displayed channel is saved to
the radio’s memory. Once a channel has been programmed
into memory, MEM appears on the display each time the
channel number appears. You can store any channel
except a weather channel into the radio’s memory. Briefly
press MEM/UIC again to remove the channel from memory.
Deleting Channels From Memory
Tune the channel you want to delete then briefly press
MEM/UIC. MEM disappears.
Changing UIC Mode
Hold down MEM/UIC for about 2 seconds. The currently-
set UIC (USA, INT, and CAN) appears as you press MEM/UIC.
Selecting Menu Items
Briefly press SELECT/SCRAM to select menu items.
Displaying Time/Position/Course Info
Briefly press SELECT/SCRAM while a channel number
appears to display the following.
• Current Local Time
• Current Position (Latitude/Longitude)
• SOG (Current Speed Over Ground)
• COG (Current Course Over Ground)
Briefly press SELECT/SCRAM again to turn off display
mode. The current channel name appears.

Basic Operation 17
Note: Channel mode display information always appears first.
It appears when the radio receives an incoming transmission
or when the radio is transmitting. Toggle back and forth
between the two displays by repeatedly pressing
SELECT/SCRAM from the channel display screen.
Using the Scrambler
Hold down SELECT/SCRAM for about 2 seconds. The
radio turns on Scramble mode for the selected channel.
Using the Hailer
Briefly press HAIL/INTERCOM. The radio activates its
hailer. Press PTT to use the hailer. Briefly press HAIL/
INTERCOM to turn off the hailer. Repeatedly press to
increase or to decrease the outgoing hail volume.
Briefly press POWER/VOLUME, then repeatedly press
to increase or to decrease the incoming hail volume.
Using the Intercom
Hold down HAIL/INTERCOM for about 2 seconds. The
radio activates its intercom and all available units appear
on the display. You can select any displayed unit to
communicate with.
Turning the Backlight On and Off
Repeatedly press LIGHT/LOCK to adjust the display
backlight level. Press LIGHT/LOCK when the backlight is
set to its highest level to turn off the backlight.
Using Keylock
Hold down LIGHT/LOCK for about 2 seconds to turn on
the keylock. All keys on the microphone except PTT are
locked. To turn off keylock, hold down LIGHT/LOCK for
about 2 seconds or turn the microphone off then on again.
Using Distress
To send a distress call, lift the protective tab over DISTRESS
then hold down DISTRESS for about 5 seconds. You hear
an audible countdown from 5 seconds to 0 as you hold
down DISTRESS. The radio does not send the distress
call if you release DISTRESS before the countdown is
complete.

Using Setup Options
18
Changing Output Transmit Power
Hold down MENU/H/L for about 2 seconds to change the
current output transmit power for the current channel from
high to low or low to high.
Note: Changing the output transmit power works only if it
is legal to do so on the current channel.
Resetting the Microphone
Cautions:
• Resetting the microphone does not reset the radio’s
user MMSI.
• Resetting the microphone sets all features back to
their factory settings.
To reset the microphone, turn off the microphone, then
hold down MENU/H/L while turning on the microphone.
Using Setup Options
This section details the operation of the microphone’s
setup options. You normally set these options the first
time you use the microphone.
Notes:
• The operation described in this section does not work
with Uniden's UM625 marine radio. See the UM625
Owner's Manual for more information about
connecting a WHAM x 4 microphone to that radio.
• See “Using System Options” on Page 23 for more
information about options you change more often.
Using the Directory
This option lets you set up a directory of other vessels
with DSC-capable radios. You can set up the microphone
so it displays another vessel’s MMSI and name.
To add a new directory entry:
1. Briefly press MENU. MAIN MENU appears. Then
press SELECT/SCRAM.
2. Repeatedly press or until SETUP appears, then
press SELECT/SCRAM.
3. Repeatedly press or until DIRECTORY
appears, then press SELECT/SCRAM.
Using Setup Options

Using Setup Options 19
4. Repeatedly press or until NEW appears, then
press SELECT/SCRAM.
5. Repeatedly press or to select the first number
of the vessel’s user MMSI, then press SELECT/
SCRAM to register it.
6. Repeat Step 5 for each number in the user MMSI.
After you enter the last number, the cursor flashes at
the lower left side of the screen.
7. Repeatedly press or to select the first character
of the name you want to assign to the vessel, then
press SELECT/SCRAM to register it.
8. Repeat Step 7 for each of the name’s characters (up
to 12). If the vessel’s name is less than 12 characters,
repeatedly press SELECT/SCRAM.After you enter
the last character, YES appears.
9. Press SELECT/SCRAM to confirm the name you
entered. Otherwise, to cancel the directory entry,
repeatedly press or until NO appears then
press SELECT/SCRAM.
10. Repeat Steps 4-9 to enter another vessel in the directory.
To change an entry already in the directory:
1. Repeat Steps 1-3 above.
2. Repeatedly press or until the name of the entry
you want to change appears, then press SELECT/
SCRAM again. EDIT appears. Press SELECT/SCRAM.
The first character of the vessel’s user MMSI flashes.
3. Repeat Steps 5-9 to edit the user MMSI and vessel name.
Using Channel Names
This option lets you change the preset channel names.
For example, this might be necessary if a channel’s
authorized use has changed in your area.
1. Briefly press MENU. MAIN MENU appears. Then
press SELECT/SCRAM.
2. Repeatedly press or until SETUP appears, then
press SELECT/SCRAM.
3. Repeatedly press or until CH TAG appears,
then press SELECT/SCRAM.

Using Setup Options
20
4. Repeatedly press or to select the preset channel name
you want to change, then press SELECT/SCRAM. EDIT
appears. Then press SELECT/SCRAM.
5. Repeatedly press or to select the first character
of the name you want to assign to the channel, then
press SELECT/SCRAM to register it.
6. Repeat Step 5 for each of the name’s characters (up to
12). If the channel’s name is less than 12 characters,
repeatedly press SELECT/SCRAM.After you enter the
last character, YES appears.
7. Press SELECT/SCRAM to confirm the channel name you
entered. Otherwise, to cancel the entry, repeatedly press
or until NO appears then press SELECT/SCRAM.
8. Repeat Steps 4-5 to change another channel name.
Adjusting the Local Time
This option lets you adjust the local time by up to one hour
for any location in North America.
1. Briefly press MENU. MAIN MENU appears. Then press
SELECT/SCRAM.
2. Repeatedly press or until SETUP appears, then
press SELECT/SCRAM.
3. Repeatedly press or until GPS SETUP appears,
then press SELECT/SCRAM.
4. Repeatedly press or until TIME ADJUST
appears, then press SELECT/SCRAM.
5. Repeatedly press or to adjust the time, then
press SELECT/SCRAM. SET appears.
6. Press SELECT/SCRAM.
Turning Daylight Saving On or Off
1. Briefly press MENU. MAIN MENU appears. Then press
SELECT/SCRAM.
2. Repeatedly press or until SETUP appears, then
press SELECT/SCRAM.
3. Repeatedly press or until GPS SETUP appears,
then press SELECT/SCRAM.
4. Repeatedly press or until DAYLITE SAV
appears, then press SELECT/SCRAM.
This manual suits for next models
1
Table of contents
Languages:
Other Uniden Microphone manuals

Uniden
Uniden BC906W User manual

Uniden
Uniden WHAMx4 User manual

Uniden
Uniden WHAM User guide

Uniden
Uniden BC906W User manual

Uniden
Uniden WHAM2 User guide

Uniden
Uniden BM100 User manual

Uniden
Uniden UH7760NB User manual

Uniden
Uniden UA466ZL User manual

Uniden
Uniden MK800W User manual

Uniden
Uniden BC906W User manual