Uniden XDECT 8015WP series User manual

XDECT 8015WP
Series
For more exciting new products please visit our website:
Australia: www.uniden.com.au
New Zealand: www.uniden.co.nz

Important Safety Instructions!
When using your telephone equipment, basic safety precautions should
always be followed to reduce the risk of fire, electric shock and injury to
persons, including the following:
The base and charger(s)(if included) are NOT waterproof: Do not use or
place the base or charger near water (e.g., near a bathtub, wash bowl,
kitchen sink or laundry tub, in a wet basement or near a swimming
pool).
If the base or charger falls into the water, unplug the AC adapter before
removing it from the water.
Wipe excess water off of the handset before returning it to the base or
charger.
Avoid using a telephone (other than a cordless type) during an electrical
storm. There may be a remote risk of electric shock from lightning.
Do not use the telephone to report a gas leak in the vicinity of the leak.
Use only the power cord and batteries indicated in this manual. Do not
dispose of batteries in a fire. They may explode. Check with local codes for
possible special disposal instructions.
Do not place the handset in any charging cradle without the battery installed
and the battery cover securely in place.
SAVE THESE INSTRUCTIONS!
Important Notice:
Under power failure conditions this appliance may not operate.
Please ensure that a separate telephone, not dependent on local power, is
available for emergency use.
General Notices for New Zealand Model:
The grant of a NZ Telepermit for any item of terminal equipment indicates
only that Telecom has accepted that the item complies with minimum
conditions for connection to its network. It indicates no endorsement of the
product by Telecom, nor does it provide any sort of warranty. Above all, it
provides no assurance that any item will work correctly in all respects with
another item of Telepermitted equipment of a different make or model, nor
does it imply that any product is compatible with all of Telecom's network
services.
The maximum volume setting of this telephone exceeds the Telecom
specified volume requirement. Telecom takes no responsibility for the high
volume available on this telephone, customer’s who believe this telephone is
too loud should contact the manufacturer at the website indicated on owner’s
manual warranty page.
For telephone networks other than Telecom there may be a charge incurred
for local calls if the Insert 0 feature is on. Turn Insert 0 off.
This equipment may not provide for the effective hand-over of a call to
another device connected to the same line.

XDECT 8015WP
base & cordless
handset
Base AC adapter
(AAD-041S(M))
Telephone
cord
Charger AC
adapter
AAD-600S(M)
XDECT
8005WP
accessory
handset &
charger
If you purchased
model number:
You should
have:
XDECT 8015WP None
XDECT 8015WP+1WP 1 of each
XDECT 8015WP+2WP 2 of each
XDECT 8015WP+3WP 3 of each
You might also nd:
Not pictured:
- Factory installed rechargeable
battery
- Belt clip
Not pictured:
- Factory installed rechargeable
battery
- Belt clip
3
If any items are missing or damaged, contact your place of
purchase immediately.
Never use damaged products!
Need Help? Get answers at our website:
www.uniden.com.au for Australian model
www.uniden.co.nz for New Zealand model.
XDECT 8015WP Series
What's in the box?

4
Contents
Features of the XDECT 8015 WP Series ...................................................................... 5
INSTALLING YOUR PHONE ...........................................................................................6
Charge the Battery ....................................................................................................6
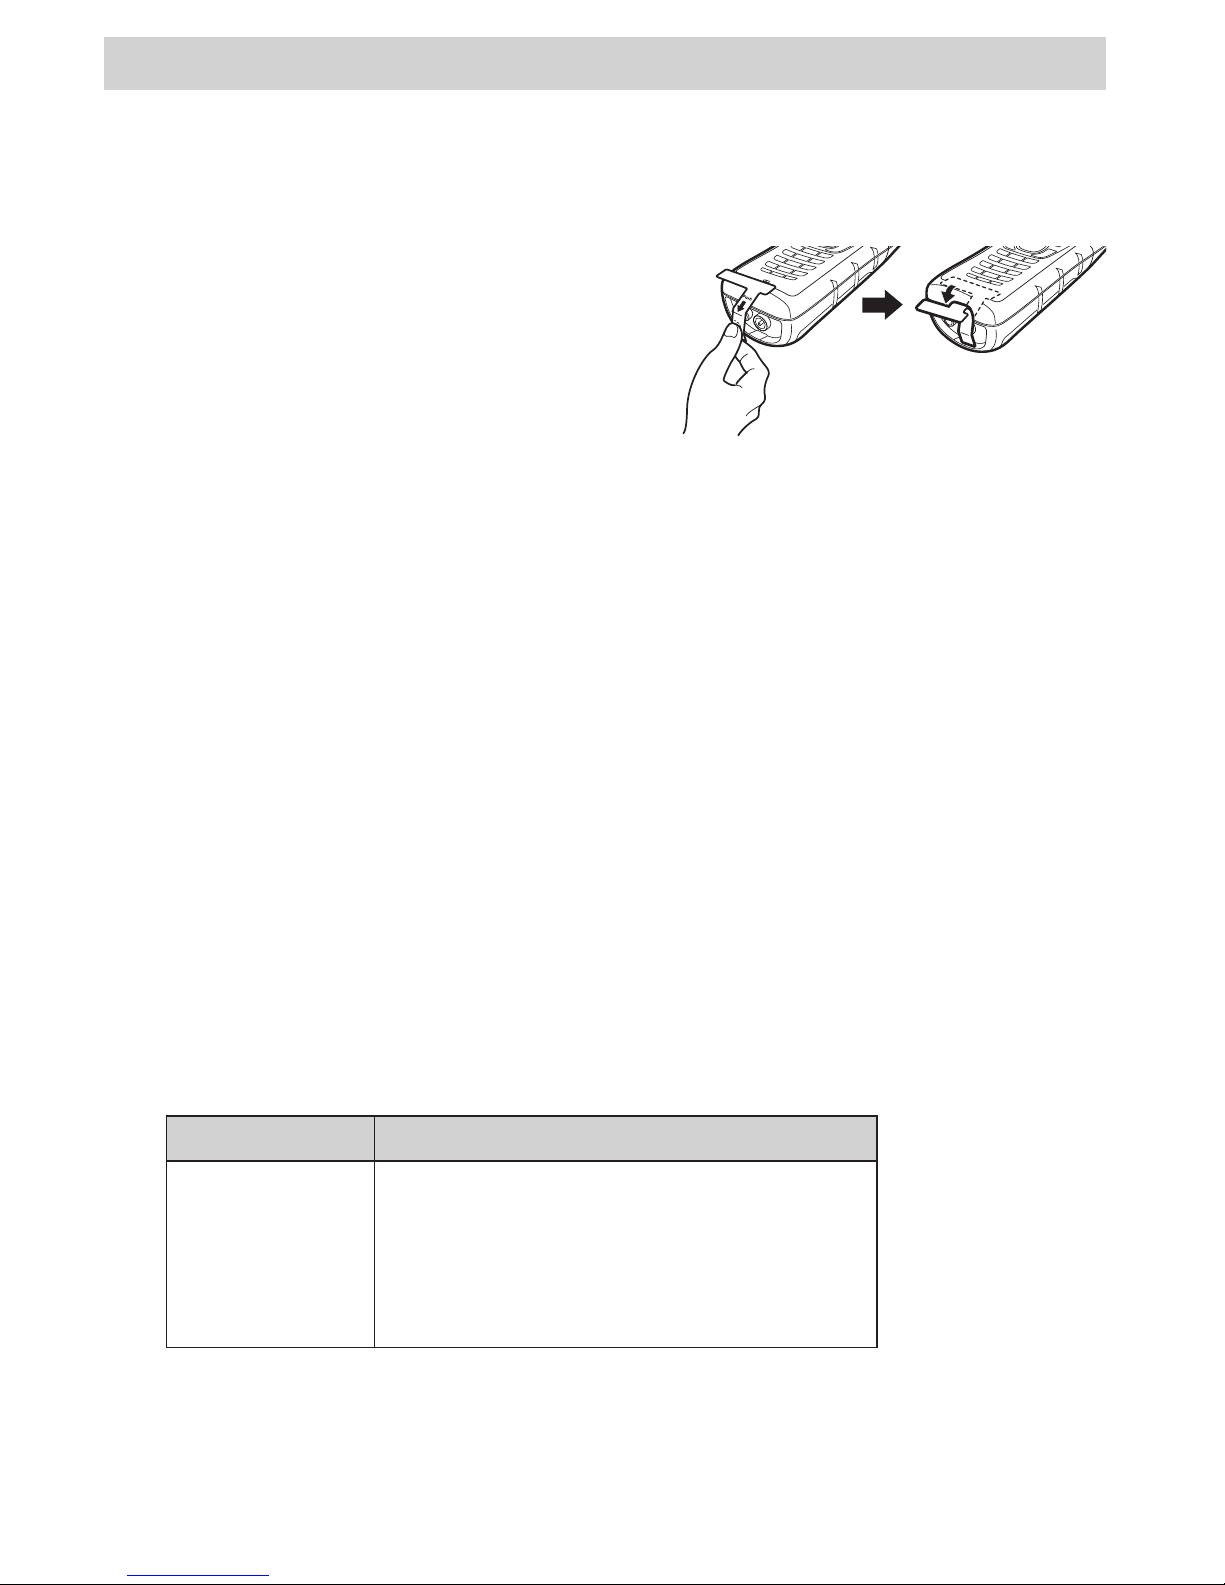
Connect the Telephone Cord / Test the Connection / Installing the Belt Clip........7
GETTING TO KNOW YOUR PHONE...............................................................................8
Parts of the Base & Handset .........................................................................................8
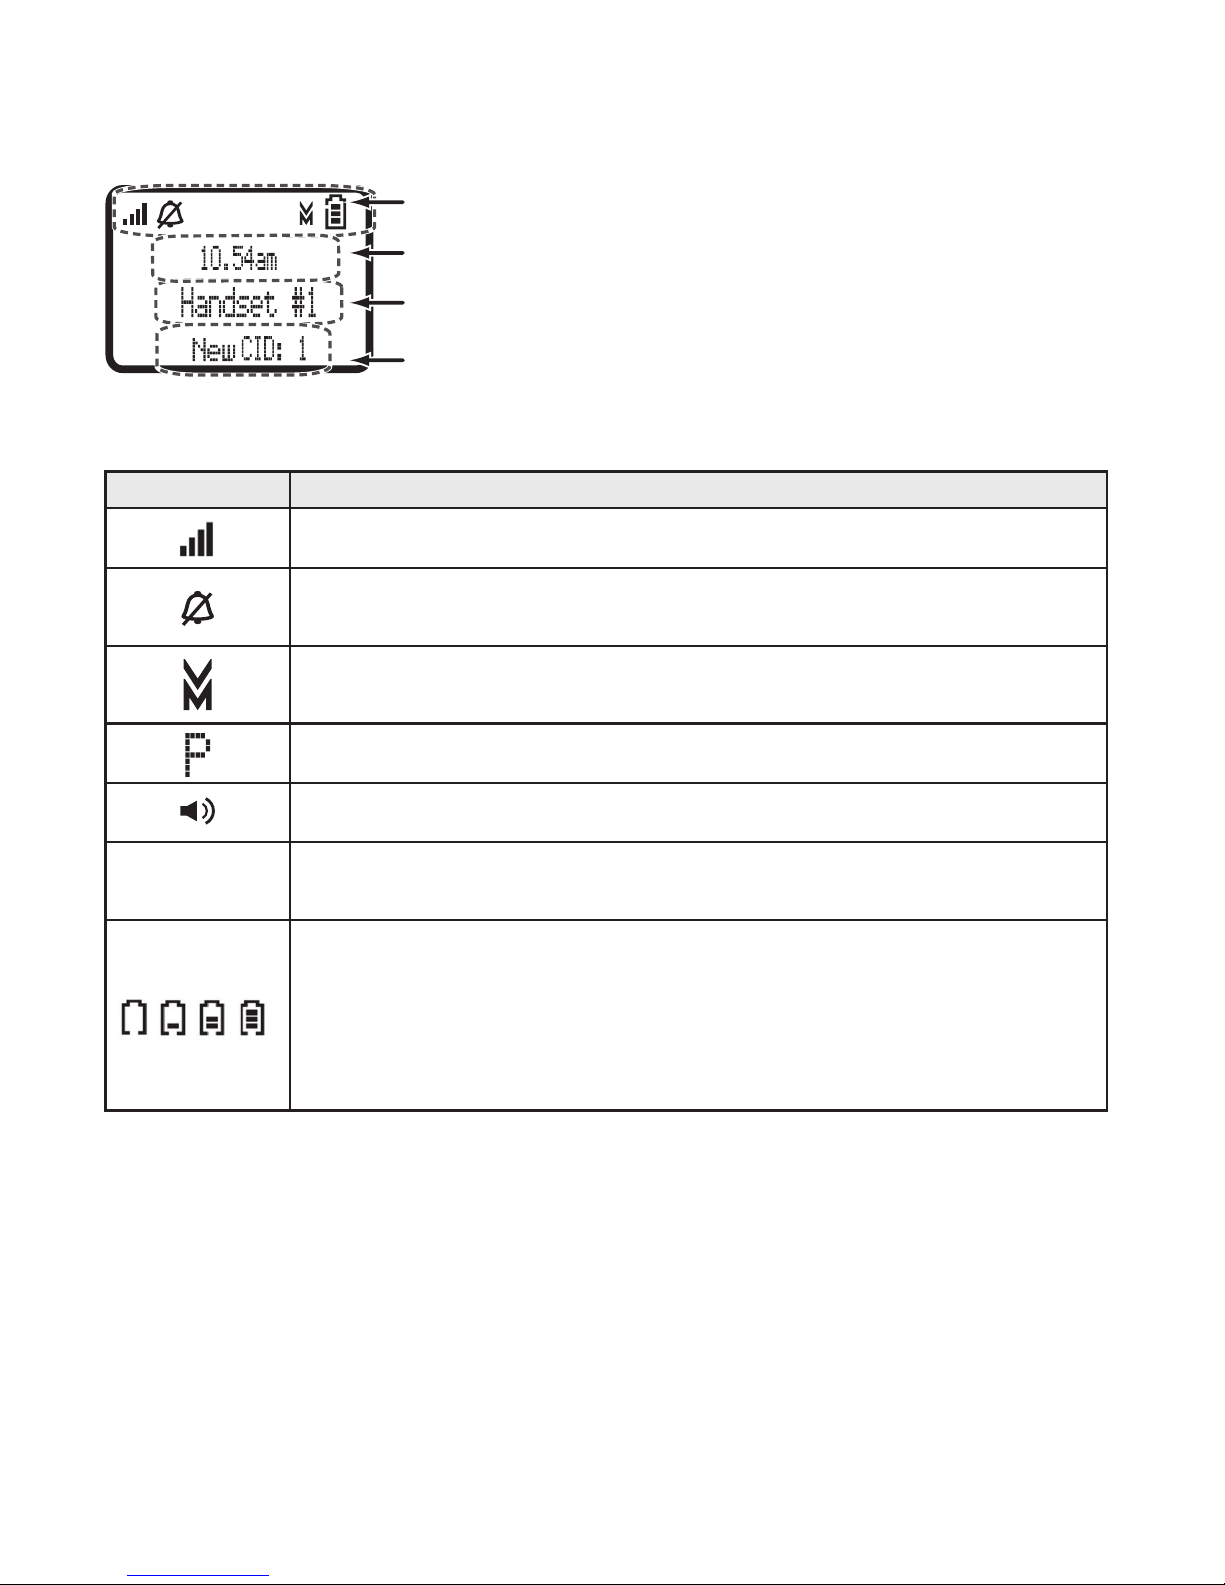
Reading the Handset Display .....................................................................................10
USING THE HANDSET MENUS ...................................................................................11
Handset Setup ................................................................................................ 12
Day & Time .......................................................................................................13
Global Setup ....................................................................................................13
Entering Text on Your Phone..................................................................................14
USING YOUR PHONE ...................................................................................................15
Changing the Volume ..............................................................................................15
Using the Redial List ................................................................................................16
Using Caller ID and Call Waiting .............................................................................16
Dialling from the Caller ID list ..........................................................................16
Caller ID menu options ....................................................................................17
Using Call Waiting....................................................................................................17
Using the Phonebook ..............................................................................................18
Phonebook menu options / Phonebook entry options .................................. 18
Chain Dialing ............................................................................................................19
Finding a Lost Handset............................................................................................19
USING SPECIAL FEATURES ........................................................................................20
Using Voice Message Notication ..........................................................................20
Setting Up Your Voice Mail / Getting Your Messages ...................................20
Resetting the voice message indicator...........................................................20
USING MULTI-HANDSET FEATURES .........................................................................21
Expanding Your Phone............................................................................................21
Using Conference Calling ........................................................................................21
Using Privacy Mode.................................................................................................22
Using Call Transfer...................................................................................................22
Using the Intercom ..................................................................................................23
SOLVING PROBLEMS ..................................................................................................24
Weak or Hard To Hear Audio ..................................................................................25
Noise or Static On The Line ....................................................................................25
Here are some hints for when the static is......................................................26
Inserting a line filter or DSL filter ................................................................... 26
Resetting and Registering Handsets.......................................................................27
Registering a handset ..................................................................................... 27
Handling Liquid Damage .........................................................................................28
IMPORTANT INFORMATION .......................................................................................29
Terms Used In This Guide.......................................................................................29
Specications...........................................................................................................30
Automatic ECO (Power Save) Mode.......................................................................30
INDEX .......................................................................................................................32
ONE-YEAR LIMITED WARRANTY................................................................................33

5
Features of the XDECT 8015WP Series
Great features of this cordless phone include:
Designed and Engineered in Japan
1.8GHz Extended DECT Technology
Multi (6) Handset
1
Multi (2) Repeater Capable (optional)
Extra Large Backlit LCD Display with Time
Backlit Keypad
Digital Duplex Speakerphones on Handset
70 Number Phonebook (shared)
Call Waiting²/Flash
Caller ID² Features
30 Caller ID² Memories (shared)
Caller Name Tag²
Caller Personal Ring²
8 Ringer options (4 Ringers/4 Melodies)
4 Level Ringer Volume
Ringer Do Not Disturb (DND) mode
6 Level Earpiece Volume
6 Level Speaker Volume
5 Number Redial Memories
Intercom/Announce Call Transfer
up to 7 Days Standby Time
up to 10 Hours Talk Time
Mute/Hold
Beltclip
And More!
¹ Maximum expandable with XDECT 8005WP accessory.
² Caller ID, Call Waiting features work only if you subscribe to the service
provided by your local telephone company. There is usually a fee for this
service. Name Tag and Personal Ring features require incoming Caller ID
data.
Specifications subject to change. Visit the XDECT 8015WP webpage on the
website for the latest information.

6
Installing Your Phone
Charge the Battery
The handset's rechargeable battery is already installed. Before you
can charge the battery, you have to power it on.
Remove the cardboard spacer.1)
Press the power on/off (activation)2)
pin according to the directions on
the label.
Remove the label once the handset3)
is powered on.
Save the power on/off pin in case you need to change the
handset's power status later (i.e., to power off the handset when
it will not be used for a long time). Use the plastic power on/off
pin or a blunt-tipped object like an uncurled paper clip to press
the power on/off toggle through the rubber seal. Do not use a
sharp object; sharp objects might puncture the rubber seal and
jeopardize the handset's waterproof status.
Connect the base AC adapter to the4)
DC IN 9V
jack on the base.
If you have accessory handsets, connect the AC adapter to the5)
charger's
DC IN 9V
jack and set the cord into the notch. (This
adapter might already be connected.)
Plug the other end of each adapter into a standard 240V AC6)
power outlet.
Place the handset in the base with the display facing forward.7)
The display on the handset should turn on.
If... Try...
the handset
display does
not turn on
Checking the AC adapter connection.-
Seeing if the outlet is controlled by a-
wall switch.
Check handset activation at step 2-
above.
Charge the handset completely (about 16 hours) before using it.

7
Connect the Telephone Cord
Use the telephone cord to connect the
TEL LINE
jack to a standard telephone wall jack.
Test the connection
Pick up the handset from the cradle and press1)
TALK/FLASH.
You
should hear a dial tone, and the display should say
Talk
.
If... Try...
you don't hear a dial tone or the
display says
Check Tel Line
checking the connection between
the base and the phone jack.
Make a quick test call. (Press2)
END
to hang up.)
If... Try...
there's a lot of noise or static see page 25 for tips on avoiding
interference.
Test any accessory handsets the same way. If you can't get a3)
dial tone or the handset display says Unavailable, try moving the
handset closer to the base or resetting it (see page 27). Charge
all handsets completely (about 15 hours) before using them.
Installing the Belt Clip
Line up the holes on each side of the handset. To attach the belt
clip, insert into the holes on each side of the handset. Press down
until it clicks. To remove the belt clip, pull either side of the belt clip
to release the tabs from the holes.

8
Getting to Know Your Phone
Parts of the Base & Handset
If the key name is spelled out on the key itself, it's not labeled in the
drawings.
Base keys and how they
work
Key name What it does
FIND
In standby: page
-
all handsets so you
can find a lost one.
CHARGING
CONTACTS
Charge contacts
-
with handset
locator.
REDIAL
Microphone
Twelve-
key dial
pad
Display
Charging
contacts
Earpiece
UP
SPEAKER
PHONEBOOK/
LEFT
DOWN
CALLER ID/
RIGHT
MESSAGES
CLEAR/
INTERCOM
KEYPAD LOCK
TALK/FLASH END
FIND
FIND
FIND
Charging Area

9
Handset keys and how they work
Key name (and
icon) What it does
UP ( )
In standby: increase the ringer volume.
-
During a call: increase the call volume.
-
In the menu or any list: move the cursor up one line.
-
CALLER ID/
RIGHT ( )
In standby or during a call: open the Caller ID list.
-
During text entry: move the cursor to the right.
-
DOWN ( )
In standby: decrease the ringer volume.
-
During a call: decrease the call volume.
-
In the menu or any list: move the cursor down one line.
-
MENU/SELECT In standby: open the menu.
-
In the menu or any list: select the highlighted item.
-
END During a call: hang up.
-
In the menu or any list: exit & go to standby.
-
INTERCOM/
CLEAR
In standby: page another handset using the intercom.
-
During a call: put the call on hold & start a call transfer.
-
While entering text: delete one character, or press & hold
-
to delete all the characters.
PHONEBOOK/
LEFT ( )
In standby or during a call: open the phonebook.
-
In the menu: go back to the previous screen.
-
During text entry: move the cursor to the left.
-
*/ LOCK In standby: press and hold to lock or unlock the keypad.
-
TALK/FLASH In standby: start a telephone call (get a dial tone).
-
During a call: switch to a waiting call.
-
SPEAKER ( ) Switch a normal call to the speakerphone (& back).
-
REDIAL/PAUSE In standby: open the redial list.
-
While entering a phone number: insert a 2-second pause.
-
MESSAGE ( ) In standby: access your voice mail (see page 20).
-
MUTE
During a call: mute the microphone.
-
While the phone is ringing: mute the ringer for this call
-
only.

10
Reading the Handset Display
Handset banner
Status icons
Caller ID count
Time
The table below shows the
possible icons and what they
mean. Since the icons appear
based on what you're doing
with the phone, you won't ever
see all of these icons at the
same time.
Icon What it means
Received signal strength indicator.
The ringer is turned off: this handset will not ring when a call
comes in.
You have a voice message waiting (see the section titled
"Using Voice Message Notification" on page 20).
Privacy Mode is on: no other handset can join your call.
The speakerphone is on.
T
T-coil mode is on. (See "Do you use a T-coil hearing aid?" on
page 25.)
The battery levels;
Level 3 (Full)
Level 2
Level 1
Level 0 (Empty)

11
Using the Handset Menus
The menus are designed to be as easy as possible. Some users don't
even need the manual once they know how to perform these actions:
To... Press...
Open the menu Press MENU/SELECT.
Highlighting
menu options
Use UP to highlighted option above & DOWN to highlight
the option below.
Select an option Move the cursor to highlight the option, then press
MENU/SELECT.
Go up one screen Press PHONEBOOK/LEFT.
Close the menu
Press END.
(If you open the menu during a call, use PHONEBOOK/
LEFT to back out of the menu without hanging up.)
If you don't press any keys for thirty seconds, the phone times
out and exits the menu. (When setting the date and time, the
time-out period is extended to two minutes.)
To open the menu,
press
MENU/SELECT.
To select the
highlighted
option, press
MENU/SELECT.
To close the menu,
press
END
.
OR
Use
UP
and
DOWN
to move
the cursor.

12
Handset Setup
You can change these settings separately for each handset.
Menu Option
What it does
T-coil
Turn on T-coil mode to reduce noise on some hearing
aids (see "Do you use a T-coil hearing aid?" on page 25).
Ringer Tones
Choose one of four ringers and four melodies for the
handset's main ring tone. As you highlight each ring
tone, the phone plays a sample of the tone. When you
hear the tone you want, press MENU/SELECT.
Personal Ring
Turn on the personal ring feature. If you have Caller ID,
this feature lets you assign special ring tones to anyone
in your phonebook: this handset will use the special
ring tone when that person calls.
Autotalk
Turn on Auto Talk so you can answer the phone just by
picking up the handset from the cradle (without having
to press any buttons).
Any Key Answer
Turn on Any Key Answer so you can answer the phone
by pressing a key on the twelve-key dial pad.
Banner
Change the name used on the handset's display.
Key Touch Tone
Have the keypad sound a tone when you press a key.

13
Day & Time
If you set the day and time the clock in your handset's display will be
correct. The format is;
week, hour/minutes/am/pm
Use the number keypad (1)
0-9
) or
UP/DOWN/LEFT/RIGHT
to enter
the week and then hour, minutes and AM or PM.
Press2)
MENU/SELECT
to confirm.
Global Setup
The settings on this menu apply to all handsets and the base. Before
changing these settings, make sure the phone is in standby and all
handsets are within range of the base. (Only one handset at a time
can change these settings.)
Menu Option
What it does
Set Line Mode
Do not change this setting unless instructed to by
customer service.
VMWI Reset
Resets the Voice Mail Waiting Indicator LED.
Edit V_mail No.
If you subscribe to a Voice Mail service you can set the
Voice Mail number .
Insert 0
This feature adds “0” or “00” at the beginning of the
number received from Caller ID. The default setting for
New Zealand is ON. The default setting for Australia is
OFF.

14
Entering Text on Your Phone
When you want to enter text into your phone (for example, a name
in the phonebook), use the twelve-key dial pad to enter the letters
printed on the number keys. Here's how it works:
The phone enters the letters in the order they appear on the key.
For example, if you press the number key
2
once, the phone
enters the letter
A
. Press
2
twice for
B
, and three times for
C
.
If you press the key again after the last letter, the phone starts the
same letter sequence with small letters. If you press
2
four times
in a row, the phone enters
a
(small letter). Press
2
five times for
b
,
and six times for
c
.
If you see the icon
[Aa]
in the display, the phone enters capital
letters first (
A B C
), then small letters (
a b c
), then the number on
the key (
2
). The icon
[aA]
means the phone starts at the small
letters, so it enters small letters first, then the number on the key,
then capital letters.
The phone automatically uses a capital letter for the first letter and
any letter right after a space; all other times, it uses small letters.
If two letters in a row use the same number key, enter the first
letter, then use
CALLER ID/RIGHT
to move the cursor to the next
position to enter the second letter.
To Follow these steps
Switch between
capital & small letters Press / LOCK.
Move the cursor
Press PHONEBOOK/LEFT to move the cursor to
the left or CALLER ID/RIGHT to move the cursor to
the right.
Leave a blank space Press #.
Erase one letter Move the cursor to the letter you want to erase and
press INTCOM/CLEAR.
Erase the entire entry Press & hold INTCOM/CLEAR.
Enter punctuation or a
symbol Press 0to rotate through the available symbols.

15
Using Your Phone
To... From a handset From a handset
speakerphone
make a call: Dial
the number, then Press TALK/FLASH. Press SPEAKER.
answer a call Press TALK /FLASH. Press SPEAKER.
hang up Press END or put the handset in the cradle.
switch between
the speaker &
earpiece
Press SPEAKER. Press SPEAKER.
mute the micro-
phone during a call
Press MUTE.
Press again to turn the microphone back on.
put a call on hold
Press INTCOM/CLEAR.
If the call is on hold for 5 minutes, it will be
disconnected.
return to a call on
hold Press TALK /FLASH. Press SPEAKER.
mute the ringer for
this call only While the phone is ringing, press MUTE.
Changing the Volume
You can set the ringer, earpiece, and speaker volume separately for
each handset. For each item, press
UP
to make it louder or
DOWN
to
make it softer. The available volume levels and how change them are
listed below:
Change the When On a handset
ringer
volume the phone is in standby
choose one of 4 volume levels.
Note: lowest level is ringer off
- and the ringer off icon shows
on the display.
earpiece
volume you are on a normal call choose one of 6 volume levels
speaker
volume
you use the speaker-phone for
a call. choose one of 6 volume levels

16
Using the Redial List
The phone saves the last 5 numbers you dial on each handset. To
open the redial list, press
REDIAL/PAUSE
; use
UP
and
DOWN
to scroll
through the list. To close the list, press
PHONEBOOK/LEFT
. With the
phone in standby, open the list and find the number you want. Then:
To... Press...
redial the selected number Press TALK/FLASH or SPEAKER.
delete the number Press MENU/SELECT & select
Delete
.
save it to the phonebook Press MENU/SELECT & select
Store Into PB.
Using Caller ID and Call Waiting
You have to subscribe to Caller ID, Call Waiting, and Caller ID
on Call Waiting services to use the features described in this
section: contact your telephone provider for more information.
When a call comes in, the phone displays the caller’s number and
name (if available). The phone saves the information for the last 30
received calls to the CID list. When it's in standby, the phone displays
how many calls came in since the last time you checked the CID list.
All handsets share the same CID list so only one handset can
access the list at a time.
To... Press...
Open the CID list Press CALLER ID/RIGHT.
Scroll through the
CID list
Press DOWN to scroll through the list from newest
to oldest. Press UP to scroll from oldest to newest.
Close the CID list Press PHONEBOOK/LEFT.
Dialing from the Caller ID list
Find the entry you want to dial.1)
Press2)
TALK /FLASH
or
SPEAKER
to dial the number.
(You can also press
TALK/FLASH
or
SPEAKER
before you open the
CID list. Find the number you want to dial, then press
MENU/SELECT
.)

17
Caller ID menu options
Open the CID list with the phone in standby. Find the number you
want and press
MENU/SELECT
. Choose one of these CID menu
options:
Menu Option
What it does
Delete
Erase this Caller ID number.
Store into PB
Add this number to the phonebook. The phone prompts
you to enter the name, edit the phone number, and
choose a personal ring.
Delete All
Erase the CID list.
Using Call Waiting
If you get a Call Waiting call, the phone sounds a tone and displays
any CID information received for the waiting call.
For Australian Model:
Press
TALK /FLASH
and then
2
on the handset to accept the waiting
call. The first caller is put on hold, and you will hear the new caller
after a short pause. To return to the original caller, press
TALK /
FLASH
and then
2
again.
For New Zealand Model:
Press
TALK /FLASH
on the handset to accept the waiting call. The
first caller is put on hold, and you will hear the new caller after a short
pause. To return to the original caller, press
TALK/FLASH
again.
Note: You must subscribe to Call Waiting service for this feature
to operate. Not all features are available in all areas.

18
Using the Phonebook
The phone can store up to 70 entries in its phonebook. All handsets
share the same phonebook, so only one handset can access it at a
time.
To... Press...
Open/close the phonebook Press PHONEBOOK.
Scroll through the entries Press DOWN to scroll through the phonebook
from A to Z or UP to scroll from Z to A.
Jump to entries that start
with a certain letter
Press the number key corresponding to the
letter you want to jump to.
Dial an entry Find the entry you want to dial.1.
Press2. TALK /FLASH or SPEAKER.
Phonebook menu options
Open the phonebook with the phone in standby, then press
MENU/
SELECT
to open the phonebook menu. Choose one of these options:
Menu Option
What it does
Create New
Add an entry to your phonebook. The phone prompts you to
enter the name and phone number, and choose a personal
ring.
Delete All
Erase all the entries in this handset's phonebook.
Phonebook entry options
With the phone in standby, open the phonebook and find the entry
you want. Press
MENU/SELECT
to open the individual phonebook
entry menu. Choose one of these options:
Menu Option
What it does
Edit
Edit this entry. The phone prompts you to edit the name and
phone number, and choose a personal ring.
Delete
Erase this entry.

19
Chain Dialing
If you often have to enter a series of digits or a code number
during a call, you can save that code number to a phonebook
entry and use the phonebook to send the code number.
Enter the code number (up to 20 digits) into the phonebook just
like a regular phonebook entry. Be sure to enter the code number
into the phonebook exactly as you would enter it during a call.
When you hear the prompt that tells you to enter the number, open
the phonebook and find the entry that contains your code number.
Press
MENU/SELECT
to transmit the code. Or, if you change your
mind, use
PHONEBOOK/LEFT
to close the phonebook.
Finding a Lost Handset
With the phone in standby, press
FIND
on the base. All the handsets
will beep for 1 minute, or until you press
FIND
again or any key on the
handset.

20
Using Special Features
Using Voice Message Notification
This feature supports Frequency-Shift Keying (FSK) message
notification. Contact your voice mail provider for more details.
If you subscribe to a voice mail service, your phone
can notify you when you have a new message
waiting. When you have new messages, the voice
message icon
(
) appears in the display, and the
new message light (at the top of the handset) blinks.
Setting Up Your Voice Mail
When you sign up for a voice mail service, your service provider
should give you an access number. If you don't have this information,
contact your provider before you start.
With the phone in standby, open the menu.1)
Select2) Global Setup, then select Edit Voice Mail. For the New
Zealand model the Telecom access number (083210) is pre-
programmed.
Enter your access number exactly as you would dial it. You can3)
enter a total of 20 digits. If you need the phone to wait for a few
seconds between digits (to wait for the service to answer, for
example), press
REDIAL/PAUSE
to insert a 2-second pause. If
two seconds isn't long enough, you can insert as many pauses
as you need, but each pause counts as one digit. Press
SELECT/
MENU
when you're finished.
Getting Your Messages
Press
MUTE
and then
MENU/SELECT
to dial the access number you
programmed into this handset.
Resetting the voice message indicator
If the voice message icon remains after you check your messages,
you can reset it.
With the phone in standby, open the menu.1)
Select2) Global Setup, then select VMWI Reset.
Select3) Yes.
Table of contents
Other Uniden Telephone Accessories manuals
Popular Telephone Accessories manuals by other brands

Konig & Meyer
Konig & Meyer 19761 INFORMATION FOR USE

Nortel
Nortel DMS-100 Series user guide

Grandstream Networks
Grandstream Networks HT812 Administration guide

Siemens
Siemens optiPoint application module Information and important operating procedures

Mytrex
Mytrex myActive Alert User instructions

On-Hold Plus
On-Hold Plus OHP 4000 Series user manual