manuals.online logo
Brands
  1. Home
  2. •
  3. Brands
  4. •
  5. Uniden
  6. •
  7. Two-way Radio
  8. •
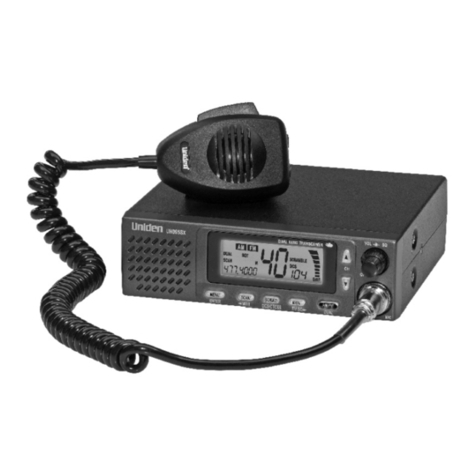
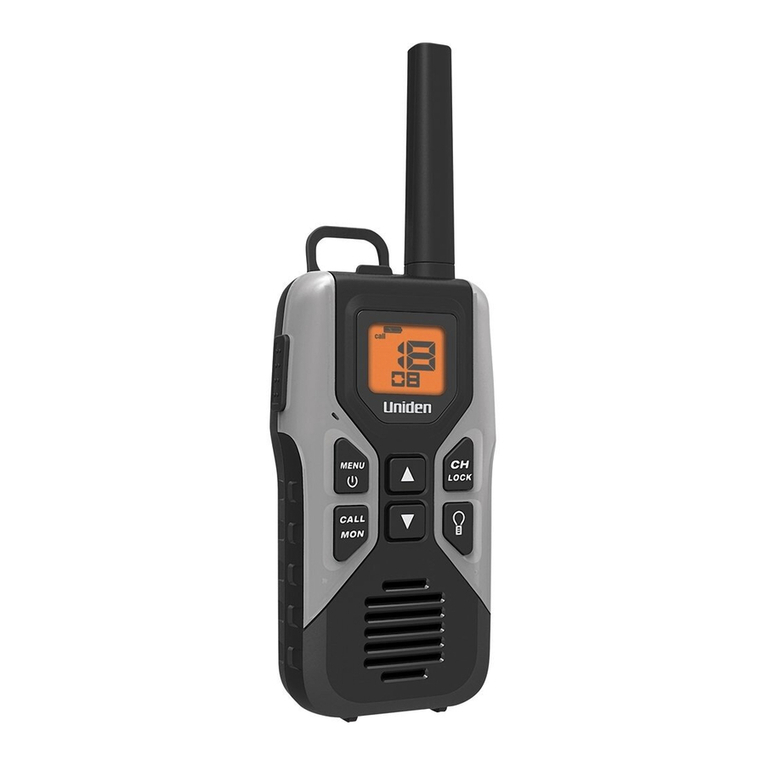
  9. Uniden GMR5088-2CKHS User manual

Uniden GMR5088-2CKHS User manual

GMR5088-2CKHS, GMR5095-2CKHS
GMR5098-2CKVP
CHARGING CRADLE
1
2
3
4
5
6
7
10
11
12
13
14
17
19
22
LIQUID CRYSTAL DISPLAY
9
8
15
16
18
20 21
Radio color/pattern varies
according to model number.
23
24
25
*Range may vary depending on environmental
and/or topographical conditions.
• 15GMRS/7FRSChannels
• 7WeatherChannels
• 142PrivacyCodes(CTCSS
ToneandDCSCode)
• Upto50MileRange*
• InternalVOXCircuitry
• TRUWaterproof™(JIS7)—
SubmersibleandFloats
• DirectCallwithName
Display
• 143GroupCodes
• SilentMode
• 10SelectableCall/RingTone
Alerts
• BacklitLCDDisplay
• RogerBeep
• CallAlert;Vibrate
• 2EarbudswithVOXMicor2
1Antenna 14 Enter/Lock
2PushtoTalk 15 BatteryLevel
3Boost 16 GroupNumber
4Monitor 17 GroupIndicator
5ChannelUp/Down 18 RX(Receive)orTX
(Transmit)Indicator
6Tone 19 VOXIndicator
7 DCall 20 MissedCallIndicator
8Microphone 21 AlertIndicator
9Speaker 22 ChannelNumber
10 Flashlight/Monitor 23 ChargingLED
11 Menu/Power 24 Chargingcontacts
12 VolumeUp/Down 25 miniUSBport
13 Weather
CongratulationsonyourpurchaseofaUniden
GMRS(GeneralMobileRadioService)
waterproofradio.Theselightweight,palm-sized,
radiosarestate-of-the-artdevices.The
GMR5088-2CKHSandGMR5095-2CKHS
modelsincludeearbudvoxmics.GMR5098-
2CKVPincludestwoVOXheadset boommics.
Usethematsportingeventstocontactfamily
andfriends,whilehiking,skiing,oroutdoors,or
inaneighborhoodwatchforvitalcommunication
—evenoutsidebythepool!Don'tworry;they
float!
Your radio complies with JIS7 water-
resistant standards, which means the radio
can be submerged in 1.0 meters of water for
30 minutes without damage.
• Theradiowillonlymeetthisratingiffully
assembledandallrubbersealsandthejack
coverarewellmaintainedandcorrectlyfitted.
ThismeansthattheHeadsetplugisnot
inserted,andtheHeadsetjackcoverandthe
batterypackareattachedandsecurely
fastened.
• Afteryourradioissubmergedinwater,you
mightnoticethatthesoundisdistorted.Thisis
becausewaterremainsinandaroundthe
speakerandmicrophone.Justshaketheradio
toclearexcesswater,andthesoundshould
returntonormal.
Note: If your radio is exposed to salt water,
clean your radio thoroughly with fresh water
and dry it before turning it on.
PACKAGE CONTENTS
Yourpackagecontainstworadios,6
rechargeableAANiMHbatteries,oneACadapter
withmicroUSBconnector,onechargingcradle,2
earbud/micheadsetsforGMR5095-2CKHSand
GMR5088-2CKHS(GMR5098-2CKVPhastwo
headsetboommics),twobeltclips,andthis
referenceguide.Toorderthefollowingoptional
accessories,visitourwebsiteatwww.uniden.
com.Use only Uniden accessories.
• NiMHBatteries–#BP-38
• ChargingCradle–#RC-658R
• HeadsetBoomMic–#ZA-133orZA-160
• ACAdapter–#AD-0001
• CarabinerClip–#TSTD0720002
GMRS LICENSE
The radio operates on the General Mobile
Radio Service (GMRS) frequencies when
using Channels 1-7 and channels 15-22. You
must have a GMRS license issued by the
Federal Communications Commission to
legally use these channels.
For licensing information and application
forms, visit the FCC online at: www.fcc.gov/
wtb/uls or call the FCC hotline at 1-800-418-
3676. If you have any questions, you can
contact the FCC direct at 1-888-225-5322. No
license is required for operation on channels
8-14 or operation on any channel in Canada.
INSTALL THE BATTERY
Eachradiouses3rechargeableAANiMH
batteriesforpower(included).Itcanalsouse
non-rechargeableAAalkalinebatteries(not
included).ToinstalltheNiMHbatteries:
1.Turnthe screwholdingthebattery
compartmentcounterclockwisewitha
screwdriverandliftupthebatterycover,
2.Insert theNiMHbatteriesin thebattery
compartmentaccordingtothedirections
indicatedonthebattery.Installingthe
batteriesincorrectlywillpreventtheunitfrom
operating.
3.Before placingthebatterycoverbackonthe
radio,checktherubbersealaroundthe
batterycompartment.Makesurethattheseal
isingoodconditionandthatthereisno
foreignmatterunderit.
4.Replace thebatterycompartmentdoor.
Tightenthescrewssecurely.
Note:If the rubber seal appears worn, nicked,
or dried out, replacement seals are available
from www.uniden.com.
CHARGING THE RADIO
Followtheseinstructionstochargeorrecharge
yourradios.
Make sure to turn the radio OFF before
placing it in the charging cradle.
1.Insert theadapter'smicroUSBplug toDCIN
5VUSBjackofthechargingcradleandplug
theotherendintoanACoutlet.
2.Set thechargingcradleonastabledeskor
tabletopandplacetheradiosinthecharging
cradlewiththekeypadfacingforward.
3.Make surethattheLED illuminates.Charge
thebatteriesfor16hoursandremovethe
radiofromthechargingcradleaftercharging.
Note:
• UseonlythesuppliedbatteriesandAC
adapterorapprovedaccessoriesfrom
Uniden.
• Chargetimemayvarydependingonthe
batteryliferemaining.
• Thebatteriesmustbeinstalledfortheunitto
operate,eveniftheunitisalsoconnectedto
externalpower.
• Ifbatterypowerislow,youcannotoperate
theradioevenusingexternalpower.Allow
thebatteriestochargebeforeusing.Ifyoutry
Choosing a Channel
Yourradiohas22channelsand142Privacy
codesyoucanusetotalktoothers.Inorderto
speaktosomeone,bothyourradiosmustbeset
tothesamechannelandPrivacycode.
Tochooseachannel:
PressCH or ,thenpressCH or 
toincreaseordecreasethechannel
numberdisplayed.
Toscrollthroughthechannels,pressCHor
,thenpressandholdCHor formore
than1second.
Note: Channels 1-7 and 15-22 have a typical
range of up to 50 miles by pressing BOOST.
HI displays when you select a GMRS
channel, and LO displays when you select
an FRS channel.
SETTING UP GROUP MODE
Groupmodeletsseveralpeopletalkonthe
samechannelinaseparategroup.Inorderto
useGroupmode,youneedtoinitializespecific
settingsinyourradio:
• SettheradiotoGroupmode.
• SetaGroupCode.
• SetaUnitNumber.
• Seta"Nickname."
Setting the Radio to Group Mode
TosettheradiotoGroupmode,whichenables
DirectCall,AutoChannelChange,andAllCall,
pressandholdTONE/GROUPfor 2seconds.
TheradiodisplaysGRP andgroupcode.
Note: In Group mode, you cannot receive
transmissions from other radios unless
they are also set to the same channel and
group code.
Setting the Group Code
Setthegroupcodeforyourradiogroupfrom
0-142.Everyoneinyourgroupmustselectthe
samegroupcodeinordertocommunicatewith
eachother.
1.PressTONE/GROUPinGroupmode.Press
CHor toselectthegroupnumber.
2.Press ENTER/ orTONE/GROUPtoreturn
tonormaloperation.
Setting the Unit Number
Eachradioinyourgroupneedstobesettoa
uniqueunitnumber,from1-16.
1.Press MENU/ .Advancethroughthemenu
untilUNITappears,andthenpressENTER/
.Thecurrentunitnumber flashes.
2.Press CH or toselectthedesiredunit
number.
3.Press ENTER/ tocontinueto thenext
section.
Setting Your Nickname
Yournicknameappearsonotherunits’displays
whenyoumakeanAllCallorDirectCall.Thisis
alsothenamethatappearsonotherradio
displayswhensomeonewantstomakeaDirect
Calltoyou.Withoutanickname,theunit
numbershows.
1.Press MENU/ .Advancethroughthemenu
untilUNITappears,andthenpressENTER/
.Thecurrentunitnumber flashes,then
pressENTER/ .Theradiodisplays - - - -
(oryourcurrentnickname)withthefirstplace
inthenicknameflashing.
2.Press CH or toselecttheletter,then
ENTER/ toadvancetothenextletteruntil
youhaveenteredyournickname.
3.Press MENU/ toconfirmthe settingand
exitthemenu.
Using Group Mode
Groupmodeletsyoumakedirectcallstoother
peopleinyourgroupwithoutalertingtheentire
groupandalsoletsyouquicklychange
everyoneinyourgrouptoanotherchannelfrom
asingleradio.BeforeusingGroupmode,follow
theinstructionsin"SettingUpGroupmode"on
everyradioinyourgroup.Then,torecordthe
unitIDandeveryone’snickname ineveryradio,
sendacallto"All"fromeachradioonetime
(see"SendingaDirectCall").
Sending a Direct Call
DirectCallletsyoucalleveryoneinyourgroup
atonce,orcallasinglepersoninyourgroup
withoutanyoneelseinthegroupknowing.Itis
likea"speeddial"directlytotheperson(s)you
wanttotalkto.
Tocalleveryoneinyourgroup,pressD CALLin
Groupmode.Theradioflashes ALL.Then,
pressD CALL or ENTER/ .Everyonein your
groupreceivesacall"chirp"forabout3
seconds.Whenthechirpends,beginyour
conversation.
Note:When you make a direct call to "all," your
radio also sends out your nickname or ID so
that it will show up in the call list for everyone in
your group.
Tocallonepersoninyourgroupwithouthaving
otherpeopleknow,pressD CALLinGroup
mode.Then,useCHor to selectthe
personyouwanttocallandpressD CALL or
ENTER/ .Yourradiosoundstonesfor3
secondsasitsendsthecall.Whentheselected
personanswers,youcanbeginyour
conversation.
Youcansilencethecalltonesanytime by
pressingPTTorBOOST.
from brand to brand. See the specifications
for the specific tones used for each setting.
Channel Scan Feature
Yourradiohasachannelscanfeaturethatlets
youeasilyscanall22channels.Whenanactive
channelisdetected,theradiopausesonthat
channeluntilthechannelisclear.Thenaftera
2-seconddelay,theradioresumesscanning.
PressingPTTorBOOSTwhilethescanis
pausedonachannelletsyoutransmitonthat
channel.
Toturnonchannelscan:
PressMENU/ .Theradiodisplays SCAN.
PressENTER/ .Thechannelnumberchanges
astheradiorapidlycycles throughthechannels.
UsetheradioinStandard(notGroup)mode
whenyouneedtobeabletocommunicatewith
radiosthatdonothavethegroupfeature.
Talking on Your Radio
Totalktoothersusingtheradio:
1.Press andholdPTTor BOOSTandspeakin
aclear,normalvoiceabout2-3inchesaway
fromthemicrophone.Whileyoutransmit,
TXHIorTXLOappearsonthedisplay
accordingtothetypeofchannel.Toavoid
cuttingoffthefirstpart ofyourtransmission,
pauseslightlyafterpressingPTTorBOOST
beforeyoustarttalking.
2.When youfinishspeaking,release PTTor
BOOST.Youcannowreceiveincomingcalls.
Whilereceiving,RXappearsonthedisplay.
Note:
• When you press BOOST, BOOST appear on
the display. The radio transmits at maximum
power when a GMRS channel is selected.
• IfBOOST,PTTorVOXiscontinuouslyused,
1minuteafteryoustartusingthefeaturethe
transmissionstopsandyouhearatimeout
errortone.
Monitor Mode Feature
Yourradioletsyoulistenforweaksignalson
thecurrentchannelatthepressofakey.
ToturnontheMonitormode:
• PressandholdLIGHT/MONfor2seconds
untiltwobeepssoundforcontinuous
listening.Thereceivercircuitstays open,so
youhearboththenoiseandweaksignals.
ToturnoffMonitormode:
PressLIGHT/MONtoreturntotheprevious
mode.MONandRXdisappear.
Navigating through the Normal Menu
YourradiohasaMenufunctiontoaccess
advancedfeatures.InordertouseAuto
ChannelChange,youneedtosetyourradioto
Groupmode.
Start
Scanning
Scan
Mode
Silent
Mode
ON-OFF
Auto
Channel
Change
Channel
Change
VOX
Level
OFF,1-5
1-10
Call
Tone
Unit
Setting
Setting
Unit
Number
Roger
Beep
ON-OFF
Beep
Tone
ON-OFF
Setting
Nickname
1.Toenterthemenu,press MENU/ .
2.Press MENU/ againtoadvance through
themenu.Afterthelastmenuitem,theradio
exitstothepreviousmode.
3.Other waystoexitthe Menufunctionare:
a.Press PTT,BOOST,LIGHT/MON, D
CALL, WX/ALERT or TONE/GROUP.
b.Wait10 secondsuntiltheradio
automaticallyreturnstotheprevious
mode.
Setting Silent Mode
WhenyouturnonSilentmode,allincoming
callsaremuted,thedisplaybacklightflashes,
andthechannelindicatordisplaysSLNTand
CALLtoalertyoutoanincomingcall.Ifyoudo
notrespondtothecallwithin15seconds,the
backlightturnsoff.TheGMR5095will also
vibratetoremindyouthatyoumissedacall.
Silentmodeisdisabledfor15secondswhen
youtransmit,receive,orpressanyotherbutton.
TosetSilentmode:
1.Enter themenu.Advancethroughthemenu
untiltheSLNTdisplays,thenpressENTER/
.Thecurrentsettingflashes.
2. Press
CH
todisplayon,thenpressENTER/ 
Note: To prevent unwanted silent alerts, be sure
to use a Privacy Code or Group Code whenever
you use the Silent mode feature.
You can hear the received voice when you turn
on channel scan and an active channel is
detected, even during Silent mode.
Missed Call Alerts
IfyoureceiveanincomingcallwhileSilent
modeisonanddonotrespond,theradiowill
turnontheMissedCallicon.Ifyouareusing
Groupmode,theradiowillalsoindicatewho
madethecall.
TheGMR5095willalsoremindyouofamissed
callbyvibratingeveryminuteafterthecallfor3
minutes.
HeadsetBoomMics
• BOOSTforMaximum
Range*
• HeadsetJack
• AutoChannelChange
Call
• BatteryLevelMeter
• RechargeableNiMH
Batteries
• DualChargingCradle
withACAdapter
• ChannelMonitor
• ChannelScan
GroupScan
• KeypadLock
• EmergencyWeather
Alert
• EmergencyLight
Yourconversationremainsprivatebetweenyou
andthepersonyoucalleduntil15secondsafter
yourlastconversation.Then,your radio
automaticallyexitsPrivatemode.
Automatically Changing Channels
AutoChannelChangeletsyoueasilycoordinate
achannelchangeforeveryoneinyourgroup.
Youmightwanttodothiswhenyou findyouare
gettingalotofinterferenceonyourcurrent
channel.Youalsousethisfeaturetochange
fromalow-powerchannel(8-14)tooneofthe
high-poweredchannels(1-7,15-22)formore
range(ortoalow-powerchannelifyouneed
longerbatterylife).
Tostartanautochannelchange,onanyradio
inthegroup,pressMENU/ . Advancethrough
themenuuntilCHCX appears,thenpress
ENTER/. Thecurrentchannelflashes.Use
CHor  to selectthetargetchannel.You
cancheckwhethertheselectedchannelis
clear.ThenpressD CALLorENTER/ .
Yourradiochirpsforabout10secondswhile it
sendsoutthechannelchangesignal.Aseach
radioreceivesthechannelchangesignal,it
chirpsonce,thenchangestothenewchannel.
Toensureallradiosmakeittothenewchannel,
werecommendyou:
• Makesureyouareinanopenenvironment,
wheretheradiowillgetthebestrange.
• Optimizerangeduringthechannelchange
signalbyraisingtheradiooveryourheadto
givethebestpossibleheight.
• Doa"rollcall"onthenewchannelafterthe
movetobesurenoonewasleftbehind.If
youmissedsomeone,returntotheprevious
channelandissuethesignalagain.
USING THE RADIO IN
STANDARD MODE
UsetheradioinStandard(notGroup)mode
whenyouneedtobeabletocommunicatewith
radiosthatdonothavethegroupfeature.
Choosing a Privacy Code
YoucanselectaPrivacyCodefrom1-142for
eachchannel.oF(off)indicates noPrivacy
Codeselectedandyourradiocanreceivea
signalregardlessofthecodesettingsofthe
transmittingradio.
1.Press TONE/GROUP.ThePrivacyCode
indicatorflashes.
2.Press CHor toincreaseor decrease
thecode.YoucanalsoselectoF.
3.Press ENTER/ orTONE/GROUP toreturn
tonormaloperation.
Note: Only tones 1-38 are standard across
radio brands. Other settings might differ
Voice Operated Transmission
Yourradioisequippedwithauserselectable
VoiceOperatedTransmitter(VOX)thatcanbe
usedforautomaticvoicetransmissions.TheVOX
featureisdesignedtobeusedwithaheadsetwith
amicrophone.Initiatetransmissionbyspeaking
intotheremotemicrophoneinsteadofpushing
PTTandBOOST.ToselecttheVOXlevel:
1.Press MENU/ .AdvancethroughtheMenu
untilVOXappearsonthedisplay, thenpress
ENTER/ . The currentlevel(off,1-5) flashes.
LeveloF(off)disablesVOX, whilelevels1-5
setthesensitivityoftheVOXcircuit.
2.Press eitherCHor to reachthedesired
VOXsensitivitylevel,thenpressENTER/ .
Uselevel1forincreasedsensitivitytovoicein
normallyquietenvironments,anduseahigher
leveltoreduceundesiredactivationinvery
noisyenvironments.
Transmitting a Call Tone
Yourradioisequippedwith10selectablecall
tonesthataretransmittedwhenyoupressD
CALLinStandardmode.
Theselectedtonealsowillbeheardwhen
someoneplacesadirectcalltoyou.
Toselectacalltone:
1.Press MENU/ .Advancethroughthemenu
untilCALLappears,thenpressENTER/ .The
currentcalltonenumber(1-10)flashes.
2.Press CH or toincreaseordecreasethe
numbertothedesiredcalltone.Eachtonewill
beheardthroughthespeaker.PressENTER/
toselectacalltone.
Totransmittheselectedcalltone,pressD CALL.
Theselectedtoneistransmittedforafixedlength
oftime.PressPTTorBOOSTtocancel.
Roger Beep
RogerBeepisabeepthatissenttonotifytheend
oftransmission(bothPTTand VOXtransmission).
YoucanhearRogerBeepthroughthespeaker
whenbothRogerBeepandBeepToneareon.
WhenRogerBeepisonandBeepToneisoff,you
donothearRogerBeep,butitistransmittedto
yourparty.
ToadjustRogerBeep,pressMENU/ .Advance
throughthemenuuntilRGRappears,thenpress
ENTER/ .Thecurrentsettingflashes.
ToturnoffRogerBeep:
PressCH todisplayoF,thenpressENTER/
ToturnonRogerBeep:
PressCHtodisplayon,thenpressENTER/
Adjusting the Sound (Beep Tone)
Yourradiosoundsabeepeachtimeyou
pressakey(exceptforPTTandBOOST).
totransmitwhilepowerislow,theradiowill
automaticallyturnoff.
• Chargetimemayvarydependingonthe
batteryliferemaining.
• Donotrechargealkalinebatteries.Doingso
cancreateasafetyhazardordamagethe
radio.
• Forfastercharging,turnofftheradiobefore
charging.
Warning!
• Thechargingcradleisnotwaterproof.Ifthe
chargingcradlefallsinthewater,unplugit
beforeattemptingtoremoveitfromthewater.
Allowthecradletodrycompletelybefore
reconnectingthepower.
• Wipeoffdirtorshake waterfromyourradio
beforeplacinginthechargingcradleifyour
radioissoiledorwet.
USING A HEADSET
GMR5088-2CKHSandGMR5095-2CKHSboth
comewithanearbudheadsetwithmiconthe
cord.TheGMR5098-2CKVPcomeswithboom
micheadset.Touseaheadset,lifttherubber
coverfromovertheheadsetjack,thenplugin
theheadset.
Important: Your radio is not waterproof when
using a headset jack. When you remove the
headset, be sure to fully press the jack cover
into place to restore its waterproof capability.
USING RADIO BATTERY LEVEL
AND LOW BATTERY ALERT
Thisradiohasabatterylevelmeterthat
indicatesthebatterypowerlevel.Whenthe
batterylevelislow,thebatterylevelmetericon
flashesandthenBATT appearsafter30
seconds.RechargetheNiMHbatteries
immediately.
Warning!To avoid the risk of personal injury or
property damage from fire or electrical shock,
only use the Uniden accessories specifically
designated for this product.
USING THE RADIO
Inordertogetthemostoutofyournewradio,
readthisreferenceguidecompletelybefore
attemptingtooperateit.
Turning the Radio On and Adjusting
the Volume
1.Press andholdMENU/ to turntheradio
on.
2.Press VOor toincreaseordecrease
thevolumelevelthenpressENTER/ .
3.Press andholdMENU/ to turntheradio
off.
Toadjustthesound,pressMENU/ .Advance
throughthemenuuntilTONEappears,thenpress
ENTER/ .Thecurrentsettingflashes.
Toturnoffthebeep:
PressCH todisplayoF,thenpressENTER/ .
Toturnonthebeep:
PressCH todisplayon,thenpress
ENTER/ .
Key Lock
PressandholdtheENTER/ untilLOCKappears.
ToturnKeylockoff,pressandholdENTER/
again.
Note:
• If Keylock is on, the radio can still receive
transmissions. Use D CALL in Standard mode,
VOor , PTT, BOOST, LIGHT/MON, and
MENU/ to turn the radio on or off.
• The radio retains the keylock status even when
you cycle power.
Using the Flashlight
Youcanusethisradioinanemergency.Ifyou
pressLIGHT/MON,theradioturnsonthehigh-
intensityLEDflashlightonyourradio.Depending
onhowyousetitup,theLEDfunctionsasa
flashlight,flashes“SOS”ininternationalMorse
Code,isalwayson,orisoff.
Note: Your radio operates normally when the
SOS strobe is activated.
1.Press LIGHT/MONwhilethislight isturnedoff,
theStrobeLightemitstheSOSsignal.(Strobe
SOSmode)
2.And then,pressLIGHT/MONonce more,itwill
turnoncontinuously.(AlwaysOnmode)
3.And then,pressLIGHT/MONwhileAlwaysOn
mode,thelightwillbeturnedoff.
Automatic Power Save Feature
Yourradiohasauniquecircuitdesignedto
dramaticallyextendthelifeofthebattery.Ifyoudo
nottransmitanddonotreceiveanincomingcall
within3seconds,yourradioswitchestothePower
Savemode.Theradiois stillabletoreceive
transmissionsinthismode.
LCD Backlight
TheLCDBacklightautomaticallyturnsonwhenany
key(exceptforPTTandBOOST)ispressed.The
LCDremainslitfor10secondsbeforeturningoff.
USING THE WEATHER RADIO
Yourradiocanreceiveweatherbroadcastsfromthe
NOAANationalWeatherService.WheninWeather
RadioAlertmode,thesystemfunctionsasitdoes
inStandardmodeorGroupmodebutalsomonitors
theselectedweatherchannelforalertswhennot
communicating.WhileusingtheWeatherRadio,
youarenotabletoreceiveGMRScommunications.
1.ToturnontheWeatherRadioBroadcastmode,
pressWX/ALERT.WXappears.
2.Press CHor toincreaseor decreasethe
numbertothedesiredWeatherChannel.
3.ToexittheWeatherRadioBroadcastmode,press
WX/ALERT.WXdisappears.
WhenintheWeatherRadio Broadcastmode,you
canonlysettheBeepTonefromtheMenumode.
Choosing an Emergency/Weather Channel
Thereare7NOAAchannelfrequenciesavailable
andthesefrequenciesarecommonbetweentheUS
andCanada.Youneedtoknowwhatfrequencyis
beingtransmittedinyourlocation.
1.Press andholdWX/ALERT. appears.
2.When theunitreceivesa warningsignal,itbeeps
for5seconds. andchannelindicatorflash.
3.ToturnoffWeatherAlert,pressandhold 
WX/ALERT. disappears.
• WhenWeatherAlertisactivated,thehighest
priorityisgiventothisfunction.Itchecksthe
weatheralertsignalsevery7seconds.Whenthe
unitfindsawarningsignal,itswitchestothe
WarningReceivemodeautomatically.
• WeatherAlertisactivatedevenifBeepToneis
off.
NOAAWeatherRadioFrequencyList:
Chan. Freq.
(MHz)
Chan. Freq.
(MHz)
1162.550 5162.450
2162.400 6162.500
3162.475 7 162.525
4162.425
SPECIFICATIONS
Item Specication
Channels 15GMRS/7FRS/7Weather
Privacy
Codes
38Sub-Codes
83DCSCodes
Operating Frequency (MHz)
GMRS/FRS: 462.5500-467.7125
WX: 162.4000-162.5500
Power
Source
Perradio:3AANiMHBatteries
(700mAh)
Range
(Chan.)
Miles
Item Specication
1-7 Upto18(upto50withBOOST)
8-14 Upto5
15-22 Upto18(upto50withBOOST)
Battery Life
(Hours)
8.5Hours(typical)--NiMH
Batteries(5/5/90dutycycle)

FREQUENCIES
Frequency Chart
CH. Freq. Cross-Ref. CH. Freq. Cross-
Ref.
1462.5625 FRS&GMRS1 12 467.6625 FRS12
2462.5875 FRS&GMRS2 13 467.6875 FRS13
3462.6125 FRS&GMRS3 14 467.7125 FRS14
4462.6375 FRS&GMRS4 15 462.5500 GMRS11
5462.6625 FRS&GMRS5 16 462.5750 GMRS8
6462.6875 FRS&GMRS6 17 462.6000 GMRS12
7 462.7125 FRS&GMRS7 18 462.6250 GMRS9
8467.5625 FRS8 19 462.6500 GMRS13
9467.5875 FRS9 20 462.6750 GMRS10
10 467.6125 FRS10 21 462.7000 GMRS14
11 467.6375 FRS11 22 462.7250 GMRS15
CTCSS & DCS CODES
CTCSS Chart (Hz)
Code Freq. Code Freq. Code Freq.
oF OFF 13 103.5 26 162.2
167.0 14 107.2 27 167.9
271.9 15 110.9 28 173.8
374.4 16 114.8 29 179.9
477.0 17 118.8 30 186.2
579.7 18 123.0 31 192.8
682.5 19 127.3 32 203.5
7 85.48 20 131.8 33 210.7
888.5 21 136.5 34 218.1
991.5 22 141.3 35 225.7
10 94.8 23 146.2 36 233.6
11 97.4 24 151.4 37 241.8
12 100.0 25 156.7 38 250.3
DSC Code List
Tone
No.
Octal
Code
Tone
No.
Octal
Code
Tone
No.
Octal
Code
39 023 67 174 95 445
40 025 68 205 96 464
41 026 69 223 97 465
42 031 70 226 98 466
43 032 71 243 99 503
44 043 72 244 100 506
45 047 73 245 101 516
46 051 74 251 102 532
47 054 75 261 103 546
48 065 76 263 104 565
49 071 77 265 105 606
50 072 78 271 106 612
51 073 79 306 107 624
52 074 80 311 108 627
53 114 81 315 109 631
54 115 82 331 11 0 632
55 116 83 343 111 654
56 125 84 346 11 2 662
57 131 85 351 11 3 664
58 132 86 364 11 4 703
59 134 87 365 115 712
60 143 88 371 116 723
61 152 89 411 11 7 731
62 155 90 412 118 732
63 156 91 413 11 9 734
64 162 92 423 120 743
65 165 93 431 121 754
66 172 94 432
RBRC Information
Aspartofourcommitmentto
protecttheenvironmentand
conservenaturalresources,
Unidenvoluntarilyparticipates
inanRBRC®industryprogram
tocollectandrecycleusedNi-MHbatteries
withintheUS.
Pleasecall1-800-8-BATTERYforinformationon
Ni-MHbatteryrecyclinginyourarea.(RBRC®is
aregisteredtrademarkoftheRechargeable
BatteryRecyclingCorporation.)
MAINTENANCE
To be safe and sure:
• Neveropenyourradio’scase.
• Neverchangeorreplaceanythinginyourradio
exceptthebatteries.
Care and Safety
Tocleantheradio,useasoftcloth
dampenedwithwater.Donotusecleanersor
solventsbecausetheycanharmthebodyof
theunitandleakinside,causingpermanent
damage.Useadry,lint-freeclothtoclean
thebatterycontacts.Donotsubmergethe
unitinwater.Iftheunitgetswet,turnitoff
andremovethebatteriesimmediately.
Drythebatterycompartmentwithasoftcloth
tominimizepotentialwaterdamage.Leave
thebatterycompartmentcoveroffovernight
toensurecompletedrying.Donotusethe
radiountiltheunitiscompletelydry.
YourradiomightcauseTVorradio
interferenceevenwhenitisoperating
properly.Todeterminewhetheryourradiois
causingtheinterference,turnitoff.Ifthe
interferencegoesaway,yourradioiscausing
it.Trytoeliminatetheinterferencebymoving
yourradioawayfromthereceiver.Ifyou
cannoteliminatetheinterference,theFCC
requiresthatyoustopusingtheradio.
Hazardous Environments
Donotoperatetheradioinhazardous
environments.Explosionorfiremayresult.
Donotoperatetheradionearunshielded
electricalblastingcaps.
Undercertainconditions,radioscaninterfere
withblastingoperationsandmaycausean
explosion.TurnyourradioOFFtoprevent
accidentaltransmissionwheninablasting
areaorinareasposted:"Turnofftwo-way
radio."Constructioncrewsoftenuseremote
controlRFdevicestosetoffexplosives.
WARNING!Readthisinformationbefore
usingtheradio.InAugust1996theFederal
CommunicationsCommission(FCC)ofthe
UnitedStateswithitsactioninReportand
OrderFCC96-326adoptedanupdated
safetystandardforhumanexposuretoradio
frequencyelectromagneticenergyemittedby
FCCregulatedtransmitters.
Thoseguidelinesareconsistentwiththe
safetystandardpreviouslysetbybothU.S.
andinternationalstandardsbodies.The
designoftheradiocomplieswiththeFCC
guidelinesandtheseinternationalstandards.
Neverallowchildrentooperatetheradio
withoutadultsupervisionandtheknowledge
ofthefollowingguidelines.
WARNING!Itisuptotheusertoproperly
operatethisradiotransmittertoinsuresafe
operation.Pleaseadheretothefollowing:
Donotusetheradiowithadamaged
antenna.Ifadamagedantennacomesinto
contactwiththeskin,aminorburnmayresult.
Pleasecontactyourlocaldealerfora
replacementantenna.
REGULATORY INFORMATION
Hand-Held Operation (Held-to-Face)
Thisdevicewasevaluatedfortypicalhand-
held(held-to-face)operationswitha1inch
spacingfromthefrontoftheradio.Forhand-
heldoperation,theradioshouldbeheld1
inchfromtheuser'sfaceinordertocomply
withFCCRFexposurerequirements.
Body-Worn Operation
Thisdevicewasevaluatedforbody-worn
operationswiththesuppliedbelt-clip
accessory.(Allnecessaryaccessoriesare
includedinthepackage;anyadditionalor
optionalaccessoriesarenotrequiredfor
compliancewiththeguidelines.)Thirdparty
accessories(unlessapprovedbythe
manufacturer)shouldbeavoidedasthese
mightnotcomplywithFCCRFexposure
guidelines.
Forbodywornoperation,thisdevicehas
beentestedandmeetstheIndustryCanada
RFexposureguidelineswhenusedwith
Unidenaccessoriessuppliedordesignatedfor
thisproduct.Useofotheraccessoriesmay
notensurecompliancewithIndustryCanada
RFexposureguidelines.
Fonctionnementdel’appareil,lorsqueporté
surlecorps.Cetappareilaététestéets’est
avéréconformeauxnormesd’Industrie
Canadaetapprouvépourleportsurlecorps
àl’aidedesaccessoiresUnidenincluset
conçuspourcetappareil.L’utilisation
d'accessoiresnerespectantpasles
exigencesd'expositionRFd’IndustrieCanada
doitêtreévitée.
FCC Compliance
ThisdevicecomplieswithPart15oftheFCC
rules.Operationissubjectedtothefollowing
twoconditions:(1)thisdevicemaynotcause
harmfulinterference,and(2)thisdevicemust
acceptanyinterferencereceived,including
interferencethatmaycauseundesired
operation.
Changesormodificationsnotexpressly
WARRANTYDURATION:Thiswarrantytothe
originalusershallterminateandbeofnofurther
effect12monthsafterthe dateoforiginalretail sale.
ThewarrantyisinvalidiftheProductis:
(A)damagedornotmaintainedasreasonableor
necessary,(B)modified,altered,orusedas partof
anyconversionkits,sub-assemblies,orany
configurationsnotsoldbyUniden,(C)improperly
installed,(D)servicedorrepairedbysomeoneother
thananauthorizedUnidenservicecenterforadefect
ormalfunctioncoveredbythiswarranty,(E)usedin
anyconjunctionwithequipmentorpartsoraspartof
anysystemnotmanufacturedbyUniden,or(F)
installedorprogrammedbyanyoneotherthanas
detailedbytheowner ’smanualforthisproduct.
STATEMENTOFREMEDY:Intheeventthatthe
productdoesnotconformtothiswarrantyatanytime
whilethiswarrantyisineffect,warrantorwilleither,at
itsoption,repairorreplacethedefectiveunitand
returnittoyouwithoutchargeforparts,service,or
anyothercost(exceptshippingandhandling)
incurredbywarrantororitsrepresentativesin
connectionwiththeperformanceofthiswarranty.
Warrantor,atitsoption,mayreplacetheunit witha
neworrefurbishedunit.
THELIMITEDWARRANTYSETFORTHABOVEIS
THESOLEANDENTIREWARRANTYPERTAINING
TOTHEPRODUCTANDISINLIEUOFAND
EXCLUDESALLOTHERWARRANTIESOFANY
NATUREWHATSOEVER,WHETHEREXPRESS,
IMPLIEDORARISINGBYOPERATIONOFLAW,
INCLUDING,BUTNOTLIMITEDTOANYIMPLIED
WARRANTIESOFMERCHANTABILITYOR
FITNESSFORAPARTICULARPURPOSE.THIS
WARRANTYDOESNOTCOVERORPROVIDE
FORTHEREIMBURSEMENTOVERPAYMENTOF
INCIDENTALORCONSEQUENTIALDAMAGES.
Somestatesdonotallowthisexclusionorlimitation
ofincidentalorconsequentialdamagessotheabove
limitationorexclusionmaynotapplytoyou.
LEGALREMEDIES:Thiswarrantygivesyouspecific
legalrights,andyoumayalsohaveotherrights
whichvaryfromstatetostate.Thiswarranty
.
isvoid
outsidetheUnitedStatesofAmericaandCanada.
PROCEDUREFOROBTAININGPERFORMANCE
OFWARRANTY:If,afterfollowingtheinstructions in
theowner’smanualyou arecertainthatthe Product
isdefective,packtheProductcarefully(preferablyin
itsoriginalpackaging).Disconnectthebatteryfrom
theProductandseparatelysecurethebatteryinits
ownseparatepackagingwithintheshippingcarton.
TheProductshouldincludeallpartsandaccessories
originallypackagedwiththeProduct.Include
evidenceoforiginalpurchaseandanotedescribing
thedefectthathascausedyoutoreturnit.The
Productshouldbeshippedfreightprepaid,by
traceablemeans,towarrantorat:
UnidenAmericaService
C/OSaddleCreek
743HenriettaCreekRoad,Suite100
Roanoke,TX76262
approvedbythepartyresponsiblefor
compliancecouldvoidyourauthorityto
operatetheequipment.
AvisdeconformitéàlaFCC:Cedispositifa
ététestéets’avèreconformeàl’article15
desrèglementsdelaCommissionfédérale
descommunications(FCC).Cedispositifest
soumisauxconditionssuivantes:1)Ce
dispositifnedoitpascauserd’interférences
nuisibleset;2)Ildoitpouvoirsupporterles
parasitesqu’ilreçoit,incluantlesparasites
pouvantnuireàsonfonctionnement.
Toutchangementoumodificationnon
approuvéexpressémentparlapartie
responsablepourraitannulerledroità
l’utilisateurdefairefonctionnercet
équipement.
IC Compliance
ThisdevicecomplieswithIndustryCanada
license-exemptRSSstandard(s).Operationis
subjecttothefollowingtwoconditions:(1)
thisdevicemaynotcauseinterference,and
(2)thisdevicemustacceptanyinterference,
includinginterferencethatmaycause
undesiredoperationofthedevice.
Changesormodificationsnotexpressly
approvedbythepartyresponsiblefor
compliancecouldvoidyourauthorityto
operatetheequipment.
CetappareilestconformeauxnormesRSS
exemptesdelicencesd’IndustrieCanada.
Sonfonctionnementestsoumisauxdeux
conditionssuivantes:(1)cetappareilnedoit
pascauserd’interférencesnuisibleset(2),il
doitpouvoiraccepterlesinterférences,
incluantcellespouvantnuireàson
fonctionnementnormal.
Toutchangementoumodificationnon
approuvéexpressémentparlapartie
responsablepourraitannulerledroità
l’utilisateurdefairefonctionnercet
équipement.
ONE YEAR LIMITED
WARRANTY
Important: Saveyourreceipt! Evidenceof
originalpurchaseisrequiredforwarrantyservice.
WARRANTOR:UNIDENAMERICA
CORPORATION("Uniden")
ELEMENTSOFWARRANTY:Unidenwarrants,for
oneyear,totheoriginalretailowner,thisUniden
Producttobefreefromdefectsinmaterialsand
craftsmanshipwithonlythelimitationsorexclusions
setoutbelow.
©2015UnidenAmericaCorp. Issue2,March 2016
Allrightsreserved PrintedinChina

This manual suits for next models

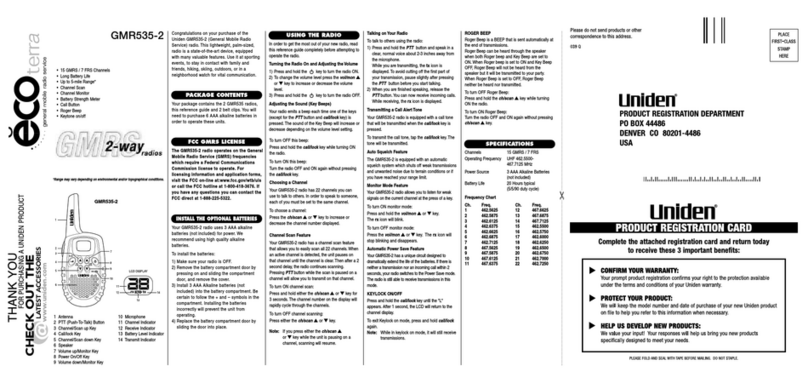
2

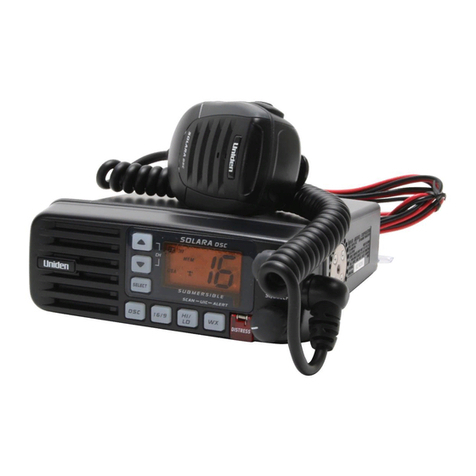
Other Uniden Two-way Radio manuals

Uniden GMR325-2 User manual

Uniden

Uniden GMR325-2 User manual

Uniden GMR638-2 User manual

Uniden

Uniden GMR638-2 User manual

Uniden GMR1058-2CK(4CK) User manual

Uniden

Uniden GMR1058-2CK(4CK) User manual

Uniden UH044SX User manual

Uniden

Uniden UH044SX User manual

Uniden GMR1636-2C Configuration guide

Uniden

Uniden GMR1636-2C Configuration guide

Uniden GMR1235-2 User manual

Uniden

Uniden GMR1235-2 User manual

Uniden UH089 User manual

Uniden

Uniden UH089 User manual

Uniden UH039P User manual

Uniden

Uniden UH039P User manual

Uniden UH041/ User manual

Uniden

Uniden UH041/ User manual

Uniden FRS1400-2 User manual

Uniden

Uniden FRS1400-2 User manual

Uniden GMR1235-2 User manual

Uniden

Uniden GMR1235-2 User manual

Uniden GMR535-2 User manual

Uniden

Uniden GMR535-2 User manual

Uniden UH044DP User manual

Uniden

Uniden UH044DP User manual

Uniden Eco Trek FRS440 User manual

Uniden

Uniden Eco Trek FRS440 User manual

Uniden ecoterra GMRS520 User manual

Uniden

Uniden ecoterra GMRS520 User manual

Uniden PC68LTW - Bearcat Pro User manual

Uniden

Uniden PC68LTW - Bearcat Pro User manual

Uniden GMRS750 User manual

Uniden

Uniden GMRS750 User manual

Uniden UH075 User manual

Uniden

Uniden UH075 User manual

Uniden BearCat PC78XL+ User manual

Uniden

Uniden BearCat PC78XL+ User manual

Uniden GMR535-2 User manual

Uniden

Uniden GMR535-2 User manual

Uniden PMR1188-2CK User manual

Uniden

Uniden PMR1188-2CK User manual

Uniden GMR2872-2CK User manual

Uniden

Uniden GMR2872-2CK User manual

Uniden UH-048XR User manual

Uniden

Uniden UH-048XR User manual

Uniden GMRS522-2 User manual

Uniden

Uniden GMRS522-2 User manual

Popular Two-way Radio manuals by other brands

Midland BR777 Alignment procedure

Midland

Midland BR777 Alignment procedure

Esscom TWINTALKER 9200 user manual

Esscom

Esscom TWINTALKER 9200 user manual

Motorola TLKR T80 EXTREME Setup & user guide

Motorola

Motorola TLKR T80 EXTREME Setup & user guide

switel WTF 770 operating manual

switel

switel WTF 770 operating manual

Entel HT644 GMDSS Quick start user guide

Entel

Entel HT644 GMDSS Quick start user guide

Intek i-Talk T90 user manual

Intek

Intek i-Talk T90 user manual

Cobra microTALK PR 900 DX operating instructions

Cobra

Cobra microTALK PR 900 DX operating instructions

Intek HX-446S instruction manual

Intek

Intek HX-446S instruction manual

Baofeng BF-H6 user manual

Baofeng

Baofeng BF-H6 user manual

Amytel AW 827 user manual

Amytel

Amytel AW 827 user manual

Panasonic KX-TR320EXF Service manual

Panasonic

Panasonic KX-TR320EXF Service manual

Cobra PR 945 operating instructions

Cobra

Cobra PR 945 operating instructions

Motorola solutions ASTRO APX 8000 Series Quick reference card

Motorola solutions

Motorola solutions ASTRO APX 8000 Series Quick reference card

Floureon M-880 User Manual and Instruction Guide

Floureon

Floureon M-880 User Manual and Instruction Guide

Neptune T7100 user guide

Neptune

Neptune T7100 user guide

Motorola CP110 UHF user guide

Motorola

Motorola CP110 UHF user guide

Cobra microTALK FRS132 owner's manual

Cobra

Cobra microTALK FRS132 owner's manual

Motorola TALKABOUT T5419 user guide

Motorola

Motorola TALKABOUT T5419 user guide

manuals.online logo
manuals.online logoBrands
  • About & Mission
  • Contact us
  • Privacy Policy
  • Terms and Conditions

Copyright 2025 Manuals.Online. All Rights Reserved.