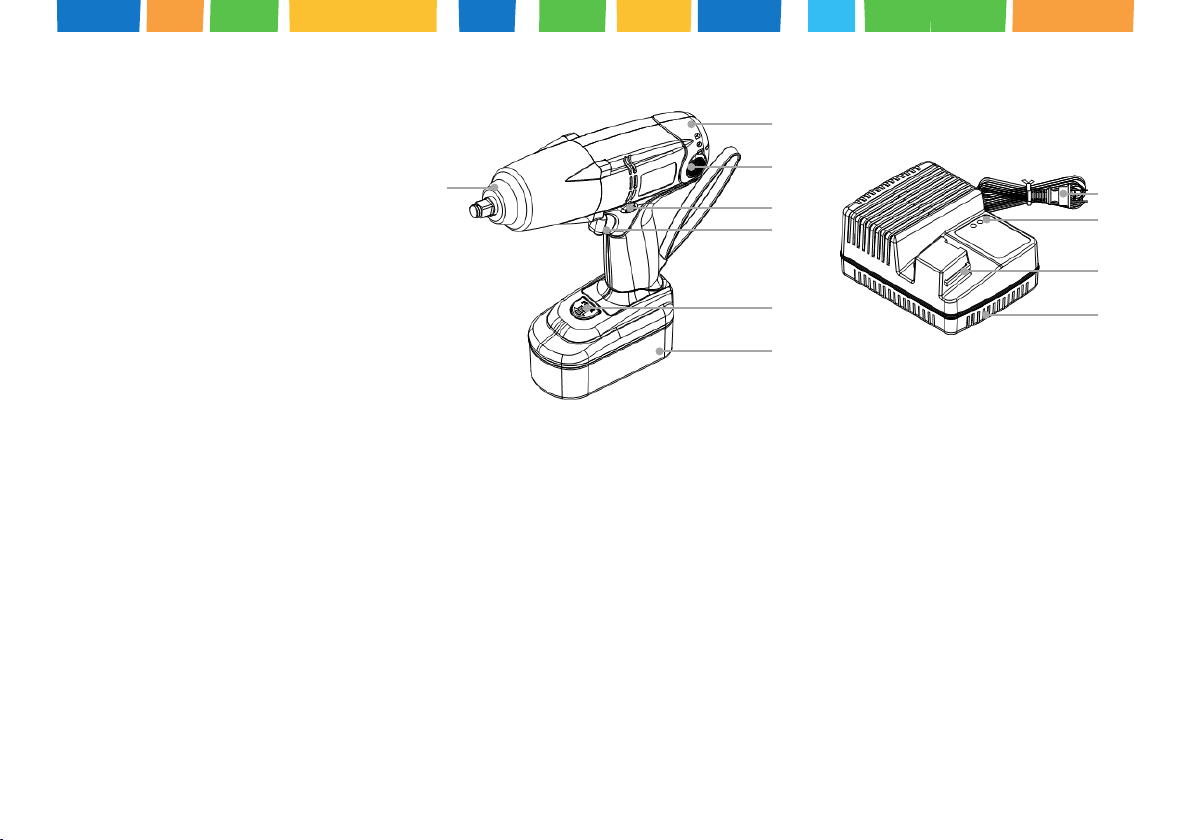
Unior 1392 User manual

1392
AKU screwdriver
EN
GENERAL WARNINGS
(1) For usage outside EU region, use corresponding adapter between charger cord and outlet
of your electrical network (2) Do not operate power tools in explosive atmospheres, such as in the
presence of flammable liquids, gases, or dust. (3) Keep bystanders, children and visitors away while
operating a power tool. (4) A battery operated tool with integral batteries or a separate battery pack
must be recharged only with the specified charger for the battery. A charger that may be suitable for one
type of battery may create a risk of fire when used with another battery. (5) Use battery operated tool
only with specifically designed battery pack. Use of any other batteries may create a risk of fire. (6)
Stay alert, watch what you are doing and use common sense when operating a power tool. Do not use
tool while tired or under the influence of drugs, alcohol, or medication. (7) Do not wear loose clothing
or jewelry. Keep your hair, clothing and gloves away from moving parts. Loose lathes, jewelry, or
long hair can be caught in moving parts. (8) Avoid accidental starting. Be sure switch is off position
before inserting battery. (9) Remove adjusting keys or wrenches before turning the tool on. (10) Use
safety equipment. Always wear eye protection. Dust mask, non-skid safety shoes, hard hat, or hearing
protection must be used for appropriate conditions. (11) Do not use tool if switch does not turn it on
or off. Any tool that cannot be controlled with the switch is dangerous and must be repaired. (12)
Disconnect battery pack from tool or place the switch in the locked or off position before making any ad-
justments, changing accessories, or storing the tools. Such preventive safety measures reduce the risk of
starting the tool accidentally. (13) Store idle tools out of reach of children and other untrained per-
sons. Tools are dangerous in the hands of untrained users. (14) When battery pack is not in use, keep
it away from other metal objects like: paper clips, coins, keys, nails, screws, or other small metal objects
that can make a connection from one terminal to another. Shorting the battery terminals together may
cause sparks, burns, or a fire. (15) Maintain tools with care. Keep cutting tools sharp and clean. Pro-
perly maintained tools, with sharp cutting edges are less likely to bind and are easier to control.
(16) Check for misalignment or binding of moving parts, breakage of parts, and any other condition that
may affect the tools operation. If damaged, have the tool serviced before using. Many accidents are ca-
used by poorly maintained tools. (17) Use only accessories that are recommended by the manufac-
turer for your model. Accessories that may be suitable for one tool, may become hazardous when
used on another tool. (18) Tool service must be performed only by qualified repair personnel. Service
or maintenance performed by unqualified personnel could result in a risk of injury. (19) When servicing
a tool, use only identical replacement parts. Use of unauthorized parts or failure to follow Main-
tenance Instruction may create a risk of electric shock or injury. (20) NEVER disassemble the battery.
(21) NEVER incinerate the battery, even if it is damaged or is completely worn out.The battery can
explode in a fire. (22) NEVER short-circuit the battery. (23) NEVER insert any objects into the battery
charger’s air vents. Electric shock or damage to the battery charger may result. (24) NEVER charge
outdoors. Keep the battery away from direct sunlight and use only where there is low humidity and good
ventilation. (25) NEVER charge when the temperature is below 32°F (0°C) or above 104°F (40°C). (26)
NEVER connect two battery chargers together. (27) NEVER insert foreign objects into the hole for the
battery or the battery charger. (28) NEVER use a booster transformer when charging. (29) NEVER use
an engine generator or DC power to charge. (30) NEVER store the battery or battery charger in places
where the temperature may reach or exceed 104°F (40°C). (31) ALWAYS operate charger on standard
household electrical power (230 volts). Using the charger on any other voltage may overheat and
damage the charger. (32) ALWAYS wait at least 15 minutes between charges to avoid overheating the
charger. (33) ALWAYS disconnect the power cord from its receptacle when the charger is not use.
(34) Keep your work area and clean and well lit.

Specifications
1. AKU screwdriver
Voltage: 19,2V - DC
Free speed: 0 - 1600 rpm
Chuck: 1/2“
Dimension: 273x76x85 mm
Max Torque: 350Nm (maximal +/- 10%)
Weight (with Battery): 3518g
2. Charger List
Input Voltage: 230V, AC
Output Voltage: 19,2V
Approval: CE
Charging Time: 60 minutes
3. Battery pack list
Voltage: 19,2V
Capacity cell type: 3,0 Ah Ni-Mh
1
3
2
4
5
6
1 Housing 2 Carbon brush 3 Shaft 4 Foward/Reverse handle 5 Switch trigger 6 Release button
7 Battery 8 Cord 9 Pilot lamps 10 Battery installation hole 11 Body
7
9
8
10
11
Removal and installation method of battery
How to install the battery? Align the battery with the groove in tool handle and slip it into place. Always slide it all the way until it locks in place with a little click, If not, it may
accidentally fall out of the tool, causing injury to you or someone around you.
How to remove the battery? Withdraw battery from the tool handle while pressing the latch on the top of the battery.
Charging method
1. Insert the plug of battery charger into the receptacle. When the plug of battery charger has been inserted into the receptacle, there is no lamp will light. Before plugging
into the receptacle, make sure the following points. The power source voltage is stated on the nameplate and the cord is not damaged. WARNING! Do not charge at voltage
higher than indicated on the nameplate. If charged at voltage higher than indicated on the nameplate, the charger will burn up. Do not use the electrical cord if damaged.
Have it repaired immediately..

How to make the batteries perform longer
We ought to possess the common knowledge of caring for battery pack in use. In other word, we might concern with how to extend the useful life of battery pack as below.
1. New battery packs normally should be treated no charged at all or only charged of 20% power before shipment in order to avoid battery’s crashing or chaotic vibration in
transit that might subsequently result in a short circuit of battery pack
2. Do not repeat charges for Ni-Cd and Ni-Mh battery pack as its remaining power is still available. Otherwise, battery pack will have memory effect that might result in reducing
charging capacity.
3. In order to increase charging capacity and the useful life of battery pack, please discharge the remaining power first and re-charge the battery pack for continuous 24-hour
whenever the user charges the battery pack in first time OR re-use the battery pack again after more than one-month’s idle placement.
WARNING! Place battery pack inside the house (temperature between 10°C ~40°C ) for one-hour first before charging, if the battery pack is stored under 10°C! If the yellow
light of charger will slowly flash to indicate unusual charging status, this happens if you charge the battery pack under 0°C. If battery pack is in a low temperature (under-20°C)
its chemical solutions will be in solid state and resistance in charging will become too big for battery to be charged. If battery pack is in a high temperature(above 65°C), its
chemical solution will be in a vapor state that can make battery ineffective in a short time. Please note that charging temperature for battery is 10°C ~40°C, and discharging
temperature is betwen -20°C ~65°C. Please also note that ideal storage temperature is -20°C ~65°C!
2. Slide the battery to the battery charger. Slide the battery into the battery charger as shown below. Make sure it contacts the bottom of the battery charger. WARNING!
If the batteries are inserted in the reverse direction, not only recharging will become impossible, but it may also cause problems in the charger such as a deformed recharging
terminal.
3. Charging. When the battery is connected to the battery charger, charging will commence and the pilot lamp will light in red. If the pilot lamp flickers in red, pull out the
plug from the receptacle and check if the battery is properly mounted. When the battery is fully charged, the pilot lamp will light in green WARNING! If any of the following
occurs, unplug the charger from the power supply outlet and replace the battery pack: none of the indicators lights on or only the red indicator light is on even if the battery
pack is installed.
The indicators of the charger
RED: Charging
GREEN STEADY: Battery full
GREEN FLASH: High temperature pause and battery low volt
4. Disconnect battery charger from the receptacle. WARNING! Do not pull the plug out of the receptacle by pulling on the cord. Make sure to grasp the plug when removing
from receptacle to avoid damaging cord.
5. Remove the battery from the battery charger. Supporting the battery charger with hand, pull out the battery from the battery charger. WARNING! When the battery
charger has been continuously used, the battery charger will be heated, thus constituting the cause of the failures. Once the charging has been completed, give 15 minutes
rest until the next charging. If the battery is recharged when it is warm due to battery use or exposure to sunlight, the pilot lamp may light in green. The battery will not be
recharged. In such a case, let the battery cool before charging. When the pilot lamp flickers rapidly in red (at 0.2 – second intervals), check for and take out any foreign objects
in the charger’s battery installation hole. If there are no foreign objects, it is probable that the battery or charger is malfunctioning. Take it to your authorized Service Center.

2. Installing a socket align the plunger located in the square part of the shaft/anvil with the hole in the square socket. Check
that the plunger is fully engaged in the hole. When removing the socket, reverse the sequence.
3. Removing the socket. Please do the opposite point on the method of installing socket.
4. Confirm that the battery is mounted correctly.
5. Check the rotational direction the socket or bit rotates clockwise (viewed from the rear side) by pushing the R-side of the
push button. The L-side of the push button is pushed to turn the bit counterclockwise. (The L and R marks are engraved on
the body.) WARNING! The push button can not be switched while the impact wrench is turning. To switch the push button,
stop the impact wrench, then set the push button..
button
6. Switch operation. When the trigger switch is depressed, the tool rotates. When the trigger is released, the tool stops. The rotational speed can be controlled by varying the
amount that the trigger switch is pulled. Speed is low when the trigger switch is pulled slightly and increases as the trigger switch is pulled more. WARNING! A buzzing noise
is produced when the motor is about to rotate; this is only a noise, not a machine failure.
7. Tightening and loosening screws. Install the socket or bit that matches the screw, line up the bit in the grooves of the head of the screw, then tighten it.
Push the impact wrench just enough to keep the bit fitting the head of the screw. WARNING! Applying the impact wrench for too long tightens the screw too much and can
break it. Tightening a screw with the impact wrench at an angle to that screw can damage the head of the screw and the proper force will not be transmitted to the screw.
Tighten with this impact wrench lined up straight with the screw.
8. Tightening and loosening bolts. A square socket matching the bolt or nut must first be selected. Then mount the socket on the anvil, and grip the nut to be tightened with
the hex socket. Holding the wrench in line with the bolt, press the power switch to impact the nut for several seconds. If the nut is only loosely fitted to the bolt, the bolt
may turn wit the nut, therefore mistaking proper tightening. In this case, stop impact on the nut and hold the bolt head with a wrench before restarting impact, or manually
tighten the bolt and nut to prevent them slipping.
Maintenance and inspection
1. Checking the condition of the socket or bit: The bits should be checked regularly. If worn or broken bits can slip or decrease the efficiency of the motor and burn it out.
Replace worn bits with new ones. WARNING! Pull out battery before doing any inspection or maintenance.
2. Checking the condition of the socket A worn or deformed a square-holed socket will not give an adequate tightness to the fitting between the nut or anvil, consequently
resulting in loss of tightening torque. Pay attention to wear of a socket holes periodically, and replace with a new one if needed. WARNING! If you use a driver bit of which point
is worn or broken, it will be dangerous since it slips. So replace it with a new one.
3. Check the Screws. Loose screws are dangerous. Regularly inspect them and make sure they are tight. WARNING! Using this power tool with loosened screws or nut is extre-
mely dangerous.
Use
Check the work area to make sure that it is clear of debris and clutter. Clear the area of unnecessary personnel. Ensure that
lighting and ventilation is adequate.
1. Install the socket or bit. WARNING! Make sure it is not coming off, if the socket or bit is lightly pulled. Push forward the bit
chuck on one side. If the guide sleeve does not return to its original position, then the bit is not installed properly.
push
trigger

4. Maintenance of the motor. The motor unit winding is the very “heart” of the power tool. Exercise due care to ensure the winding does not become damaged and/or wet with
oil or water.
5. Inspecting the carbon brushes. The motor employs carbon brushes which are consumable parts. Since and excessively worn carbon brush can result in motor trouble, replace
the carbon brush with new ones when it becomes worn to or near the “wear limit”. In addition, always keep carbon brushes clean and ensure that they slide freely within the
brush holders.
6. Replacing carbon brushes. Take out the carbon brush by first removing the brush cap and then hooking the protrusion of the carbon brush with a flat head screw driver.
When installing the carbon brush, choose the direction so that the carbon brush agrees with the contact portion outside the brush
tube. Then push it in with a finger as illustrated in Lastly, install the brush cap. WARNING! Be absolutely sure to insert the nail of
the carbon brush into the contact portion outside the brush tube. Caution must be exercised since any error in this operation can
result in the deformed the carbon brush and may cause motor trouble at an early stage.
7. Check for Dust. Dust may be removed with a soft cloth or a cloth dampened with soapy water. Do not use bleach, chlorine,
gasoline or thinner, for they may damage the plastics.
8. Disposal of the exhausted battery. WARNING! Do not dispose of the exhausted battery. The battery must explode if it is incinerated. The product that you have purchased
contains a rechargeable battery. The battery is recyclable. At the end of its useful life, under various state and local laws, it may be illegal to dispose of this battery into the
municipal waste stream. Check with your local solid waste officials for details in your area for recycling options or proper disposal.
9. Storage. Storing in a place below 104°F (40°C) and out of the reach of children.
10. It is are constantly being improved and modified to incorporate the latest technological advancements. Accordingly, some parts may be changed without prior notice.
WARNING! Repair must be carried Out to the Authorized Service Center. This Parts List will be helpful if presented with the tool to the Service Center when requesting repair or
other maintenance. In the operation and maintenance of power tools, the safety regulations and standards prescribed in each country must be observed.
carbon brush
Accessories
WARNING! ALWAYS use only authorized replacement parts and accessories. NEVER use replacement parts or accessories which are not intended for use with this tool. My hand
center if you are not sure. whether it is safe to use a particular replacement part or accessory with your tool. The use of any other attachment or accessory can be dangerous
and could cause injury or mechanical damage. ATTENTION! Accessories are subject to change without any obligation.
12
13
14
12 Battery 13 Battery charger 14 Plastic case
Vibration and Noise
Hand-Arm Vibration Level(Load): 10.07 m/s
Sound Power Level(Load): 93.29 dB(A)
Sound Pressure Level At Operator Position:
104.29dB(A)

Guarantee card
Name of customer: __________________________________________________
Mailing address: ____________________________________________________
City: __________ State: _____________ Customer phone number: ___________
Article number: ___________________ Serial number: _____________________
______________________________
Date of sale, seller stamp
Name of service department: _________________________________________
Mailing address of service department: _________________________________
City: __________ State: _________ Phone number: _______________________
GUARANTEE CARD MUST BE FILLED OUT COMPLETELY AND CLEARLY BY THE
DEALER AT THE TIME OF SALE. GURANTEE IS NOT VALID WITHOUT SELLER
STAMP AND CUSTOMER PURCHASE RECEIPT OR DELIVERY NOTE!
This product is guaranteed by Unior for period of 1 year after the date of purchase
against defects due to faulty manufacture or material. Service under guarantee is
provided only upon presentation of reasonable evidence (completed guarantee
card, purchase receipt or delivery note). Damage attributable to normal wear and
tear, overload or improper handeling will be excluded from guarantee. In case of
complaint, please send the tool undismanteled together with proof of purchase
to the nearest Unior service station, postal charges prepaid.
Unior d.d. reserves the right to decline responsibility in case of repairs made by
persons other than Unior staff. In no event compensation can be claimed in case
of damage to the workpiece or injury to the tool user. Information on guarantee
in instruction manual herewith expires.
Spare parts
Declaration of conformity
Unior d.d., Kovaška cesta 10, 3214 Zreče, declares under its full responsibility that
the power tool is in confirmity with following standards 93/68/EEC, 98/37/EC,
2006/95/EC, 89/336/EEC, EN 60745-2-2:2003, EN 60745-1:2003+A1:2003, EN55014-
1:2000+A1:2001+A2:2002, EN 55014-2:1997+A1:2001 Category III, EU Directive
2002/95/EC, 2005/717/EC, 2005/747/EC, EU 2002/95/EC, EU 2002/95/EC.
37
11
28
27
22
38
29
30
36
35
34
33
32
31
23
24
25
26
16
8
9
10
12
18
19
13
15
17
14
21
20
5
6
1
3
2
4
7
39
Table of contents