UNITEC Climate W010 User manual

Bedienungsanleitung
Owner’s Manual
Manuel de l’utilisateur
Manuale d’istruzioni
Funkwetterstation
Wireless weather station
Station météorologique, sans fi l
Stazione meteo wireless
313514_Manual.indd 1 20.12.12 10:44

313514_Manual.indd 2 20.12.12 10:44

3 Deutsch
Funkwetterstation W010
Bezeichnungen und Funktionen von Tasten:
Funktion drücken 3 Sekunden halten
1 CH Kanal 1 Kanal löschen
2 SET ZONENZEIT Einstellung von Datum u. Uhrzeit
3 + 1 Schritt vorwärts / Weckzeit 1, Weckzeit 2 an/aus Schnell vorwärts
4 – 1 Schritt zurück Schnell zurück / Manuelle
Funksignal-Synchronisierung
5 MEM Max.- und Min.-Speicher einsehen für Temperatur und
Luftfeuchtigkeit
°C/°F wählen
6 CLEAR Speicher von Max/Min-Anzeige löschen Wetter-Anpassung
7 AL WECKZEIT 1, 2 ablesen WECKZEIT 1, 2 einstellen
8 Light/ Zz
Hintergrundbeleuchtung für 3 Sekunden einschalten /
Taste
drücken, um während des Wecksignals die Schlummer-
funktion einzuschalten.
Bezeichnungen und Funktionen von Tasten am Fernsensor:
9 Tx Übertragung der Außentemperatur zum Hauptgerät
C / F Anzeigenschaltung Grad Celsius oder Grad Fahrenheit
1 / 2 / 3 Kanalwahlschalter
Vielen Dank für den Kauf dieser elektronischen Wetterstation. Das Gerät wurde mit aktueller Technologie und
modernsten Bauteilen hergestellt; es liefert durch eine Messung des Luftdrucks, der Innen- und Außentem-
peraturen und der Luftfeuchtigkeit eine genaue und zuverlässige Wettervorhersage. Außerdem enthält es
eine funkgesteuerte Uhr mit ewigem Kalender. Lesen Sie dieses Handbuch sorgfältig durch, um die hochent-
wickelten Eigenschaften und Funktionen dieses neuen Produktes vollständig kennenzulernen.
W010 (313514.00)
Station: 2 x AA, 433 MHz
Sender: 2 x AAA (W044-0)
Tegro AG
CH-8603 Schwerzenbach
W010 (313514.00)
Station: 2 x AA, 433 MHz
Sender: 2 x AAA (W044-0)
Tegro AG
CH-8603 Schwerzenbach
W010 (313514.00)
Station: 2 x AA, 433 MHz
Sender: 2 x AAA (W044-0)
Tegro AG
CH-8603 Schwerzenbach
W010 (313514.00)
Station: 2 x AA, 433 MHz
Sender: 2 x AAA (W044-0)
Tegro AG
CH-8603 Schwerzenbach
W010 (313514.00)
Station: 2 x AA, 433 MHz
Sender: 2 x AAA (W044-0)
Tegro AG
CH-8603 Schwerzenbach
W010 (313514.00)
Station: 2 x AA, 433 MHz
Sender: 2 x AAA (W044-0)
Tegro AG
CH-8603 Schwerzenbach
W010 (313514.00)
Station: 2 x AA, 433 MHz
Sender: 2 x AAA (W044-0)
Tegro AG
CH-8603 Schwerzenbach
W010 (313514.00)
Station: 2 x AA, 433 MHz
Sender: 2 x AAA (W044-0)
Tegro AG
CH-8603 Schwerzenbach
W010 (313514.00)
Station: 2 x AA, 433 MHz
Sender: 2 x AAA (W044-0)
Tegro AG
CH-8603 Schwerzenbach
3 2 4
1 7 8 5 6
9
313514_Manual.indd 3 20.12.12 10:45

Deutsch 4
EINSETZEN DER BATTERIEN
Hauptgerät:
Öffnen Sie das Batteriefach an der Rückseite des
Gerätes, legen Sie 2 AA-Batterien mit der angege-
benen Polarität ein; schließen Sie das Batteriefach
wieder.
Fernsensor:
Nehmen Sie den Fuß ab, lösen Sie die 4 Schrau-
ben mit einem kleinen Schraubendreher und
legen Sie 2 AAA-Batterien ein; achten Sie dabei auf
die richtige Polarität.
Taste CH : Auf CH 1 schieben, um den 1. Sensor
anzusteuern
Taste C/F : Wahl zwischen °C / °F
Taste Tx 9: Drücken, um eine manuelle Übertra-
gung auszulösen
Setzen Sie den Deckel nach Auswahl der ge-
wünschten Modi wieder auf und ziehen Sie die vier
Schrauben wieder an. Der Fernsensor wurde für
die Verwendung im Freien konstruiert; positionieren
Sie ihn jedoch so, dass er nicht direktem Sonnen-
licht, Regen oder Chemikalien ausgesetzt ist.
EINRICHTUNG
Geben Sie die bestehenden Wetterbedingungen
in Ihre Wetterstation ein. Nach dem Einlegen der
Batterien in das Hauptgerät werden die bestehenden
Wetterbedingungen abgefragt. Drücken Sie „MEM”
5, um die Wetterbedingung auszuwählen (sonnig,
teilweise sonnig, bewölkt, regnerisch und stürmisch)
und drücken Sie „CLEAR” 6, um die Einstellung zu
bestätigen. Das eingebaute Barometer wird automa-
tisch auf diese Einstellung gebracht.
EINRICHTUNG DES FUNKTHERMOMETERS:
Nach Eingabe der aktuellen Wetterbedingung be-
ginnt der Empfänger, Funksignale zu suchen, um das
Funkthermometer erkennen zu können.
• Legen Sie bei der Erstinbetriebnahme immer
erst Batterien in das Hauptgerät und dann in den
Fernsensor ein. Wählen Sie für den Fernsensor
Kanal 1.
• Drücken Sie die Taste Tx 9 an der Rückseite des
Fernsensors, um die Funkübertragung zu testen.
• Wenn der Empfänger das Funksignal erfolgreich
empfängt, werden die Temperatur/Luftfeuchtigkeit
(D / I) sowie die Kanalnummer (C) in der 2. Zeile
auf dem LCD-Bildschirm angezeigt.
• Wenn Sie die Batterien des Fernsensors ersetzen,
löschen Sie den Kanal im Hauptgerät auf folgende
Weise: Wählen Sie den entsprechenden Kanal
durch Drücken der Taste CHANNEL 1 und halten
Sie die Taste CHANNEL 1 3 Sekunden lang
gedrückt, um die Erkennung zu löschen.
•
Wenn Sie die Batterien im Hauptgerät ersetzen,
nehmen Sie die Batterien auch aus dem Fernsensor.
Bezeichnung der Display-Funktionen
A Trend- / Tendenzanzeige
B Symbole Wettervorhersage
C Kanalnummer
D Aussentemperatur
E Innentemperatur
F
Batterieanzeige Fernsensor
G Batterieanzeige Hauptgerät
H
Innen-Luftfeuchtigkeit
I
Aussen-Luftfeuchtigkeit
J Datumsanzeige
K
Weckfunktion
L
Funkuhr
M Uhranzeige
N
Mondphase
A
B
C
D
E
G
F
K
J
I
H
N M L
313514_Manual.indd 4 20.12.12 10:45

5 Deutsch
FUNKUHR
Das Gerät beginnt die Synchronisierung des
DCF77-Signals nach Einsetzen der Batterien.
Auf dem LCD-Bildschirm wird das Funkturmsymbol
(L) angezeigt; während der Synchronisierung blinkt
das Wellensymbol für die Signalstärke. Die Signal-
stärke wird folgendermaßen angezeigt:
1.
Sehr schwach oder kein Signal (kein Wellensymbol)
2. Schwach (1. Wellensymbol blinkt)
3. Zufriedenstellend (2. Wellensymbol blinkt)
4. Gut (3. Wellensymbol blinkt)
5.
Das Funkturmsymbol (L) und alle 3 Wellensymbole
werden durchgängig angezeigt (Empfang erfolgreich)
6. Das Funkturmsymbol und alle 3 Wellensymbole
werden nicht angezeigt (Empfang fehlgeschlagen)
Wenn der Signalpegel schwach und der Empfang des
Funkzeitsignals fehlgeschlagen ist, positionieren Sie
das Gerät entfernt von Störquellen und versuchen
Sie, an einem anderen Aufstellungsort ein besseres
Signal zu erhalten.
Die Funkuhr wird jeden Tag um 01:00 Uhr synchro-
nisiert. Ist dies nicht erfolgreich, sucht die Funkuhr
einmal pro Stunde das Funkzeitsignal erneut. Alle 3
bis 5 Minuten findet ein Funkempfangszyklus statt.
Um Interferenzen zu vermeiden, deaktiviert das Ge-
rät die Tastenfunktionen während des Empfangs des
Funkzeitsignals. Dies stellt keinen Defekt dar. Sie
können dann immer noch die Taste „ - “ 4 drücken,
um den Empfang des Funkzeitsignals vorüberge-
hend auszuschalten.
EINSTELLUNG VON DATUM UND UHRZEIT
Der Anwender kann Uhrzeit und Datum manuell ein-
stellen. Drücken und halten Sie die Taste „SET“
2
3 Sekunden lang, um Datum und Uhrzeit in folgender
Reihenfolge einzustellen: 12/24-Stunden-Format ->
Jahr -> Monat -> Tag -> Stunde -> Minute -> Zeitzo-
nenversatz -> Speichern und beenden.
Drücken Sie die Tasten „+“
3
/ „-“
4
, um den Wert
einzustellen, und „Set“
2
, um zu bestätigen.
(Geben Sie +/- 12 Stunden Zeitzone (Schweiz 1) für
die verschiedenen Zeitzonen ein; lassen Sie den
Zeitversatz bei 0, um Ihre Ortszeit einzustellen).
Drücken Sie „SET/ ZONE”
2
, um die Ortszeit und die
Zonenzeit festzulegen.
AUSWAHL VON °C/°F AM HAUPTGERÄT
Drücken und halten Sie die Taste „MEM” 5 3 Se-
kunden lang, um zwischen °C und °F auszuwählen.
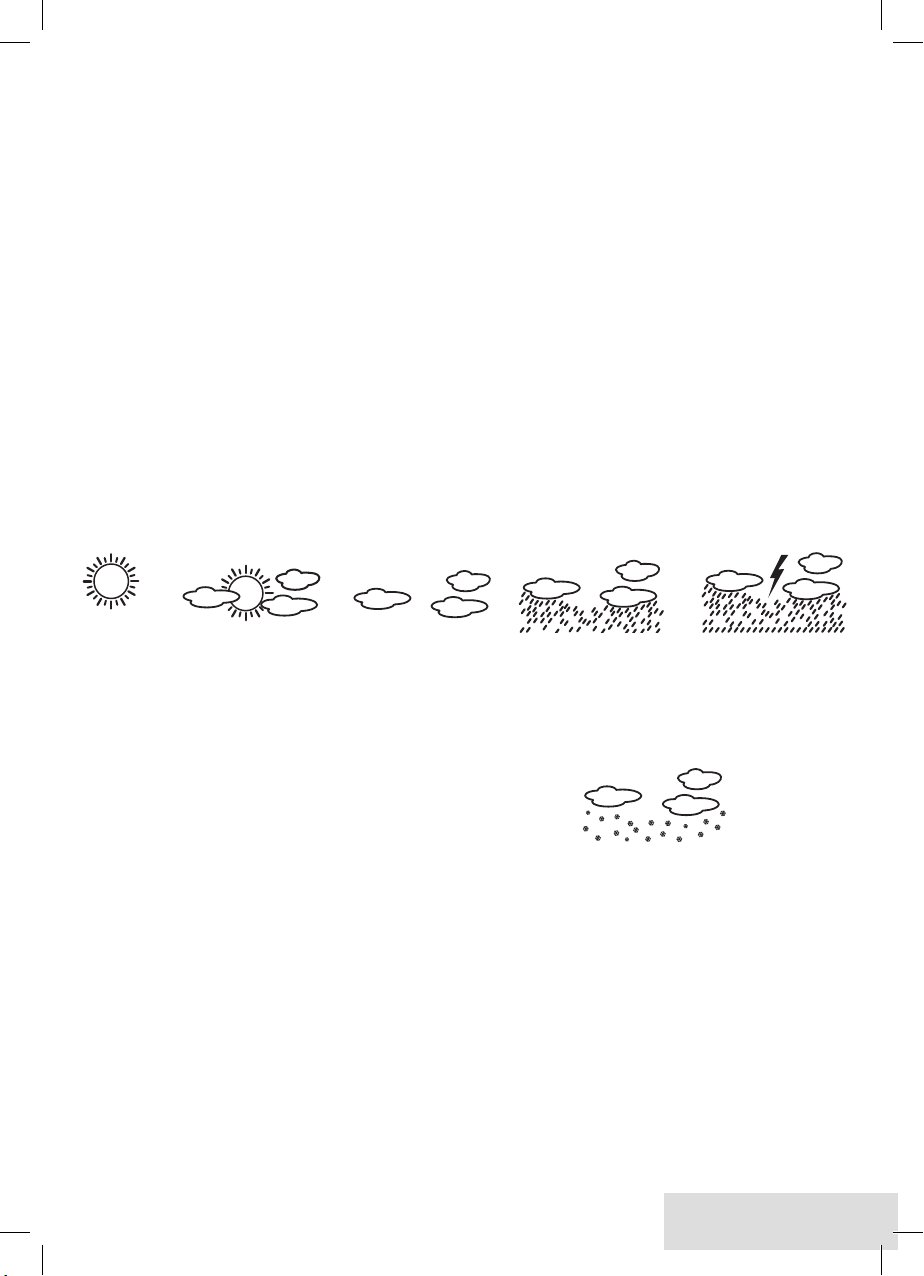
SONNIG TEILWEISE BEWÖLKT BEWÖLKT REGNERISCH STÜRMISCH
WETTERVORHERSAGE MIT
STURMWARNUNG
Der eingebaute Präzisions-Drucksensor misst den
atmosphärischen Druck und berechnet das Wetter
(B) der nächsten 12 Stunden. Auflösung:
ANPASSUNG DER WETTERBEDINGUNGEN
Wenn der Wetterbericht (B) vom tatsächlichen Wet-
ter abweicht, können Sie die Wetterbedingungen im
Gerät wie folgt anpassen:
1. Drücken und halten Sie die Taste „CLEAR”
6
3 Sekunden lang, um den Luftdruck-Anpassungs-
modus einzuschalten. Das Wettersymbol beginnt
zu blinken.
2. Wählen Sie die aktuelle Wetterbedingung durch
Drücken der Taste „MEM”
5
.
3. Drücken Sie die Taste „CLEAR”
6
, um zu bestäti-
gen und zu beenden.
SCHNEEALARM (nur sichtbare Darstellung)
Wenn die Außentemperatur auf Kanal 1 unter +4 °C
fällt, blinkt das Schneesymbol auf der LCD-Anzeige.
ANZEIGEN FÜR LUFTDRUCK-, TEMPERATUR-
UND LUFTFEUCHTIGKEITSTRENDS
Wenn sich der Wert für die Außentemperatur, die Luft-
feuchtigkeit oder den Luftdruck geändert hat, zeigen 3
kleine Pfeile die Tendenz (A) an: Steigend, gleichblei-
bend, fallend.
MONDPHASE
Die aktuelle Mondphase (N) wird automatisch
angezeigt.
313514_Manual.indd 5 20.12.12 10:45

Deutsch 6
MAX./MIN. SPEICHER
Drücken Sie die Taste „MEM“ 5, um die minimalen
und maximalen Werte für Temperatur und Luftfeuch-
tigkeit abzulesen. Um die Max/Min-Speicheraufzeich-
nung zu löschen, drücken Sie die Taste „CLEAR” 6
während der Max/Min-Anzeige.
EINSTELLUNG VON WECKZEIT 1, WECKZEIT 2
Wählen Sie Weckzeit 1 oder Weckzeit 2 (K), indem
Sie die Taste „AL” 7 drücken.
Drücken und halten Sie dann die Taste „AL“ 7 3
Sekunden lang. Drücken Sie “+ 3, - 4 “, um den
gewünschten Wert einzustellen, und drücken Sie die
Taste „AL“ 7 zur Bestätigung.
Um Weckzeit 1 und 2 einzusehen, drücken sie
einfach die Taste „AL” 7, um AL 1 und AL 2 abzu-
lesen. Die Weckzeit wird für 5 Sekunden angezeigt ;
anschließend wird wieder die Uhrzeit (M) angezeigt.
Um die Weckzeit 1 und 2 (K) ein- bzw. auszuschal-
ten, drücken Sie die Taste „+ 3 (Klingel)“. Das Gerät
gibt ein ansteigendes Wecksignal mit der Dauer von
2 Minuten aus.
SCHLUMMERFUNKTION
Drücken Sie während des Ertönens des Wecksignals
entweder die Taste „LIGHT/ Zz“ 8, um die Schlum-
merfunktion einzuschalten, oder drücken Sie eine
andere Taste (AL 7, SET 2, + 3 oder - 4), um
den Alarm für einen Tag auszuschalten. Wenn die
Schlummerfunktion aktiviert ist, blinkt das Symbol
„Zz“ und das Klingelsymbol (K).
Jetzt können Sie entweder 5 Minuten warten, bis
der Alarm wieder ertönt, oder eine andere Taste
drücken (AL 7, SET 2, + 3 oder - 4), um die
Schlummerfunktion auszuschalten.
BATTERIEANZEIGE
Für das Heimgerät (G) und den Fernkanal (F) gibt es
eine Anzeige für niedrigen Batteriestand. Ersetzen
Sie die Batterien und befolgen Sie die Inbetriebnah-
meanweisungen in diesem Handbuch.
TECHNISCHE DATEN
Temperaturmessbereich:
Hauptgerät: -5 °C bis 50 °C
20 % bis 99 % relative Luftfeuchtigkeit
Fernsensor: -20 °C bis 60 °C
20 % bis 99 % relative Luftfeuchtigkeit
Genauigkeit der Temperaturanzeige: +/- 1 °C im Bereich von 0 °C - 50 °C
+/- 1,5 °C in anderen Bereichen
Genauigkeit der Feuchtigkeitsanzeige: +/- 5 % im Bereich von 40 % - 80 %
+/- 8 % im Bereich von 30 - 40 % oder 80% - 95%
nicht anwendbar unter 30 % oder über 95 %
Übertragung: 30 m in offenen Bereichen, 433 MHz
Aufl ösung: 0,1 °C, 1% relative Luftfeuchtigkeit
Uhr: Quarzpräzision, +/- 45 Sek. pro Monat, wenn kein Funksignalempfang
Spannungsversorgung Hauptgerät: 2 x 1,5 V
Batterietyp Hauptgerät: 2 x AA / LR6 / AM3
Spannungsversorgung Fernsensor: 2 x 1,5 V
Batterietyp Fernsensor: 2 x AAA / LR03 / AM4
313514_Manual.indd 6 20.12.12 10:45

7 English
Wireless weatherstation W010
Name and Functions of Buttons:
Press Functions Hold 3 seconds
1 CH Select Channel 1 Delete current channel
2 SET ZONE time Enter clock & calendar setting
3 + 1 step foreward / Alarm 1, Alarm 2 on/ off Fast advance
4 – 1 step backward Fast backward / Manual RCC
signal synchronization
5 MEM View max & min memory for temperature & humidity Select C/F
6 CLEAR Clear memory at Max/Min Display Weather Offset
7 AL Read ALARM TIME 1, 2 Set ALARM TIME 1, 2
8 Light/ Zz Trigger backlight for 3sec. / Press to trigger Snooze alarm
during alarm sound.
Name and Functions of Buttons on Remote Sensor:
9 Tx Transmit outdoor temperature data to main unit
C / F Display degree Celcius or degree Fahrenheit
1 / 2 / 3 Channel switch
Thank you for purchasing the new generation electronic weather station. Designed and engineered with the
state-of-art technology and components, this instrument will provide accurate and reliable weather forecast
by measurement of air pressure, in/out temperature and humidity together with a Radio-Controlled perpetual
calendar clock. Read this manual carefully to full explore the sophisticated features and functions of the new
product.
W010 (313514.00)
Station: 2 x AA, 433 MHz
Sender: 2 x AAA (W044-0)
Tegro AG
CH-8603 Schwerzenbach
W010 (313514.00)
Station: 2 x AA, 433 MHz
Sender: 2 x AAA (W044-0)
Tegro AG
CH-8603 Schwerzenbach
W010 (313514.00)
Station: 2 x AA, 433 MHz
Sender: 2 x AAA (W044-0)
Tegro AG
CH-8603 Schwerzenbach
W010 (313514.00)
Station: 2 x AA, 433 MHz
Sender: 2 x AAA (W044-0)
Tegro AG
CH-8603 Schwerzenbach
W010 (313514.00)
Station: 2 x AA, 433 MHz
Sender: 2 x AAA (W044-0)
Tegro AG
CH-8603 Schwerzenbach
W010 (313514.00)
Station: 2 x AA, 433 MHz
Sender: 2 x AAA (W044-0)
Tegro AG
CH-8603 Schwerzenbach
W010 (313514.00)
Station: 2 x AA, 433 MHz
Sender: 2 x AAA (W044-0)
Tegro AG
CH-8603 Schwerzenbach
W010 (313514.00)
Station: 2 x AA, 433 MHz
Sender: 2 x AAA (W044-0)
Tegro AG
CH-8603 Schwerzenbach
W010 (313514.00)
Station: 2 x AA, 433 MHz
Sender: 2 x AAA (W044-0)
Tegro AG
CH-8603 Schwerzenbach
3 2 4
1 7 8 5 6
9
313514_Manual.indd 7 20.12.12 10:45

English 8
BATTERY INSTALLATION
Home Receiver:
Lift off the battery cover
at the back, install 2
pcs AA batteries according to the polarity indicated,
close the battery cover.
Remote Sensor:
Lift off the bracket stand
, loose the 4 screws
with a small screwdriver; insert 2 pcs AAA
batteries according to the polarity indicated.
CH button
: Slide to CH 1
C/F button
: Select viewing C or F
Tx button
9
: Press to trigger a manual transmission
After selecting the desired modes, replace the cover
and tighten the 4 screws
. The remote sensor is
designed for outdoor use, but please put the remote
sensor avoid direct sunlight, rain drop and chemical.
SET UP:
Enter the Existing Weather Condition into your
Weather Station. Install batteries into the home
unit and it will ask you to enter the existing weather
condition. Press “MEM”
5
to select the weather
condition (Sunny, Partial Sunny, Cloudy, Rainy, and
Stormy), press “CLEAR”
6
to confirm the setting.
The built-in barometer will be automatically offset in
this setting.
SET UP WIRELESS THERMOMETER:
After setting up the current weather condition, receiver
will start seeking RF signal to register wireless ther-
mometer.
• For the first installation, always insert batteries to
the home unit and then the remote sensor. Set
Channel 1 for remote sensor.
• Press the ”Tx”
9
button on the back of remote
sensor to verify the RF transmission.
• If receiver successfully receive the RF signal, the
outdoor temperature/ humidty (D+I)and the
Channel number (C) will be displayed in the 2nd row
on the LCD.
• When replacing batteries for the remote sensor,
remember to clear the corresponding channel of the
home unit in this way: Select the respective channel
by pressing the ”CHANNEL”
1
button, hold the
”CHANNEL”
1
button 3 seconds to clear the
registration.
• When replacing batteries for the home receiver,
please remove batteries of remote sensor and re-
install the batteries.
Descriptions of display-functions
A Trend / tendency display
B Wheather forecast symbols
C Channel number
D Outdoor temperature
E Indoor temperature
F
Low battery indicator remote sensor
G Low battery indicator main unit
H
Indoor humidity
I
Outdoor humidity
J Day / month display
K
Clock alarm
L
Radio controlled clock
M Clock display
N
Moonphase
A
B
C
D
E
G
F
K
J
I
H
N M L
313514_Manual.indd 8 20.12.12 10:45

9 English
RADIO-CONTROLLED CLOCK
The unit will start synchronizing the DCF77 sig-
nal after batteries are installed.
The Tower icon (L) will appear on the LCD, and the
waveform representing signal strength will flash
regularly during synchronization. Signal strength level
is indicated in this way:
1. Very weak or No signal (No waveform)
2. Weak (1st waveform flash)
3. Satisfactory (flash up to 2nd waveform)
4. Good (flash up to 3rd waveform)
5. Tower and 3 waveform icons appear fixed (Recep-
tion successful)
6. Tower (L) and 3 waveform icons out (Reception
failure)
If signal level is weak and time reception is not success-
ful, move the unit away the source of interference and
try again in another location with better radio signal.
The R/C clock will have a daily synchronization at
01:00 everyday. If not successful, the R/C clock will
seek for time signal every hour. Each R/C reception
cycle around 3 minutes to 5 minutes. To avoid inter-
ference, the unit will disable the buttons functions
during radio time reception. This is not a defect. But
you can still simply press “ – “
4
button to turn off
the radio time reception temporarily.
CALENDAR/TIME SETTING
User can setting the calendar and time manually. Hold
„SET“
2
button for 3 sec to set the calendar / time in
the follow sequence: 12/24hr format -> year -> month
-> day -> hour -> minute -> Zone time offset -> save
and exit.
Press „ + „
3
/ „ - „
4
button to adjust, „SET“
2
button to comfirm.
(Enter + - 12 hr in hour offset for different time zones,
(Switzerland 1) leave offset to 0 for home time) Press
”SET / ZONE”
2
to select home time and ZONE Time.
C/ F SELECTION on the home unit
Hold “MEM”
5
button 3 seconds to select C and F
WEATHER FORECAST WITH STORM ALERT
The built-in precision pressure sensor will read the
atmospheric pressure and calculate the weather
condition (B) of the next 12 hours.
The resolution:
OFFSETTING WEATHER CONDITION
In case the weather forecast (B) deviates from the
existing conditions, you can still change the weather
offset in the way:
1. Hold ”CLEAR”
6
button for 3 seconds to enter
the pressure offset mode. The weather icon will
flash.
2. Select the existing weather condition by pressing
”MEM”
5
.
3. Press ”CLEAR”
6
to confirm and exit.
SNOW ALERT (visible only)
When outdoor temperature of Channel 1 is less than
+4C, the SNOW icon will keep flashing on LCD.
PRESSURE, TEMPERATURE, HUMIDITY
TREND INDICATORS
If value of the outdoor temperature / humidity or pres-
sure has changed, the 3 small arrow icons will indicate
the tendency (A): Rising, Steady, Falling.
MOON PHASE
The current moon phase (N) is displayed automati-
cally.
SUNNY PARTLY SUNNY CLOUDY RAINY STORMY
313514_Manual.indd 9 20.12.12 10:45

English 10
MAX/MIN MEMORY
Press ”MEM”
5
button to view max & min memory
of temperature & humidity. To clear Max/Min memo-
ry, press ”CLEAR”
6
button during Max/Min Display
ALARM 1, ALARM 2 SETTING
Select AL 1 or AL 2 (K) bby pressing the AL
7
key.
Then hold “AL“
7
for 3 seconds. Press “+
3
, –
4
“
to enter the desired value and press “AL“
7
to
confi rm setting.
To view alarm time 1 and 2, simply press “AL”
7
button to read AL 1 and AL 2. The alarm time will
display for 5 seconds and resume to normal clock
(M) thereafter.
To turn AL 1, AL 2 (K) on and off, press “ +
3
(bell)“
button. The unit will provide Crescendo alarm which
last for 2 minutes.
SNOOZE ALARM
During alarm sound, either press „LIGHT/ Zz“
8
button to trigger snooze alarm, or press another but-
ton (AL
7
, SET
2
, +
3
or -
4
) to stop the alarm for
1day. If snooze function is activated, „Zz“ and the
bell icon (K) will keep fl ashing. At that moment, eit-
her wait for 5 minutes and the alarm will be turned
on again, or press another button (AL
7
, SET
2
, +
3
or -
4
) to disable the snooze function.
LOW BATTERY INDICATION
Low battery indication is available for the home unit
(G) itself and of the remote channel (F). Replace the
batteries and follow the setup procedure as menti-
oned in this instruction manual.
SPECIFICATIONS
Range of temperature measurement:
Indoor unit: -5 C to 50 C (32F to 122F)
20% to 99% RH
Remote sensor: -20 C to 60 C (14F to 140F)
20% to 99% RH
Temperature Accuracy: +/- 1 C in the range of 0C ~ 50C
+/- 1.5 C in other range
Humidity Accuracy: +/- 5% in the range of 40% ~ 80%
+/- 8% in the range of 30~40% or 80%~ 95%
N/A below 30% or above 95%
Transmission: 30M (100 ft.) open area, RF433 MHz
Resolution: 0.1 degree C, 1%RH
Clock: Quartz precision +-45 sec per month when out of RCC
Power for main unit: 2 x 1,5 V
Type of battery in main unit: 2 x AA / LR6 / AM3
Power for remote sensor: 2 x 1,5 V
Type of battery in remote sensor: 2 x AAA / LR03 / AM4
313514_Manual.indd 10 20.12.12 10:45

11 Français
Station météorologique, sans fi l, W010
Nom et fonctions des boutons :
Fonctions appui simple Maintien 3 secondes
1 CH Sélection canal 1 Efface le canal
2 SET Fuseau horaire Réglage horloge et calendrier
3 + Réglage lent vers l'avant / Alarme 1, alarme 2 ON/OFF Réglage rapide vers l'avant
4 – Réglage lent vers l'arrière Réglage rapide vers l'arrière /
Synchronis. manuelle signal RCC
5 MEM Affi che valeurs maxi et mini en mémoirepour la tempéra-
ture et l‘humidité
Sélectionne °C/°F
6 CLEAR Efface valeurs maxi/mini en mémoire Modifi cation paramètres météo
7 AL Heure de l'alarme 1, 2
Réglage de l'heure de l'alarme 1, 2
8 Light/ Zz Déclenche rétroéclairage pendant 3 sec. / Rappel d‘alarme
lorsque l‘alarme retentit
Nom et fonctions des boutons sur le capteur distant:
9 Tx Transmission de la température extérieure à l’unité principale
C / F Indicateur degré Celsius/Fahrenheit
1 / 2 / 3 Commuter pour sélectioner le canal
Merci d’avoir acheté la nouvelle génération de station météorologique électronique. Conçu et développé avec
une technologie et des composants de pointe, cet instrument vous fournira des informations précises et
fi ables sur les prévisions météorologiques, la pression de l‘air, la température et l‘humidité intérieures/exté-
rieures ainsi qu‘une horloge-calendrier perpétuel radio pilotée. Lisez attentivement ce manuel afi n d’explorer
les caractéristiques et fonctions évoluées de ce nouveau produit.
W010 (313514.00)
Station: 2 x AA, 433 MHz
Sender: 2 x AAA (W044-0)
Tegro AG
CH-8603 Schwerzenbach
W010 (313514.00)
Station: 2 x AA, 433 MHz
Sender: 2 x AAA (W044-0)
Tegro AG
CH-8603 Schwerzenbach
W010 (313514.00)
Station: 2 x AA, 433 MHz
Sender: 2 x AAA (W044-0)
Tegro AG
CH-8603 Schwerzenbach
W010 (313514.00)
Station: 2 x AA, 433 MHz
Sender: 2 x AAA (W044-0)
Tegro AG
CH-8603 Schwerzenbach
W010 (313514.00)
Station: 2 x AA, 433 MHz
Sender: 2 x AAA (W044-0)
Tegro AG
CH-8603 Schwerzenbach
W010 (313514.00)
Station: 2 x AA, 433 MHz
Sender: 2 x AAA (W044-0)
Tegro AG
CH-8603 Schwerzenbach
W010 (313514.00)
Station: 2 x AA, 433 MHz
Sender: 2 x AAA (W044-0)
Tegro AG
CH-8603 Schwerzenbach
W010 (313514.00)
Station: 2 x AA, 433 MHz
Sender: 2 x AAA (W044-0)
Tegro AG
CH-8603 Schwerzenbach
W010 (313514.00)
Station: 2 x AA, 433 MHz
Sender: 2 x AAA (W044-0)
Tegro AG
CH-8603 Schwerzenbach
3 2 4
1 7 8 5 6
9
313514_Manual.indd 11 20.12.12 10:45

12Français
INSTALLATION DES PILES
Récepteur domestique :
Soulevez la trappe à piles au dos, insérez 2 piles
AA en respectant la polarité indiquée puis refermez
la trappe.
Capteur distant :
Soulevez le pied du support , dévissez les 4 vis
à l‘aide d‘un petit tournevis, insérez 2 piles AAA en
respectant la polarité indiquée.
Bouton CH : bascule sur le canal 1 pour le capteur
Bouton C/F : sélectionne °C (Celsius) ou °F (Fah-
renheit)
Bouton Tx 9: déclenche une transmission manuelle
Après avoir sélectionné les modes souhaités,
remettez la trappe en place et serrez les 4 vis .
Le capteur distant est certes conçu pour un usage
extérieur mais évitez de l‘exposer au rayonnement
solaire direct, à la pluie et aux produits chimiques.
PARAMÉTRAGE :
Saisissez les conditions météorologiques actuel-
les sur votre station météo. Insérez les piles dans
l‘unité domestique, le système vous demande alors
de saisir les conditions météo actuelles. Appuyez
sur „MEM“ 5 pour sélectionner les conditions
météo (ensoleillé, peu nuageux, nuageux, pluvieux,
orageux), appuyez sur „CLEAR“ 6 pour confirmer
le paramétrage. Le baromètre intégré sera automati-
quement initialisé en fonction de ces paramètres.
PARAMÉTRAGE DU THERMOMÈTRE SANS
FIL :
Après avoir paramétré les conditions météo actuelles,
le récepteur va chercher le signal RF pour enregistrer
le thermomètre sans fil.
• Pour la première installation, insérez toujours les
piles de l‘unité domestique en premier, puis celles
du capteur distant. Paramétrez
le canal 1 (channel
1) pour le premier capteur distant.
•
Appuyez sur le bouton „Tx“
9
au dos du capteur
distant pour vérifier la transmission de radiofréquence
(RF).
• Si le récepteur reçoit le signal RF, la température/
l‘humidité (D / I) extérieures et le numéro du canal
(C) correspondant s‘affichent sur la 2ème rangée de
l‘écran LCD.
• Lorsque vous réinsérez des piles pour le capteur
distant, pensez à effacer le canal correspondant
sur l‘unité domestique comme suit : sélectionnez
le canal correspondant en appuyant sur le bouton
CHANNEL
1
(canal), maintenez le bouton CHAN-
NEL
1
appuyé pendant 3 secondes pour effacer
l‘affectation.
• Lorsque vous réinsérez des piles pour le récepteur
domestique, retirez les piles et réinsérez les piles
dans les capteurs
Désignation des fonctions d’affichage
A Affichage tendance
B Symboles prévisions météo
C Numéro de canal
D Température extérieure
E Température intérieure
F
Indicateur batterie capteur distant
G Indicateur batterie unité principale
H
Humidité atmosphérique intérieur
I
Humidité atmosphérique extérieur
J Affichage jour / mois
K
Fonction réveil
L
Horloge radio pilotée
M Affichage horloge
N
Phase de lune
A
B
C
D
E
G
F
K
J
I
H
N M L
313514_Manual.indd 12 20.12.12 10:45

13 Français
HORLOGE RADIO PILOTÉE
L‘unité se met à synchroniser le signal DCF77
une fois les piles installées.
L‘icône Tour (L) apparaît sur l‘écran LCD et l‘onde
représentant le signal émis se met à clignoter
régulièrement durant la synchronisation. Le niveau
d‘émission du signal est indiqué comme suit :
1. Signal très faible ou absent (pas d‘onde)
2. Faible (la 1ère onde clignote)
3. Satisfaisant (2 ondes clignotent)
4. Bon (3 ondes clignotent)
5. Les icônes Tour (L) et 3 ondes apparaissent en
fixe (réception réussie)
6. Les icônes Tour et 3 ondes sont absentes (échec
de la réception)
Si le niveau du signal est faible et la réception de
l‘heure a échoué, déplacez l‘unité à l‘écart de toute
source d‘interférence et essayez à nouveau dans un
autre endroit doté d‘un meilleur signal radio.
L‘horloge radio pilotée se synchronise tous les jours
à 1h00. Si la synchronisation échoue, l‘horloge radio
pilotée lancera une recherche du signal de l‘heure
toutes les heures. Chaque cycle de réception radio
pilotée dure entre 3 et 5 minutes. Pour éviter toute
PRÉVISIONS MÉTÉOROLOGIQUES AVEC
ALERTE ORAGE
Le capteur de pression de précision intégré relève
la pression atmosphérique et calcule les conditions
météorologiques (B) des 12 prochaines heures.
Précision :
MODIFICATION DES CONDITIONS MÉTÉO
Si les prévisions météorologiques (B) ne reflètent pas
les conditions actuelles, vous avez la possibilité de
modifier le paramètre météo de cette façon :
1. Maintenez le bouton ”CLEAR“
6
pendant 3
secondes pour accéder au mode Modification de
pression. L‘icône météo se met à clignoter.
2. Sélectionnez les conditions météorologiques actu-
elles en appuyant sur ”MEM“
5
.
3. Appuyez sur ”CLEAR“
6
pour confirmer et
quitter.
interférence, l‘unité désactive la fonction des bou-
tons pendant la réception de l‘heure par radio. Il ne
s‘agit pas d‘un défaut. Mais vous avez la possibilité
d‘appuyer sur le bouton ” – ” 4 pour désactiver
temporairement la réception de l‘heure par radio.
RÉGLAGE DU CALENDRIER ET DE L‘HEURE
L‘utilisateur peu régler le calendrier et l‘heure manu-
ellement. Maintenez le bouton „SET“
2
pendant 3
secondes pour régler le calendrier/l‘heure dans l‘ordre
suivant : format 12/24 heures -> année -> mois -> jour
-> heures -> minutes -> décalage horaire -> confirmer
et quitter.
Appuyez sur le bouton ” + ”
3
ou ” - ”
4
„ pour sai-
sir les heures, appuyez sur ”SET”
2
pour confirmer.
(Saisissez un décalage horaire de + à - 12 heures pour
le fuseau horaire (Suisse 1), réglez le décalage sur 0
pour l‘heure locale) Appuyez sur ”SET/ZONE”
2
pour
sélectionner heure locale ou fuseau horaire.
SÉLECTION °C/°F sur l‘unité domestique
Appuyez sur le bouton „MEM“ 5 pendant 3 secon-
des pour sélectionner C (Celsius) ou F (Fahrenheit)
Alerte NEIGE (visuelle uniquement)
Si la température extérieure du canal 1 est inférieure
à +4°C, l‘icône NEIGE se met à clignoter sur l‘écran
LCD.
INDICATEURS DE TENDANCE DE PRESSION,
DE TEMPÉRATURE ET D‘HUMIDITÉ
Si la valeur de la température/l‘humidité extérieures ou
de la pression a évolué, les 3 icônes „petite flèche“
indiquent la tendance (A): Rising (en hausse), Steady
(stable), Falling (en baisse).
PHASE LUNAIRE
La phase lunaire (N) actuelle s‘affiche automatique-
ment.
ENSOLEILLÈ PEU NUAGEUX NUAGEUX PLUVIEUX ORAGEUX
313514_Manual.indd 13 20.12.12 10:45

14Français
MÉMOIRE MAXI/MINI
Appuyez sur le bouton ”MEM“ 5 pour affi cher
les valeurs maximales et minimales en mémoire
correspondant à la température et à l‘humidité. Pour
effacer les valeurs maxi/mini en mémoire, appuyez
sur le bouton ”CLEAR“ 6 lorsque les valeurs maxi/
mini s‘affi chent.
RÉGLAGE DE L‘ALARME 1, ALARME 2
Appuyez sur la touche ”A” 7 L pour sélectionner
AL 1 ou AL 2 (K).
Maintenez ”AL“ 7 pendant 3 secondes. Appuyez
sur ” + ” 3 ou ” – ” 4 pour saisir la valeur souhai-
tée et appuyez sur „AL“ 7
pour confi rmer le réglage.
Pour voir l‘heure des alarmes 1 et 2 (K), appuyez
simplement sur le bouton „AL“ 7 pour affi cher AL
1 ou AL 2. L‘heure de l‘alarme s‘affi che pendant 5
secondes et revient sur l‘heure normale (M) ensuite.
Pour activer ou désactiver l‘alarme AL 1 ou AL 2
(K), appuyez sur le bouton ” + ” 3 (cloche). L‘unité
émettra une alarme crescendo pendant une durée
de 2 minutes.
CARACTÉRISTIQUES TECHNIQUES
Plage des valeurs de température:
Unité intérieure: -5°C à 50°C (32°F à 122°F)
20% à 99% HR
Capteur distant: -20°C à 60°C (14°F à 140°F)
20% à 99% HR
Précision de la température: +/- 1°C dans la plage de 0°C à 50°C
+/- 1,5°C dans une autre plage
Précision de l‘humidité:
+/- 5% dans la plage de 40% à 80%
+/- 8% dans la plage de 30% à 40%
ou 80% à 95%
néant < 30% ou > 95%
Transmission: 30 m dans une zone dégagée, RF 433 MHz
Précision: 0,1°C, 1% HR
Horloge: précision à quartz +/-45 sec par mois si hors de portée du circuit radio
commandé
Alimentation en tension unité principale
: 2 x 1,5 V
Type de pile unité principale
: 2 x AA / LR6 / AM3
Alimentation en tension capteur distant
: 2 x 1,5 V
Type de pile capteur distant
: 2 x AAA / LR03 / AM4
RAPPEL D‘ALARME
Lorsque l‘alarme retentit, appuyez soit sur le bouton
„LIGHT/Zz“ 8 pour activer le rappel d‘alarme, soit
sur un autre bouton (AL 7, SET 2, + 4 ou - 4)
pour arrêter l‘alarme jusqu‘au lendemain. Si la
fonction rappel d‘alarme est activée, „Zz“ et l‘icône
„cloche“ se mettent à clignoter. A ce moment là,
soit vous attendez 5 minutes et l‘alarme retentit à
nouveau, soit vous appuyez sur un autre bouton (AL
7, SET 2, + 4 ou - 4) pour désactiver la fonction
rappel d‘alarme (K).
INDICATION DE PILE FAIBLE
L‘indication de pile faible est disponible pour l‘unité
domestique (G) elle-même et pour le canal distant
(F). Remplacez les piles et suivez la procédure de
paramétrage expliquée dans ce manuel.
313514_Manual.indd 14 20.12.12 10:45

15 Italiano
Stazione meteo wireless W010
Nome e funzioni dei pulsanti:
Funzioni Pressione per 3 secondi
1 CH Selezione canale 1 Cancellazione canale corrente
2 SET ZONE Time Accesso all’impostazione di orolo-
gio e calendario
3 + 1 scatto avanti / Allarme 1, 2 acceso/spento Avanzamento rapido
4 – 1 scatto indietro Retrocessione rapida / Sincroniz-
zazione manuale del segnale RCC
5 MEM
Visualizzazione valori max. e min. per temperatura e umidità
Selezione di C/F
6 CLEAR Cancellazione memoria con visualizzazione max./min. Offset del tempo
7 AL Valore ALLARME 1, 2 Impostazione ALLARME 1, 2
8 Light/ Zz
Attivazione della retroilluminazione per 3 sec. / Premere per
attivare all’allarme Snooze mentre è in corso un allarme.
Nome e funzioni dei pulsanti del sensore remoto:
9 Tx Trasmissione dei dati relativi alla temperatura esterna all’unità principale
C / F Cambiare visualizzazione in gradi Celsius o Fahrenheit
1 / 2 / 3 Selezione del canale remoto
Grazie per aver acquistato la stazione meteo elettronica di nuova generazione. Progettata e realizzata con
tecnologie e componenti allo stato dell’arte, questo strumento garantisce previsioni meteo precise e affi dabile
grazie alla misurazione di pressione atmosferica, umidità e temperatura interna/esterna unitamente ad un
orologio calendario perpetuo radiocontrollato. Leggere attentamente il presente manuale che consentirà di
acquisire una totale dimestichezza con le sofi sticate caratteristiche e funzioni di questo nuovo prodotto.
W010 (313514.00)
Station: 2 x AA, 433 MHz
Sender: 2 x AAA (W044-0)
Tegro AG
CH-8603 Schwerzenbach
W010 (313514.00)
Station: 2 x AA, 433 MHz
Sender: 2 x AAA (W044-0)
Tegro AG
CH-8603 Schwerzenbach
W010 (313514.00)
Station: 2 x AA, 433 MHz
Sender: 2 x AAA (W044-0)
Tegro AG
CH-8603 Schwerzenbach
W010 (313514.00)
Station: 2 x AA, 433 MHz
Sender: 2 x AAA (W044-0)
Tegro AG
CH-8603 Schwerzenbach
W010 (313514.00)
Station: 2 x AA, 433 MHz
Sender: 2 x AAA (W044-0)
Tegro AG
CH-8603 Schwerzenbach
W010 (313514.00)
Station: 2 x AA, 433 MHz
Sender: 2 x AAA (W044-0)
Tegro AG
CH-8603 Schwerzenbach
W010 (313514.00)
Station: 2 x AA, 433 MHz
Sender: 2 x AAA (W044-0)
Tegro AG
CH-8603 Schwerzenbach
W010 (313514.00)
Station: 2 x AA, 433 MHz
Sender: 2 x AAA (W044-0)
Tegro AG
CH-8603 Schwerzenbach
W010 (313514.00)
Station: 2 x AA, 433 MHz
Sender: 2 x AAA (W044-0)
Tegro AG
CH-8603 Schwerzenbach
3 2 4
1 7 8 5 6
9
313514_Manual.indd 15 20.12.12 10:45

Italiano 16
INSTALLAZIONE DELLA BATTERIA
Ricevitore domestico:
Sollevare lo sportellino sul retro, installare 2 batte-
rie AA rispettando la polarità indicata quindi chiudere
lo sportellino.
Sensore remoto:
Sollevare il supporto a staffa, allentare le 4 viti
con un piccolo cacciavite; inserire 2 batterie AAA
rispettando la polarità indicata.
Pulsante CH : portare in posizione CH 1 per il
sensore
Pulsante C/F : Selezionare la visualizzazione
di C o F
Pulsante Tx 9: Premere per passare ad una
trasmissione manuale
Dopo aver selezionato le modalità desiderate, rimon-
tare il coperchio e serrare le 4 viti . Il sensore
remoto è concepito per essere utilizzato all’esterno.
Si sconsiglia tuttavia di posizionare il sensore remoto
alla luce diretta del sole, in prossimità di grondaie e a
contatto con sostanze chimiche.
CONFIGURAZIONE:
Inserimento delle condizioni meteo attuali nella
propria stazione meteo. Installare le batterie
nell’unità domestica che chiederà di inserire le attuali
condizioni meteo. Premere „MEM” 5 per selezio-
nare le condizioni meteo (Soleggiato, Parzialmente
soleggiato, Nuvoloso, Pioggia e Temporali), preme-
re „CLEAR” 6 per confermare l’impostazione. Il
barometro incorporato registrerà automaticamente
questa impostazione.
CONFIGURAZIONE DEL TERMOMETRO
WIRELESS:
Una volta impostate le attuali condizioni meteo, l’unità
ricevente inizia la ricerca del segnale RF per la registra-
zione del termometro wireless.
• Per la prima installazione inserire sempre le batteria
nell’unità domestica e poi nel sensore remoto.
Impostare
il Canale 1 per il sensore remoto.
• Premere il pulsante „Tx”
9
sul retro del sensore
remoto per verificare il segnale RF.
• Se l’unità ricevente riceve correttamente il segnale
RF, la temperatura/umidità (D / I) esterne e il numero
del canale (C) verranno visualizzati nella 2a fila dello
schermo LCD.
• Per la sostituzione delle batterie del sensore remoto,
ricordarsi di cancellare il canale dell’unità domestica
nel seguente modo: Selezionare il canale premendo
il pulsante CHANNEL
1
, tenere premuto il canale
CHANNEL
1
per 3 secondi in modo da cancellare la
registrazione.
• Al momento della sostituzione delle batterie
del’unità ricevente, rimuovere le batterie del
sensore remoto e reinstallarle nel sensore di base.
Denominazione delle funzioni del display
A Visualizzazione trend / tendenza
B Simboli previsioni meteo
C Numero del canale
D Temperatura esterna
E Temperatura interna
F
Indicatore batteria sensore remoto
G
Indicatore batteria apparecchio principale
H
Umiditá atmosferica interno
I
Umiditá atmosferica esterno
J Visualizzazione giorno / mese
K
Allarme orologio
L
Orologio radiocontrollato
M Visualizzazione orologio
N
Fase lunare
A
B
C
D
E
G
F
K
J
I
H
N M L
313514_Manual.indd 16 20.12.12 10:45

17 Italiano
OROLOGIO RADIOCONTROLLATO
L’unità avvia la sincronizzazione del segnale
DCF77 dopo l’installazione delle batterie.
Sullo schermo LCD compare l’icona Torre (L) e du-
rante la sincronizzazione lampeggia in modo regolare
la forma d’onda che indica l’intensità del segnale.
L’intensità del segnale è indicata in questo modo:
1. Segnale molto debole o assenza di segnale
(Nessuna forma d’onda)
2. Segnale debole (lampeggia la 1a forma d’onda)
3. Segnale soddisfacente (lampeggia fino alla 2a
forma d’onda)
4. Segnale buono (lampeggia fino alla 3a forma
d’onda)
5. Le icone della Torre (L) e delle 3 forme d’onda
restano fisse (ricezione corretta)
6. Le icone della Torre e delle 3 forme d’onda
scompaiono (ricezione non riuscita)
Se l’intensità del segnale è debole e la ricezione non
ottimale, allontanare l’unità dalla potenziale fonte di
interferenza e cercare in un’altra posizione un miglior
segnale radio.
L’orologio R/C si sincronizza quotidianamente verso
le ore 01:00. Nel caso in cui la sincronizzazione non
PREVISIONI METEO CON ALLERTA
TEMPORALI
Il sensore di pressione di precisioni incorporato legge
la pressione atmosferica e calcola le previsioni meteo
(B) delle 12 ore successive.
La risoluzione:
OFFSET DELLE CONDIZIONI METEO
Se le previsioni meteo (B) differiscono dalle condizi-
oni meteorologiche esistenti è possibile modificare
l’offset del tempo procedendo come segue:
1. Tenere premuto il pulsante „CLEAR”
6
per 3
secondi per accedere alla modalità di offset della
pressione. Lampeggia l’icona relativa alle condizio-
ni meteo.
2. Selezionare le condizioni meteo attuali premendo
„MEM”
5
.
3. Premere „CLEAR”
6
per confermare e uscire.
sia possibile, l’orologio R/C cercherà il segnale ogni
ora. La durata di ciascun ciclo di ricezione R/C va dai
3 ai 5 minuti. Onde evitare interferenze l’unità disa-
biliterà le funzioni dei pulsanti durante la ricezione
radio. Non vuol dire che il dispositivo è difettoso.
Basterà premere il pulsante „ - “ 4 per spegnere
temporaneamente la ricezione radio.
IMPOSTAZIONE CALENDARIO/ORA
L’utente può impostare manualmente l’ora e il calen-
dario. Tenere premuto il pulsante „ Set“
2
per 3 sec.
e impostare il calendario/l’ora nella seguente sequen-
za: formato 12/24 ore -> anno -> mese -> giorno ->
ora -> minuto -> Offset fuso orario -> salva ed esci.
Premere il pulsante „ + ”
3
/ „ - ”
4
per effettuare
la regolazione, quindi il pulsante „Set“
2
per confer-
mare.
(Immettere + - 12 ore nell’offset dell’ora (Svizzera 1)
per diversi fusi orari, lasciare l’offset su 0 per l’ora
locale) Premere SET/ ZONE
2
per selezionare l’ora
locale e il fuso orario
SELEZIONE C/ F SULL’UNITÀ DOMESTICA
Tenere premuto il pulsante „MEM” 5 per 3 secondi
per selezionare C e F
Allerta NEVE (solo visibile)
Quando la temperatura esterna del canale 1 è inferi-
ore a +4°C, l’icona SNOW inizia a lampeggiare sullo
schermo LCD.
INDICATORE DI TREND DI TEMPERATURA,
UMIDITÀ E PRESSIONE
Se il valore della temperatura/umidità o della pressione
esterna cambia, le 3 piccole icone freccia ne indicano
la tendenza (A): In aumento, Stabile, In calo.
FASI LUNARI
Viene visualizzata automaticamente la fase lunare (N)
corrente.
SOLEGIATO LEGGERMENTE
NUVOLOSO
NUVOLOSO PIOGGIA TEMPORALI
313514_Manual.indd 17 20.12.12 10:45

Italiano 18
MEMORIA MAX./MIN.
Premere il pulsante „MEM” 5 per visualizzare i
valori max. e min. di temperatura e umidità. Per
cancellare i valori Max./Min., premere il pulsante
„CLEAR“ 6 durante la loro visualizzazione
IMPOSTAZIONE ALLARME 1 E ALLARME 2
Selezionare AL 1 o AL 2 (K) premendo il tasto
”AL” 7.
Tenere premuto “AL“
7
per 3 secondi. Premere
„+ 3,
- 4” per immettere i valori desiderati quindi premere
„AL” 7 per confermarne l’impostazione.
Per visualizzare l’ora dell’allarme 1 e 2 (K), premere
il pulsante „AL” 7 che leggerà i valori AL 1 e AL 2.
L’ora dell’allarme resterà visualizzata per 5 secondi
dopo di che verrà ripristinata la normale funzione
orologio (M).
Per attivare e disattivare AL 1, AL 2 (K), premere
il pulsante „+ 3 (campanello)”. L’unità attiverà
l’allarme Crescendo che dura 2 minuti.
ALLARME SNOOZE
Durante l’attivazione dell’allarme, premere il pulsante
„LIGHT/ Zz“ 8 per attivare l’allarme snooze oppure
premere l’altro pulsante (AL 7, SET 2, + 3 o - 4)
per interrompere l’allarme per 1 giorno. In caso di
attivazione della funzione snooze, „Zz“ e l’icona del
campanello (K) iniziano a lampeggiare. Attendere
quindi 5 minuti e l’allarme ai riattiverà oppure pre-
mere l’altro pulsante (AL 7, SET 2, + 3 o - 4) per
disabilitare la funzione snooze.
INDICAZIONE DI BATTERIA SCARICA
L’indicazione di batteria scarica può essere visualizza-
ta sia sull’unità (G) che sul canale remoto (F).
Sostituire le batterie e seguire la procedura di
configurazione come descritta nel presente manuale
di istruzioni.
SPECIFICHE
Range di misurazione della temperatura:
Unità interna: da -5 C a 50°C (da 32°F a 122°F)
dal 20% al 99% RH
Sensore remoto: da –20°C s 60°C (da 14°F a 140°F)
dal 20% al 99% RH
Precisione della temperatura: +/- 1°C nel range di 0°C ~ 50°C
+/- 1,5°C nell’altro range
Precisione dell’umidità: +/- 5% nel range del 40% ~ 80%
+/- 8% nel range del 30~40% o 80%~ 95%
N/A al di sotto del 30%
o al di sopra del 95%
Trasmissione: 30 metri (100 ft.) in spazi aperti, RF433 MHz
Risoluzione: 0,1 gradi C, 1%RH
Orologio: precisione al quarzo +-45 sec. al mese quando al di fuori di RCC
Alimentazione tensione apparecchio principale
: 2 x 1,5 V
Tipo di batteria apparecchio principale
: 2 x AA / LR6 / AM3
Alimentazione tensione sensore remoto
: 2 x 1,5 V
Tipo di batteria sensore remoto
: 2 x AAA / LR03 / AM4
313514_Manual.indd 18 20.12.12 10:45

313514_Manual.indd 19 20.12.12 10:45

W010 - 313514.00
Tegro AG
CH-8603 Schwerzenbach
Aussentemperatur
Outdoor temperature
Température extérieure
Temperatura esterna
Luftfeuchtigkeit
Humidity
Humidité atmosphérique
Umiditá atmosferica
Kanalanzeige
Channel display
Affi chage du canal
Visualizzazione canale
Trend-/Trendanzeige
Trend / tendency display
Affi chage tendance
Visualizzazione trend / tendenza
Symbole Wettervorhersage
Wheather forecast symbols
Symboles prévisions météo
Simboli previsioni meteo
Uhranzeige
Clock display
Affi chage horloge
Visualizzazione orologio
Aussentemperatur
Outdoor temperature
Température extérieure
Temperatura esterna
Innentemperatur
Indoor temperature
Température intérieure
Temperatura interna
Funkuhr
Radio controlled clock
Horloge radio pilotée
Orologio radiocontrollato
Datumsanzeige
Day / month display
Affi chage jour / mois
Visualizzazione giorno / mese
Außen-Luftfeuchtigkeit
Outdoor humidity
humidité atmosphérique
extérieure
Umiditá atmosferica
externa
Innen-Luftfeuchtigkeit
Indoor humidity
humidité atmosphérique intérieure
Umiditá atmosferica interna
Mondphase
Moon phase
Phase lunaire
Fase Lunare
313514_Manual.indd 20 20.12.12 10:45
Table of contents
Languages:
Other UNITEC Climate Weather Station manuals

UNITEC Climate
UNITEC Climate W0785 User manual

UNITEC Climate
UNITEC Climate E0316 User manual

UNITEC Climate
UNITEC Climate W129-1 User manual

UNITEC Climate
UNITEC Climate W164 User manual

UNITEC Climate
UNITEC Climate W177 User manual

UNITEC Climate
UNITEC Climate W185-0 User manual

UNITEC Climate
UNITEC Climate W194-1 User manual

UNITEC Climate
UNITEC Climate WT3081 User manual

UNITEC Climate
UNITEC Climate E0106 User manual

UNITEC Climate
UNITEC Climate W263 User manual