4 TruVision DVR 44HD Quick Start Guide
By default, the setup wizard will start once the
recorder has loaded. The wizard walks you
through some of the more important settings
of your recorder. Select the preferred
language for the system and then enter the
administrator password. The default admin
password is 1234. It is strongly recommended
that this password is changed.
The wizard will then guide you through the
menus to set the time and date, network
configuration, HDD management, and
recording configuration.
When all the required changes have been
entered, click Finish to exit the wizard. The
recorder is now ready to use. Recording starts
automatically.
Important: Your TruVision unit is
delivered with default user name
and password credentials for initial
access, easy configuration and auto
discovery. For security reasons, it is
highly recommended to change the
Operating the recorder
There are several ways to control the unit:
•Front panel control
•IR remote control
•Mouse control
•Web browser control (TruVision Navigator,
TVRmobile)
•KTD-405 keypad control
•TVK-800 keypad (from TVK-800 firmware
version 1.0i)
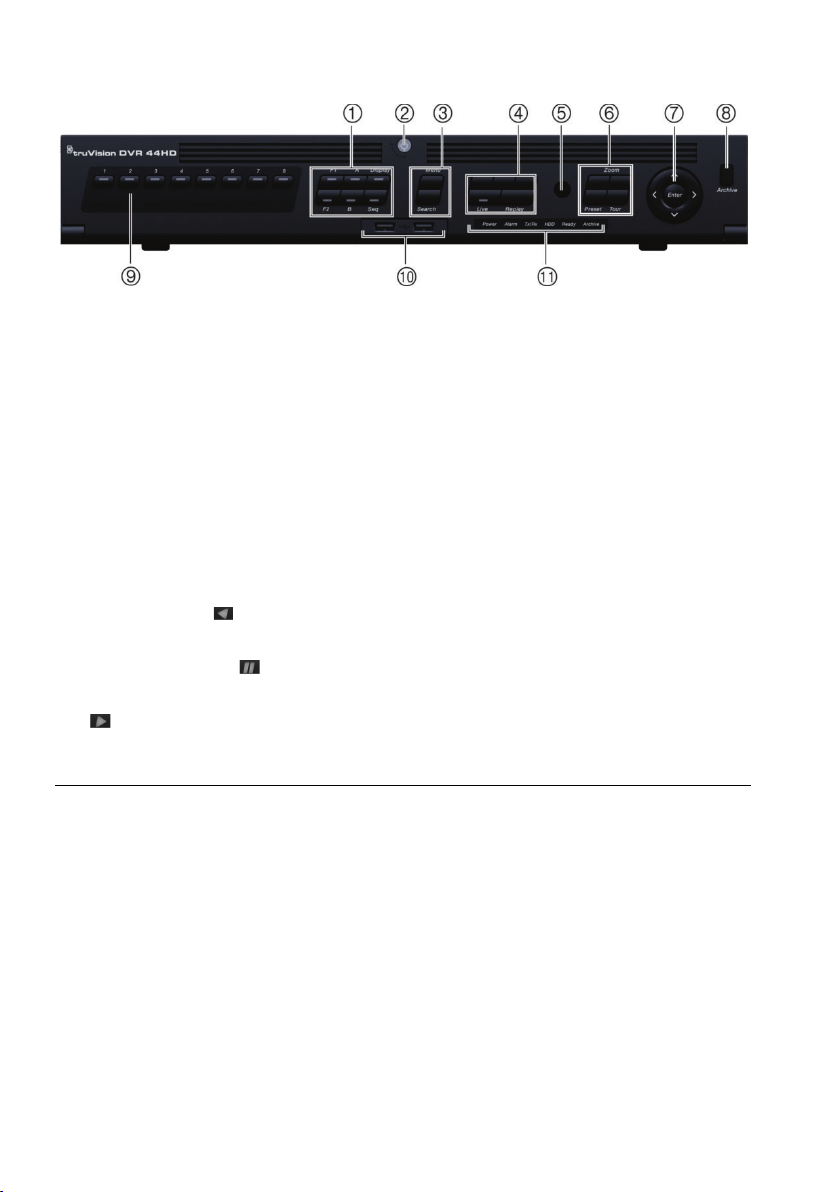
Front panel
The buttons on the front panel control most
functions. See Figure 2 on page 2 for the
locations of the controls.
IR remote control
The IR remote control buttons are similar to
those on the front panel. Place the two AAA
batteries in the remote control.
To connect the remote control to the
recorder:
1. Press Menu on the front panel or right-click
the mouse and select Menu. The main
menu screen appears.
2. Select Device Management > General
Settings.
3. Check the recorder’s remote control ID
value. The default value is 255. The device
address is valid for all IR controls.
4. On the remote control press the Device
button.
5. Enter the remote control ID value. It must
be the same as that on the recorder.
6. Press OK on the remote control.
USB mouse
The USB mouse provided with the recorder
operates all the functions of the recorder,
unlike the front panel, which has limited
functionality. The mouse lets you navigate and
make changes to settings in the user
interface.
Connect the mouse to the recorder by
plugging the mouse USB connector into the
USB port on the back or front panel. The
mouse is immediately operational and the
pointer should appear.
Web browser control
The recorder’s Web browser lets you view,
record, and play back videos as well as
manage all aspects of the recorder from any
PC with Internet access. The browser’s easy-
to-use controls give you quick access to all
recorder functions.
To access the unit, open a web browser and
enter the IP address assigned to the recorder
as a web address. In the logon screen, enter
the default user ID and password:
• User ID: admin
• Password: 1234
The default values for recorder network
settings are:
• DHCP: Disabled by default.
• IP address - 192.168.1.82