2 / 3 AdvisorOne Battery Installation Sheet
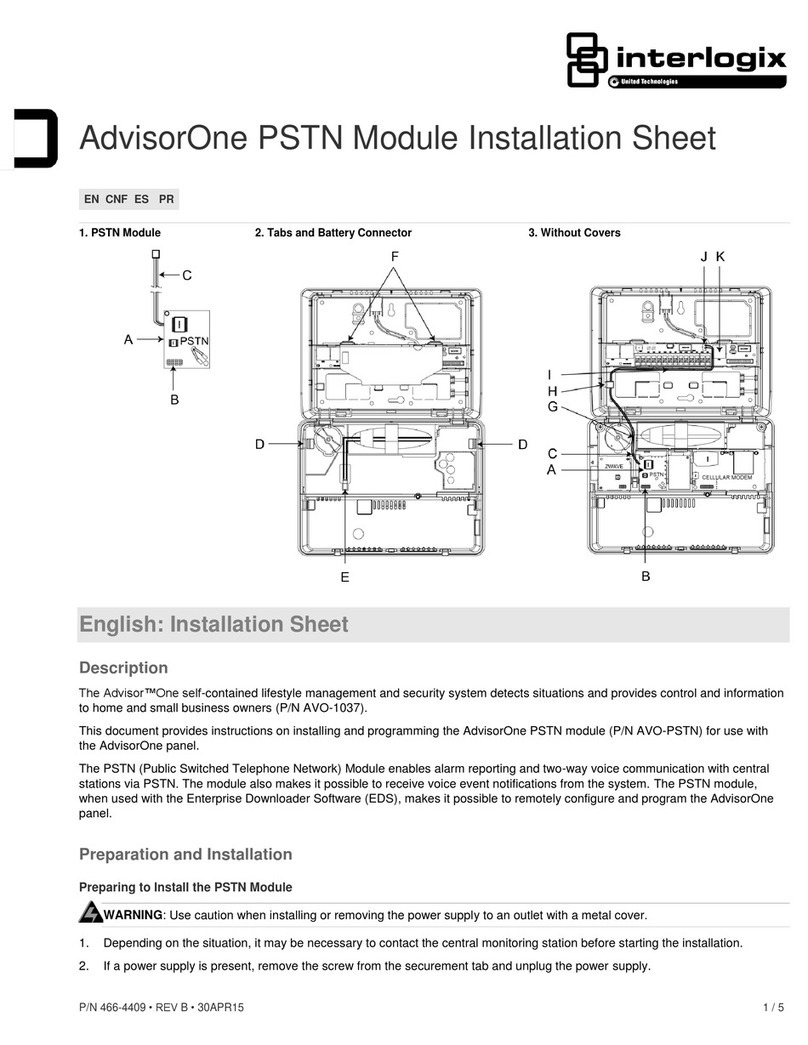
4. If a battery (A in Figures 1 and 2) is not installed, proceed to “Installing the Battery”. If a battery is currently installed, release
the battery strap (F in Figure 2). Disconnect the battery from the battery connector (D in Figures 1 and 2) by pressing down on
the wire end of the battery clip (E in Figure 1). Remove the existing battery.
Note: Do not dispose of the old battery until the new battery has been installed, tested and is functional. Once the new battery
is tested and is functional, dispose of the old battery in accordance with local regulations.
Installing the Battery
1. Place the battery in the battery compartment with the wires (B in Figures 1 and 2) facing up as shown. Position the battery so
that the tape (C in Figures 1 and 2) is near the battery connector (D in Figure 2). Secure the battery in position with the battery
strap (F in Figure 2).
2. Route the battery wires (B in Figures 1 and 2) to the battery connector (D in Figure 2) and place the excess cable in the open
area next to the battery. Do not connect the battery to the battery connector on the panel until step 4.
3. Supply power to the panel as noted in Table 1.
Table 1: Powering the Panel
Plug the power supply into the outlet and secure with the supplied screw.
Plug the power supply into the outlet.
Do not use the securement tab and screw.
Follow regional requirements.
Note: Connect the battery within 15 seconds of providing power from the power supply to reduce the potential for a
low battery indication.
4. Connect the battery to the battery connector on the panel (D in Figure 2). Note that the cable connector (E in Figure 1) locks in
place.
5. Close the panel, making sure all tabs are engaged. Replace the screw securing the panel chassis.
6. If the central monitoring station was notified, inform them that this operation is complete.
Upon initial installation, the battery may take up to 48 hours to be fully charged. If the battery is low, a Low Battery icon will be
present and trouble beeps will sound until the battery is sufficiently charged. After the initial charge, should the panel lose power
from the power supply and experience a low battery condition, the icon will appear and trouble beeps will sound unless silenced.
Battery Configuration and Programming
To confirm the battery is supplying power to the panel:
1. Press the System Status icon .
2. Verify the Battery icon is displayed in the System Status. If the Battery icon is not displayed, see the “Troubleshooting”
section.
Battery Configuration
At installation, the battery may not be fully charged. To check the battery status, press the System Status icon .
To test the battery:
1. Press the Settings icon on the lower left of the main screen.
2. Press CONFIGURATION to enter programming.
3. Enter installer code or dealer code.
4. From the Configuration & Programming screen press TEST.
5. From the Test screen press BATTERY.
6. To start the battery test, press START. The results will be displayed after the battery test is complete.
Programming
No programming is required.


