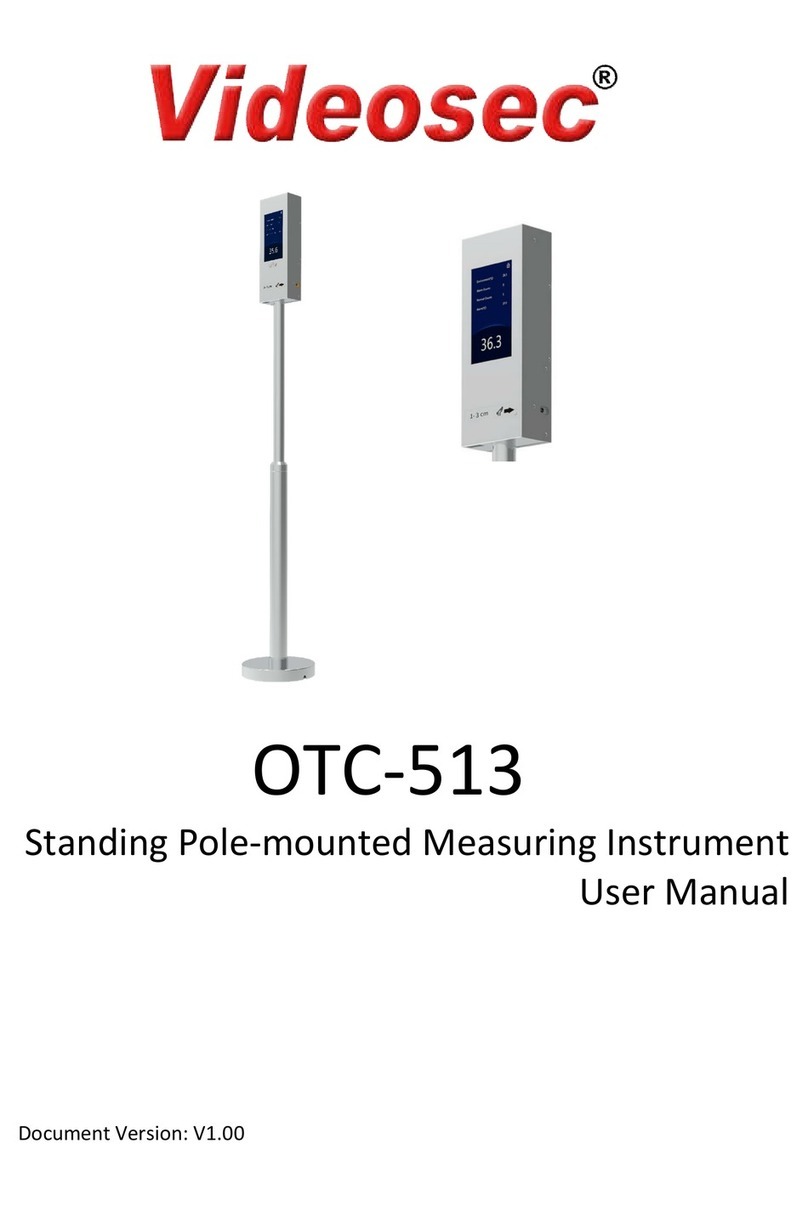
UNV OTC-513-M User manual

Standing Pole-mounted Measuring Instrument
User Manual
Document Version: V1.00

Thank you for purchasing our product. If there are any questions, or requests, please do not hesitate to contact
the dealer.
Disclaimer
No part of this manual may be copied, reproduced, translated, or distributed in any form or by any means without
prior written consent from Uniview.
The manual may be updated from time to time due to version upgrade or other reasons.
The manual is for reference only. All the statements, information, and suggestions contained herein do not
constitute warranties of any kind, express or implied.
Uniview shall not under any circumstances be liable for any special, consequential, incidental or indirect damages
arising from the use of this manual or Uniview's product, including but not limited to any loss of commercial
profits, losses caused by missing data or documents, and anomalies during product running or information leakage
due to cyber attacks, hacker attacks, or virus attacks.
Safety Precautions
CAUTION!
The default password is used for your first login. To ensure account security, please change the password after
your first login. You are recommended to set a strong password (no less than eight characters).
Before performing operations, be sure to carefully read through and observe safety specifications in this manual.
Screenshots provided in this document are used as examples only and the UI layout varies with versions.
This manual applies to multiple models but the models are not completely listed herein. Refer to actual
products while reading this manual.
Zhejiang Uniview Technologies Co., Ltd. (hereinafter referred to as "Uniview") reserves the right to
modify the content in this manual without prior notice or prompt, but Uniview does not ensure that
this manual is completely error-free.
Subject to uncertain factors such as the physical environment, actual values of data may differ from the
reference values described here. In case of any question or dispute, the right of final interpretation
resides with Uniview.
Follow operation instructions in this manual when using the product. Uniview is not responsible for
problems caused by the violation of the instructions. Thank you for your cooperation.
Environmental Protection
This product has been designed to comply with the requirements on environmental protection. For the proper
storage, use and disposal of this product, national laws and regulations must be observed.
Conventions
The figures, charts or photos in this manual are used for illustration only, which may differ from the
actual product.
This manual applies to multiple models but the models are not completely listed herein. Refer to actual
products while reading this manual.

Subject to uncertain factors such as the physical environment, actual values of some data may differ
from the reference values described here. In case of any question or dispute, the right of final
interpretation resides with Uniview.
Follow this manual when using the product. Professional guidance is recommended.
Notational conventions used in this document are described as follows:
Format
Description
Boldface
Indicates buttons, menus, tabs, window names, dialog names, and parameter names. For example, click
OK or select Device Management.
" "
Indicates messages. For example, "Hanging Up" is displayed on the interface.
>
Directs you to go to a multi-level menu. For example, go to Device Management > Add Device. In this
example, Add Device is a submenu under Device Management.
The symbols in the following table may be found in this manual. Carefully follow the instructions
indicated by the symbols to avoid hazardous situations and use the product properly.
Symbol
Description
WARNING!
Contains important safety instructions and indicates situations that could cause bodily injury.
CAUTION!
Means reader be careful and improper operations may cause damage or malfunction to product.
NOTE!
Means useful or supplemental information about the use of product.

i
Contents
1Introduction······················································································································1
2Local Operations ················································································································1
2.1 Main Interface ··············································································································· 1
2.1.1 Not Measuring Temperature ····················································································· 1
2.1.2 Measuring Temperature··························································································· 1
2.2 Screensaver Mode ·········································································································· 2
2.3 Activation Config ············································································································ 3
2.3.1 Basic Info ············································································································ 3
2.3.2 Network Setting ···································································································· 4
2.3.3 Change Password··································································································· 5
2.3.4 Temperature Setting ······························································································· 6
2.3.5 Device Maintenance ······························································································· 6
3Web Operations·················································································································7
3.1 Login ·························································································································· 7
3.2 Network Configuration ····································································································· 9
3.2.1 Ethernet ············································································································· 9
3.2.2 DNS ··················································································································11
3.2.3 Port Setting·········································································································11
3.2.4 DDNS ················································································································12
3.2.5 802.1x ···············································································································12
3.3 Security ······················································································································12
3.3.1 User ·················································································································12
3.3.2 Network Security ··································································································13
3.3.3 Registration Info ···································································································14
3.4 System Configuration ······································································································14
3.4.1 Device Info··········································································································14
3.4.2 Time Setting ········································································································15
3.4.3 Advanced Setting ··································································································17
3.4.4 Ports & Devices ····································································································18
3.4.5 Personalization ····································································································19
3.4.6 Maintenance ·······································································································20

1
1 Introduction
Intelligent standing pole-mounted Measuring Instrument is a non-contact thermometer that measures body
temperature on the wrist. It supports local and web operations. This manual describes how to operating a device
locally or through the Web interface.
Before you begin, please follow the quick guide to complete the installation and power up.
2 Local Operations
2.1 Main Interface
2.1.1 Not Measuring Temperature
When the device is not measuring temperature, environment temperature, the number of alarms and normal
temperatures measured are displayed on the screen.
2.1.2 Measuring Temperature
To take a temperature, place your wrist 1cm -4cm to the temperature measurement module. The screen displays
as follows.
Clear data
Latest temperature measurement

2
Normal temperature Abnormal temperature
2.2 Screensaver Mode
It will enter the screensaver mode when there is no personnel temperature measurement or no operation for
more than 30S (default value).
If someone measures the temperature or touches the screen, the system will exit the screensaver mode.

3
2.3 Activation Config
Hold down the main interface of the device for a long period of time. In the displayed password input interface,
enter the configured activation password to go to the Activation Config interface. If you forget the password,
contact the local deale to seek help.
NOTE!
The default password is admin. To ensure account security, please change the password after your first login.
The activation password is consistent with the password for the admin to log in to the Web interface. If the
activation password is changed, use the new password to login.
On the Activation Config interface, you can view basic information about the device, configure the network,
temperature, password, and device maintenance.
2.3.1 Basic Info
The Basic Info interface allows you to view the status of the current device in real time, so as to rapidly know
about the device condition and better maintain the device.
(1) On the Activation Config interface, tap to go to the Basic Info interface.

4
2.3.2 Network Setting
On the Network Setting interface, you can modify the device IP address and other communication parameters so
that the device can communicate with external devices.
(1) On the Activation Config interface, tap to go to the Network Setting interface.
(2) Set network parameters by referring to the table below.

5
Parameter
Parameter Description and Configuration
IP Address
Enter the IP address of the device.
The IP address of the device must be unique across the network.
Subnet Mask
Enter the subnet mask of the device.
Default Gateway
Enter the default gateway of the device.
(3) Tap Save to complete network setting.
2.3.3 Change Password
To change the configured activation password, do as follows:
(1) On the Activation Config interface, tap to go to the Change Password interface.
(2) Enter the old password, new password, and confirm the new password as required.
NOTE!
The password must contain at least eight characters (including at least two of the following types: upper case
letters, lower case letters, digits, underscores, and hyphens).
The confirmation password must be consistent with the new password.
The activation password is consistent with the password for the admin to log in to the Web interface. If the
activation password is changed, use the new password to login.
(3) Tap Save to complete the activation password change.

6
2.3.4 Temperature Setting
Configure temperature measurement range and temperature alarm threshold.
(1) Click in Activation Config interface.
(2) Set parameters by referring to the table below.
Parameter
Description
Temperature Unit
You can choose between degrees Celsius and degrees Fahrenheit.
Temperature Range
Valid range: 30-45. Default range:35-42.
Configure the range based on actual application scenes.
Temperature Alarm Threshold
When the temperature measurement module detects a temperature higher than the
threshold, the abnormal temperature alarm is displayed on the GUI and the corresponding
warning is sounded.
Valid range: 30-45. Default: 37.3.
(3) Tap Save to complete the temperature setting.
2.3.5 Device Maintenance
On the Device Maintenance interface, you can restart the system or restore the default configuration.
Click in Activation Config interface to enter Device Maintenance.

7
NOTE!
If the restore all factory default settings feature is not enabled, the restore factory settings will retain the
network and user settings.
3 Web Operations
3.1 Login
The default static IP address of the device is 192.168.1.13. The device also supports simple login using the IP
address of 192.168.0.13 and subnet mask of 255.255.255.0.
The Dynamic Host Configuration Protocol (DHCP) is enabled on the device by default. If a DHCP server is used in
the network, the IP address may be assigned dynamically. In this case, use the actual IP address for login. For
operations to be performed when a dynamic IP address is assigned, click Here for a reference.
The steps of logging in to the Web interface (Internet Explorer 10 as an example) are as follows:
(1) Enter the IP address in the address bar of the browser and press Enter.
(2) A plug-in installation prompt as shown in the figure below is displayed when you log in to the Web interface
for the first time. Follow instructions on the interface to complete the plug-in installation (all browsers need
to be closed for the installation), restart the Internet Explorer, and log in to the system again.
NOTE!
To manually load the ActiveX, enter http://IP address/ActiveX/Setup.exe in the address bar and press Enter.
(3) Enter the username and password, and then click Login.

8
The table below describes parameters and plug-ins on the interface and their configuration.
Parameter/Plug-in
Description
Configuration
Username/Password
Username and password for logging in to the Web interface.
At initial login:
The default username is admin and the default password is admin.
The password for admin to log in to the Web interface is the same
as the activation password. If the activation password has been
changed, enter the new password here.
Enter the username and
password based on the
actual conditions.
Forgot Password
If the user forgets the login password, he can retrieve the login
password by clicking here.
Email the device’s serial number (20 characters, pasted on the
device) and date (See the pop-up prompt box below) to
change the login password after login.
/
Reset
After Reset is clicked, the Username and Password boxes will be
cleared.
/

9
NOTE!
The default password is used for your first login. To ensure account security, please change the password after
your first login. You are recommended to set a strong password (no less than eight characters).
The device protects itself from illegal access by limiting the number of failed login attempts. If login fails six times
consecutively, the device locks automatically for ten minutes.
3.2 Network Configuration
3.2.1 Ethernet
Modify communication settings such as the IP address for the device so that it can communicate with other
devices.
NOTE!
After you have changed the IP address, you need to use the new IP address to log in.
(1) Choose Setup > Network > Network to go to the Ethernet interface.
(2) Set Obtain IP Address as shown in
1
in the figure above.
Set network parameters by referring to the table below.

10
Parameter
Description and Configuration
Network Isolation
Keep the default value Off. It cannot be configured.
IP Address
Enter the IP address of the device.
The IP address of the device must be unique across the network and cannot begin
with 127.
Subnet Mask
Enter the subnet mask of the device.
Default Gateway
Enter the default gateway of the device.
When Obtain IP Address is set to PPPoE, complete the configuration by referring to the figure below.
If the device is connected to the network through Point to Point over Ethernet (PPPoE), you need to select PPPoE
as the IP obtainment mode. Then enter the username and password provided by your internet Service Provider
(ISP).
NOTE!
This function is not supported by some models. Please see the actual model for details.
When Obtain IP Address is set to DHCP, complete the configuration by referring to the figure below.
The Dynamic Host Configuration Protocol (DHCP) is enabled by default when the device is delivered. If a DHCP
server is deployed in the network, the device can automatically obtain an IP address from the DHCP server.
(3) Configure IPv6 settings as shown in
2
in the figure above.
Parameter
Description and Configuration
IPv6 Mode
The default value is Manual. Keep the default value here.
IPv6 Address
Enter the IPv6 address of the device.
The IP address of the device must be unique across the network.
Prefix Length
Enter the length of the subnet prefix of the device.
Default Gateway
Enter the default gateway of the device.
(4) Set parameters as shown in
3
in the figure above.
Parameter
Description and Configuration
MTU
The value ranges from 576 to 1500.
This parameter is not displayed when Obtain IP Address is set to PPPoE.
Port Type
The default value is FE Port. Keep the default value.
Operating Mode
The options are as follows:

11
10M Half Duplex
10M Full Duplex
10M Auto-Negotiation
100M Half Duplex
100M Full Duplex
100M Auto-Negotiation
Auto-Negotiation
(5) Click Save to complete the configuration.
3.2.2 DNS
(1) Click Setup>Network>DNS.
(2) Set Preferred and Alternate DNS server addresses.
(3) Click Save.
3.2.3 Port Setting
1. Port
(1) Click Setup>Network>Port. Go to Port tab.
(2) Configure relevant port numbers.
(3) Click Save.
2. Port Mapping
(1) Click Setup>Network>Port. Go to Port Mapping tab.

12
(2) Enable Port Mapping and select mapping type. If Manual is selected, then external ports must be
configured (external IP is obtained automatically by the camera). If the configured port is occupied, then the
Status will show Inactive.
(3) Click Save.
3.2.4 DDNS
(1) Click Setup>Network>DDNS.
(2) Enable DDNS Service.
(3) Select a DDNS type: DynDNS, NO-IP, or EZDDNS.
(4) Complete other settings including server address, domain name, username and password.
(5) Click Save.
3.2.5 802.1x
802.1x provides authentication to devices trying to connect to a network. Only the authenticated devices can
connect the network. This enhances security.
(1) Click Setup>Network>802.1x.
(2) Select On and thencomplete other settings.
(3) Click Save.
3.3 Security
3.3.1 User
There are two types of users in the system:
Administrator: referred to as “admin” in this manual. The default name of the administrator is admin, which
cannot be modified. Admin has full permission and can manage all users and devices. Only one admin user is
allowed in the system.

13
Common user: referred to as “user” in this manual. User only has permission to play live and recorded video.
Up to 32common users are allowed in the system.
You can add a user on the user management interface (under Setup>Security> User).
After the user is added successfully, you can change the password by entering the new password or delete the
user by clearing the username.
NOTE!
Only admin can change passwords. Changing the username or password for a user when the user is still logged in
will force the user to log out. The user must use the new username or password to log in.
Only admin can add and delete users. Deleting a user when the user is still logged in will force the user to log out.
A deleted user cannot log in.
This function of playing live and recorded video is not supported by some models. So it doesn’t make sense to
add common users. Please see the actual model for details.
3.3.2 Network Security
After security information transmission is set, you can establish an information security channel to ensure data
transmission security.
1. HTTPS
(1) Click Setup > Security >Network Security >HTTPS.
(2) Select On for HTTPS. You may import a custom SSL certificate as needed.
(3) Click Save.
Next time you log in, enter the address in https://IP:HTTPS port number format, for example,
https://192.168.1.13:443 to enter secure channel mode. If you use the default HTTPS port, enter https://IP.
2. RTSP Authentication
The configuration is not supported.
3. ARP Protection
This function protects a device from ARP attacks. The gateway and the MAC address must be set properly before
a PC can access the device from another network; if an incorrect MAC is set, only PCs on the same LAN can access.
(1) Click Setup > Security >Network Security >ARP Protection.
(2) Select the check box to enable the ARP binding function and set the gateway MAC address.
(3) Click Save.
4. IP Address Filtering
Use IP address filtering to allow or forbid access from specified IP address(es).
(1) Click Setup > Security >Network Security > IP Address Filtering.

14
(2) Select On to enable IP address filtering.
(3) Select a filtering mode, and then add IP address(es).
(4) Click Save.
NOTE!
If Filtering Mode is set to Whitelist, then only the added IP address(es) are allowed to access the device. If
Filtering Mode is set to Deny Access, then only the added IP address(es) are not allowed to access the device.
Up to 32 IP addresses are allowed. Each IP address can be added once only.
The first byte of each IP address must be 1-223, and the fourth cannot be 0. For example, the following IP
addresses are illegal and cannot be added: 0.0.0.0, 127.0.0.1, 255.255.255.255, 224.0.0.1.
5. Access Policy
(1) Click Setup > Security >Network Security > Access Policy.
(2) Select On to enable friendly password and MAC Authentication.
(3) Click Save.
NOTE!
Enabling friendly password does not affect use. If you turn it off and log in with a weak password, a page will pop
up, prompting you to change the password. There is no Cancel or Close button on this page. The default
password is treated as weak.
3.3.3 Registration Info
The configuration is not support.
3.4 System Configuration
3.4.1 Device Info
1. Basic Info
The Basic Info interface allows you to view the status of the current device in real time, so as to rapidly know
about the device condition and better maintain the device.
(1) Choose Setup > System> Basic Info and click the Basic Info tab.

15
(2) Click Refresh to update the device to the latest state.
On the refreshed interface, you can view status information about the current device.
2. External Device
External device interface can view related information of temperature measurement module.
Choose Setup > System > Basic Info and click the External Device tab.
NOTE!
Only if Fireware Version and Hardware Version information are consistent, the temperature measurement
function can be used normally.
3.4.2 Time Setting
1. Time
Users can try the following methods to adjust the system time of the device to correct time.
(1) Choose Setup > System > Time to go to the Time interface.
Table of contents
Other UNV Measuring Instrument manuals
Popular Measuring Instrument manuals by other brands

Teledyne Lecroy
Teledyne Lecroy LabMaster LM 10-25Zi-A Operator's manual

PANCONTROL
PANCONTROL PAN Pocketmeter manual

Hioki
Hioki IM3523A instruction manual

Applied fire
Applied fire CFWS10 owner's manual

MessKonzept
MessKonzept FTC200-OEM operating manual

Extech Instruments
Extech Instruments 475055 user guide