6
UPLIFT Desk 1-800-349-3839
G. Turn the assembled desk right-side-up. With two people, grab the desk by the base (not the desk-
top) and turn the desk right-side up. Adjust the Leveling Studs on the Feet (Part #2) as needed.
MAKE SURE NO OBSTACLES ARE IN THE DESK’S PATH.
MAKE SURE ALL CORDS ARE OF A LENGTH THAT WILL
ACCOMMODATE THE CHANGE IN HEIGHT.
H. Plug the Power Cord into a 110v outlet.
IMPORTANT!
You must RESET the desk prior to use!
Press and hold the DOWN button on the Keypad until the desk reaches
its lowest height. Release the DOWN button. Press and hold the DOWN
button again until the LED display reads “RST” or about 10 seconds on
non-LED handset models. Release the DOWN button. Press and hold
the DOWN button again until the desk lowers a little bit more, slightly
rises and stops. Release the DOWN button. Your desk is now ready to use.
To program up to four presets:
Use the up/down buttons to nd a desired height, then press “M” followed by a number 1 – 4.
8
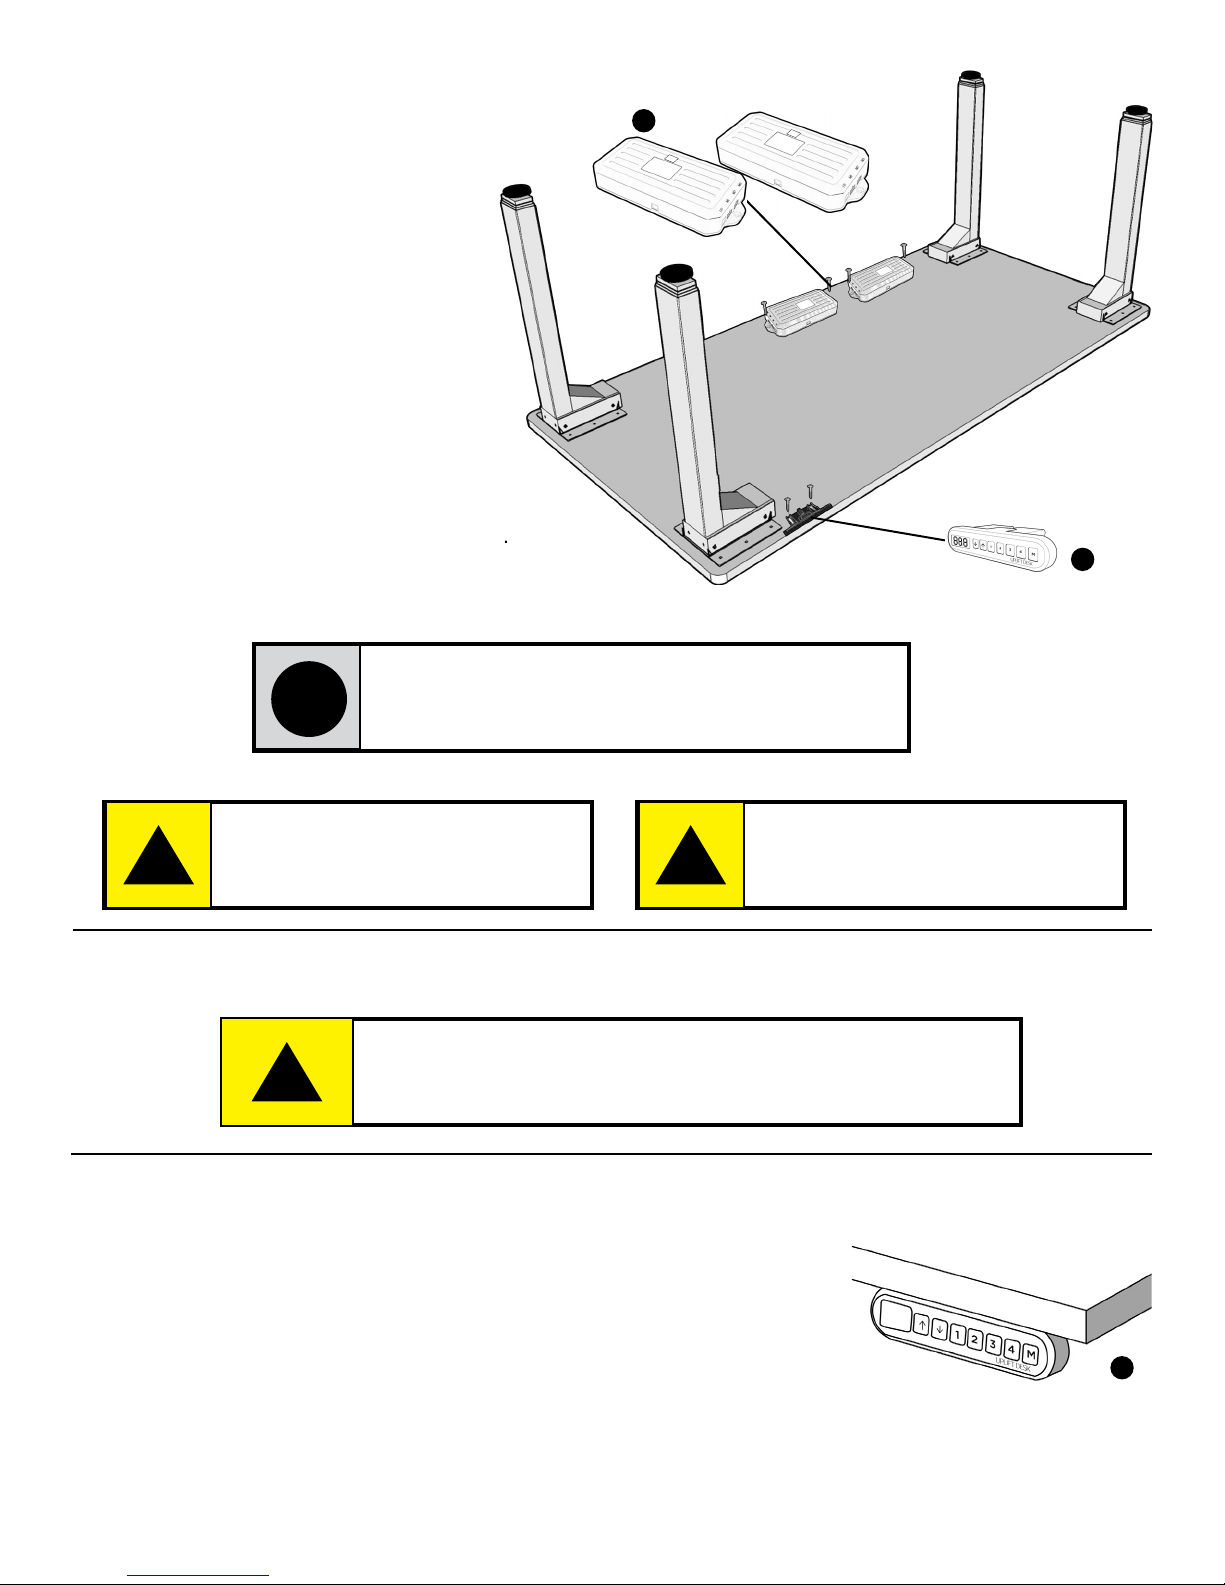
E. Attach the Control Boxes
(Part #5) to the underside of
the desktop using two (2) M5x16
Screws (part #11) per Control Box.
Ensure enough clearance at the wire
ports for cable connections. Ensure
the parts are close enough to that
the CB Cable (Part #8) can reach
the parts located on the long side
of each control box.
Place the Keypad (Part #6) so that
the front of the Keypad is ush with
the front desktop edge (or recessed
up to 1/8”). The Keypad may be placed
anywhere along the front edge of the
desktop but we reccomend placing it
toward an end so it does not interfere
with the chairs when seated. Use two
(2) M5x16 Screws (part #11) to the desktop.
Use the adhesive-backed Cable Clips (Part #12)
to secure the Connecting Wires, so they don’t sag.
Double-check that the wood screws
are not too long for the desktop
and won’t puncture the surface
when screwed all the way in.
Do not overtighten screws in this
step. Overtightening could cause
damage to the components.
We reccomend that you pre-drill any holes needed
for fasteners connecting the Control Boxes (Part #5)
or Keypad (Part #6) to the desktop (of your desktop
is not pre-drilled). Never use countersunk screws.
i
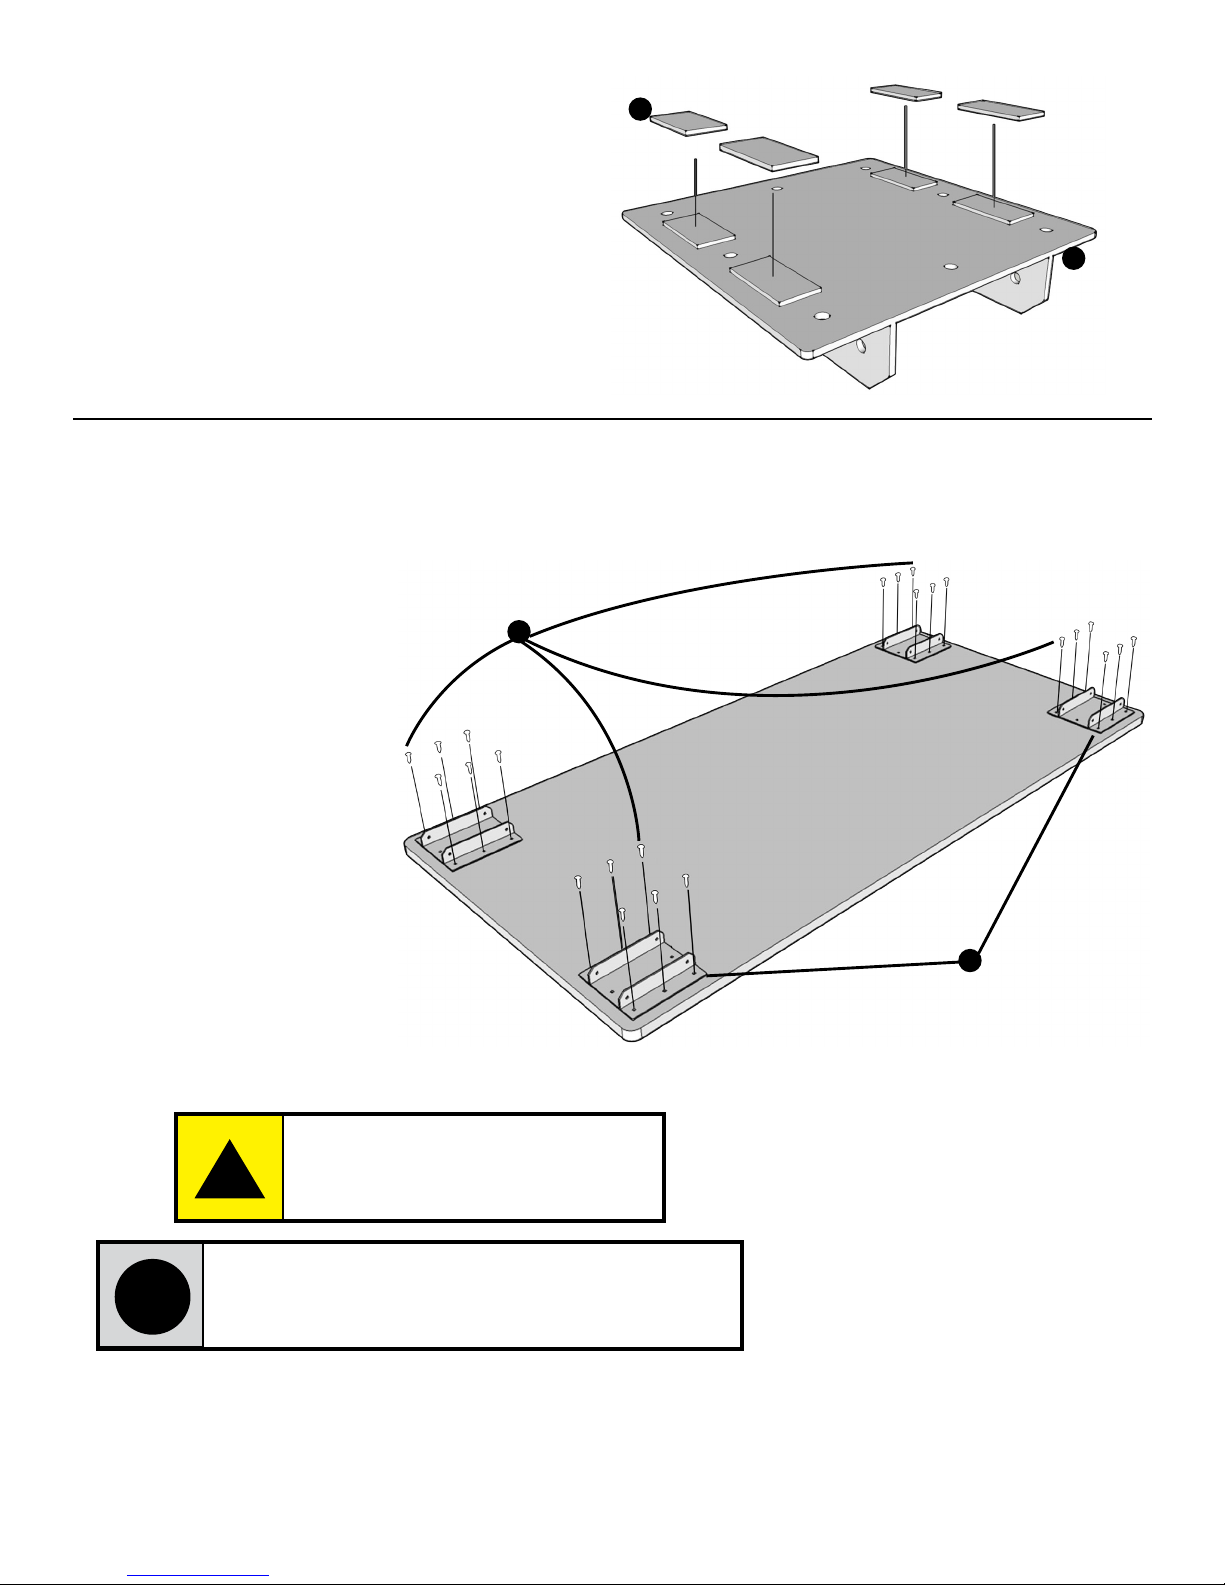
5
6
A
B
! !
!