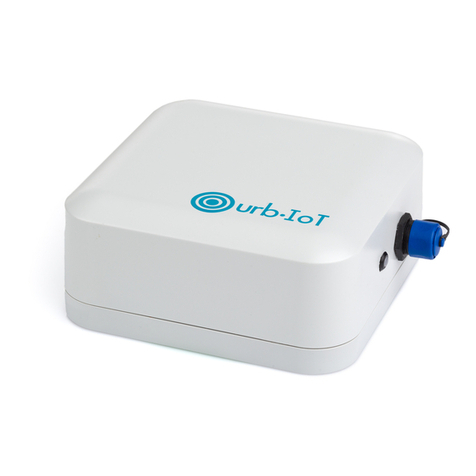
urbit URB-IOT User manual

1 / 6
URB-IOT OUTDOOR GATEWAY
Quick Start Guide
BEFORE STARTING:
MAKE SURE YOU CHARGED THE BATTERY FOR AT LEAST 24 HOURS BEFORE INSTALLING IT. WITHOUT A
FULLY CHARGED BATTERY, THE SOLAR PANEL WILL NOT BE ABLE TO RECOVER THE ENERGY FROM THE
BATTERIES CORRECTLY IN THE FIELD.
This Quick Start Guide shows you how to set up and begin using your Urb-IoT (www.urbit.us/manuals)
1. Product Overview
Urb-IoT, the first Outdoor Gateway with edge computing to enable flexible and scalable deployment of
LoRaWAN, BLE and Wi-Fi IoT objects. Offers global, wireless, and reliable connectivity thru a combination
of Wi-Fi, Global Cellular, Iridium Satellite networks and GPS tracking capabilities. Edge processing manages
data locally to reduce data transmission, cloud processing and storage. Enhances automated decision
making and analysis of data locally.
2. What’s inside de box?
•Urb-IoT (1pc)
•Wall Mount foot (4 pcs)
•Screws (4 pcs)
•USB Cable (USB-C to USB-C) (1pc) (use indoors only)
•USB-C PD Wall Charger (Use indoors only)
3. LED Indicator:

2 / 6
Color
UG Status
Event
Action
Duration
Blue
Working normally
Working
Long blink
Every minute
Blue
Low charger
voltage
Battery not
charging
Long blink
Every 2 sec.
Green
Battery charging
Battery
charging
Long blink
Every 2 sec. until battery is
fully charged
Green
Battery charged
Battery
charged
Continuous
Until battery is <100%
Red
UG turns to sleep
mode (battery
needs to be
charged)
Battery save
mode
Continuous
Battery has less than 10%
reserve (needs to be
charged)
4. Urb-IoT Configuration
IMPORTANT: Use only the included power adapter to maintain warranty coverage and ensure correct
Urb-IoT operation
STEP 1: Charge your Urb-IoT
1) Your Urb-IoT is in shelf-mode, it means its reporting interval is every 6h and all radios, except
cellular, OFF
2) Connect your Urb-IoT to the power Outlet with the adapter and cable included
3) The LED should be blinking green, in case is blinking blue, it is not charging. You may not be
using the cable and adapter included, be sure you see the green light blinking
4) Once the LED blinks green, in 5 minutes your Urb-IoT is off shelf-mode, it means now the
reporting interval is every hour and all radios except Wi-Fi are ON.
1. Be sure your Urb-IoT is in a place with cellular coverage, otherwise place it in a sky-view location
to ensure satellite and GPS connectivity. Urbit logo should point to the sky.
2. When it reaches 100% battery the light stays green
STEP 2: Create your account
1) Click the Activation link received at your registered email, you will be requested to update the
temporary password, in case you did not receive it:
Option 1: Go to www.urbit.us < login < Forgot Password < type your email address. You
will receive an email with further instructions on how to reset your password
TheLEDindicator ison theright
sideoftheUrb-IoT

3 / 6
Option 2: Send an email from your registered email to support@urbit.us with Urb-IoT
information (Serial Number and your invoice)
2) Fill in the requested user data by entering each gateway serial number
located at the back of your gateway
3) Accept terms and conditions and service contract
4) To add additional gateways, Select Add Gateway + > Fill in name and serial Number
STEP 3: Configure your Gateway via Urbit Management Center (UMC) or UrbitAPP (Android only)
Your Urb-IoT Cellular and Satellite networks are available since it is off shelf-mode, in case you have a Wi-
Fi network available, you need to configure it
NOTE: Every command you send will be delivered next time the Gateway connects to the cloud (Factory
setting = 1h) next reporting interval is shown in the UMC
1) Urbit Management Center:
a. Login to Urbit Management Center urbit.us, your account username and password created
on the Step 2
b. You should see your Urb-IoT on the section Devices or Map or Add gateway +
c. Click on the icon to see gateway information, QR code and change device name
d. To Change reporting interval:
i. Select your Urb-IoT > Send Command (top menu) > Set Gateway Reporting
interval > Send > Define reporting Interval and click “Submit”
e. To Connect your Urb-IoT to a Wi-Fi network (if available):
i. Select your Urb-IoT > Send Command (top menu) > Set Gateway WiFi parameters
> Send > Fill in SSID and Password, WiFi Mode = Client and Access point = 1
f. To add a sensor, go to STEP 4 and follow the instructions, don’t add it before
g. If connected to a power source “Charging battery” must say “Yes”
2) Via UrbitApp for local configuration without connectivity:
a. Download the App (only Android) before going to field: Play Store > Search < Urb-IoT
b. Create a new account
c. Approve BLE, Camera and Location permissions
d. Be sure the BLE on the Urb-IoT is ON (it is ON only when your Urb-IoT is connected to a power
supply - green LED)
e. Register on the App > Click the “+” button on “My Gateways” > Read the QR Code > Your
Password is the ID number of your Urb-IoT
f. Device Dashboard is shown when gateway is connected
g. Menu > Advance User > Password: urbitddmmaa.$# (Using phone’s date in the format the
format: dd = day mm = month aa = year)
h. In case you want to change factory radios configuration:
i. Verify you are connected to the Gateway Menu > Enable Interfaces > Edit values
> Send Changes
ii. Confirmation is received after the command is executed successfully
STEP 4: Add LoRa sensors
1) Register sensor in TTS before adding any LoRa sensor in the Urbit Management Center Adding
Devices | The Things Stack for LoRaWAN (thethingsindustries.com)
a. Create an account in TTS
b. End devices < + Add end device > Fill in Brand, Model, Hardware Version, Software
Version, and Region for your device.
c. Enter the JoinEUI/AppEUI, DevEUI and APPKey provided by your manufacturer

4 / 6
2) Log in to your account on the Urbit Management Center www.urbit.us
a. Select your gateway > Send Command > Add LoRaWAN Sensor > Fill in Sensor Name
(Select a name to identify your sensor), DevEUI, AppEUI, AppKey
STEP 5: Installation
NOTE: Never paint the Urb-IoT, it could adversely affect the performance of the device and voids all
warranties. Consider the Wi-Fi, BLE, LoRa and Cellular antennas are inside the Urb-IoT
1) Install your Urb-IoT outdoor as high as possible to ensure radio coverage, ensure there are not
objects colliding or blocking the Urb-IoT
2) Do not install the Urb-IoT inside a building, under metal surfaces or next to solid or dense
objects (e.g. lush trees), don’t block the Urb-IoT with the post or any other large (metallic)
structure
3) Select a flat, horizontal mounting location for optimal uniform satellite performance.
**The Urb-IoT must be placed with the logo facing upward.
Figure 1: Urb-IoT installation
4) The solar panel must be placed below the Urb-IoT, avoid overshadowing the panel with the
equipment. NOTE: DON’T BLOCK THE SKY VIEW WITH THE SOLAR PANEL., PLACE IT BELOW THE
URB-IOT
Figure 2: Solar Panel mounting
5) Be sure sensors are placed in a general line of sight of the gateway, face the LoRa Antenna to
the LoRa sensors.
Figure 1: Urb-IoT Antennas Location

6 / 6
401 E SONTERRA BLVD SUITE 375
SAN ANTONIO, TX, 78258
www.urbit.us
+1 210-343-2170
Table of contents
Other urbit Gateway manuals