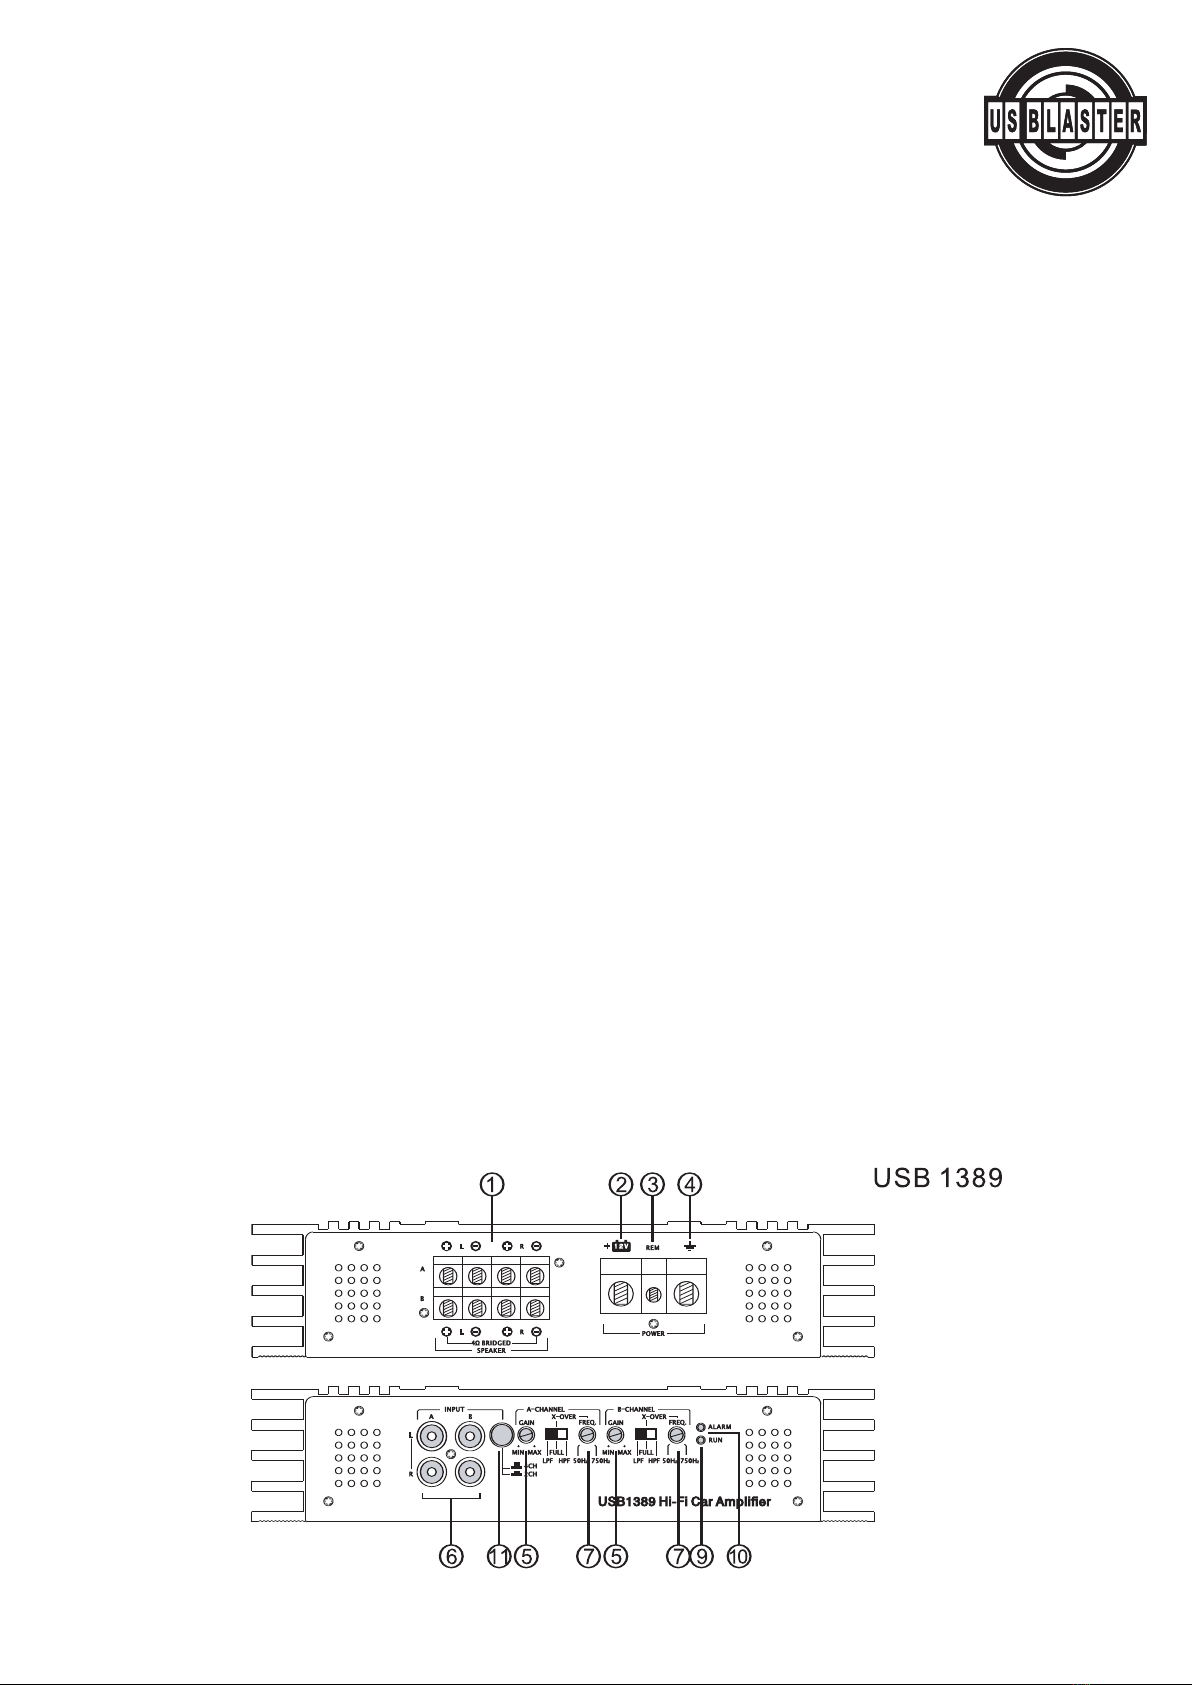
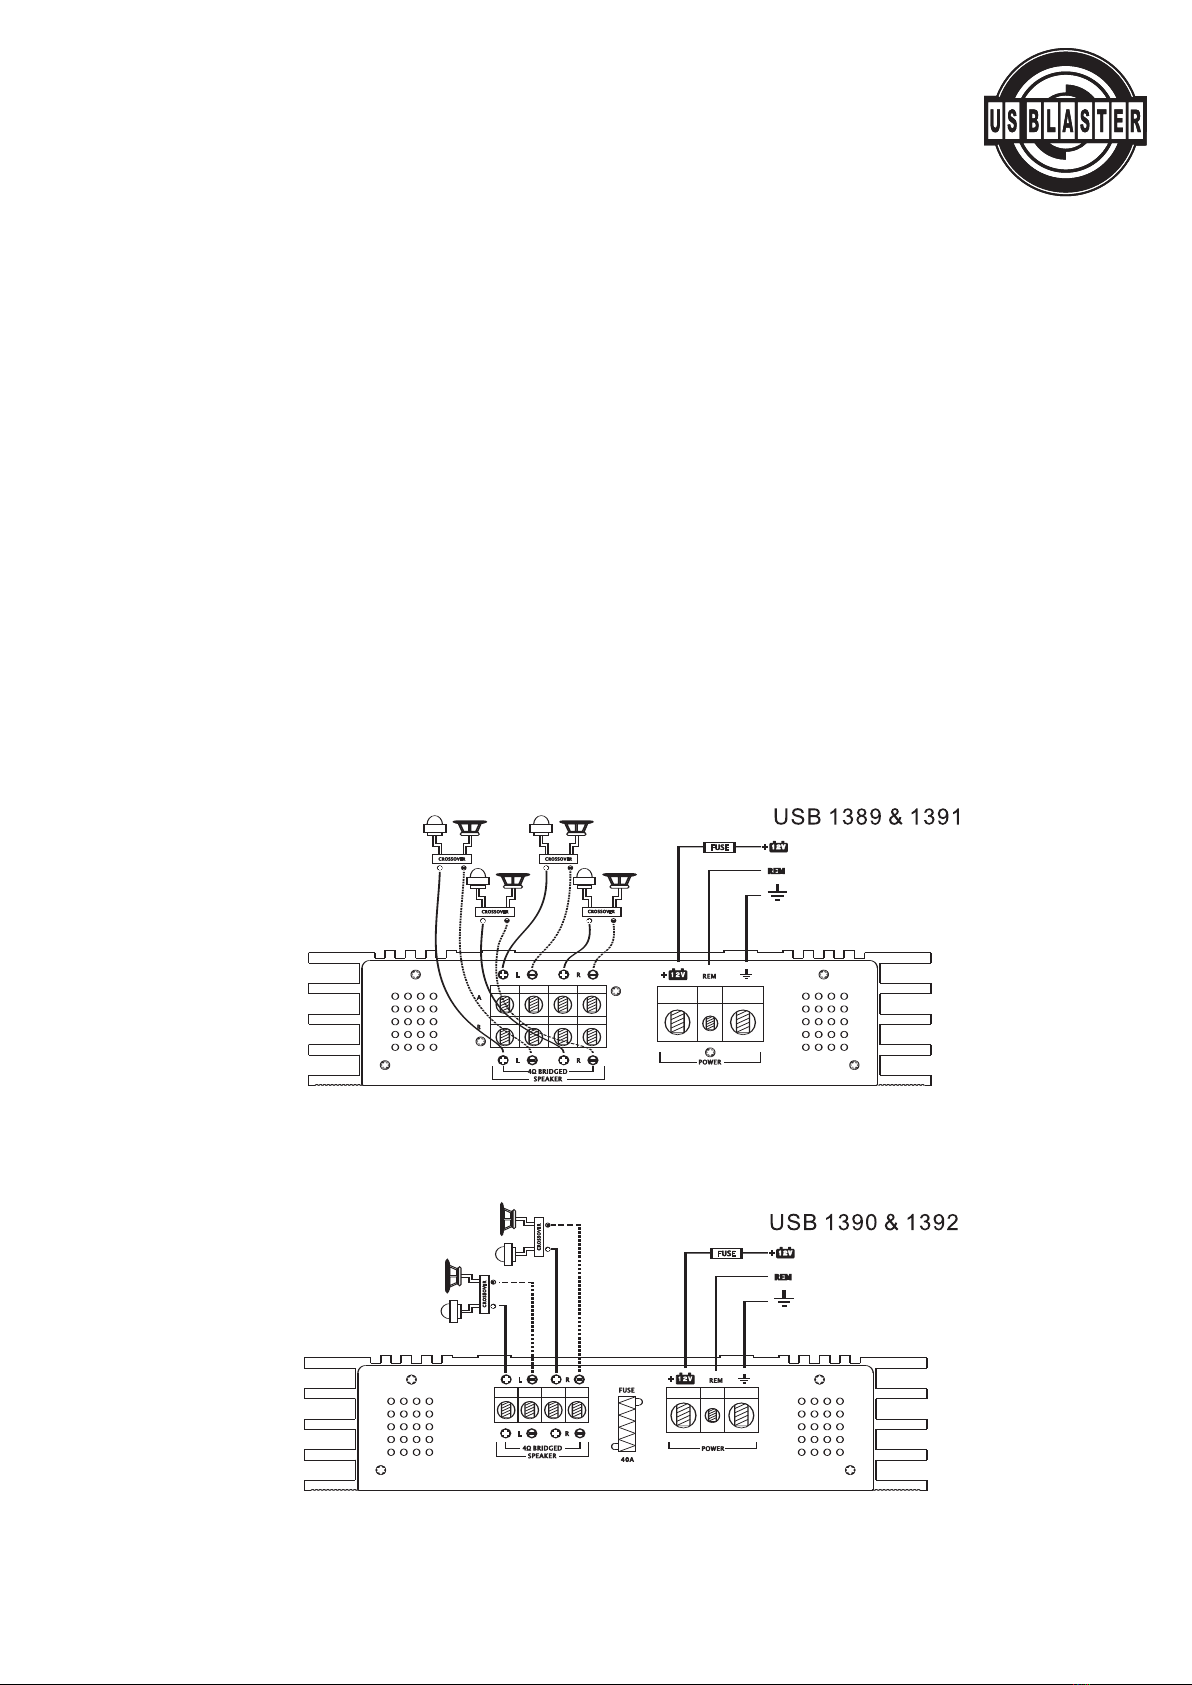
USB 1389 - 1390 - 1391 - 1392
Class-AB Power amplifiers
INTRODUCTION
Thank you for purchasing this US BLASTER Class AB full range amplifier for your car audio system.
Now you own an amplifier of uncompromising design and engineering incorporating the latest advan-
ced circuit technology.
You will soon discover the amplifiers’ optimum sound and reliable performance.
US BLASTER amplifiers are adopted by advanced craftsmanship using the highest quality components
and strict quality control system. In order to provide you with long and pleasureable listening, we
recommend that you have your amplifier installed by an authorized US BLASTER dealer. It will ensu-
re installing your product properly and will also increase the warranty to one year. (please see the
warranty section for more details.)
Please read this manual thoroughly to ensure you get the maximum benefit from this amplifier. When
installed properly, this unit will provide you years of trouble-free performance.
DESIGN FEATURES
SMD Hi-Fi audio components.
FR-4 heavy duty double side PCB.
Low ESR high capacitance filter capacitor.
Super noise rejection circuit.
Smart protection system against overload, short circuit, overheat and low voltage.
Gold plated heavyduty connectors.
Intergrated high performance filters.
AMPLIFIER FUNCTIONS
1. Speaker connection
• Never connect the speaker cables with the chassis ground. This could destory your amplifier.
• Check that your speakers are connected correctly which means plus to plus and minus to minus.
We recommend speaker cable from 16 Gauge or up. Other connection ways are shown in the attach-
ment.
2. BATT+
Battery +(plus) terminal. The +(plus) 12 Volt power cable must be connected with a fuse on the bat-
tery +(plus) terminal. We recommenda fuse listed on pre-installation a 12 feet copper cable with 8
Gauge thickness or up.
3. REM
Remote terminal. The remote cable must be connected with the radio remote output
terminal so that the amplifier will switch on and off automatically with the radio. If there are two or
more amplifiers connected to this antenna terminal it might be necessary to add an additional relay.
Please consult your dealer.
4. GND
Chassis ground terminal. The chassis ground cable must be connected very tight on a nearbymassi-
veand electric conductiveplace.
©US Blaster Europe BV