TABLE F C NTENTS
TABLE F C NTENTSTABLE F C NTENTS
TABLE F C NTENTS
1.
1.1.
1.
Introduction
IntroductionIntroduction
Introduction ....................................................................................................................... 1
1.1. General and Safety Information ........................................................................................................................ 1
1.2. Specifications ............................................................................................................................................... 1
2.
2.2.
2.
Unpacking and setup
Unpacking and setupUnpacking and setup
Unpacking and setup ............................................................................................................ 2
2.1
2.12.1
2.1 Packing List ................................................................................................................................................. 3
2.2
2.22.2
2.2 Assembling .................................................................................................................................................. 3
3.
3.3.
3.
Display and keypad
Display and keypadDisplay and keypad
Display and keypad .............................................................................................................. 4
3.1
3.13.1
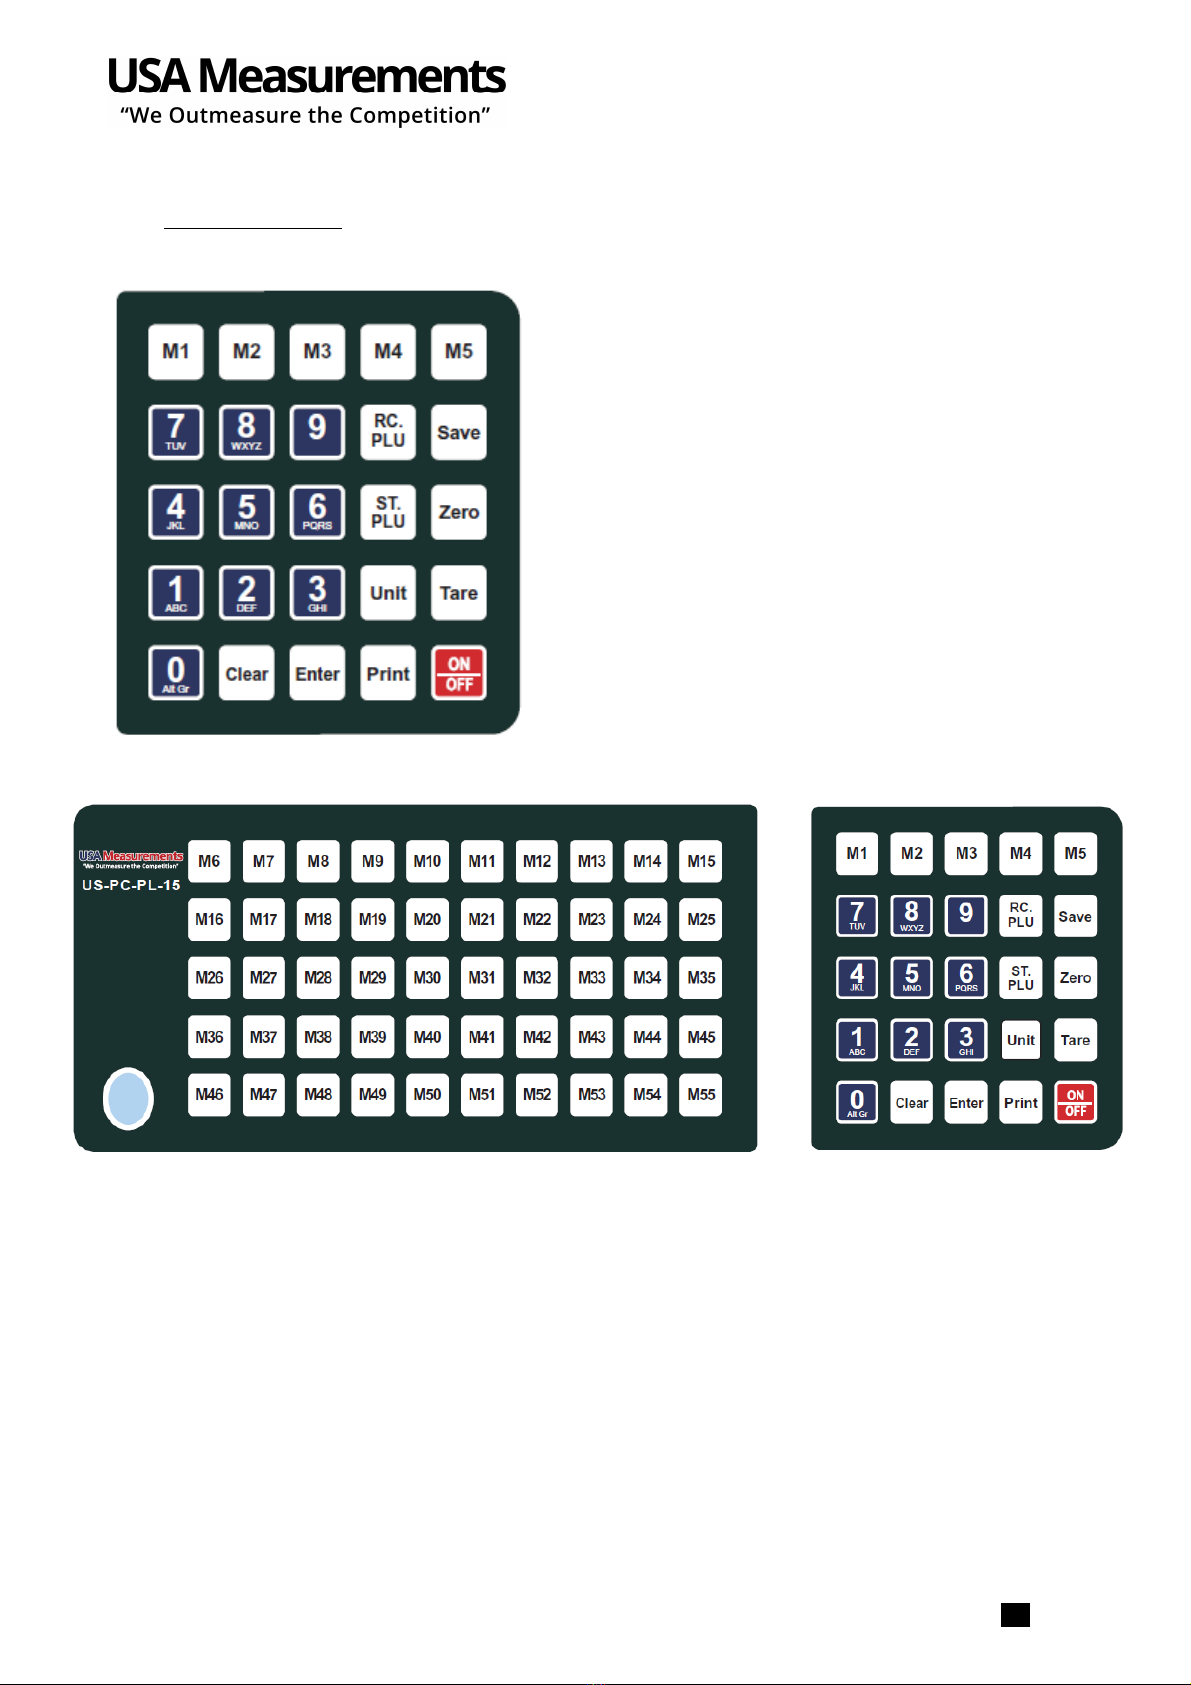
3.1 Faceplate
FaceplateFaceplate
Faceplate .................................................................................................................................................... 4
3.2
3.23.2
3.2 Keypad functions
Keypad functionsKeypad functions
Keypad functions .......................................................................................................................................... 5
3.3
3.33.3
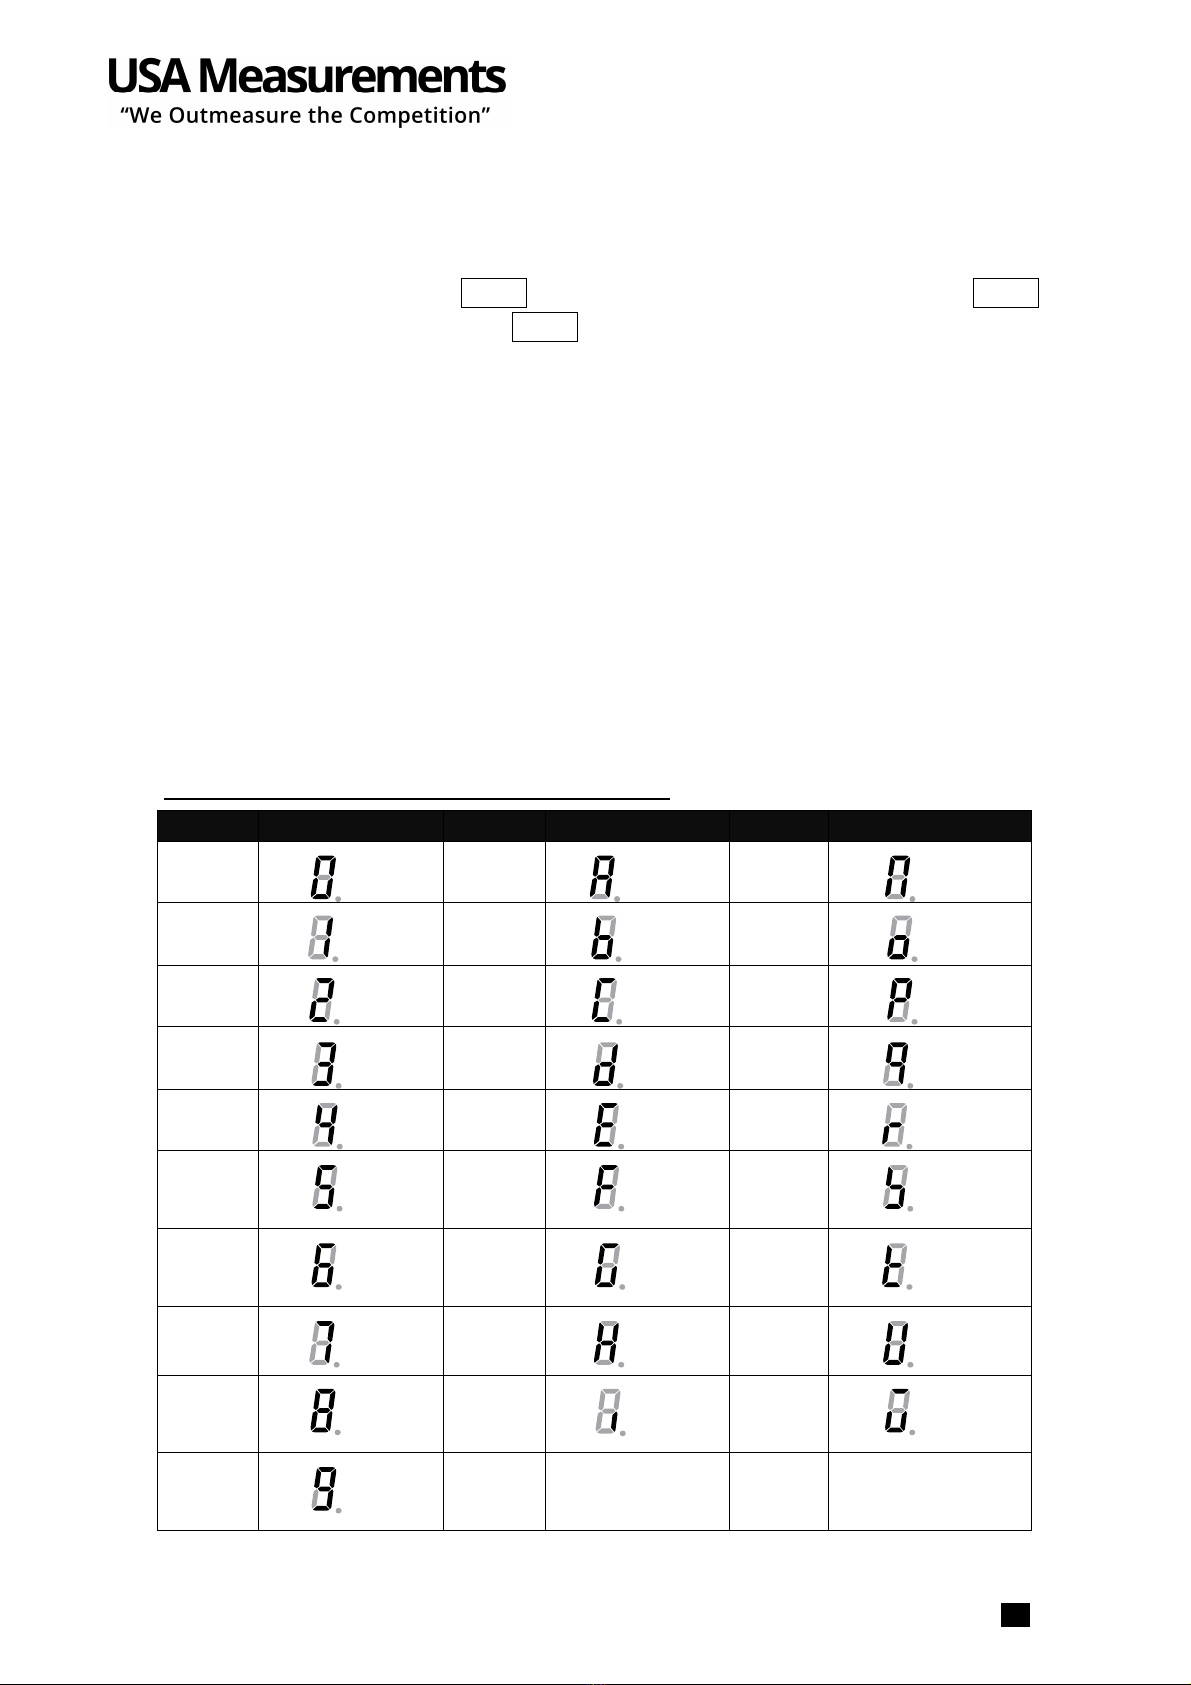
3.3 The meaning of the special displayed character
:
.............................................................................................. 6
4.
4.4.
4.
PERATI NS
PERATI NSPERATI NS
PERATI NS ...................................................................................................................... 7
Normal Weighing Mode
Normal Weighing ModeNormal Weighing Mode
Normal Weighing Mode .......................................................................................................... 7
ZER function
ZER functionZER function
ZER function ..................................................................................................................... 7
Setting the Tare Weight
Setting the Tare WeightSetting the Tare Weight
Setting the Tare Weight .......................................................................................................... 7
Save function
Save functionSave function
Save function ...................................................................................................................... 8
Print function
Print functionPrint function
Print function ...................................................................................................................... 8
Input the unit price directly
Input the unit price directlyInput the unit price directly
Input the unit price directly ..................................................................................................... 9
Set and Recall direct an
Set and Recall direct anSet and Recall direct an
Set and Recall direct and indirect PLU
d indirect PLUd indirect PLU
d indirect PLU ........................................................................................ 9
Recall direct PLU
Recall direct PLURecall direct PLU
Recall direct PLU ............................................................................................................... 10
Recall indirect PLU
Recall indirect PLURecall indirect PLU
Recall indirect PLU ............................................................................................................. 10
5.
5.5.
5.
LCD contrast and Backlight mode setting
LCD contrast and Backlight mode settingLCD contrast and Backlight mode setting
LCD contrast and Backlight mode setting .................................................................................. 10
6.
6.6.
6.
Auto
AutoAuto
Auto-
--
-off time setting
off time settingoff time setting
off time setting ........................................................................................................... 11
7.
7.7.
7.
Display A/D inner code and working voltage
Display A/D inner code and working voltageDisplay A/D inner code and working voltage
Display A/D inner code and working voltage .............................................................................. 11
8.
8.8.
8.
The details about RS232 communication
The details about RS232 communicationThe details about RS232 communication
The details about RS232 communication .................................................................................. 11
9.
9.9.
9.
Date and time setting
Date and time settingDate and time setting
Date and time setting .......................................................................................................... 14
10.
10.10.
10.
Business name setting
Business name settingBusiness name setting
Business name setting ........................................................................................................ 14
11.
11.11.
11.
Key function in the trade name or business name setting mode
Key function in the trade name or business name setting modeKey function in the trade name or business name setting mode
Key function in the trade name or business name setting mode ...................................................... 15
12.
12.12.
12.
ID setting
ID settingID setting
ID setting ........................................................................................................................ 15
13.
13.13.
13.
S
SS
S-
--
-2130D Back Feed setting
2130D Back Feed setting2130D Back Feed setting
2130D Back Feed setting ................................................................................................ 15
14.
14.14.
14.
S
SS
S-
--
-203/213 rigin setting
203/213 rigin setting203/213 rigin setting
203/213 rigin setting ................................................................................................... 15
15.
15.15.
15.
PLU upload and download
PLU upload and downloadPLU upload and download
PLU upload and download .................................................................................................... 16
16.
Calibration
CalibrationCalibration
Calibration ....................................................................................................................... 19
17.
17.17.
17.
The meaning of some displayed symbols
The meaning of some displayed symbolsThe meaning of some displayed symbols
The meaning of some displayed symbols .................................................................................. 20
18.
18.18.
18.
Troubleshooting and Battery Charging
Troubleshooting and Battery ChargingTroubleshooting and Battery Charging
Troubleshooting and Battery Charging ..................................................................................... 21
Troubleshooting
TroubleshootingTroubleshooting
Troubleshooting ..................................................................................................................................................... 21
Battery and Charging
Battery and ChargingBattery and Charging
Battery and Charging .............................................................................................................................................. 22