Usconverters XetaServer XS1200 User manual
www.USconverters.com
Copyrights © U.S. Converters LLC
1
Setup Guide
for
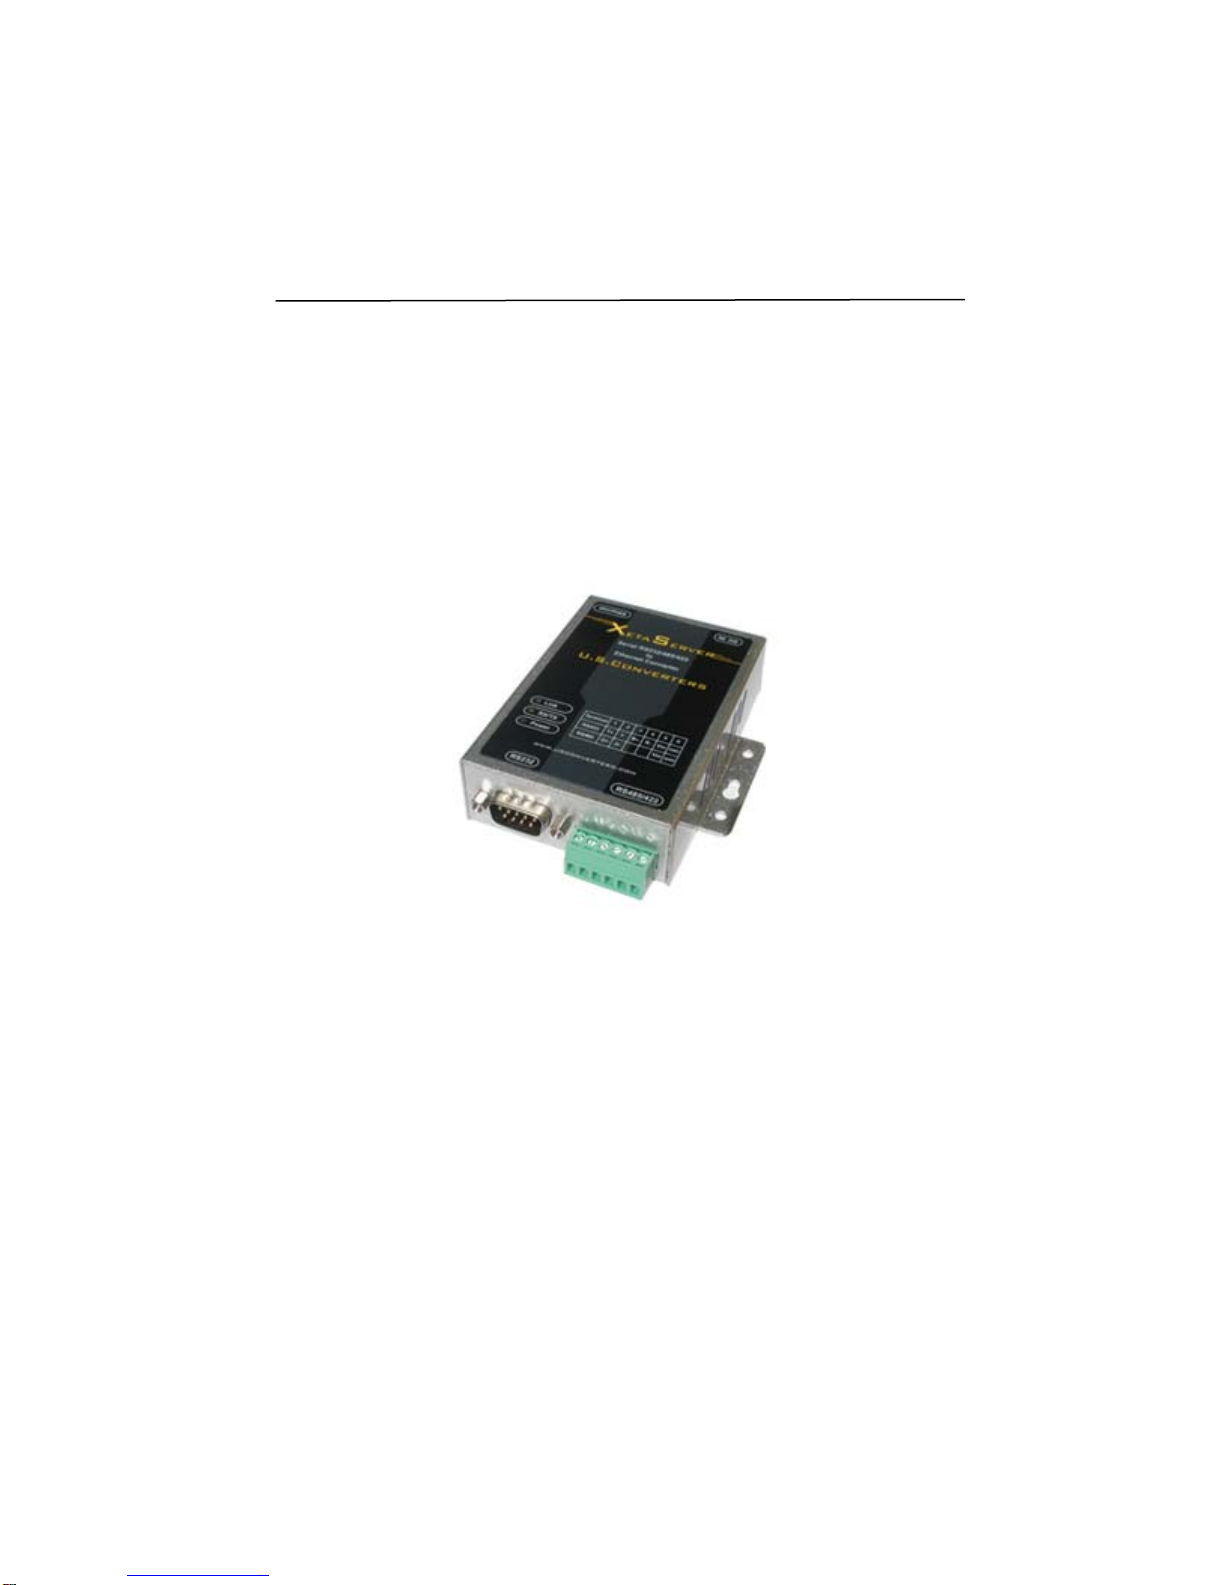
Serial to Ethernet Converter XS1200
This guide shows you how to create a virtual COM port, configure parameters and test run the
XS1200.
This installation guide is based on Windows 10 64-bit but same installation procedure
is used for other versions of Windows.
Connecting the XS1200 ……………………………………. 2
Assigning a static IP ……………………………………………… 2
Configuration and virtual COM port Software….……….…….. 6
Creating a COM port with VCOM ……………………...…… 10
Making a loop-back test …..………………..……………… 15
Configuring the parameters using a web-browser ……..… 21
Configuring the parameters over Telnet ……………….. 26
Known issues ………………………………………….….. 28

www.USconverters.com
Copyrights © U.S. Converters LLC
2
Connecting the XS1200
1. Connect the XS1200 to your computer using a standard cross over cable (EIA/TIAT568B) LAN cable.
2. Connect the XS1200 to the power supply and turn on the power.
Assigning a static IP
The XS1200’s IP address is 192.168.2.125. For your computer to be able to find the XS1200 you need to
assign a static IP address in the 192.168.2.2 to 192.168.2.254 range to the network connection to where
you connect the XS1200:
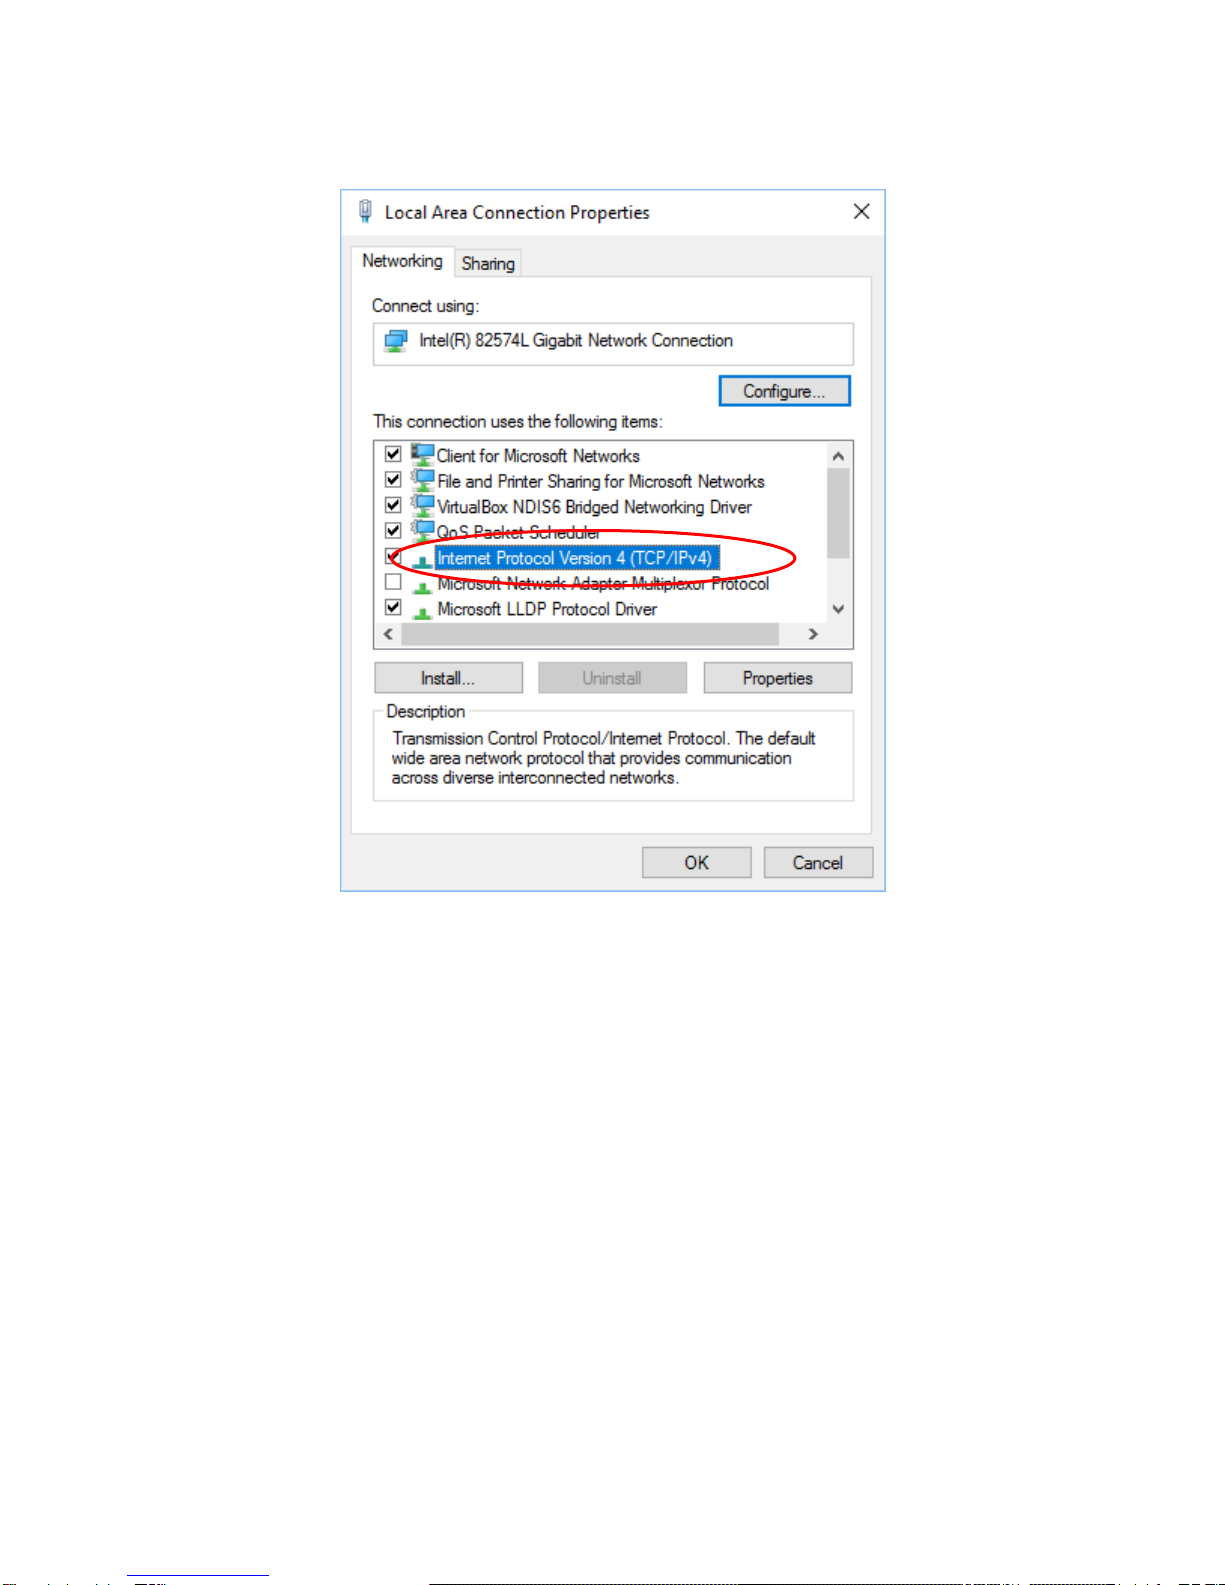
1. Click Start and go to: Control Panel\All Control Panel Items\Network and Sharing Center.
2. Click on ‘Local Area Connection’ (this is the connection where the XS1200 is connected). If you have
not connected the XS1200 to your computer, or if the cable is incorrectly connected you might not be able
to see this ‘LocalArea Connection’, so make sure the XS1200 is properly connected to your computer:

www.USconverters.com
Copyrights © U.S. Converters LLC
3
3. Click on ‘Properties’.
www.USconverters.com
Copyrights © U.S. Converters LLC
4
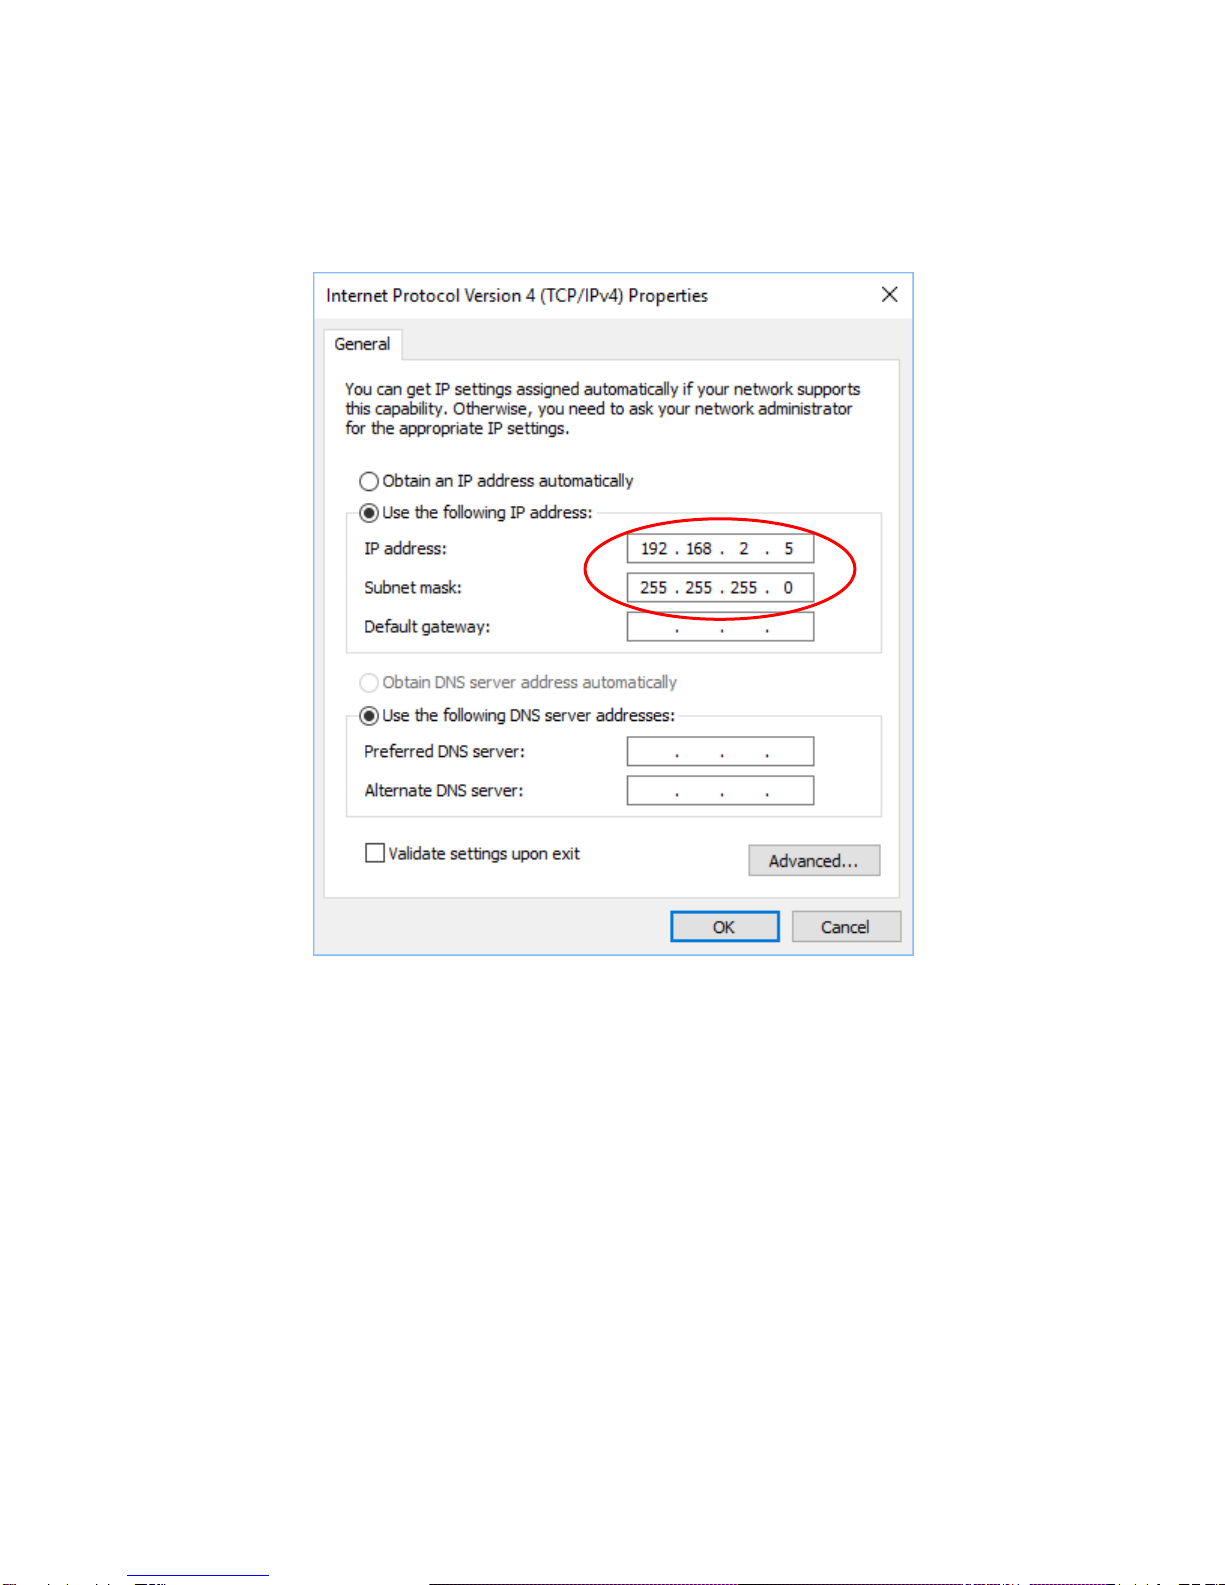
4. Highlight the ‘Internet Protocol’ and click ‘Properties’.
www.USconverters.com
Copyrights © U.S. Converters LLC
5
5. Enter a static IP address in the 192.168.2.2 to 192.168.2.254 range (except 192.168.2.125 which is the
XS1200’s IP address) and a Subnet mask of 255.255.255.0 and click OK. Click OK at the Local Area
Connection Properties window and close the LocalArea Connection Status window.
You have now assigned a static IP address to the network connection where to the XS1200 is connected.

www.USconverters.com
Copyrights © U.S. Converters LLC
6
Configuration and virtual COM port Software
To be able to create a serial COM port on your computer which the XS1200 can connect through, you
need to use a Virtual COM software.
You can use the XS1200 Configuration/VCOM software to create a virtual COM port or you can use
almost any other type of virtual COM port software such USC-VCOM (free downloadable from
Uwww.usconverters.comU), PortShare or Fabulatech. Please contact our tech support if you have questions
regarding VCOM software.
Download the most recent version of the virtual COM port software called AXR2E from
Uwww.usconverters.comU. Unzip the downloaded folder and install the software.
After installing the “AXR2E_Configuration_Utility_Setup” file (either the 32-bit version or the 64-bit
version) you can start the software. UMake sure to start the software as AdministratorU, otherwise you
might not be able to create COM port successfully. You start the software as Administrator by finding the
“AXR2E Configuration Utility” in the Windows start menu, right-click and select “More”, then click “Start as
Administrator”.
If your computer has more than one network connection you need to select the wireless network which is
in the same subnet as the XS1200:
Use the up/down arrows to scroll through the IPs if there are more than two IPs.
Click the “IP Search” button once the software is open and enter the XS1200’s IP address as shown
below:

www.USconverters.com
Copyrights © U.S. Converters LLC
7
The software should now find the XS1200 and list it as shown below:

www.USconverters.com
Copyrights © U.S. Converters LLC
8
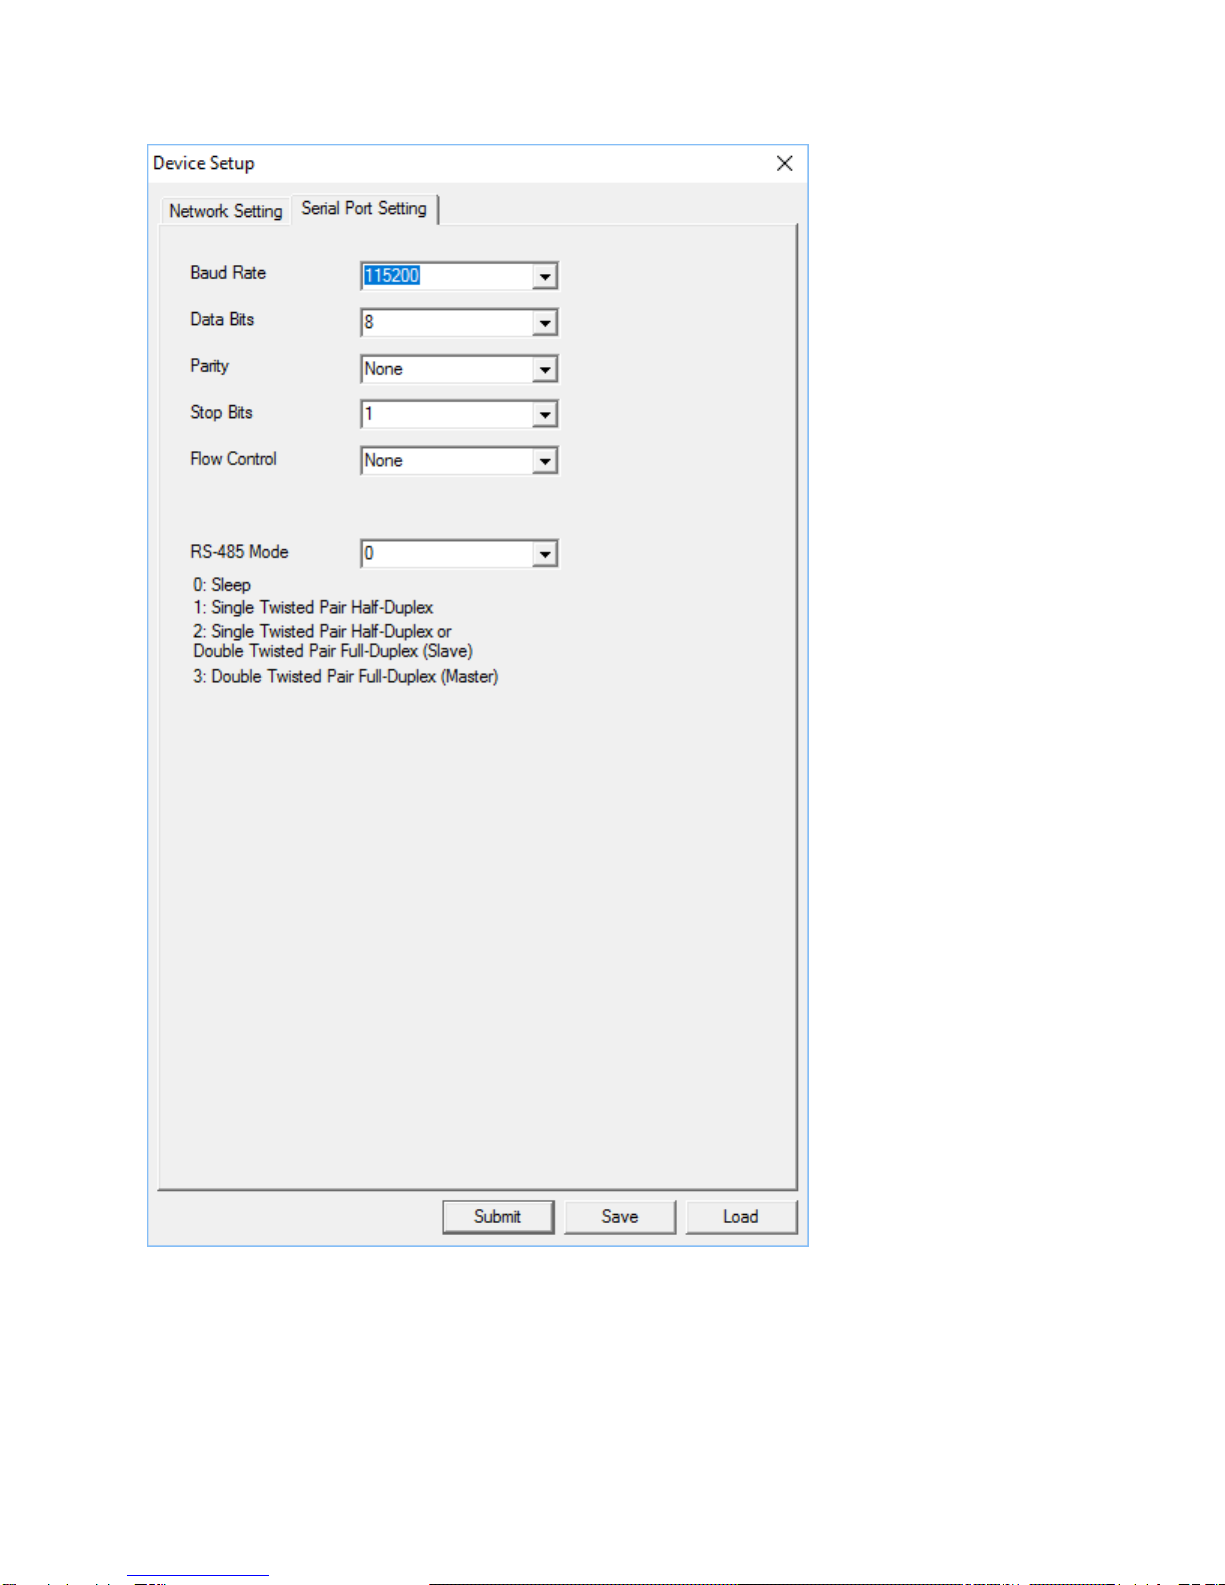
Select the XS1200 from the device list and click “Device Setup” and the settings window will open:
www.USconverters.com
Copyrights © U.S. Converters LLC
9

www.USconverters.com
Copyrights © U.S. Converters LLC
10
Creating a COM port with VCOM
A virtual COM port can be created by using the AXR2E Configuration Utility or it can be created by using
alternative VCOM software such as PortShare, Fabulatech or USC-VCOM.
Here we show how to create the virtual COM port in the AXR2E Configuration Utility.
Go to the “Virtual Serial Port” menu and click the “Add” button:
Table of contents
Other Usconverters Media Converter manuals


Popular Media Converter manuals by other brands


H&B
H&B TX-100 Installation and instruction manual

Bolin Technology
Bolin Technology D Series user manual

IFM Electronic
IFM Electronic Efector 400 RN30 Series Device manual

GRASS VALLEY
GRASS VALLEY KUDOSPRO ULC2000 user manual

Linear Technology
Linear Technology DC1523A Demo Manual

Lika
Lika ROTAPULS I28 Series quick start guide

Weidmuller
Weidmuller IE-MC-VL Series Hardware installation guide

Optical Systems Design
Optical Systems Design OSD2139 Series Operator's manual

Tema Telecomunicazioni
Tema Telecomunicazioni AD615/S product manual

KTI Networks
KTI Networks KGC-352 Series installation guide

Gira
Gira 0588 Series operating instructions

Lika
Lika SFA-5000-FD user guide