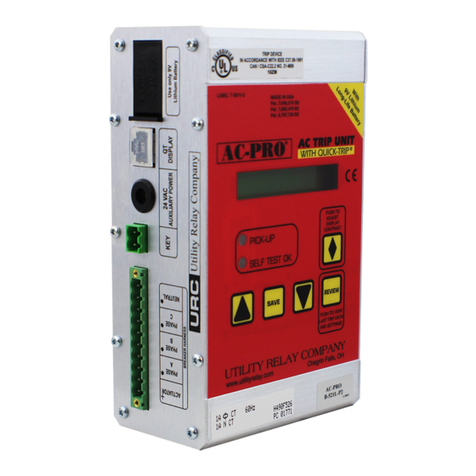
Utility Relay Company AC-PRO AKR-30 User manual

AC-PRO Retrofit Kit
Retrofit Kit Instructions for
GE
AKR-30/50
Low Voltage Breaker
Instructions for:
Manual Reset Actuator
Mechanical Reset Actuator
Including Instructions for
AC-PRO+Communications
Utility Relay Co.
Chagrin Falls, Ohio 44023
Phone: 888-289-2864 Fax: 440-708-1177
www.utilityrelay.com
I-ACM-AKR-30/50 January, 2008 Rev. 0

LIMITED WARRANTY
Utility Relay Co., Ltd. warrants that every AC-PRO and ZERO-
Hertz trip unit and related retrofit kit components (herein
collectively referred to as “product”) shall be free from
defects in material and workmanship, and will perform as
described in Utility Relay Company’s sales literature and
Instruction Manuals, under normal use and service for a
period of (2) two years from date of invoice. EXCEPT AS SET
FORTH HEREIN, IT IS EXPRESSLY AGREED THAT THERE IS NO
WARRANTY OF MERCHANTABILITY OR FITNESS FOR A PARTICULAR
PURPOSE, AND THERE IS NO OTHER WARRANTY, EXPRESS, IMPLIED OR
STATUTORY, BY UTILITY RELAY CO., LTD. WITH REFERENCE TO THE
PRODUCT.
Should any warranty claim arise within the warranty period,
contact Utility Relay Co., Ltd. at 888-289-2864 and do the
following:
1.) Provide a complete description of the problem with the
trip unit or retrofit kit component.
2.) Provide the Serial Number located on the back of the
trip unit from the warranted retrofit kit.
3.) Obtain a Returned Materials Authorization number (RMA)
and return shipping instructions.
4.) Promptly return the defective material to Utility
Relay Company.
Warranty Disclaimer and Liability Limitation
As the sole and exclusive remedy, Utility Relay Co., Ltd.
will repair or replace the trip unit and/or retrofit
component(s) at no cost to the customer during the warranty
period. The customer is liable and shall pay for shipment of
defective products back to Utility Relay Co., Ltd. In no
event shall Utility Relay Co., Ltd. be liable for any
special, incidental or consequential damages.
Excluded from this warranty and not warranted by Utility
Relay Company in any fashion, either expressed or implied
are:
1.) Any product which has been disassembled (except to
replace batteries), repaired, tampered with, altered,
changed, or modified by persons other than Utility
Relay Company’s own authorized service personnel
unless repair by others is made with the written
consent of Utility Relay Company.
2.) Defects or damage to the Product resulting from wear,
tear, misuse, negligence, improper storage, improper
testing, impacts, or use with non-approved
accessories.
3.) Products used for any other purpose other than
originally intended by Utility Relay Company.
Visit www.utilityrelay.com for latest warranty information.
12/02/05

TABLE OF CONTENTS
Section PAGE
1.0 General .............................................. 1
1.1 Inspection ...................................... 1
2.0 Initial Breaker Tests ................................ 2
3.0 Remove Existing Trip Unit ............................ 2
4.0 Install CTs .......................................... 3
4.1 Remove Existing CTs ............................. 3
4.2 Install New CTs ................................. 3
5.0 Reusing Existing Actuator ............................ 4
6.0 Install Trip Paddle .................................. 4
7.0 Manual Reset Actuator ................................ 5
7.1 Install Actuator ................................ 5
7.2 Adjust Actuator ................................. 6
7.3 Verify Trip Free Operation ...................... 6
8.0 Mechanical Reset Actuator Assembly ................... 7
8.1 Install Mechanical Reset Actuator ............... 7
8.2 Adjust Mechanical Reset Actuator ................ 7
8.3 Verify Trip Free Operation ...................... 8
8.4 Adjust Reset of Mechanical Reset Actuator ....... 8
9.0 AC-PRO Installation .................................. 9
9.1 "Blue Front" Breaker ............................ 9
9.2 "Black Front" Breaker ........................... 9
9.3 Alternate Mounting behind closing spring ........ 10
9.4 Alternate Mounting Using MicroVersa Trip Bracket 10
10.0 Wiring ............................................... 11
10.1 Color Codes and Connections ..................... 11
10.2 Current Transformer Connections ................. 11
10.3 Neutral Current Transformer ..................... 12
10.4 Actuator Connection ............................. 12
10.5 Ground Trip Unit ................................ 12
11.0 Final Test ........................................... 12
12.0 Communications ....................................... 13
12.1 Install PT Module “Blue Front” Breaker .......... 13
12.2 Install PT Module “Black Front” Breaker ......... 13
12.3 Install Fuse Block for PT Module ................ 14
12.4 Communications Wiring ........................... 15

ILLUSTRATIONS
Figure
1 Front View, "Blue" Front Breaker.....................16
2 Trip Unit Mounting, "Blue" Front Breaker.............17
3 Front View, "Black" Front Breaker....................18
4 Trip Unit Mounting, "Black" Front Breaker............19
5 CT Installation......................................20
6 Manual Reset Actuator Installation...................21
7 Mechanical Reset Actuator Pre-Assembly...............22
8 Mechanical Reset Actuator Installation...............23
9 Wiring Diagram.......................................24
10 Front View “Blue Front” with Communications..........25
11 PT Module Installation “Blue Front” Breaker..........26
12 Front View “Black Front” with Communications.........27
13 PT Module Installation “Black Front” Breaker.........28
14 Wiring Diagram for Communications....................29
Alternate Trip Unit Mounting for “Black” Front Breaker behind
closing spring.
15 Side View Alternate Mounting behind closing spring...30
Alternate Trip Unit Mounting for “Black” Front Breaker using
MicroVersa Trip Bracket.
16 Side View............................................31
17 Top View.............................................32
18 TEMPLATE: Modification to existing bracket...........33

AC-PRO Retrofit...................................................................................AKR-30/50
Page 1
GE AKR-30 & AKR-50
"Blue" Front & "Black" Front
1.0 General
All possible contingencies which may arise during the
installation, operation or maintenance, and all details and
variations of this equipment are not necessarily covered by
these instructions.
1.1 Inspection
Carefully inspect the retrofit kit on arrival. If any damage is
found, file a claim with the carrier and contact Utility Relay
Co. for replacement parts.
Verify that this is the correct kit for the circuit breaker
being retrofitted.
Check the contents of the retrofit kit package against the kit
bill of material to make sure that all the required parts are
included.
Thoroughly read and understand these installation instructions as well
as the AC-PRO trip unit instruction manual before proceeding with the
retrofit.

AC-PRO Retrofit...................................................................................AKR-30/50
Page 2
2.0 Initial Breaker Tests
Before starting the retrofit, perform a visual/mechanical
inspection and an electrical test of the breaker to determine
its condition.
Refer to the breaker manufacturer's instruction manual and
accepted test standards such as the NETA Maintenance
Specifications or PEARL reconditioning standards to verify that
the breaker is in acceptable mechanical and electrical operating
condition.
As a minimum, perform the following:
a) Close and trip operation of the breaker.
b) Measure contact resistance of each pole.
c) Measure insulation resistance from pole to pole, from pole
to frame and across open contacts.
d) Check contact compression.
e) Check for sufficient finger cluster spring tension at the
rear stabs.
Rectify any abnormalities found. Clean and lubricate the breaker
as required.
3.0 Remove Existing Trip Unit
1) Remove the old trip unit.
2) Remove the CT wires. The CTs will be removed later.
3) Save the MicroVersa Trip mounting bracket and hardware if
it is to be re-used to mount the new trip unit.

AC-PRO Retrofit...................................................................................AKR-30/50
Page 3
4.0 Install CTs
4.1 Remove Existing CTs
Remove the existing CTs on each pole as follows:
1) Remove two (2) 3/8-16 X 2 socket head cap screws from the
rear of the breaker.
2) Tip the breaker back and loosen the top shunt clamp screw.
3) Remove the top shunt.
4) Remove the CT and it’s terminal block.
4.2 Install New CTs
Install the new CTs on each pole as follows
(See Figure 5):
1) Removing the four (4) 5/16-18 X 1-1/2 H.C. screws attaching
the CT post assembly to the breaker and remove the CT post
assembly.
2) Slide the new CT and related items on the CT post in the
following order:
HW-9903-2 Collar Clamp
Current Transformer
(2) HW-2900-5 Silicone Rubber Washers
3) Locate the collar clamp so the rubber washers will be
compressed by about 1/4” when the top shunt is in position.
Tighten the set screw.
4) Remove the CT and rubber washers and replace the CT post on
the breaker.
5) Slide the CT and rubber washers back on the CT post.
6) Replace the top shunt using the existing hardware.
7) Make sure the CT terminals are pointing down and have
adequate clearance from the front shunt.
8) Securely tighten all hardware.

AC-PRO Retrofit...................................................................................AKR-30/50
Page 4
5.0 Reusing Existing Actuator
Either the existing actuator will be reused or a new actuator
was ordered. If a new actuator is being installed, skip this
section.
Check the condition of the existing actuator and verify that it
operates freely and resets properly.
1) Close the breaker.
2) Briefly touch a fresh 9 Volt battery to the actuator wires.
Red is “+” and black is “-“.
3) The actuator should trip the breaker and the mechanism
should reset the actuator.
6.0 Install Trip Paddle
If the existing actuator was reused, jump to Section 9.0.
Refer to Figures 6 or 8 for the following:
1) Remove the “A” & “C” phase trip paddles from the trip bar.
2) Loosely install the BR-218 trip paddle to the left side of
the trip bar using the BR-215 trip paddle clamp, (2) two
8-32 X 3/8 Phillips screws and lock washers and (1) one
8-32 X 1/4 set screw. Do not tighten the screws at this
time.

AC-PRO Retrofit...................................................................................AKR-30/50
Page 5
7.0 Manual Reset Actuator
The actuator is installed on the lower left side of the breaker.
Skip this section and go to section 8.0 if the mechanical reset
actuator will be installed.
On a “blue front” breaker, if the Actuator has to be mounted on
the right side of the breaker the AC-Pro must be installed on
the upper left side of the breaker as described in section 9.2
for the “black front” breaker.
7.1 Install Manual Reset Actuator
Refer to Figure 6 for the following:
1) Remove the reset knob from the actuator.
2) Replace the 5” long rod in the Model A-100 actuator with
the 8” rod provided. Transfer the 1/4-20 jam nuts and the
plastic tip to the new rod.
Use caution since the plunger is spring loaded.
3) Attach the actuator to bracket BR-111 with three
(3) 10-32 X 3/8 Phillips screws and lock washers.
4) Replace the reset knob on the end of the actuator rod and
lock in place with the 1/4-20 jam nut.
5) Place the actuator/bracket assembly underneath the
horizontal platform and mark the location of the two (2)
mounting screws. Drill and tap two (2) 1/4-20 mounting
holes where marked.
6) Attach the actuator/bracket assembly to the bottom of the
horizontal platform using two (2) 1/4-20 X 1/2 H.C. screws
and lock washers.
7) Align the trip paddle/clamp assembly with the end of the
actuator rod and tighten the clamp screws and 8-32 set
screw.

AC-PRO Retrofit...................................................................................AKR-30/50
Page 6
7.2 Adjust Actuator
1) With the breaker closed, and the actuator reset, adjust the
position of the actuator rod by screwing it in or out until
the end of the rod is about 1/64" from the trip paddle.
2) Trip the breaker. Trip the actuator by striking the reset
knob. Lock the actuator rod in position by tightening the
10-32 set screw with an Allen wrench.
3) Adjust the stop nuts as necessary to limit the actuator rod
travel within the limits of the trip bar.
4) With the actuator reset, close the breaker. If the breaker
will not close because the actuator rod is interfering with
the trip paddle, re-adjust the position of the actuator
rod.
5) Operate the actuator by lightly striking the reset knob.
The breaker should trip. Verify that the trip paddle is not
against its limit of travel.
7.3 Verify Trip Free Operation of the Manual Reset
Actuator
It is very important to verify that with the manual reset
actuator in the trip position it will keep the breaker trip
free.
1) Attempt to close the breaker without resetting the
actuator. The breaker should trip free, if not, increase
the actuator rod travel.
2) Repeat the above until completely satisfied with the
operation of the actuator.
IMPORTANT: WHEN THE ACTUATOR IS IN THE TRIP POSITION
(NOT RESET), THE BREAKER MUST BE TRIP-FREE.
THE SET SCREW IN THE PLUNGER MUST BE TIGHTENED
TO ENSURE THAT THE ACTUATOR ROD REMAINS IN
PROPER ADJUSTMENT.

AC-PRO Retrofit...................................................................................AKR-30/50
Page 7
8.0 Mechanical Reset Actuator Installation
Skip this section if the manual reset actuator was installed in
Section 7.
8.1 Install Mechanical Reset Actuator Assembly
A-300C-AKR Actuator assembly has been pre-assembled. See Figure
7 for reference. Final adjustments will be made in Section 8.2
Refer to Figure 8 for the following:
1) Using existing holes, attach the actuator assembly to the
breaker using two (2) 10-32 X 1/2 Phillips screws and lock
washers.
2) Align the trip paddle/clamp assembly with the end of the
actuator rod and tighten the clamp screws and 8-32 set
screw.
8.2 Adjust Mechanical Reset Actuator
1) With the breaker closed, and the actuator reset, adjust the
position of the hex standoff by screwing it in or out until
the end of the hex standoff is about 1/64" from the trip
paddle.

AC-PRO Retrofit...................................................................................AKR-30/50
Page 8
8.3 Verify Trip Free Operation of Mechanical Reset
Actuator Assembly
It is very important to verify that the trip adjustment of the
mechanical reset actuator assembly will keep the breaker trip
free if the actuator fails to reset properly on breaker opening.
1) Close the breaker. Trip the actuator using 18 volts (two 9
volt batteries in series.) (The Red wire is “+”).
2) With the reset spring not connected to the breaker the
actuator should not reset.
3) With the actuator still tripped, attempt to close the
breaker, it should trip free.
IMPORTANT: WHEN THE ACTUATOR IS IN THE TRIP POSITION (NOT
RESET), THE BREAKER MUST TRIP FREE.
8.4 Adjust Reset of Mechanical Reset Actuator Assembly
Refer to Figure 8 for the following:
1) With the breaker open, attach one end of the reset spring
to the breaker arm. Attach the other end of the spring to
BR-1A086 Reset Lever. This should reset the actuator. The
spring should be extended approximately 1/4 inch. If this
does not reset the actuator, loosen the two (2) 10-32
screws holding the actuator to the base plate and slide the
actuator toward the reset lever. If the actuator position
is changed, re-adjust the position of the hex standoff as
outlined in Section 8.2 and verify trip free operation as
outlined in Section 8.3.
2) Close the breaker and trip the actuator using 18 volts (two
9 volt batteries in series.) (The Red is “+”). The breaker
should open and the linkage should reset the actuator.
Cycle the breaker several times to verify reliable trip and
reset operation of the actuator.
IMPORTANT: The Actuator may not trip using just one 9 volt
battery. To insure that the actuator will trip use
two fresh 9 volt batteries in series.

AC-PRO Retrofit...................................................................................AKR-30/50
Page 9
9.0 AC-PRO Installation
9.1 “Blue Front” Breaker
The “standard” mounting is on the lower right (see Figures 1 and
2), the “alternate” location is shown in Section 9-2.
1) Attach the mounting bracket BR-048-1 to the back of the
trip unit with the short leg of the bracket pointing
towards the rear.
2) Attach the trip unit/bracket assembly to the mechanism
frame using the existing taped holes and two (2) 1/4-20 X
1/2 Phillips screws and lock washers.
9.2 “Black Front” Breaker
The trip unit mounts vertically on the upper left side of the
frame as shown in Figures 3 and 4.
1) Attach the Trip Unit Shield BR-0A030 to the BR-059 bracket
using two (2) 10-32 X 1/2 Flat head screws.
2) Attach the trip unit to the Shield using four (4) 8-32 X
1/2 Phillips screws and lock washers. Use the set of holes
that will orient the trip unit towards the right.
For the AC-PRO with the communications option, use the set
of holes that will orient the trip unit towards the left as
shown in Figure 11.
3) Install the trip unit, bracket and shield assembly to the
left breaker frame lip using two (2) 10-32 X 1/2 Phillips
screws and lock washers in the two existing tapped holes.
4) Ground the trip unit as described in Section 10.5.

AC-PRO Retrofit...................................................................................AKR-30/50
Page 10
9.3 Alternate Mounting for “Black Front” Breaker
The trip unit mounts vertically on the upper left side of the
frame behind the closing spring as shown in Figure 15.
1) Attach the Trip Unit Shield BR-094 to the BR-059 bracket
using two (2) 10-32 X 1/2 Pan head nylon screws.
2) Install the bracket and shield assembly from step #1 to the
left breaker frame lip using two (2) 10-32 X 1/2 R.H.
screws and lock washers in the two existing tapped holes.
3) Attach the BR-060 bracket to the back of the trip unit
using two (2) 8-32 X 1/2 Phillips screws and lock washers.
4) Attach the trip unit/bracket assembly to the BR-059 bracket
and the mechanism frame using the one (1) 10-32 X 5/16 R.H.
screw and lock washer and one 1/4-20 X 5/8 H.C. screw, lock
washer and hex nut.
9.4 Alternate Mounting Using Existing MicroVersa Trip
Bracket
Refer to Figures 16, 17 & 18 for the following:
1) Use the Template on Figure 18 to mark and drill two (2)
3/16 Dia. holes in the existing mounting bracket.
2) Attach the Trip unit to the mounting bracket using two (2)
8-32 X 1/2 Phillips screws and lock washers.

AC-PRO Retrofit...................................................................................AKR-30/50
Page 11
10.0 Wiring
Use the wiring harness provided to make the connections to the
CTs and the actuator. See Figure 9 for the wiring diagram.
The wiring harness plugs into the side of the AC-PRO. Be sure to
tighten the two plug retaining screws after the wiring is
complete.
Shorten the wires and tubing as required and use the cable ties
and holders provided to make a clean installation. Make sure the
wires will not be pinched, cut or chaffed by any moving parts or
sharp edges.
10.1 Color Codes and Connections
The wiring harness connector color code and connections are as
follows from left to right:
Terminal # Wire Color Use
1 Red (R) Actuator “+”
2 Black (B) Actuator “-“
3 Blue (L) Phase “A” “Dot”
4 White (W) Phase “A” Tap
5 Yellow (Y) Phase “B” “Dot”
6 White (W) Phase “B” Tap
7 Brown (N) Phase “C” “Dot”
8 White (W) Phase “C” Tap
9 Green (G) Neutral “Dot”(4W & GF only)
10 White (W) Neutral Tap (4W & GF only)
10.2 Current Transformer Connections
Each set of CT wires in the wiring harness is housed inside an
individual PVC tube for added physical protection and to
simplify the wiring process.
Connect to the #10-32 lugs using the ring tongue terminals
provided. Make sure that the same tap is used on all three CTs.

AC-PRO Retrofit...................................................................................AKR-30/50
Page 12
10.3 Neutral Current Transformer
A neutral CT is only required on a 4-wire system with the ground
fault function on.
On a 3-wire system, a neutral CT is not required even if the
ground fault function is on.
The neutral CT and neutral wiring assembly are provided with the
neutral CT kit.
When wiring to the neutral CT, make sure the same tap is used as
the phase CTs.
10.4 Actuator Connection
Route the existing or new red and black wires from the actuator
to the “ACTUATOR” terminals on the trip unit. Trim the wires to
an appropriate length. Use the protective sleeving on the wires.
Connect the red actuator wire to the “+” terminal on the wiring
harness trip unit connector. Similarly, connect the black
actuator wire to other actuator terminal on the trip unit.
10.5 Ground Trip Unit
If the trip unit is installed as shown in Figures 3 and 4, then
an external wire is required to ground the trip unit.
Refer to Figure 4 for the following:
1) Attach one end of the #14 SIS wire to the trip unit using a
#10 ring terminal.
2) Attach the other end of the #14 SIS wire to the breaker
frame using a #10 ring terminal. Make sure the wire will
not be pinched, cut or chaffed by any moving parts or sharp
edges.
11.0 Final Test
Perform a final electrical test of the breaker as in Section 1.
A primary injection test is recommended as the final test of the
AC-PRO retrofit. See Section 11 “TESTING” in the AC-PRO
instruction manual for complete details.

AC-PRO Retrofit...................................................................................AKR-30/50
Page 13
12.0 Communications
The following instructions are for the communications option
using the AC-PRO+:
12.1 Install PT Module - “Blue Front” Breaker
The PT Module mounts on the lower left of the “blue front”
breaker as shown in Figures 10 and 11.
1) Attach the BR-081 bracket to the PT Module using two
(2) 8-32 X 3/8 Phillips screws and lock washers.
2) Attach the PT Module/bracket assembly to the breaker using
two existing 1/4-20 HC screws.
12.2 Install PT Module - “Black Front” Breaker
The PT Module mounts on the lower right of the “black front”
breaker as shown in Figures 12 and 13.
1) Attach the BR-713 shield to the top of the PT Module using
two (2) 8-32 X 3/8 Nylon R.H. screws.
2) Attach the BR-073-1 bracket to the PT Module using two
(2) 8-32 X 3/8 Sems screws.
3) Attach the BR-0A017 bracket to the BR-073-1/PT Module
assembly using two (2) 1/4-20 X 3/4 F.H. screws.
4) Remove the two (2) 1/4-20 H.C. screws holding the racking
mechanism to the right side breaker frame.
5) Install the PT Module/bracket assembly using two (2)
1/4-20 X 1 HC screws, lock washers and hex nuts in the
location of the previously removed 1/4-20 hardware.

AC-PRO Retrofit...................................................................................AKR-30/50
Page 14
12.3 Install Fuse Block for PT Module
CAUTION: When selecting a mounting location for fuse block
check the breaker cell for interference from existing
devices. Check all cells for variations in
applications where breakers may be “swapped”.
Install the 3-pole fuse block on the back of the breaker as
follows:
1) Find a suitable location close to the rear stabs that will
be tapped.
2) Using the fuse block as a template, mark the location of
the two (2) mounting holes.
3) Drill & tap two (2) 8-32 holes where marked.
4) Attach the fuse block to the breaker back using two
(2) 8-32 X 3/8 P.H. screws and lock washers.

AC-PRO Retrofit...................................................................................AKR-30/50
Page 15
12.4 Communications Wiring
Refer Figure 14 for the following:
1) Voltage Input
Determine the line side of the breaker and drill and tap a
10-32 hole in each of the three line side poles.
Use #14 SIS wire from the bus taps to the 3-pole fuse
block. It is very important to maintain the proper phasing.
Use #18 MTW wire from the 3-pole fuse block to the PT
Module. Use fiberglass sleeving to protect the wires.
2) Ground Input
Connect a #18 MTW wire from the “Ground” terminal of the PT
Module to the breaker frame.
3) PT Module Harness
Plug the PT Module cable into the side of the AC-PRO+ trip
unit and into the PT Module.
Use cable ties and holders to make a clean installation.
4) Breaker Position Indication
As an option, connect an unused “a” contact in the breaker
auxiliary contacts to the two position input terminals on
the PT Module.
This will provide the breaker open or closed information to
the communications system.

AC-PRO Retrofit...................................................................................AKR-30/50
Page 16
FIGURE 1
Front View
"Blue" Front Breaker
This manual suits for next models
1
Table of contents
Other Utility Relay Company Circuit Breaker manuals
Popular Circuit Breaker manuals by other brands

Gladiator
Gladiator GCB100 Installation instruction

ABB
ABB K-Line Plus KP-32 Installation & maintenance instructions

Cutler-Hammer
Cutler-Hammer Digitrip RMS 610 instructions

Eaton
Eaton TA602LD Instruction leaflet

Huanyu
Huanyu HYW3 Series Wiring diagrams

Siemens
Siemens 3VL41 KN30 Series operating instructions

Perun Airsoft
Perun Airsoft Perun AB User and installation manual

WEG
WEG EHU ACW400 Installation instruction

Siemens
Siemens I-T-E Sensitrip MD Series Information and Instruction Guide

Eaton
Eaton DXC-EXT-2RO Instruction leaflet

Thomas&Betts
Thomas&Betts Russellstoll 9MT Series instruction sheet

Eaton
Eaton Cutler-Hammer DS Series instructions