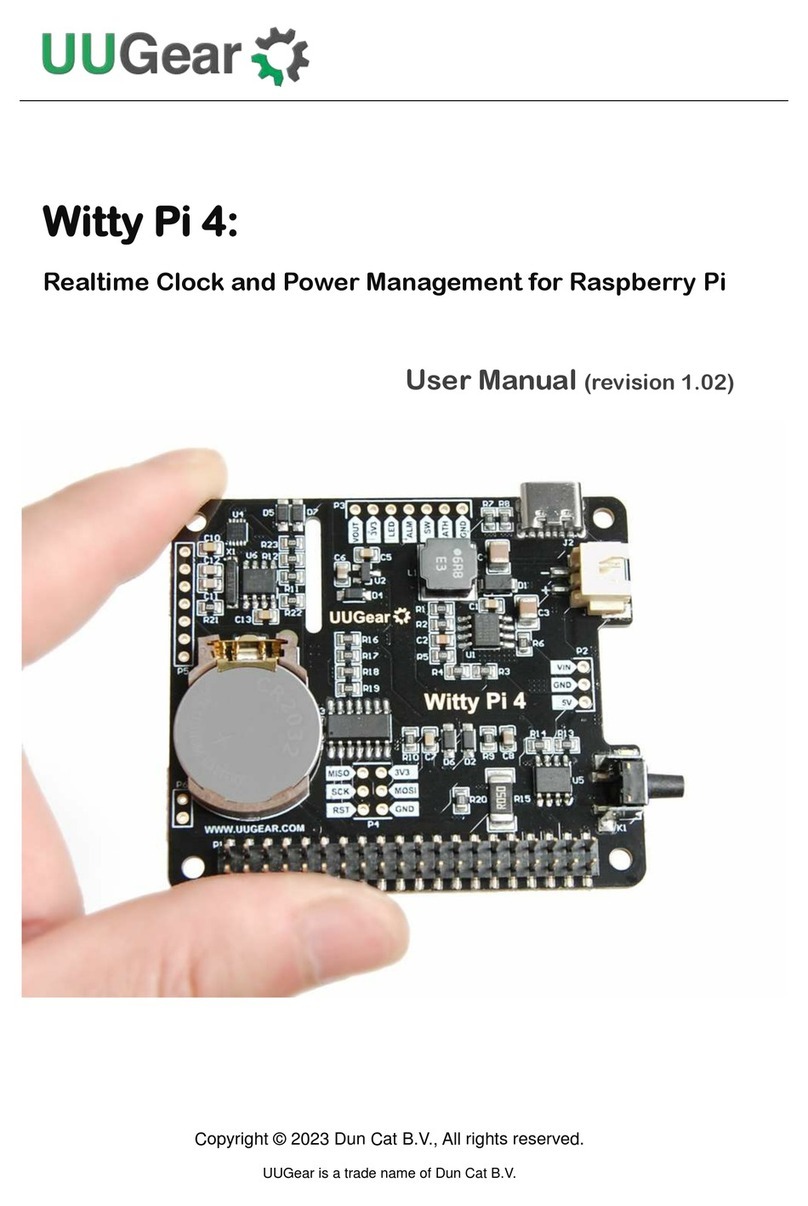
UUGear Witty Pi 4 L3V7 User manual

Copyright © 2022 Dun Cat B.V., All rights reserved.
UUGear is a trade name of Dun Cat B.V.
Witty Pi 4 L3V7:
Realtime Clock and Power Management for Raspberry Pi
User Manual (revision 1.01)

Copyright © 2022 Dun Cat B.V., All rights reserved.
UUGear is a trade name of Dun Cat B.V.
Table of Contents
1. Product Overview...................................................................................................................1
1.1 Built-in Uninterruptible Power Supply (UPS) Functionality .......................................2
1.2 Accurate Realtime Clock and ON/OFF Scheduling ..................................................2
1.3 Temperature Controlled Device .................................................................................3
1.4 e-Latching Power Switch ...........................................................................................4
1.5 Interface Introduction .................................................................................................4
2. Specification / Technical Details ............................................................................................5
3. Package Content ...................................................................................................................5
4. How Does Witty Pi Work?......................................................................................................6
5. Software Installation, Updating and Uninstallation................................................................7
5.1 Install Software ..........................................................................................................7
5.2 Update Software ........................................................................................................8
5.3 Uninstall Software ......................................................................................................8
6. Mounting Witty Pi 4 L3V7 on Raspberry Pi ...........................................................................9
6.1 Mounting Witty Pi 4 L3V7 on Raspberry Pi Zero.......................................................9
6.2 Mounting Witty Pi4 Mini on Other Raspberry Pi Models .........................................10
7. Software Usage ...................................................................................................................12
7.1 Write system time to RTC........................................................................................12
7.2 Write RTC time to system ........................................................................................13
7.3 Synchronize time .....................................................................................................13
7.4 Schedule next shutdown..........................................................................................13
7.5 Schedule next startup ..............................................................................................13
7.6Choose Schedule Script ..........................................................................................13
7.7 Set low voltage threshold.........................................................................................14
7.8 Auto-On when USB 5V is connected ......................................................................14

Copyright © 2022 Dun Cat B.V., All rights reserved.
UUGear is a trade name of Dun Cat B.V.
7.9 Set over temperature action ....................................................................................14
7.10 Set below temperature action..................................................................................14
7.11 View/change other settings......................................................................................14
7.12 Reset Data…............................................................................................................16
7.13 Exit ...........................................................................................................................16
8. Using UWI (UUGear Web Interface) ...................................................................................17
9. About Schedule Script .........................................................................................................18
9.1 How does Schedule Script Work? ...........................................................................18
9.2 Make Your Own Schedule Script .............................................................................20
9.3 Using Schedule Script Generator ............................................................................22
9.4 Advanced Usage of Schedule Script .......................................................................23
10. Know More about the Realtime Clock .............................................................................24
10.1 No Off-Power Time Keeping ....................................................................................24
10.2 Alarms and Alarm Output.........................................................................................24
10.3 Temperature Compensation ....................................................................................24
11. Additional Interfaces ........................................................................................................26
11.1 The 3 Pads for Power Connection (P2 on the back)...............................................26
11.2 The Unpopulated 7-Pin Header on the Top (P3).....................................................26
11.3 The Unpopulated 2 x 3 Pin Headers (P4) ...............................................................28
11.4 The Unpopulated 7-Pin Header in the Middle (P5) .................................................29
12. Integrate with Other Programs ........................................................................................30
13. Witty Pi Log Files .............................................................................................................32
14. Frequently Asked Questions (FAQ) .................................................................................33
14.1 What I2C address is used by Witty Pi 4 L3V7? Can I change it? ...........................33
14.2 What I2C Registers are provided by Witty Pi 4 L3V7? ............................................34
14.3 What GPIO Pins Are Used by Witty Pi4 L3V7?.......................................................41
14.4 Is Witty Pi 4 L3V7 Compatible with “Other Hardware”? ..........................................42

Copyright © 2022 Dun Cat B.V., All rights reserved.
UUGear is a trade name of Dun Cat B.V.
14.5 Witty Pi 4 L3V7 does not boot? ...............................................................................42
14.6 Why Raspberry Pi Immediately Turns On after Shutdown? ...................................45
15. Revision History ...............................................................................................................47

1
1. Product Overview
Witty Pi is an add-on board that adds realtime clock and power management to your Raspberry Pi. It
can define your Raspberry Pi’s ON/OFF sequence, and significantly reduce the energy usage.
Witty Pi 4 L3V7 is the new member of the fourth generation of Witty Pi, and it is designed to work with
3.7V Lithium (ion or polymer) battery (that’s what L3V7 stands for), and can be used as an UPS.
Witty Pi 4 L3V7 has these hardware resources onboard:
•Factory calibrated and temperature compensated realtime clock with ±2ppm accuracy.
•Dedicated temperature sensor with 0.125 °C resolution.
•AVR 8-bit microcontroller (MCU) with 8 KB programmable flash.
•DC/DC step-up (boost) converter that outputs up to 5V/3A.
•Charging manager that can charge battery with up to 1A current.
Witty Pi 4 L3V7 has very similar design with Witty Pi 4, however its DC/DC converter is a step-up
(boost) converter, while Witty Pi 4 comes with a step-down (bulk) converter. Witty Pi 4 L3V7 also
has charging circuit that can charge the battery.

2
1.1 Built-in Uninterruptible Power Supply (UPS) Functionality
Witty Pi 4 L3V7 has integrated the battery charging circuit and DC/DC boost converter on board, and
it can be used as an uninterruptable power supply (UPS). Witty Pi 4 L3V7 can work with all chargeable
Lithium Ion or Lithium Polymer battery that has nominal voltage of 3.7V (and full-charged voltage of
4.2V).
When 5V power supply is connected to the USB-C connector on Witty Pi 4 L3V7, it will take the priority
to power the board with Raspberry Pi together. In the meantime, the battery is disconnected from the
power rails and gets charged.
After 5V power supply is disconnected, the voltage of the battery will be monitored by Witty Pi 4 L3V7.
Once the battery voltage drops under a preset threshold, Witty Pi’s software will perform a graceful
shutdown and then cut the power of Raspberry Pi. By adjusting the low voltage threshold, you can
decide when should the device shutdown before the battery is fully discharged.
1.2 Accurate Realtime Clock and ON/OFF Scheduling
The realtime clock (RTC) on Witty Pi 4 L3V7 has been calibrated in the factory and Witty Pi 4 L3V7’s
firmware also makes temperature compensation for the crystal. This makes the RTC very accurate
and the actual annual error is limited within ±2ppm (about 1 minute per year). When your Raspberry
Pi boots up, the time stored in the RTC will overwrite the system time. As a result, your Raspberry Pi
knows the correct time even without accessing the Internet.
You can schedule the startup and/or shutdown of your Raspberry Pi, and make it a time-controlled
device. You can even define a schedule script to schedule complicated ON/OFF sequence for your
Raspberry Pi.

3
Scheduling the ON/OFF sequence for Raspberry Pi is the most popular feature of Witty Pi, and it is
extremely useful for systems that powered by battery. By only turning on Raspberry Pi when
necessary, the battery can work much longer with Witty Pi installed.
1.3 Temperature Controlled Device
The temperature sensor on Witty Pi 4 L3V7 has 0.125 °C resolution. The temperature data is used
for compensating the crystal and make the RTC more accurate.
You can also specific the action (startup or shutdown) when temperature goes above or below the
preset threshold. Which means you can also turn your Raspberry Pi into a temperature-controlled
device.

4
1.4 e-Latching Power Switch
Witty Pi 4 L3V7 implements an e-Latching power switch, which behaves very similar to the power
switch on your PC/laptop computer. You can gracefully turn on/off your Raspberry Pi with a single tap
on the button. The software running in background will execute the shutdown command before the
power gets cut, and it avoids the data corruption caused by “hard” shutdown.
1.5 Interface Introduction
Witty Pi 4 L3V7 supports all Raspberry Pi models that has the 40-pin GPIO header, including A+, B+,
2B, Zero, Zero W, Zero 2 W, 3B, 3B+, 3A+ and 4B. You will need to solder the 40-pin header to
Zero/Zero W/Zero 2 W model beforehand, so they can make reliable connection with Witty Pi.
The pictures below shows the available interfaces of Witty Pi 4 L3V7.
1. USB type C connector for 5V power input (5V)
2. Unpopulated 7-pin header for extension or integration
3. Red LED as power indicator
4. On/off switch
5. White LED as status indicator
6. 2x20 pin stacking header for connecting to Raspberry Pi
7. Blue LED as battery charging indicator
8. PH2.0 - 2 pin battery connector
9. Green LED as battery fully charged indicator
10. Unpopulated 7-pin header for internal I2C bus and extra signals
11. ICSP header for uploading firmware (on the back)
12. Big pads for BAT (battery V+), GND and 5V (on the back)

5
2. Specification / Technical Details
Dimension
65mm x 30mm x 7mm
Weight
10g (net weight without accessories)
Microcontroller
ATtiny841 (datasheet)
Realtime Clock
PCF85063A (datasheet), calibrated in factory.
Temperature Sensor
LM75B (datasheet)
DC/DC Converter
MP3423 (datasheet)
Charging Manager
TP4056 (datasheet)
Power In
DC 5V (via USB-C connector) or 3.7V Lithium ion/polymer battery
Output Current
Up to 3A for Raspberry Pi and its peripherals
Standby Current
~0.3mA on 3.7V battery, ~1mA on USB-C 5V
Operating
Environment
Temperature -30°C~80°C (-22°F~176°F)
Humidity 0~80%RH, no condensing, no corrosive gas
3. Package Content
Each package of Witty Pi 4 L3V7 contains:
⚫Witty Pi 4 L3V7 board x 1
⚫M2.5 x 10mm plastic screws x 4
⚫4mm plastic spacer x 4
⚫M2.5 plastic nut x 4
⚫8cm PH2.0 cable x 1

6
4. How Does Witty Pi Work?
The diagram below shows the basic workflow of how Witty Pi turns on/off your Raspberry Pi.
After you tap the button on Witty Pi, it powers your Raspberry Pi via the GPIO header, and your
Raspberry Pi will boot. Witty Pi’s software will run automatically after boot, which will send the
SYS_UP signal (via GPIO-17) to Witty Pi. Witty Pi’s firmware receives the SYS_UP signal and starts
to listen to Raspberry Pi’s TXD pin (GPIO-14). If you shut down your Raspberry Pi (running
shutdown command or choose “Shutdown” in GUI), the TXD pin will go LOW and Witty Pi will cut
the power after some delay. If you tap the button again, that equals to shorting GPIO-4 to GND, and
Witty Pi’s software will run shutdown command for you.
Witty Pi has realtime clock (RTC) onboard and it always knows the time. You can schedule the
shutdown and startup of your Raspberry Pi, which are implemented with two alarms. When the
alarm is triggered, Witty Pi’s firmware will emulate a “button clicking”, which will turn on/off your
Raspberry Pi accordingly. You can either configure single alarm for shutdown and/or startup, or you
can define a simple script to plan a rather complex on/off sequence for your Raspberry Pi.
Witty Pi has Analogue to Digital Converter (ADC) in its microcontroller (MCU), which can measure
the input voltage (VIN).
Witty Pi 4 L3V7’s design is a little different from Witty Pi 4 and Witty Pi 4 Mini, that the battery
voltage and 5V from USB-C merge into the input voltage (VIN). Please see the equivalent model
below:
Because VUSB-C is 5V and is always higher than VBattery (up to 4.2V), the power input from USB-C
connector has higher priority. As long as the power supply is connected to USB-C, the battery will

7
not be drained and VIN represents the voltage from USB-C (about 5V). When Power supply is
disconnected from USB-C, VBattery will take the place and VIN represents the battery voltage now.
In Witty Pi 4 L3V7, you can configure the low voltage threshold. If the input voltage drops below the
preset threshold, Witty Pi’s firmware will emulate a “button clicking” to turn off your Raspberry Pi.
Properly configure this low voltage threshold can change the behavior of your Witty Pi 4 L3V7.
Please read section Set low voltage threshold and section Auto-On when USB 5V is connected for
more details.
Witty Pi also has temperature sensor onboard. If the temperature rises over the preset threshold,
Witty Pi’s firmware can emulate a “button clicking” to turn off or turn on your Raspberry Pi. If the
temperature drops below the preset threshold, Witty Pi can also turn on/off your Raspberry Pi. You
can define the complete logic according to your needs, and turn your Raspberry Pi to a
temperature-controlled device.
5. Software Installation, Updating and Uninstallation
Remarks: Witty Pi’s software is developed and tested under Raspberry Pi OS (the former
Raspbian). If you want to use Witty Pi on other Linux distributions, you may not be able to install the
software without error. This is due to the fact that different Linux distributions have different packages
installed by default, and their default users may have different privilege settings too. You may need to
modify the software installation script or even the software itself, however this will need you to have
some knowledge of BASH programing.
5.1 Install Software
To install the software, please run this command to download the installation script:
Then you can run the command below to install the software:
We use “sudo” here because install.sh needs to register the wittypi service (daemon.sh) to run
automatically after boot, which needs root privilege.
The install.sh will also run UWI installation script. If you already have UWI installed before, it will
compare the versions and update your UWI when needed.
pi@raspberrypi:~ $ wget https://www.uugear.com/repo/WittyPi4/install.sh
pi@raspberrypi:~ $ sudo sh install.sh

8
5.2 Update Software
If there is a newer version of software and you want to install it, in most of the time you just need to
repeat the installation process and let it overwrite your current version.
If you prefer, you can also fully uninstall the software (please see below) and then install it again.
5.3 Uninstall Software
To uninstall the software, you need to remove the “wittypi” directory (the one that includes the software
files) and remove wittypi service from the auto-run list. Please use this command:
If you also want to uninstall UWI, you need to remove the “uwi” directory and remove uwi service from
the auto-run list. Please use this command:
pi@raspberrypi:~ $ update-rc.d -f wittypi remove
pi@raspberrypi:~ $ update-rc.d -f uwi remove

9
6. Mounting Witty Pi 4 L3V7 on Raspberry Pi
6.1 Mounting Witty Pi 4 L3V7 on Raspberry Pi Zero
If you want to use Witty Pi 4 L3V7 on Raspberry Pi Zero (V1.2, V1.3, W and 2W), you will need to
solder the 20x2 pin male header on it first, or you can buy one with the header soldered already.
Remarks: putting the header in place will NOT be enough, and you have to solder it.
You can simply mount Witty Pi 4 L3V7 on your Raspberry P Zero’s 40-pin header, and it can work just
like that. However, if you wish, you can use the plastic screws, spacers and nuts in the package to
tightly mount Witty Pi 4 L3V7 on your Raspberry Pi Zero. Please make sure NOT to put Witty Pi 4
L3V7 up-side-down, and the 40 pins on Raspberry Pi should connect to the female header via the
holes underneath Witty Pi 4 L3V7, as shown in figure below.

10
6.2 Mounting Witty Pi4 Mini on Other Raspberry Pi Models
Other Raspberry Pi models (A+, B+, 2B, 3B, 3B+ and 4B) have the 40 pin header soldered already,
so it is possible to directly mount Witty Pi 4 L3V7 over them. However, because of the existence of
display connector, you will not be able to firmly connect them.
In order to make reliable connection, we suggest to use a stacking pin header (not included in the
package).
Those 40 extra-long pins on stacking header should reach the female header via the holes on the
back of Witty Pi 4 L3V7 (as shown in figure above). You can then place a steel ruler (or something
similar) between the two rows of pins and push Witty Pi 4 L3V7 down until it reaches the plastic of the
stacking header, as shown in figure below:

11
After mounting Witty Pi 4 L3V7 on your Raspberry Pi, and connect the battery to the PH2.0 connector,
you can see the white LED blinking, which means it is standing by. Please do not connect
power supply to your Raspberry Pi directly, because Witty Pi will power your Raspberry Pi via the
GPIO header, and that is how it performs the power management. You may also connect 5V power
supply to the USB-C connector on Witty Pi 4 L3V7, so it can charge the battery.
Now your Witty Pi 4 L3V7 is ready to go.
If you want to take off the stacking header from Witty Pi 4 L3V7, the proper way is to put your Witty
Pi 4 L3V7 up-side-down, and let the 40 pins contact a flat surface (e.g. desktop), hold the two edges
of the board and press down. That way the stacking header will be taken off safely. See the figure
below:

12
7. Software Usage
The main executable (wittyPi.sh) is a bash script, and you can run it like this:
This interactive script displays the status of the device, and accepts your input to make configuration
accordingly.
There are 13 options in the main menu, and you can input the number and press ENTER to confirm.
Every time you press ENTER, the script will re-print the device status so you can see if the change
has taken affect.
7.1 Write system time to RTC
This option will copy the time from your Raspberry Pi system to the Realtime Clock on Witty Pi. This
pi@raspberrypi:~/wittypi $ ./wittyPi.sh
================================================================================
| |
| Witty Pi - Realtime Clock + Power Management for Raspberry Pi |
| |
| < Version 4.10 > by Dun Cat B.V. (UUGear) |
| |
================================================================================
>>> Current temperature: 35.625°C / 96.125°F
>>> Your system time is: 2022-11-15 11:14:18 CEST
>>> Your RTC time is: 2022-11-15 11:14:18 CEST
>>> Vin=4.18V, Vout=5.22V, Iout=0.10A (discharging battery...)
Now you can:
1. Write system time to RTC
2. Write RTC time to system
3. Synchronize with network time
4. Schedule next shutdown
5. Schedule next startup
6. Choose schedule script
7. Set low voltage threshold. [3.1V]
8. Auto-On when USB 5V is connected [Yes]
9. Set over temperature action
10. Set below temperature action
11. View/change other settings...
12. Reset data...
13. Exit
What do you want to do? (1~13)

13
option should be used when you find the Raspberry Pi system time is correct (may be synchronized
from the Internet) while the RTC time is not correct.
7.2 Write RTC time to system
This option will copy the time from the Realtime Clock on Witty Pi to your Raspberry Pi system. This
option should be used when you find the RTC time is correct while the system time is not correct.
7.3 Synchronize time
If you choose this option, it will check if Internet is accessible, and apply network time to Raspberry
Pi system and RTC when possible.
If your Raspberry Pi is not connected to Internet, choosing this option will do nothing.
7.4 Schedule next shutdown
This option allows you to specify when your Raspberry Pi should shutdown automatically.
Please notice the input format should be “DD HH:MM:SS”. DD means the day in the month, HH is the
hour, MM is the minute and SS is the second. All these should be 2 digits and 24-hour system should
be used.
Schedule script can actually make much more complex schedule. You can find more details in About
Schedule Script section.
7.5 Schedule next startup
This option allows you to specify when your Raspberry Pi should startup automatically.
Here you will need to input the startup time in the same “DD HH:MM:SS” format.
7.6 Choose Schedule Script
If you want to define a complex ON/OFF sequence for your Raspberry Pi, you should use schedule
script.
A schedule script (.wpi file) defines a loop, with all states and their durations inside. After Raspberry
Pi is boot, the “runScript.sh” will be run automatically, which will schedule the next shutdown and next
startup for you, and hence a complex ON/OFF sequence could be achieved.
After you select the “Choose schedule script” option, it will list all schedule scripts in the “schedules”
folder. You can choose one, and then Witty Pi will load and run it.
If you want to confirm what the script is doing, you can check the “schedule.log” file in the “~/wittypi”
directory, when your Raspberry Pi is running.
If you want to create your own schedule script, please read the “Making Schedule Script” section.

14
7.7 Set low voltage threshold
When there is no power supply connects to USB-C connector, Witty Pi 4 L3V7 will monitor the battery
voltage. If that voltage goes below the low voltage threshold, Witty Pi 4 L3V7 will shut down your
Raspberry Pi.
Here you can specify the low voltage from 3.0V to 4.2V, and the default value is 3.1V. This value will
decide how much the battery should be discharged before Raspberry Pi gets shut down. If you are
using a small battery and you just want your Raspberry Pi to shutdown gracefully when USB-C power
supply is off, then you may set this value to 4.2V. If you want to discharge the battery as much as
possible, you may set this value to 3.0V.
If you want to disable the low voltage threshold, just set it to 0.
7.8 Auto-On when USB 5V is connected
This is a switch to decide whether Witty Pi 4 L3V7 will turn on Raspberry Pi, when USB-C 5V power
supply is connected (no matter the battery is connected or not). This switch is turned on by default.
7.9 Set over temperature action
Here you can specify what to do if temperature exceeds a preset threshold. It does nothing by default,
but you can choose to shut down or startup your Raspberry Pi when this event happens.
The action you chose will be triggered when the temperature is higher than the temperature you input.
For example, if you input 55C here, the action will be triggered when actual temperature is 56C or
higher.
Remarks: shutdown can be triggered by temperature only after 2 minutes since Raspberry Pi is on.
7.10 Set below temperature action
Here you can specify what to do if temperature drops under a preset threshold. It does nothing by
default, but you can choose to shut down or startup your Raspberry Pi when this event happens.
The action you chose will be triggered when the temperature is lower than the temperature you input.
For example, if you input 55C here, the action will be triggered when actual temperature is 54C or
lower.
Remarks: shutdown can be triggered by temperature only after 2 minutes since Raspberry Pi is on.
7.11 View/change other settings...
Choosing this option will display a sub menu and allows you to set these parameters:
•Default state when powered
It is “OFF” by default, which means your Raspberry Pi will not be turned on when power

15
supply is connected to Witty Pi, and you will need to tap the button on Witty Pi to start it.
Here you can set it to 1 (ON) or 0 (OFF).
Remarks: this configuration is used when the board is newly powered (either by battery or
USB 5V). If you want to configure the behavior when USB 5V gets connected while the
battery is already powering the board, please look at section 7.8 Auto-On when USB 5V is
connected.
•Power cut delay after shutdown
Default value is 5.0 seconds, which means Witty Pi will fully cut the power after 5 seconds
since Raspberry Pi has been shut down. Here you can input a number between 0.0 to 25.0.
•Pulsing interval during sleep
This parameter will decide how long Witty Pi’s micro controller will wake up and drive the
white LED and/or the dummy load. By default, this interval is 4 seconds. If you wish the
white LED blinks slower, or the dummy load draws current less frequently, you can choose a
bigger value. This value is in seconds.
•White LED duration
This parameter will decide how long the white LED should stay on, when Witty Pi blinks it
during the sleep. The default value is 100, and you can use bigger value if you wish the
white LED to stay on for longer. Here you can input number from 0 to 255. If you input 0, the
white LED will not blink at all.
Dummy load duration
This parameter will decide how long the dummy load should draw current from the power
source. The default value of dummy load duration is 0, which means disabled (no dummy
load at all). You may set a value between 0 and 255 here.
If you are using a power bank to provide 5V to the USB-C connector on Witty Pi 4 L3V7, in
the majority of cases you don’t need the (pulsing) dummy load: if the battery is being
charged, it will draw enough current from the power bank and keep the power bank awake; if
the battery is fully charged, it will keep Witty Pi 4 L3V7 functional even if the power bank is in
sleep mode.
•Vin adjustment
The voltage is measured by the 10-bit ADC in micro controller. Due to the inaccuracy of
internal voltage standard and error on divider resistors, the result could have up to 5% error.
You can configure this parameter to adjust the result of voltage measurement.
The default value is set to 0.20V, and you can input a value between -1.27 and 1.27 here.
•Vout adjustment
You can configure this parameter to adjust the result of output voltage measurement.
The default value is set to 0.20V, and you can input a value between -1.27 and 1.27 here.
•Iout adjustment
The output current is calculated by measuring the voltage drop on the 0.05 Ohm sampling

16
resistor. You can configure this parameter to adjust the result of output current calculation.
The default value is set to 0.00A, and you can input a value between -1.27 and 1.27 here.
•Default ON delay
If you have configured the default state when powered to “ON”, this option allows you to
specify a delay (in seconds) before Witty Pi automatically turns on Raspberry Pi. The
purpose of this option, is to avoid turning on Raspberry Pi before the power supply gets
stable. It is a mechanism to protect the device.
7.12 Reset Data…
If you want to erase some data you previously set (scheduled startup time, scheduled shutdown time,
currently used schedule script, low voltage threshold, recovery voltage threshold), you can choose
this option.
Once you select this option, the software will display a sub menu, which allows you to:
⚫Clear auto startup time:
The auto-startup time will be erased and Witty Pi will not auto-start your Raspberry Pi.
⚫Clear auto shutdown time:
The auto-shutdown time will be erased and Witty Pi will not auto-shutdown your Raspberry Pi.
⚫Stop using schedule script:
The “schedule.wpi” file will be deleted.
⚫Clear low voltage threshold:
The low voltage threshold will be unset.
⚫Restore action when USB power is connected
Will turn on Raspberry Pi when USB power is connected.
⚫Clear over temperature action
The over temperature action will be cleared.
⚫Clear below temperature action
The below temperature action will be cleared.
⚫Perform all actions above:
Clear all scheduled times, remove the “schedule.wpi” file, unset the low voltage and recovery
voltage thresholds, clear the over-temperature and below temperature actions. This is the
fastest option to clear everything and prevent your Raspberry Pi being shut down by Witty Pi.
7.13 Exit
Selecting this option will exit the software and return to the console.
This manual suits for next models
1
Table of contents
Other UUGear Computer Hardware manuals